
Deploying on Amazon AWS EKS
This is a guide with additional steps to help you prepare your existing Amazon Elastic Kubernetes Service (Amazon EKS) cluster for installing the Arthur platform.
Ensure the initial steps detailed Installing Arthur Pre-requisites have already been applied to the cluster.
Configure EKS EBS CSI driver
As of EKS 1.23, the Amazon Elastic Block Store (Amazon EBS) Container Storage Interface (CSI) driver needs to be installed explicitly. This driver allows EKS clusters to manage the lifecycle of EBS volumes for Persistent Volumes. For more information, see Amazon Docs.
If you are deploying Arthur on EKS 1.23+, you must follow the instructions on this page.
Verify that the Add-On is successfully installed by navigating to AWS Console → EKS → Cluster → Add-Ons or by running helm list -A, depending on your installation method.
Optimizing the AWS EKS StorageClass
Once the EKS EBS CSI driver is installed, you can take advantage of the gp3 StorageClass type. This StorageClass is more cost-effective and performant than the previous gp2 StorageClass. Apply the below YAML definition to your cluster:
    apiVersion: storage.k8s.io/v1
    kind: StorageClass
    metadata:
      annotations:
        storageclass.kubernetes.io/is-default-class: "true"
      name: gp3
    parameters:
      type: gp3
      encrypted: "true" # parameter ensures created AWS EBS volumes are encrypted using AWS Managed KMS Key
      kmsKeyId: <KMS Key ARN> # optional parameter ensures created AWS EBS volumes are encrypted using Customer Managed KMS Key
    provisioner: ebs.csi.aws.com
    reclaimPolicy: Delete
    volumeBindingMode: WaitForFirstConsumer
    allowVolumeExpansion: true
Ensure there is **_only one_** default StorageClass on the cluster. This is controlled by the `storageclass.kubernetes.io/is-default-class` annotation.
Supported AWS Service Authentication Mechanisms
If using AWS services with Arthur, such as S3 or SES, you will need to configure Arthur to authenticate with AWS. Arthur currently supports 3 authentication mechanisms:

AWS Access Keys
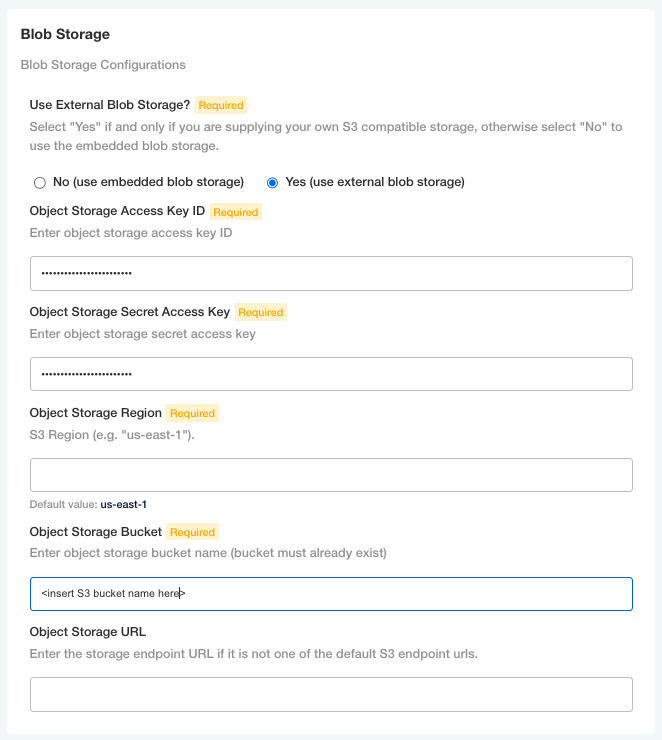
Access Keys only work with S3. If you want to use Access Keys, you must provision an IAM user and a set of keys. Via AWS IAM, you will need to grant this user read/write access to the S3 storage bucket you plan to use with Arthur. Selecting the Access Keys option will expand the Blob Storage section of the config page, where you will be able to enter your Access key, Secret Access key ID, and the S3 bucket.
IRSA
We recommend using IRSA to authenticate Arthur with AWS as it is the most secure and the only mechanism supporting SES. Using this methodology will require some AWS platform work in preparation for Arthur. You can follow these AWS docs, which will show you how to do this setup via eksctl or the AWS CLI, or you can automate this via your internal Infrastructure as Code.
The role you create will need S3 read/write privileges on the bucket you want to use with Arthur and permissions to send email via your SES entity. Example snippets are as below:
Sample IAM policies
We provide some sample IAM policy snippets so they can be referenced easily.
Sample IAM policy for S3 access
{
    "Statement": [
        {
            "Action": [
                "s3:PutObject",
                "s3:GetObject",
                ...
            ],
            "Effect": "Allow",
            "Resource": [
                "arn:aws:s3:::<insert-s3-bucket-name>/*",
                "arn:aws:s3:::<insert-s3-bucket-name>"
            ],
            ....
        },
Sample IAM policy for SES access
            "Action": [
                "ses:SendTemplatedEmail",
                "ses:SendEmail",
                "ses:SendCustomVerificationEmail",
                "ses:SendBulkTemplatedEmail",
                "ses:SendBulkEmail",
                "ses:SendBounce"
            ],
            "Effect": "Allow",
            "Resource": "*",
            "Sid": "sesSendEmails"
        },
This role will also need to have a trust relationship with the OIDC provider of your EKS cluster, specifying the Arthur service accounts. See the linked docs above for a further explanation. An example snippet of this is:
{
    "Version": "2012-10-17",
    "Statement": [
        {
            "Sid": "",
            "Effect": "Allow",
            "Principal": {
                "Federated": "arn:aws:iam::123456789012:oidc-provider/oidc.eks.us-east-2.amazonaws.com/id/ABDCEF......"
            },
            "Action": "sts:AssumeRoleWithWebIdentity",
            "Condition": {
                "StringEquals": {
                    "oidc.eks.us-east-2.amazonaws.com/id/ABDCEF:sub": [
                        "system:serviceaccount:<namespace>:arthurai-<namespace>",
                        "system:serviceaccount:<namespace>:arthurai-<namespace>-helm-hook"
                    ]
                }
            }
        }
    ]
}
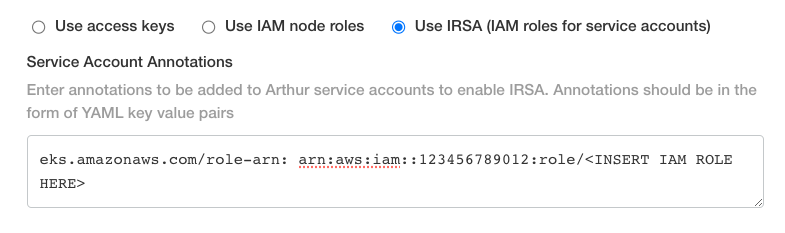
Once this is all set up, you can pass this role to Arthur via the config page. This sets the role in the Arthur Service Accounts specified above, which enables Arthur's pods to authenticate with AWS via the role, and the permissions you created. Be sure to use the exact formatting shown below:
Proceed to the Blob Storage section of the Arthur config page to specify the S3 bucket
SES
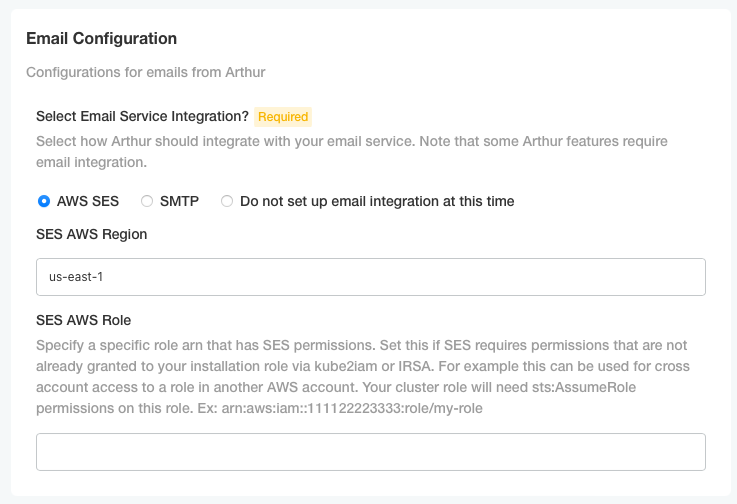
To utilize AWS SES for Arthur-generated emails, you must configure IRSA as outlined in the above section. Once this is done, navigate to the email configuration section of Arthur's config page. Select AWS SES, then enter the region in which your SES entity is configured. As outlined above, the role associated with the cluster must have permissions on this SES entity. If the SES entity is in the same account as your cluster, and you do not need to utilize a different role, such as for cross-account permissions, do not enter a role in the second box.
If your SES entity is in another Arthur, account, you must set up cross-account privileges between roles. In the account of your SES entity (Account A), you must create an IAM role (Role A) that has sent email permissions to SES, as depicted above. Role A will also need to have a trust relationship with either the account that your cluster is in (Account B), the OIDC provider on your cluster as depicted above, or the IRSA role associated with your cluster. Additionally, the IRSA role you created above in Account B, will also need to be granted STS assume role privileges on the role you are creating in Account A.
Once all of this is set up, enter the role in the account that contains the SES entity (Account A) that the IRSA role should assume to send emails:

Updated over 1 year ago