Prompt Experiments Workflow
This section describes how to use Prompt Experiments.
Common Workflows
Workflow 1: Create and Iterate Experiment from Scratch
This workflow is ideal when you're starting fresh and want to test new prompts.
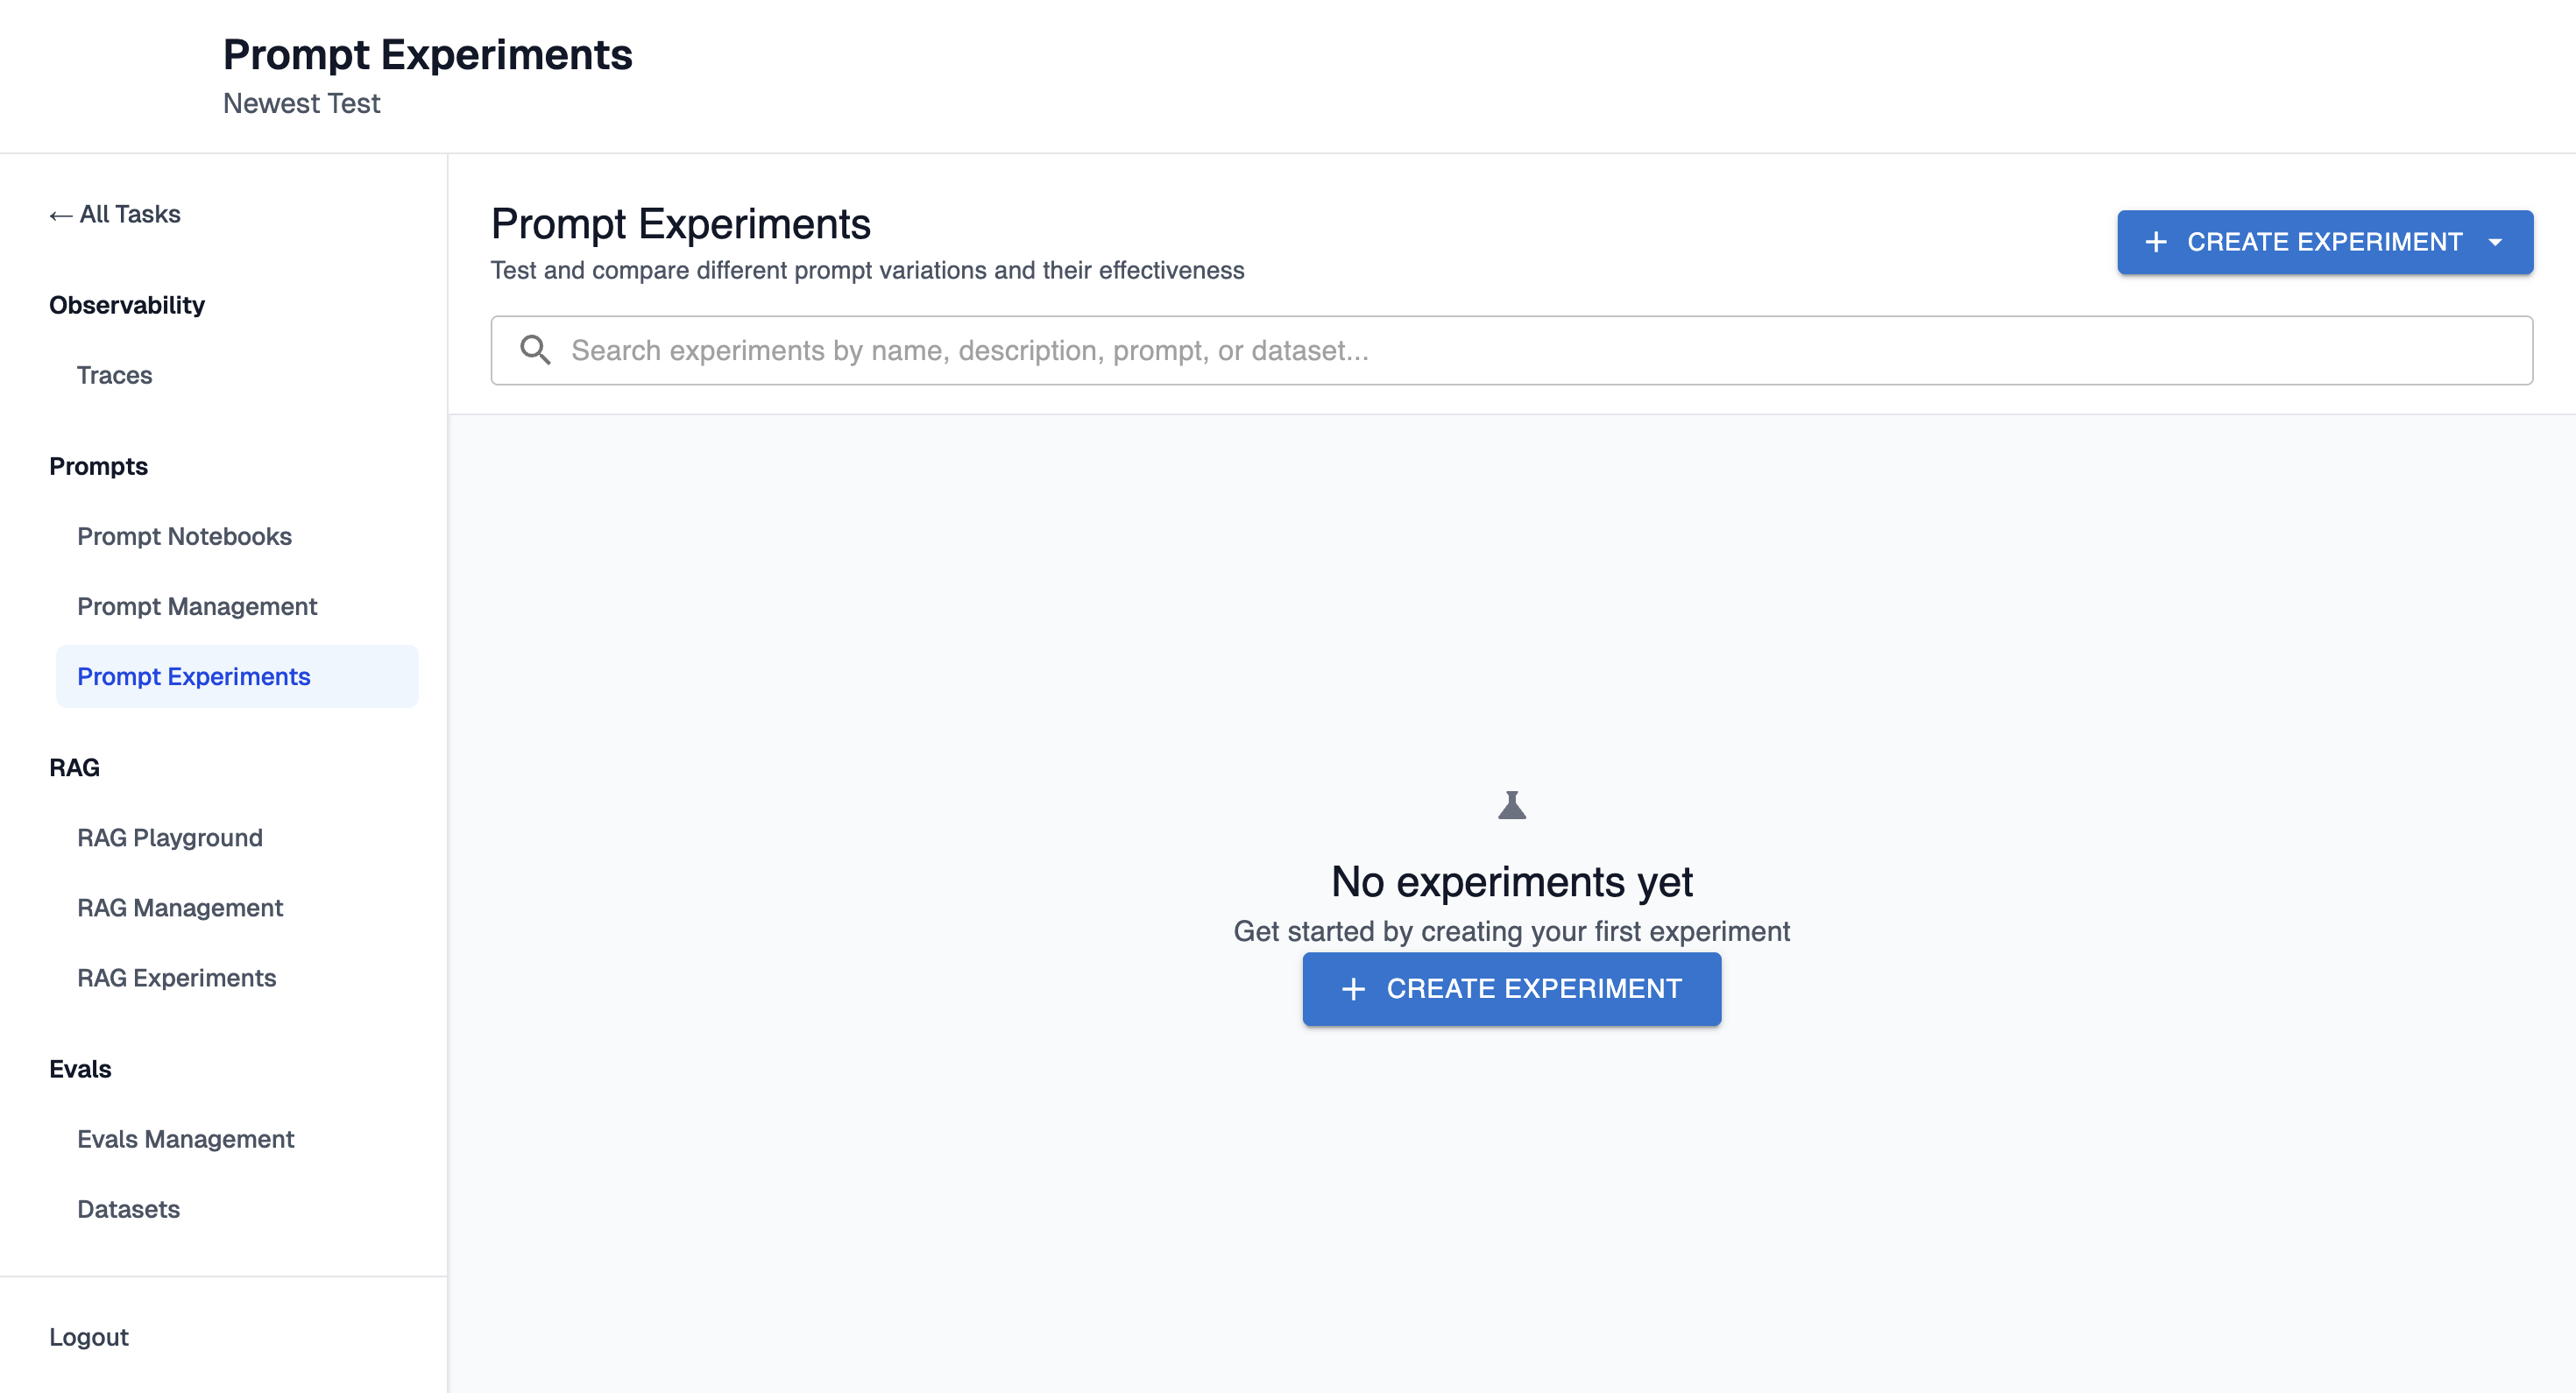
Step 1: Create a New Experiment
-
Navigate to the Prompt Experiments page for your task
-
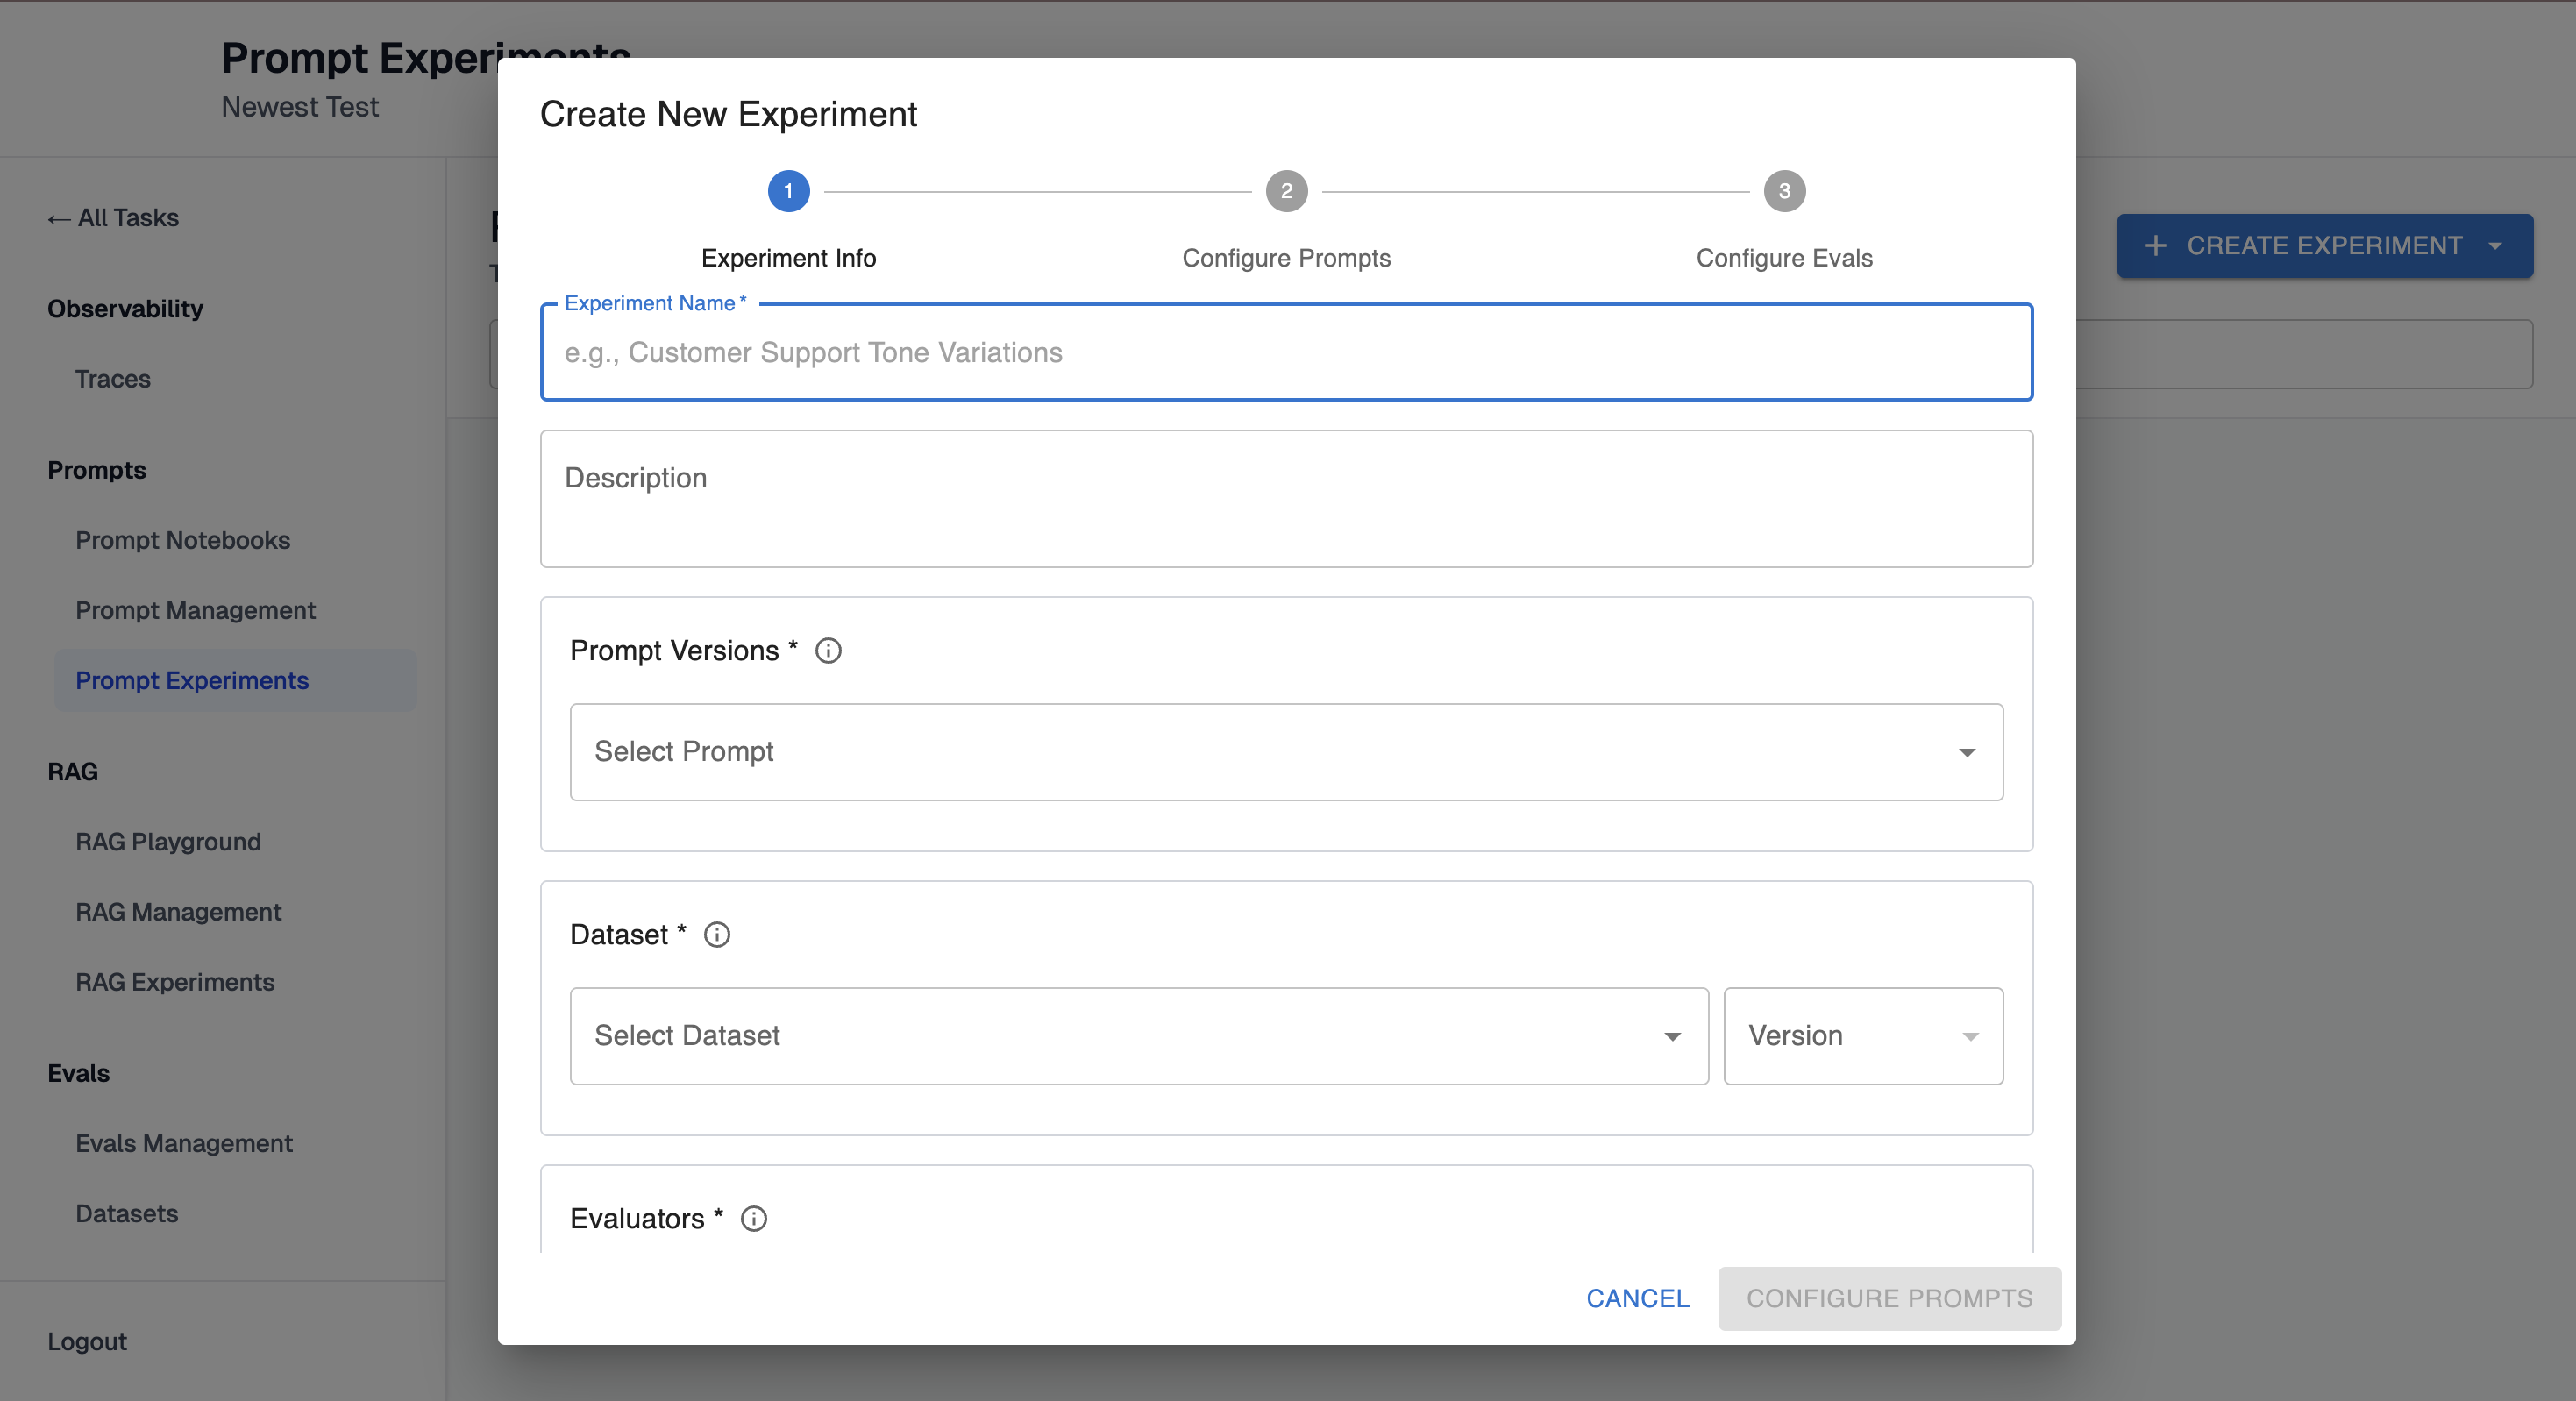
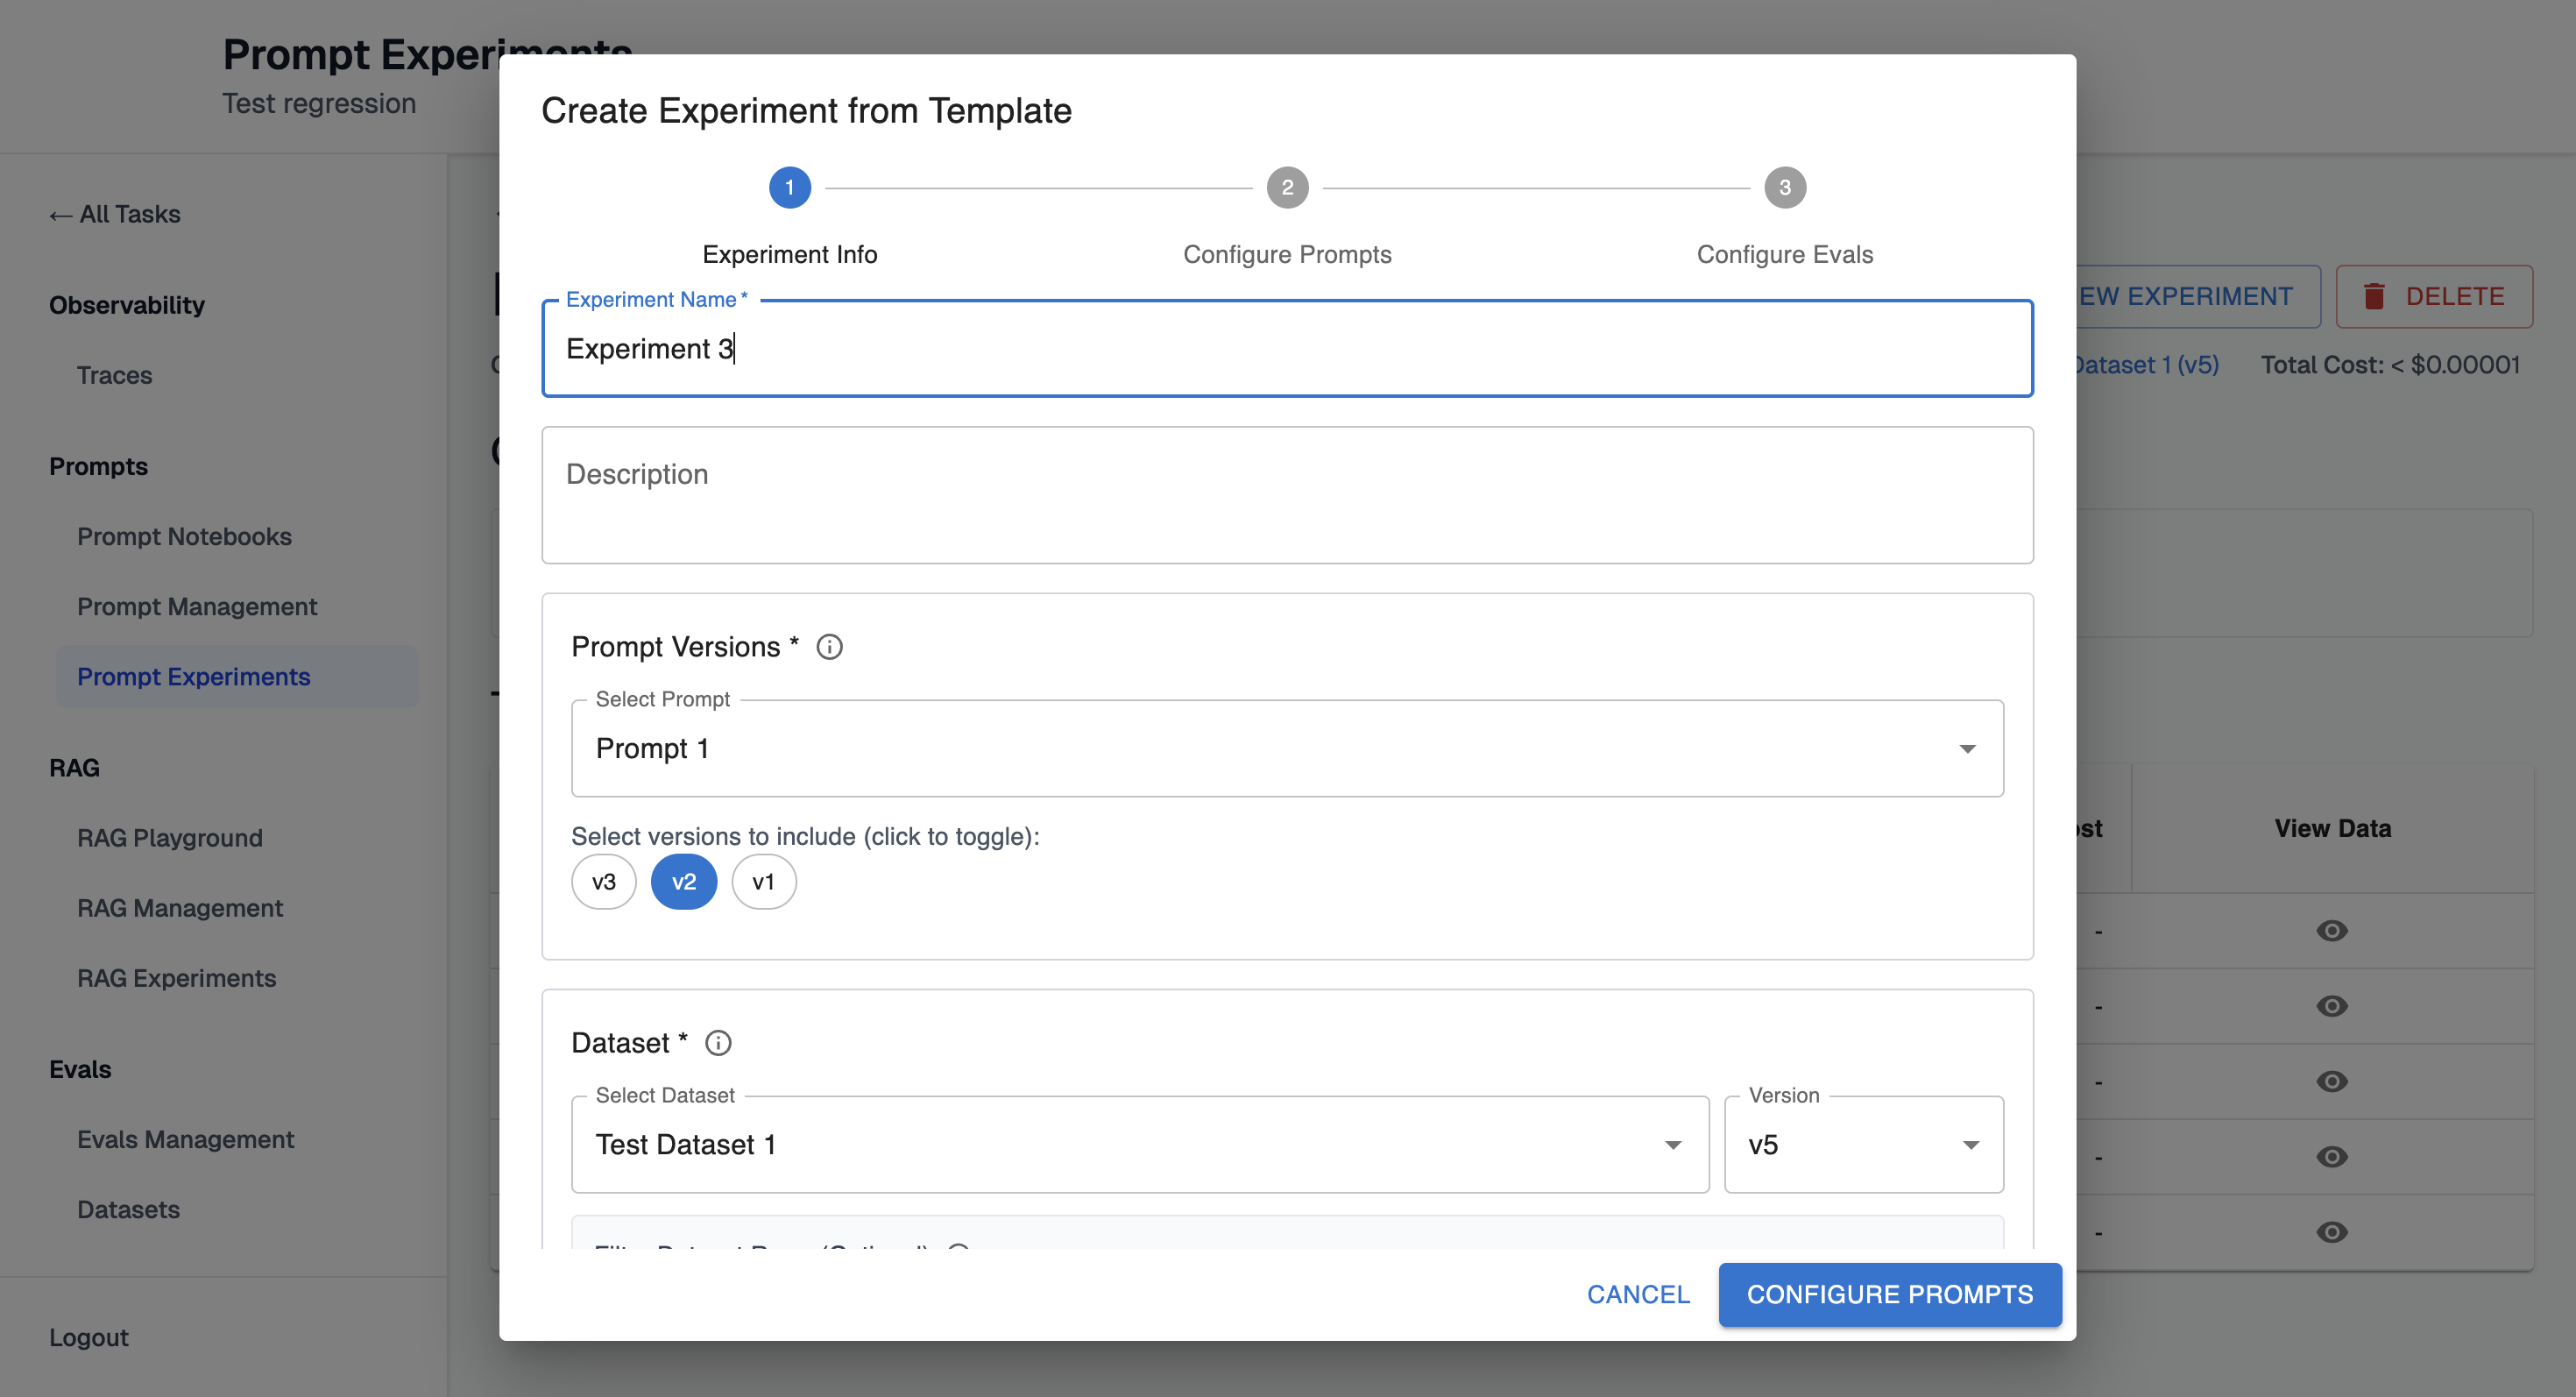
Click "Create Experiment". It will open the configuration form.
-
Enter a name and optional description
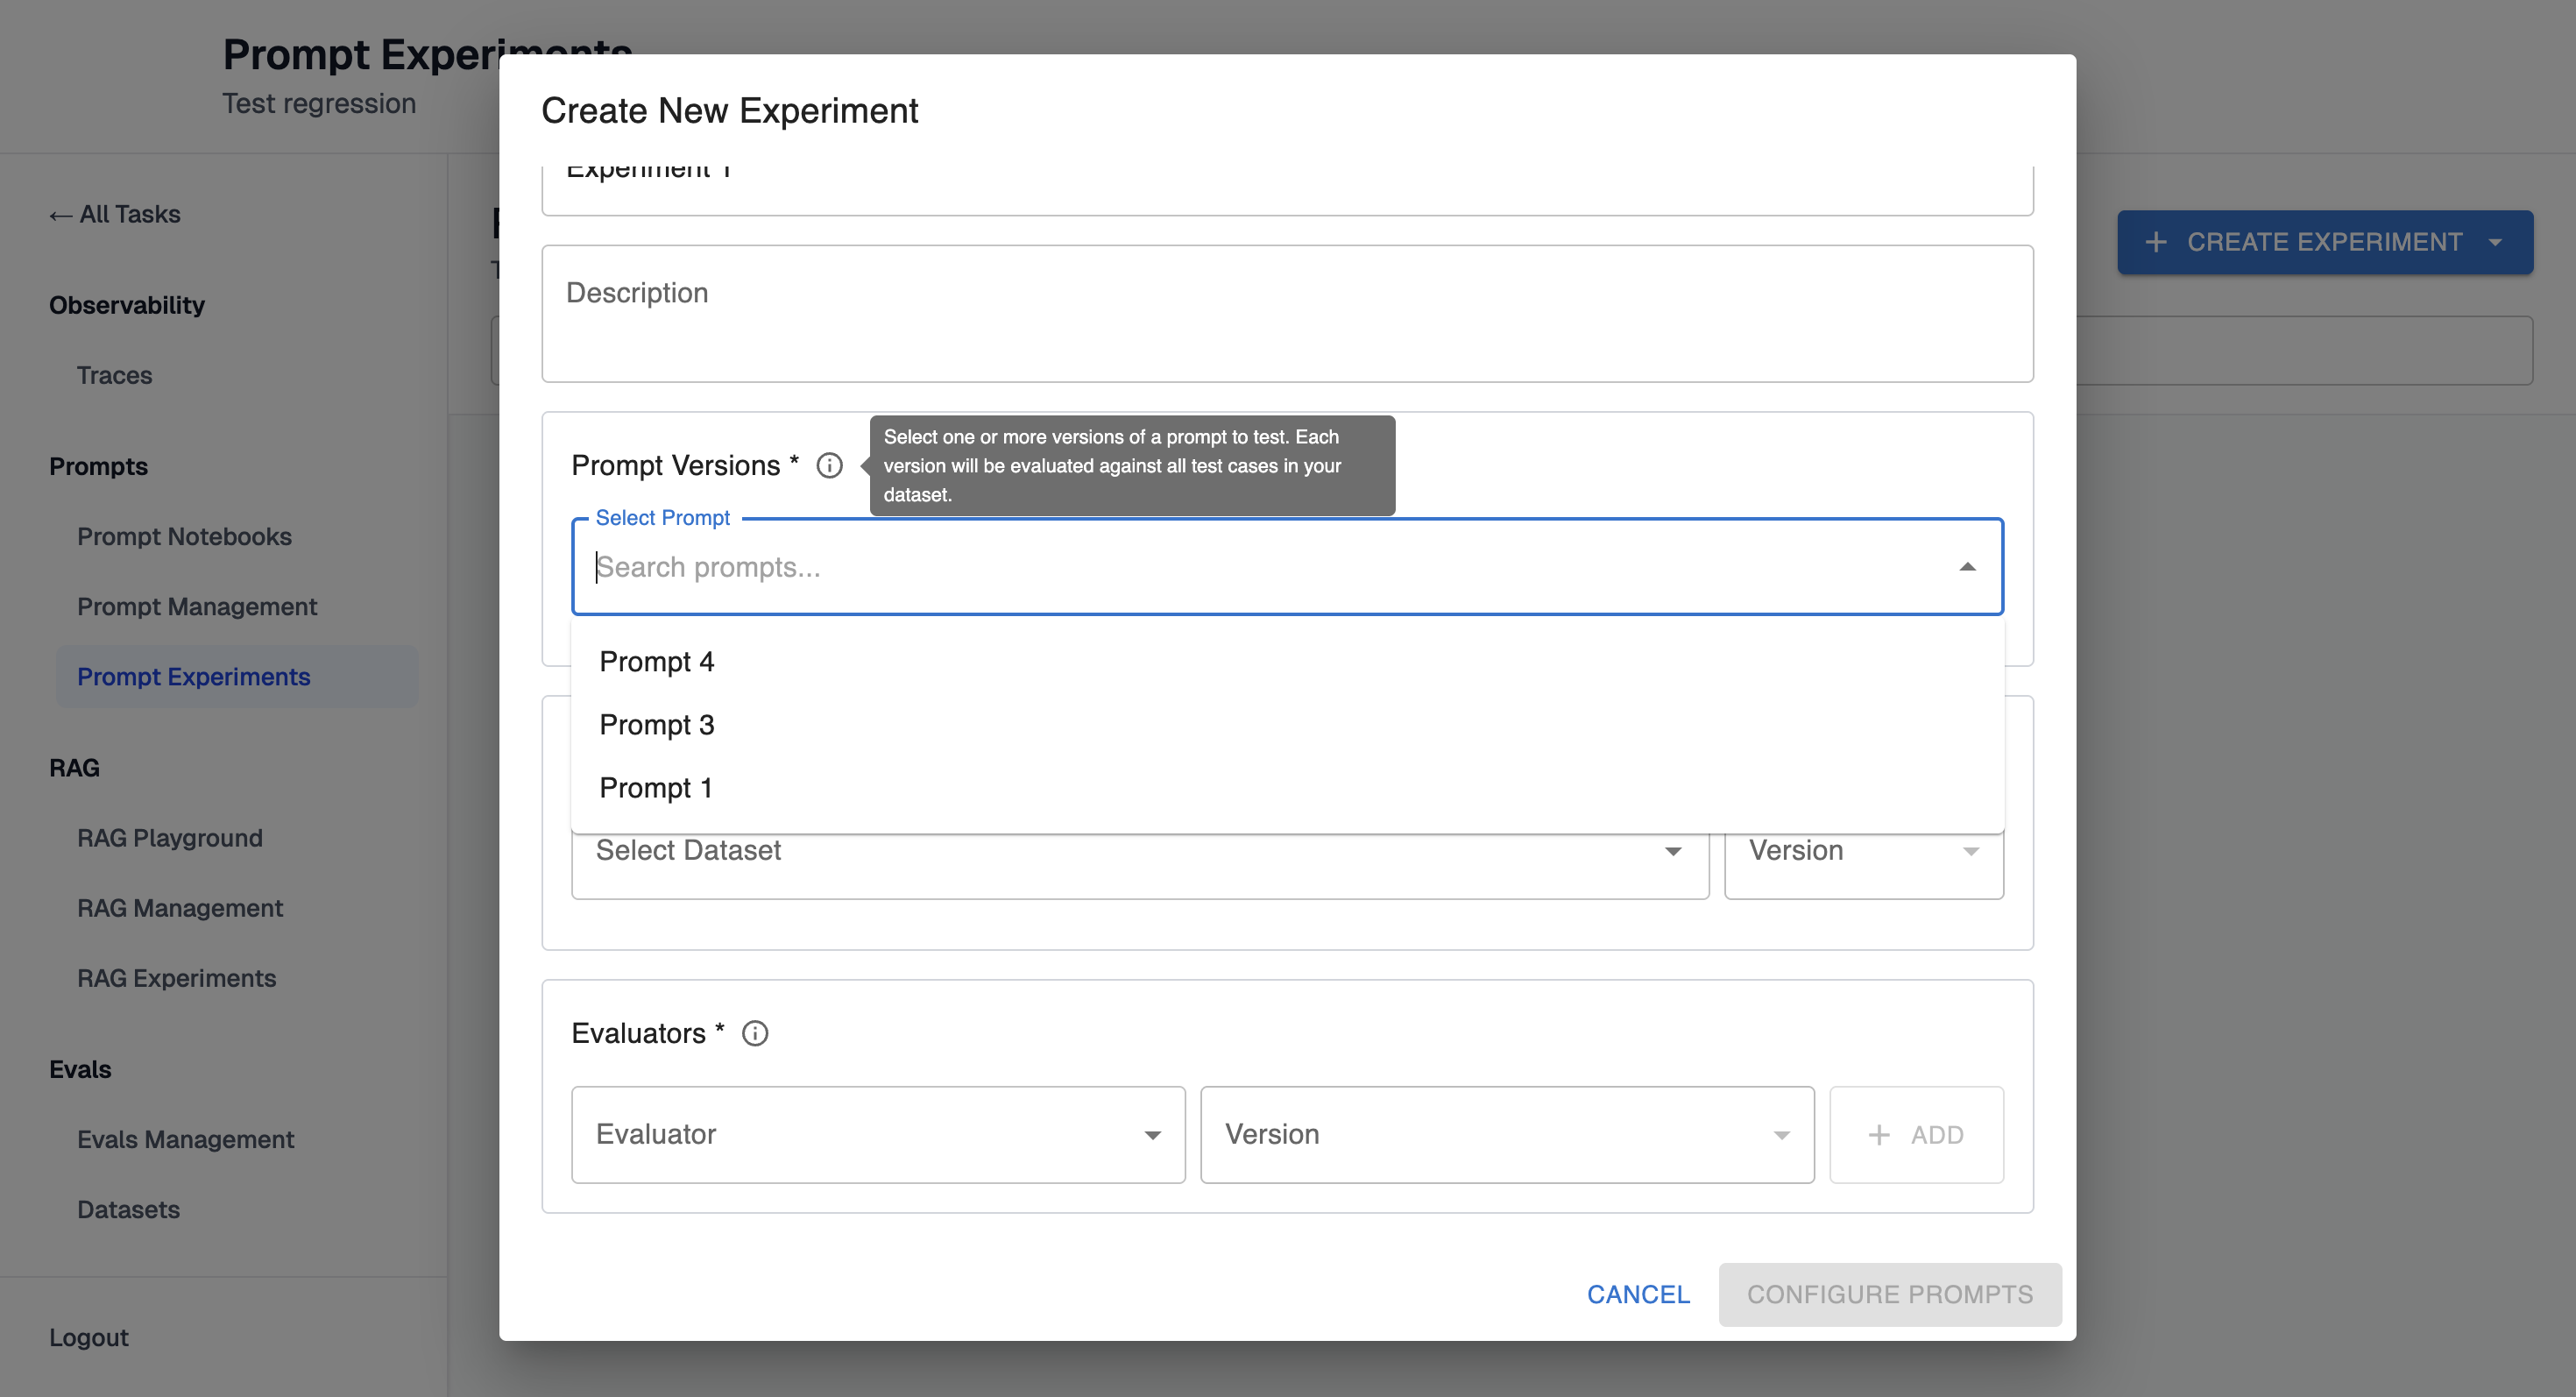
Step 2: Select Prompts
-
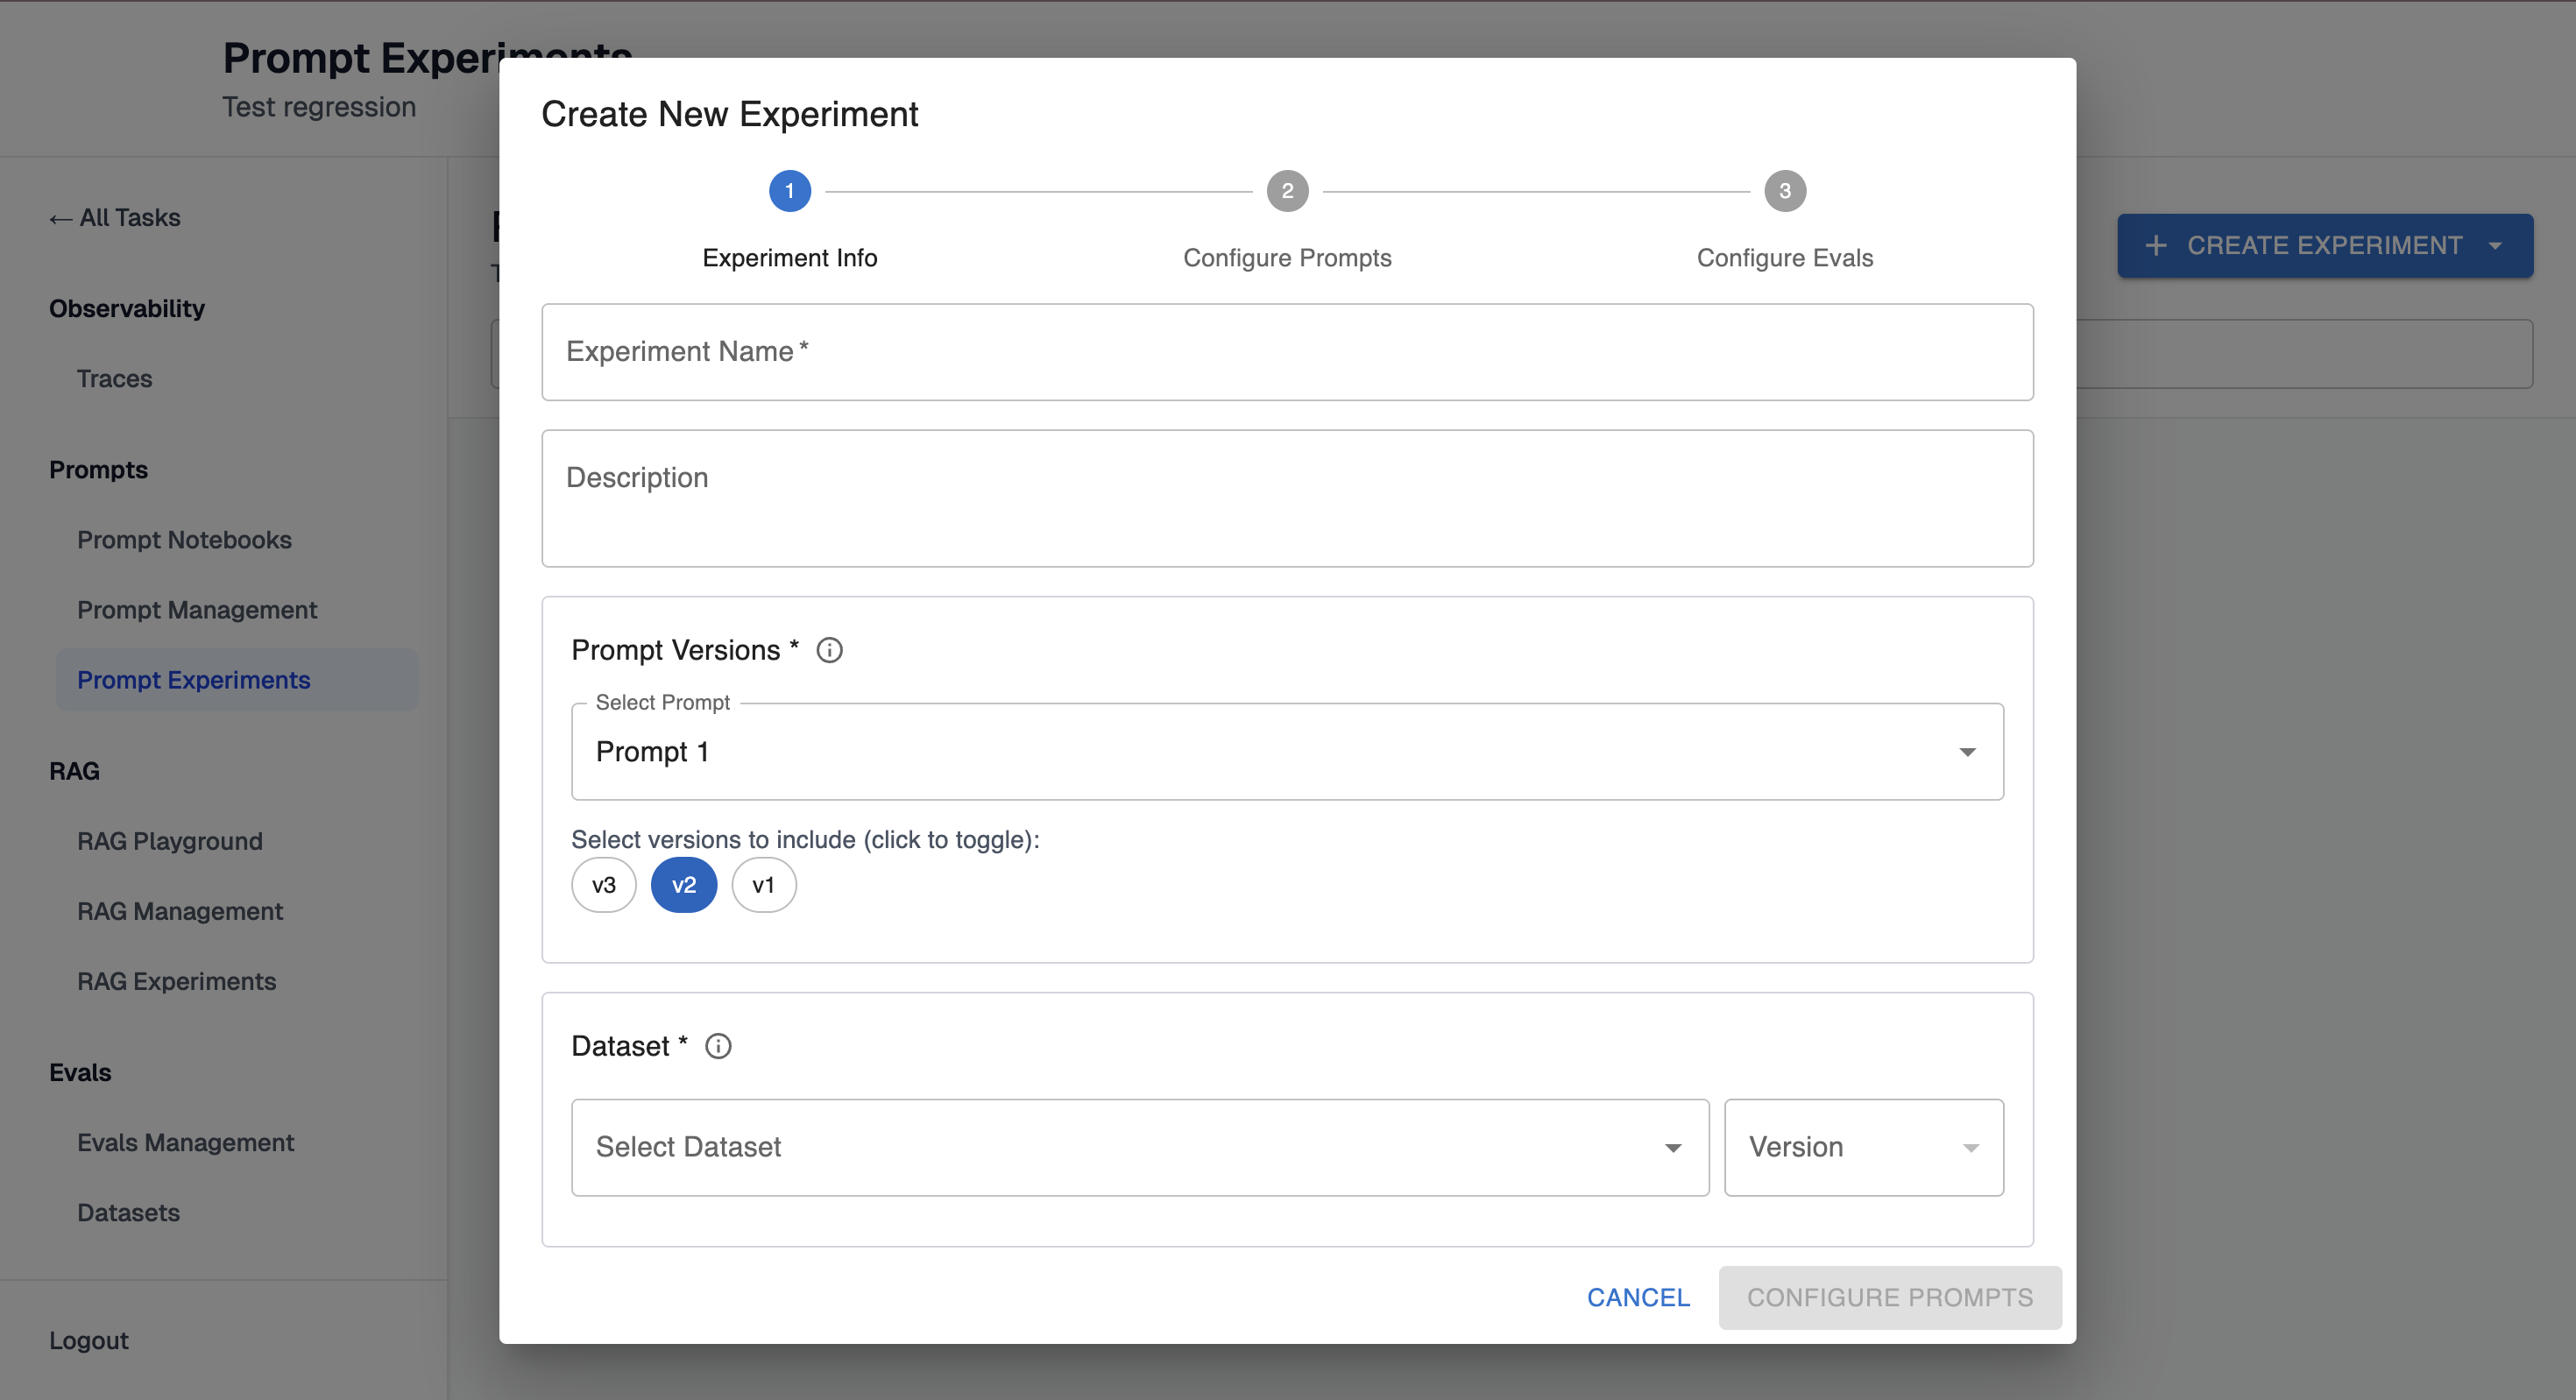
Select one of saved prompt from the dropdown:
-
Select one or more versions of that prompt to test (e.g., Prompt 1 v1, Prompt 1 v2, Prompt 1 v3)
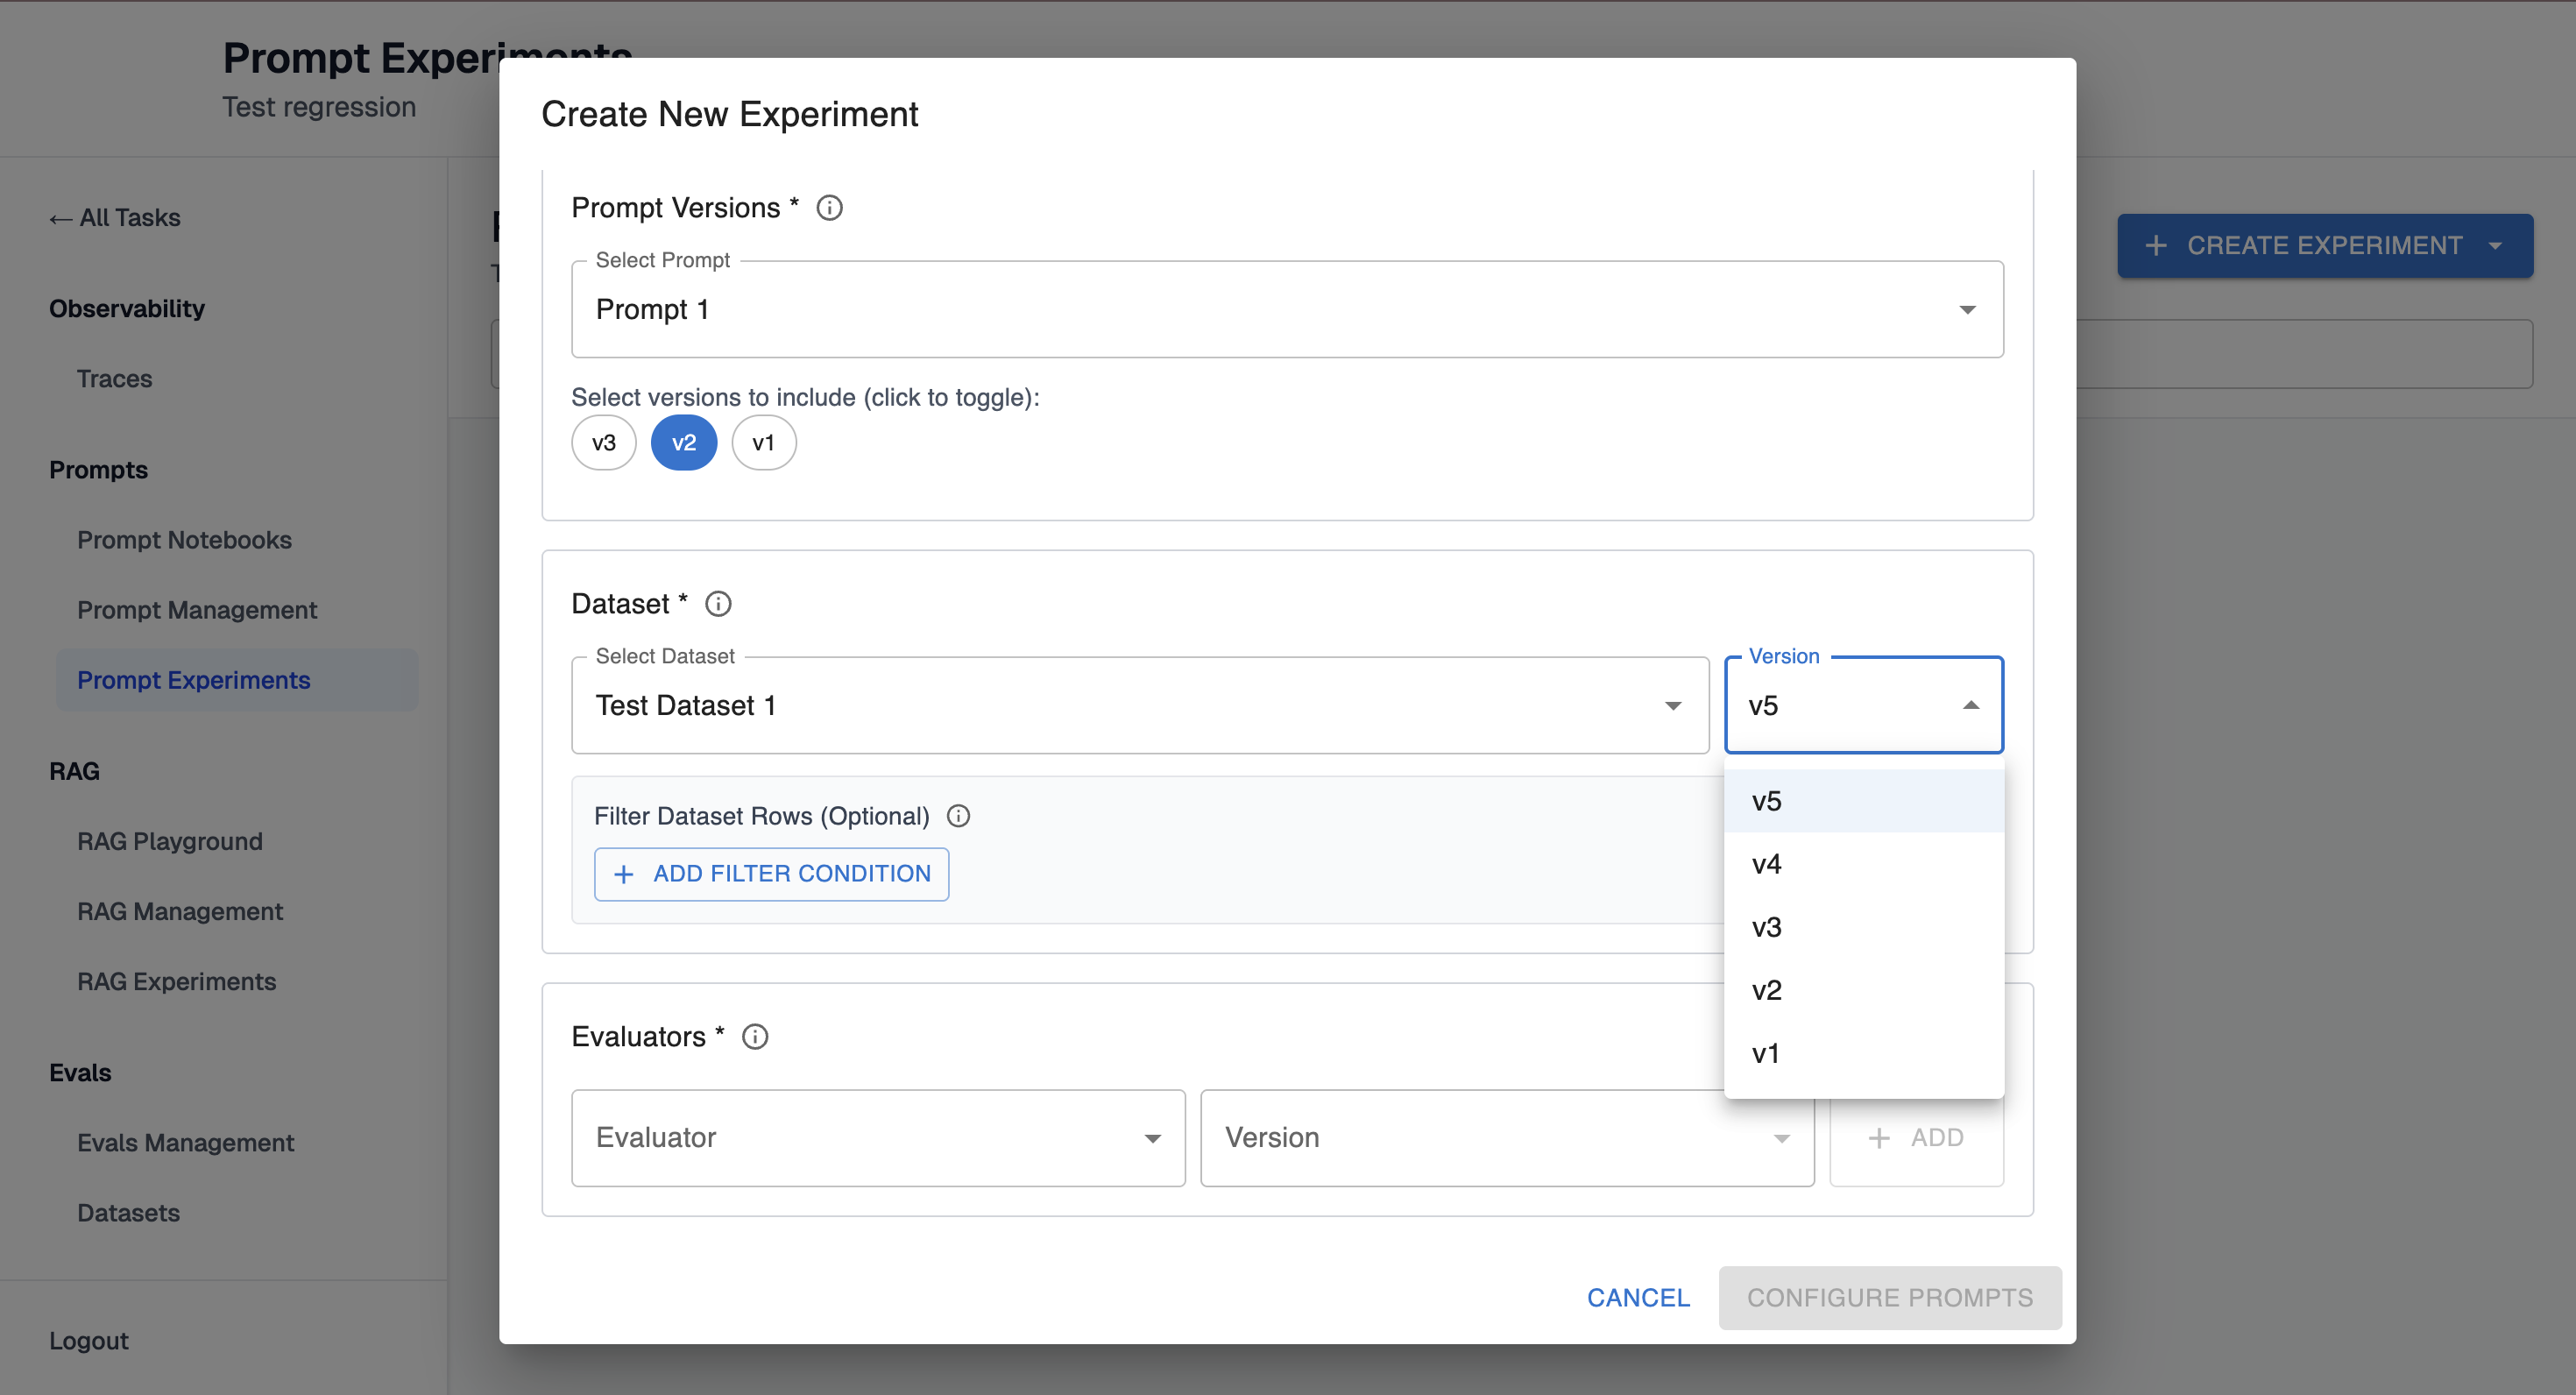
Step 3: Select Dataset
-
Select a dataset from the dropdown
-
Select a dataset version
-
(Optional) Add row filters to test on a subset
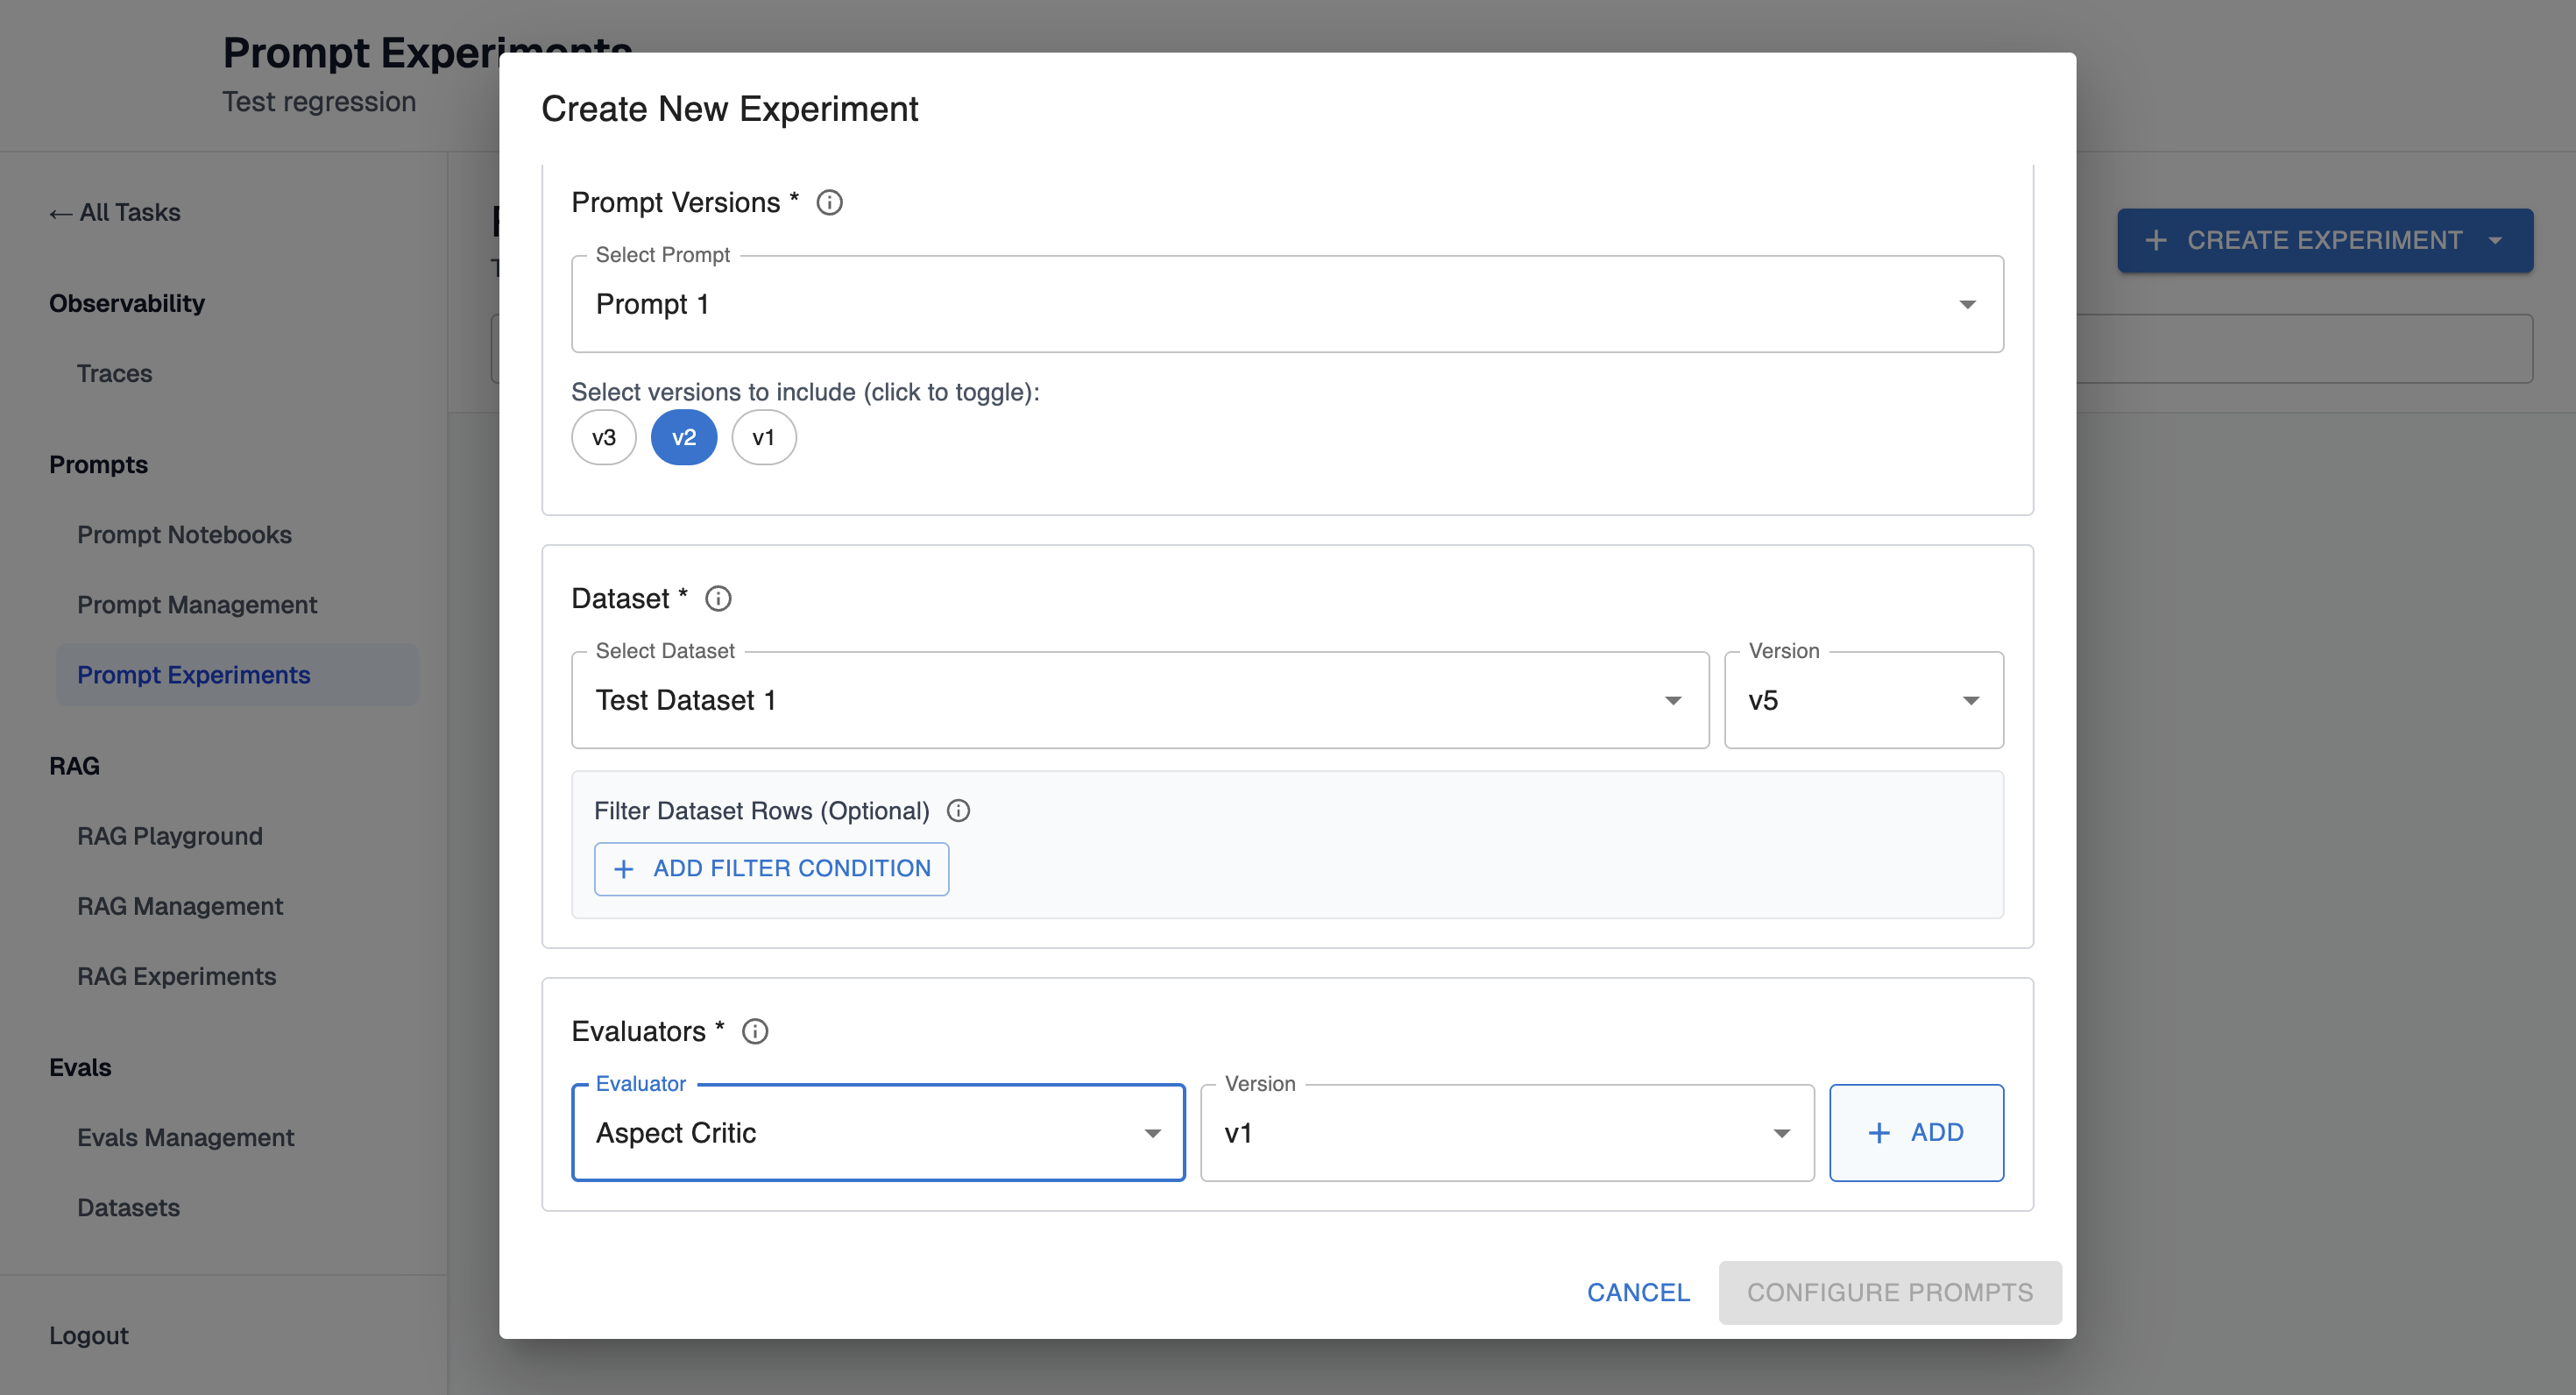
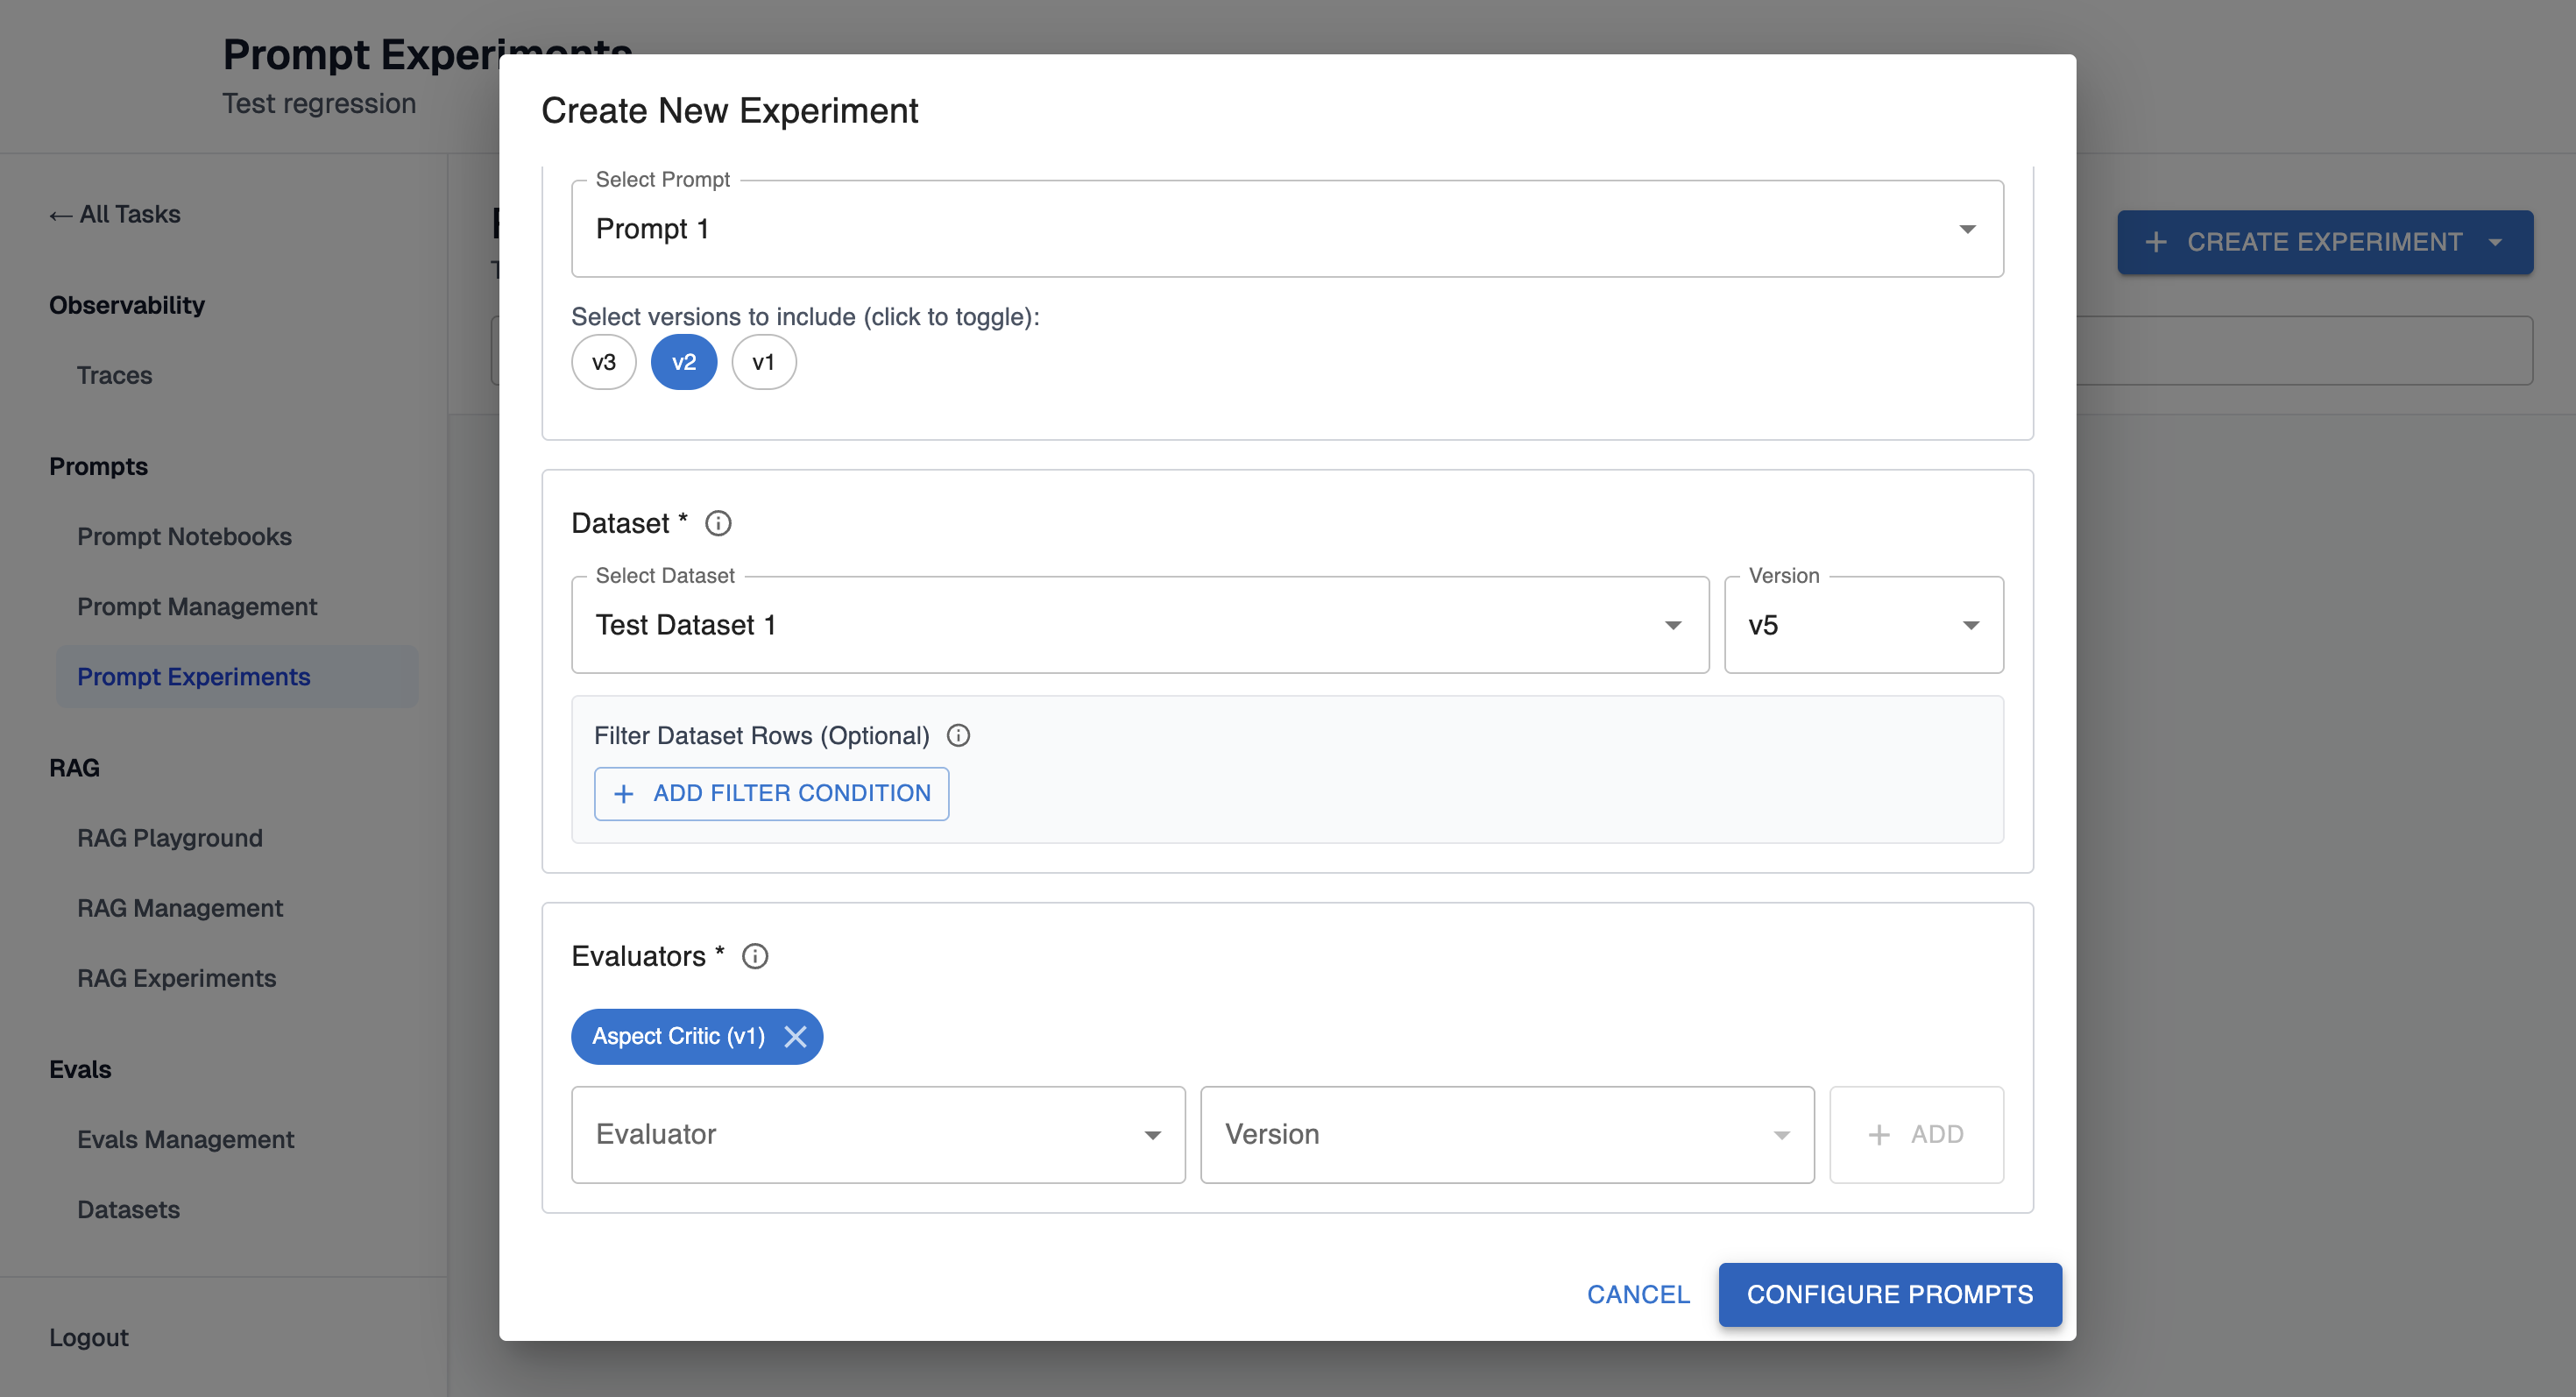
Step 4: Select Evaluators
-
Add one or more evaluators to score prompt outputs
-
Select the version of each evaluator you want to use. Then click "+ ADD"
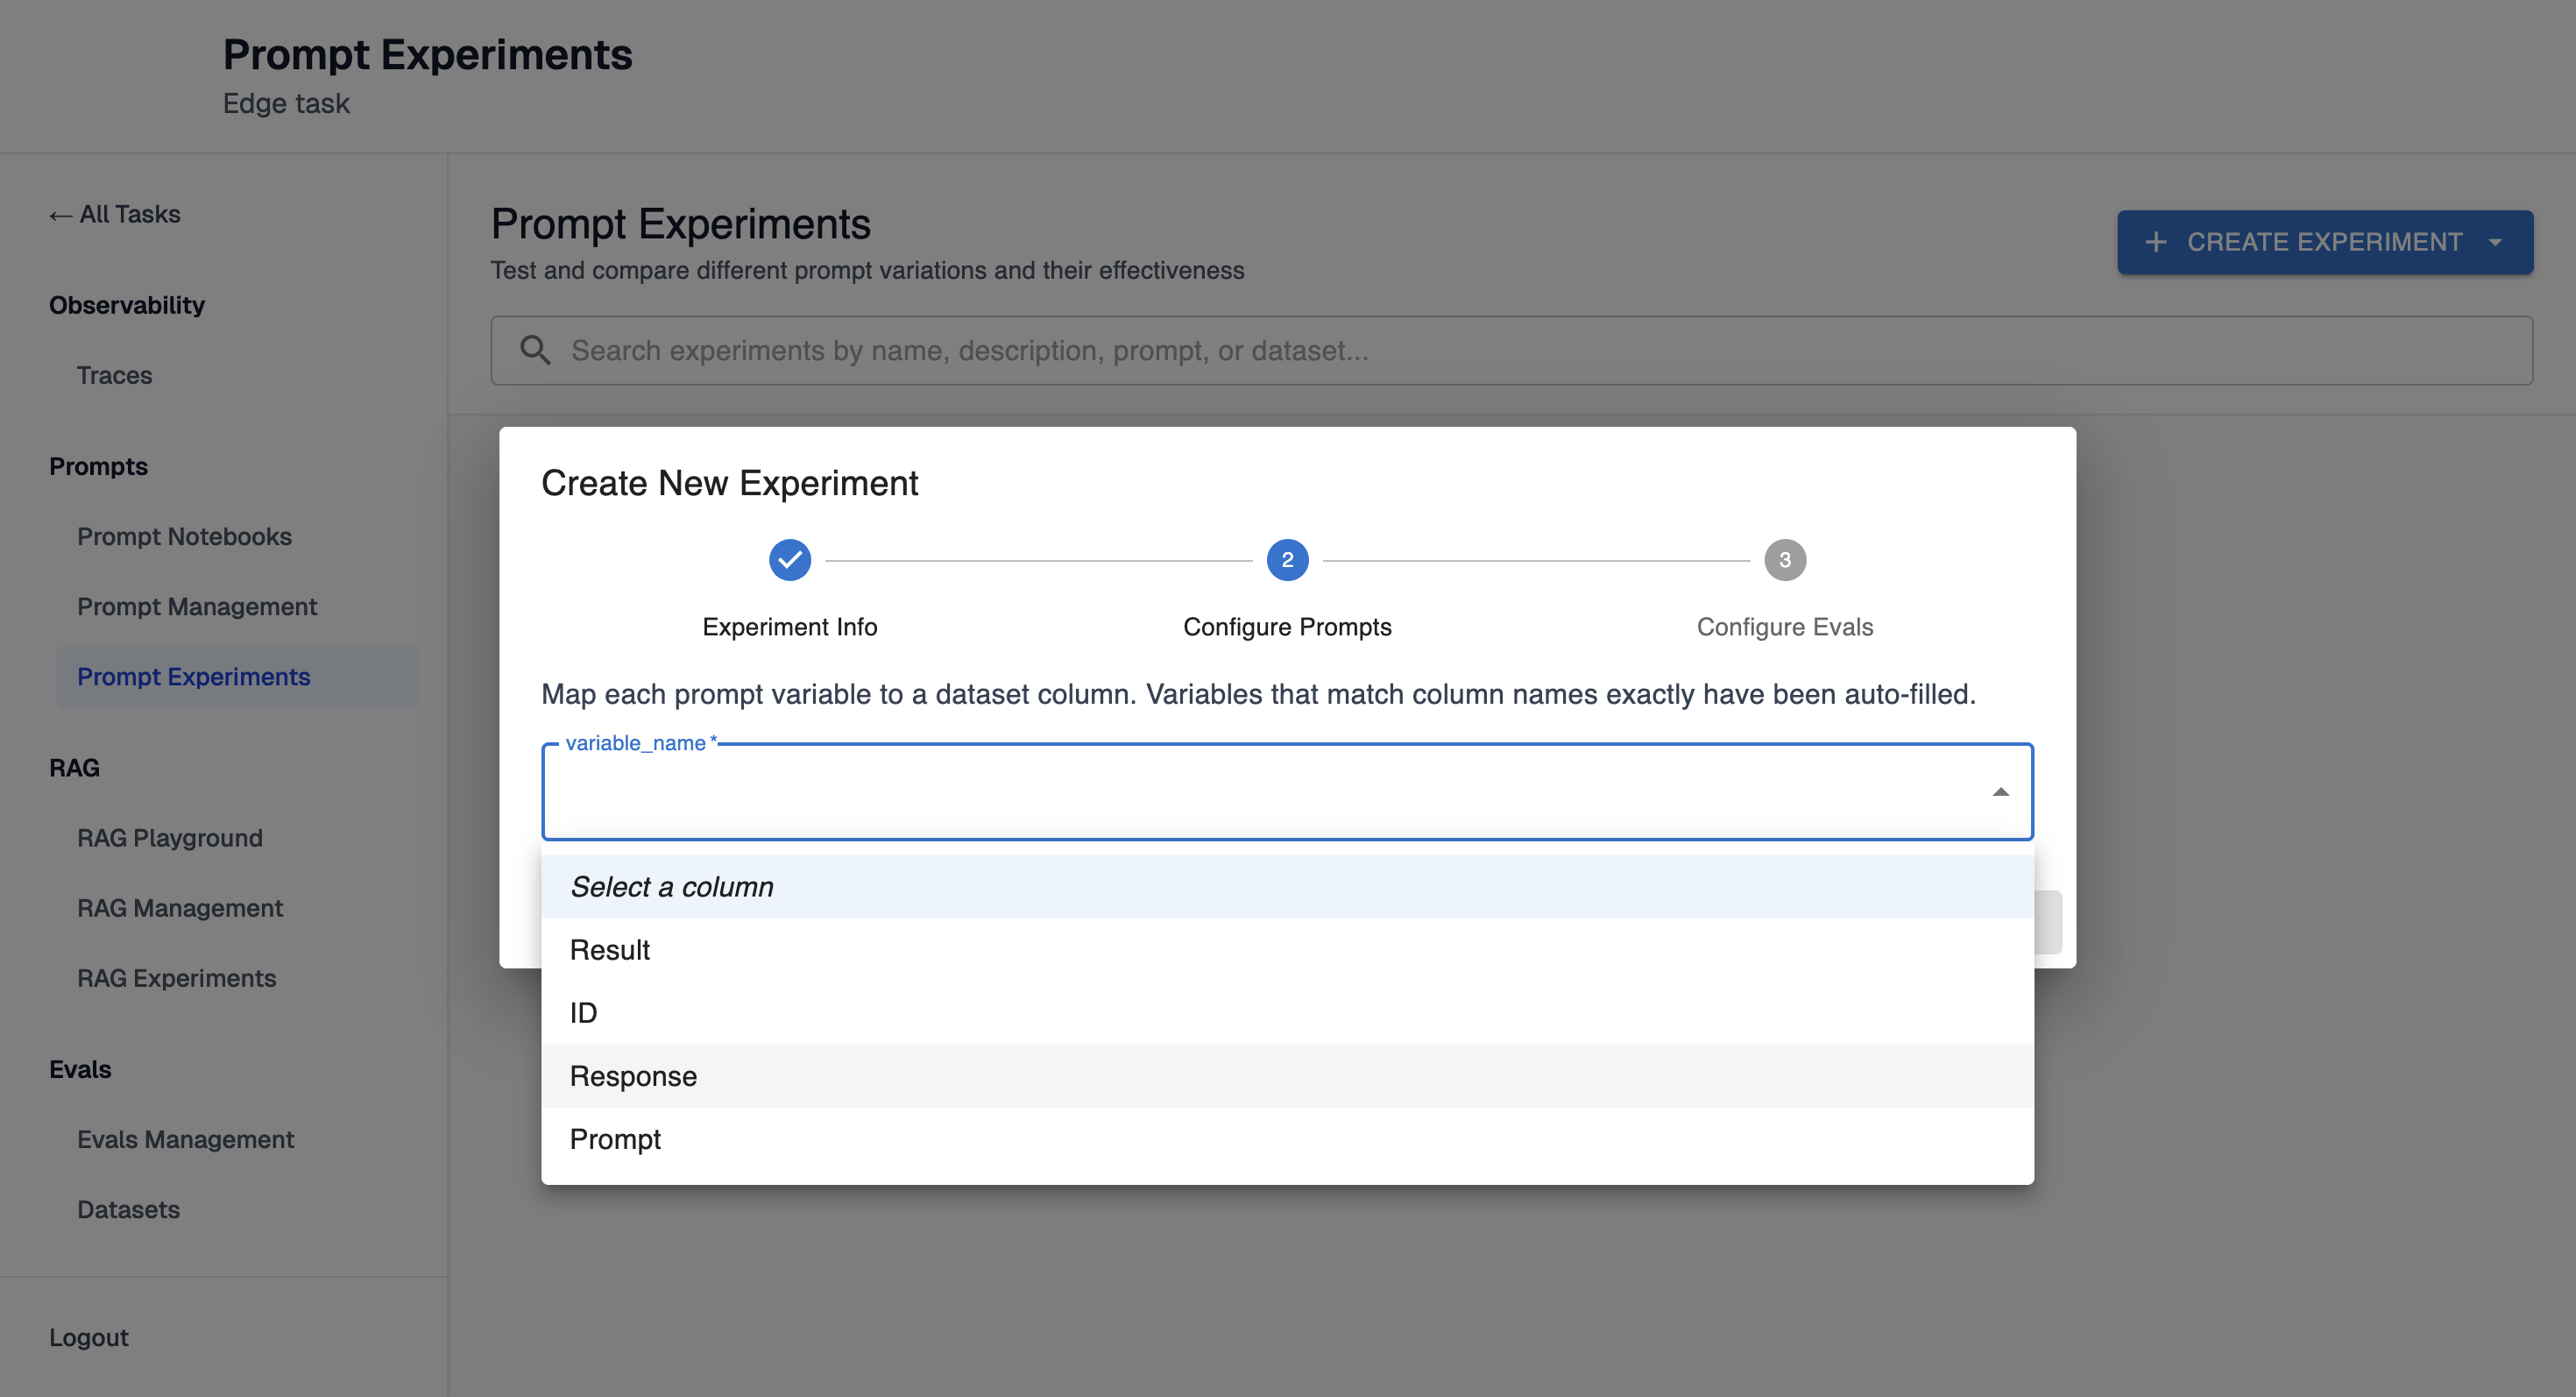
Step 5: Map Prompt Variables
-
For each variable required by your prompts, select the corresponding dataset column
-
The system validates that all required variables are mapped
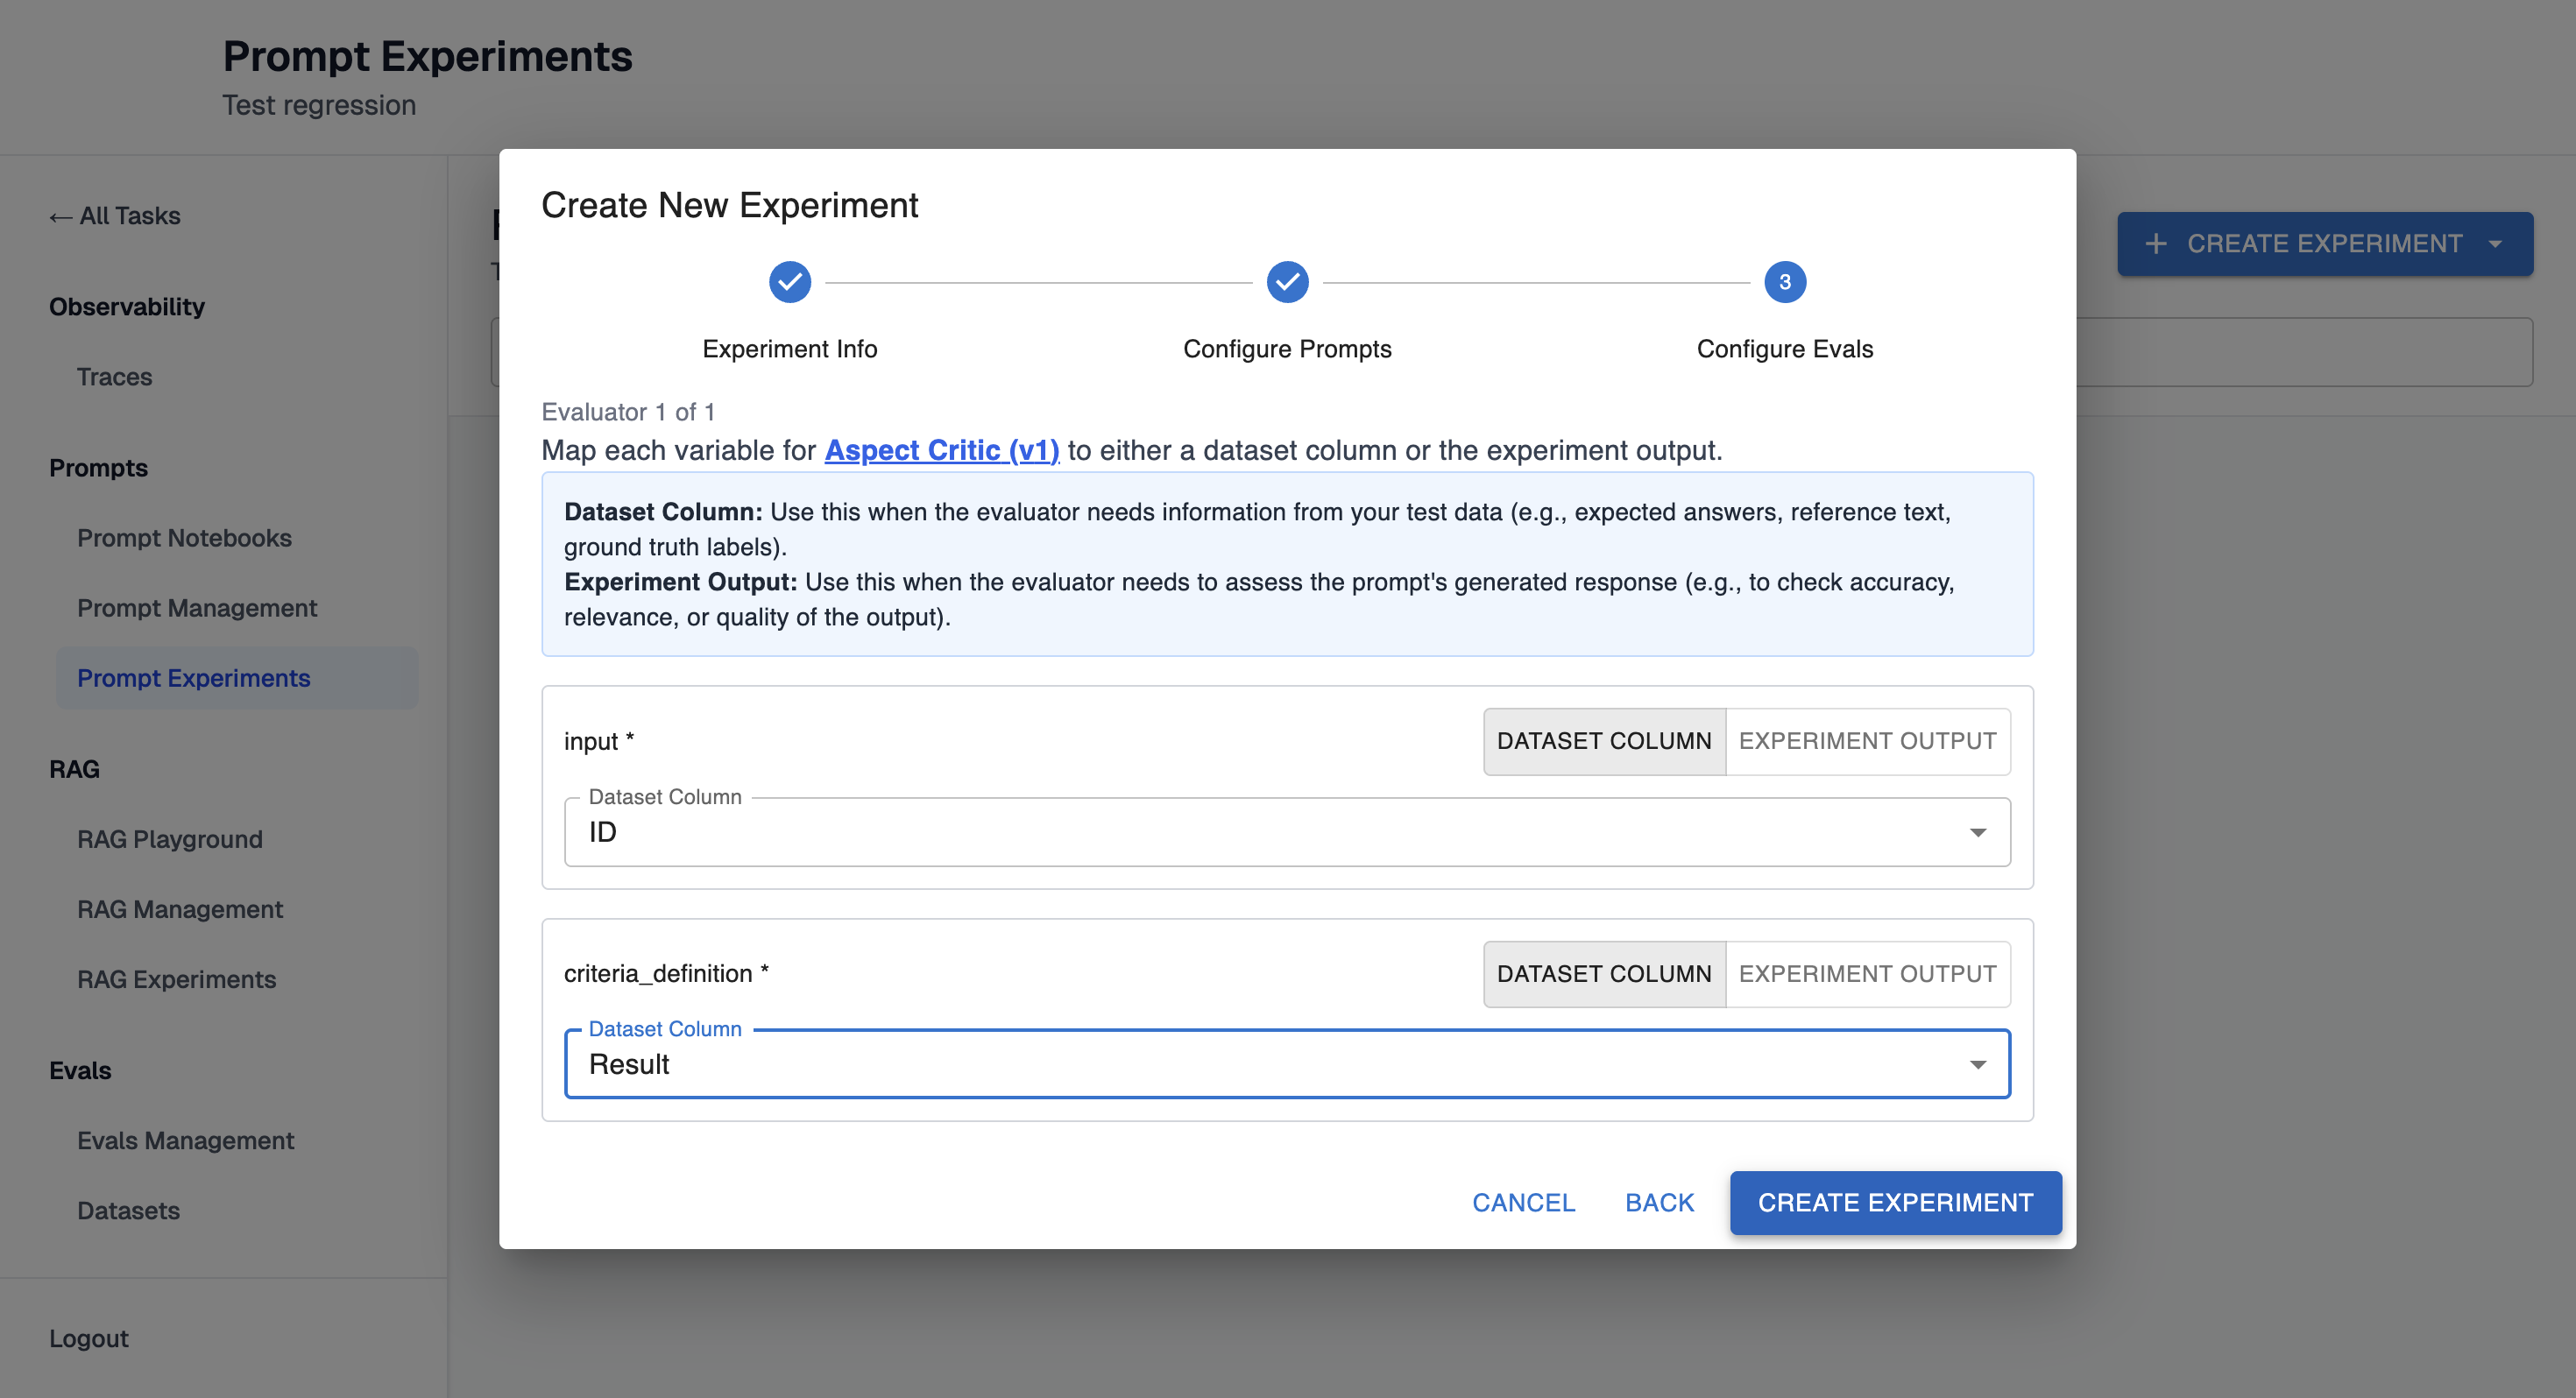
Step 6: Configure Evaluators
- For each evaluator, map its required variables:
-
Map dataset columns to evaluator variables
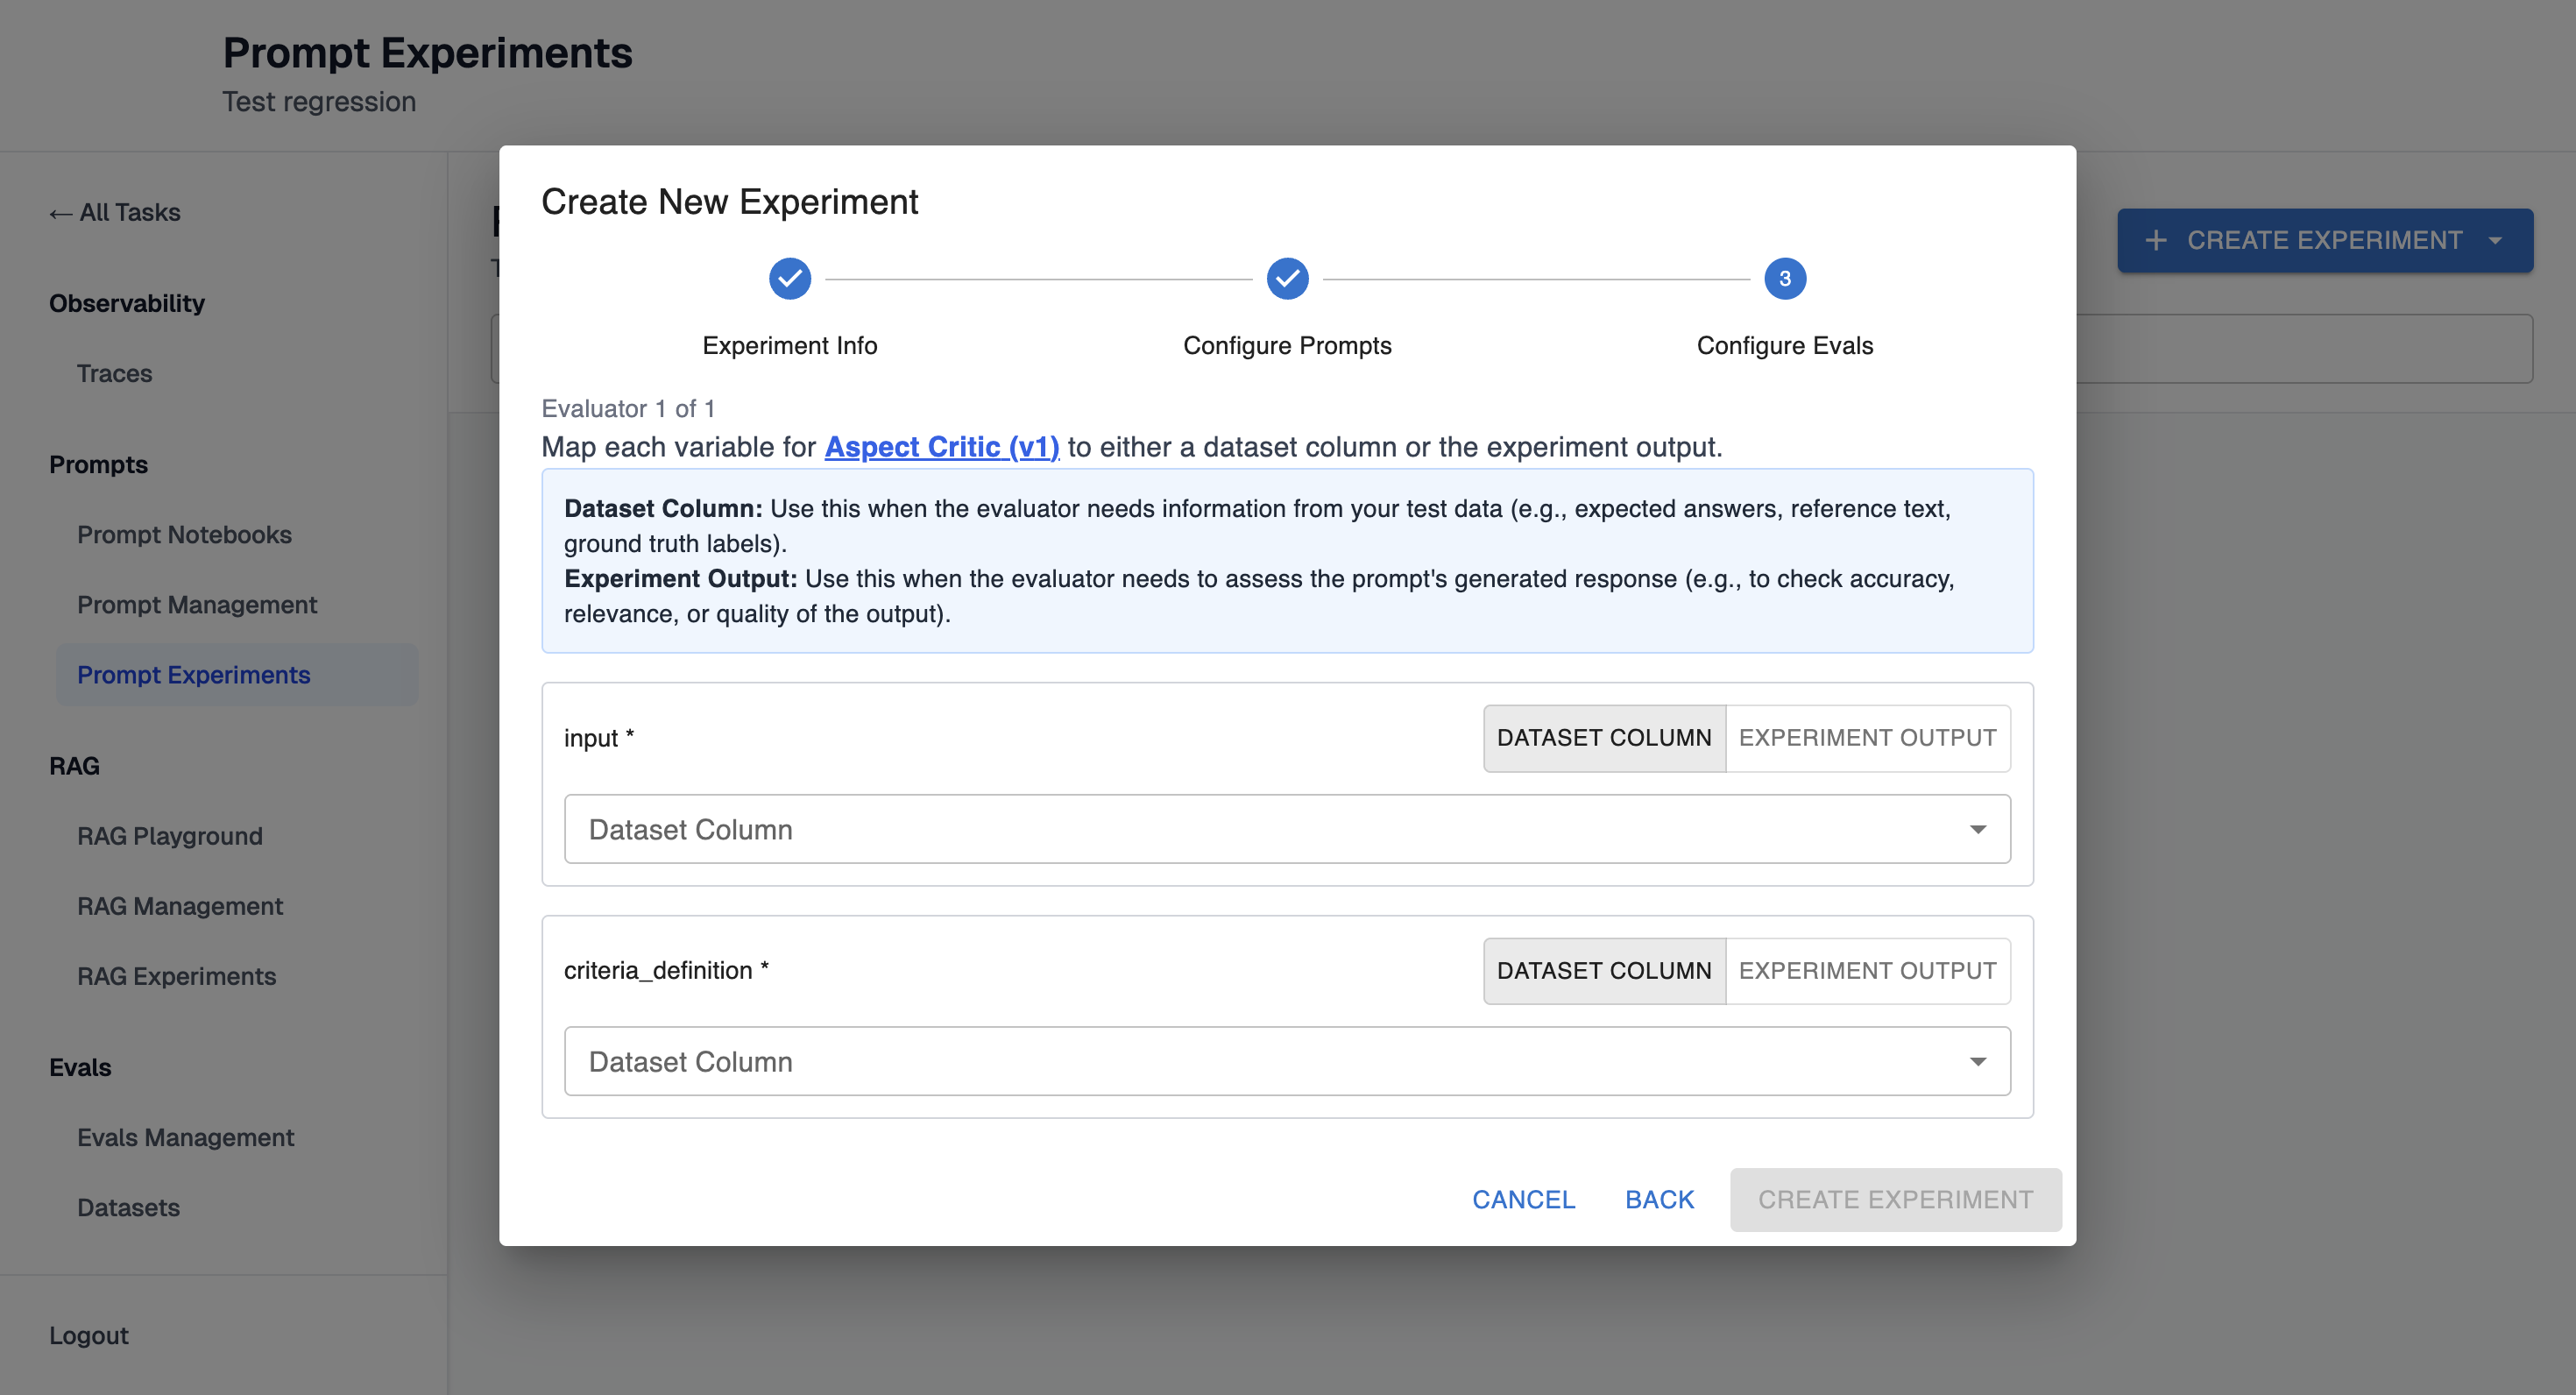
-
Or map prompt outputs to evaluator variables (using JSON paths)
-
Step 7: Create Experiment
-
Review your configuration summary
-
Click "Create Experiment" to start execution
-
The experiment runs asynchronously - results will populate automatically, and you can navigate away and return later
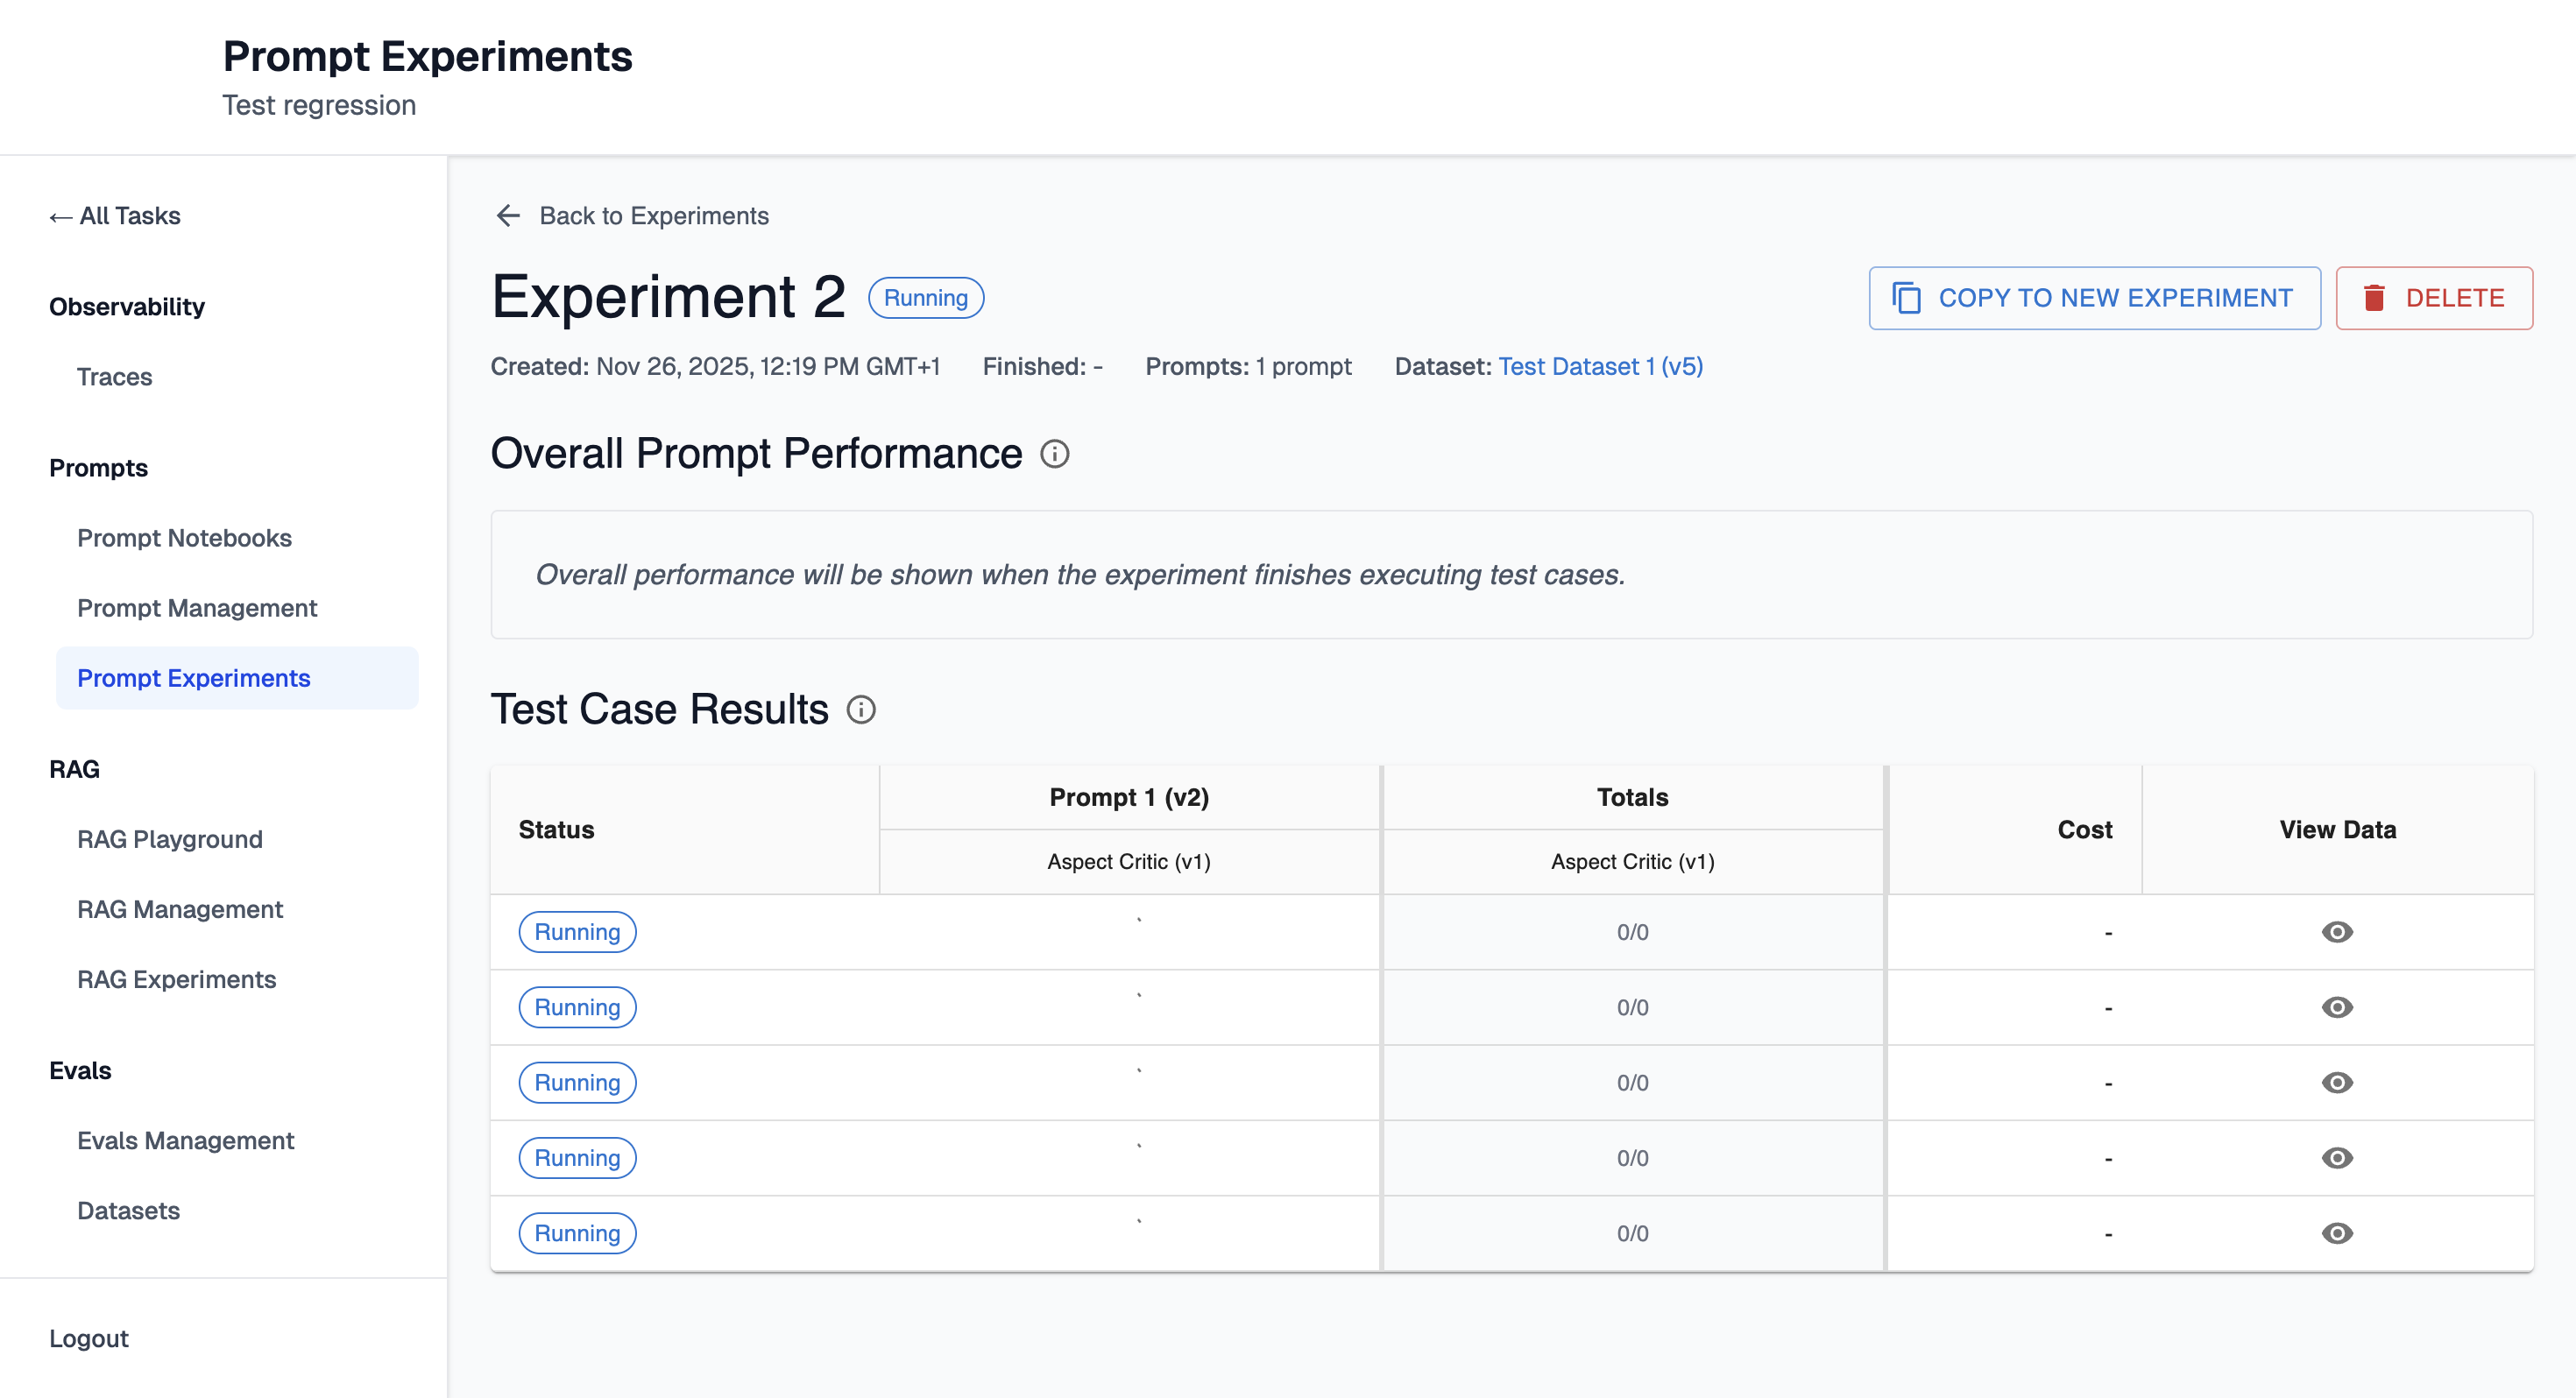
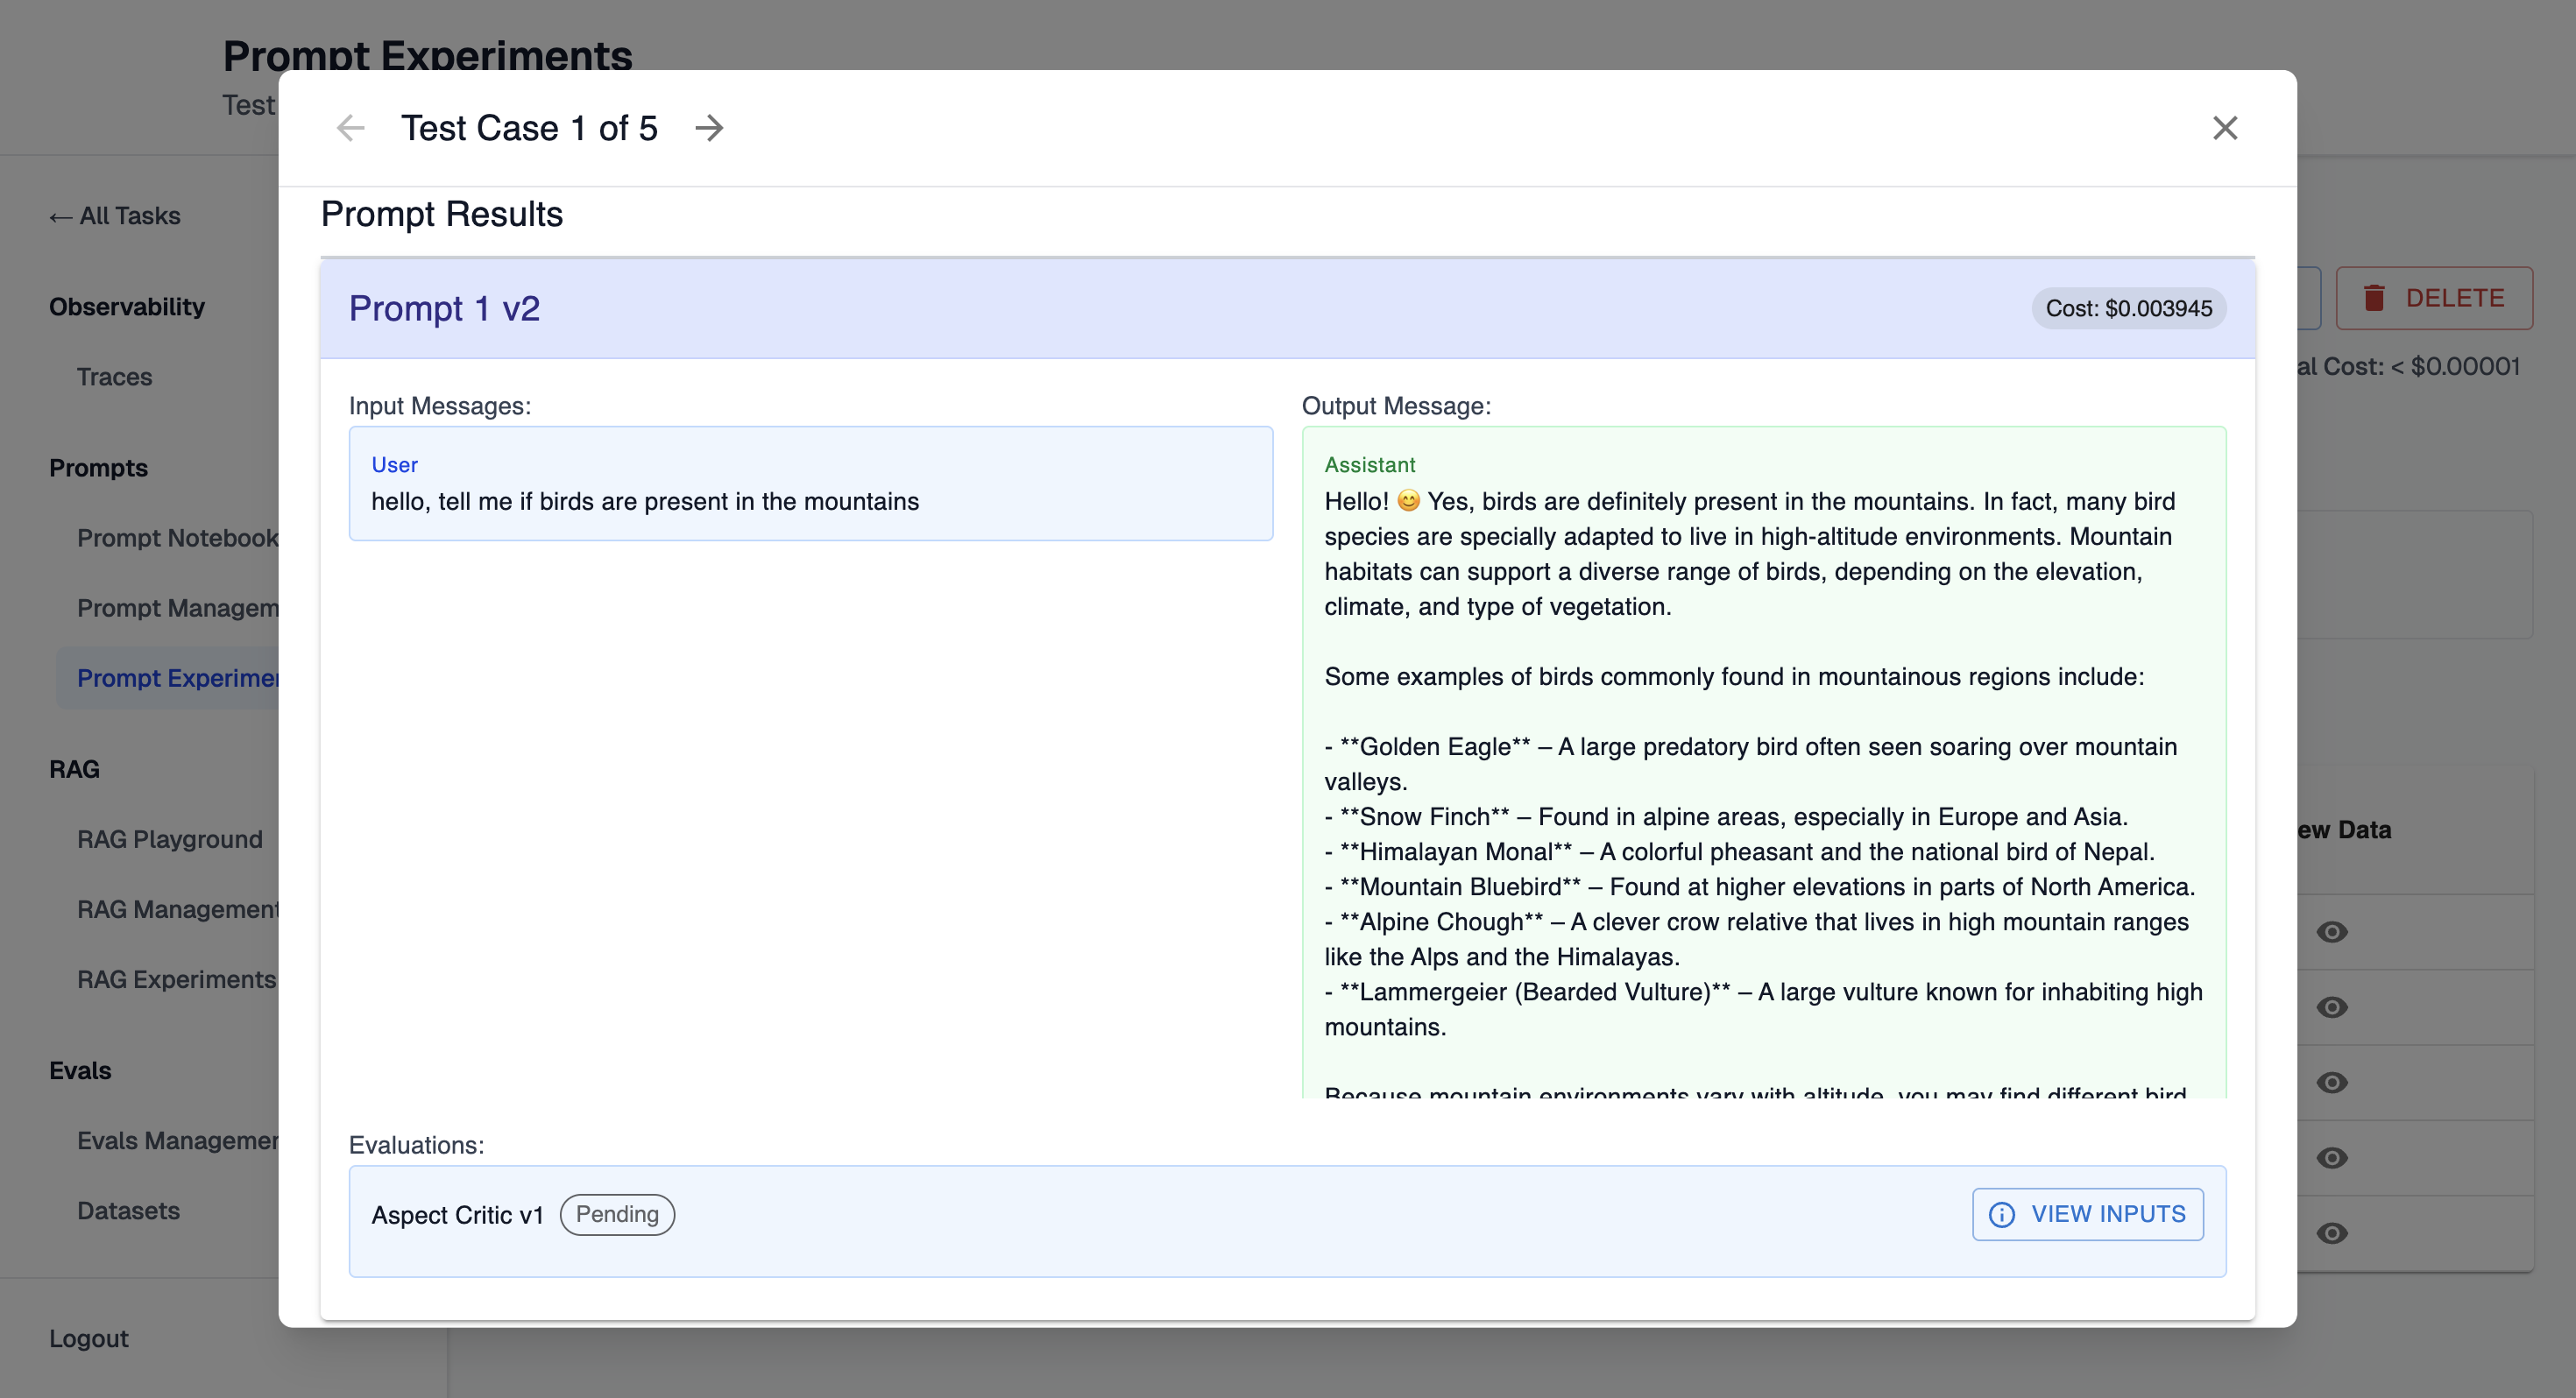
Step 8: Analyze Results
-
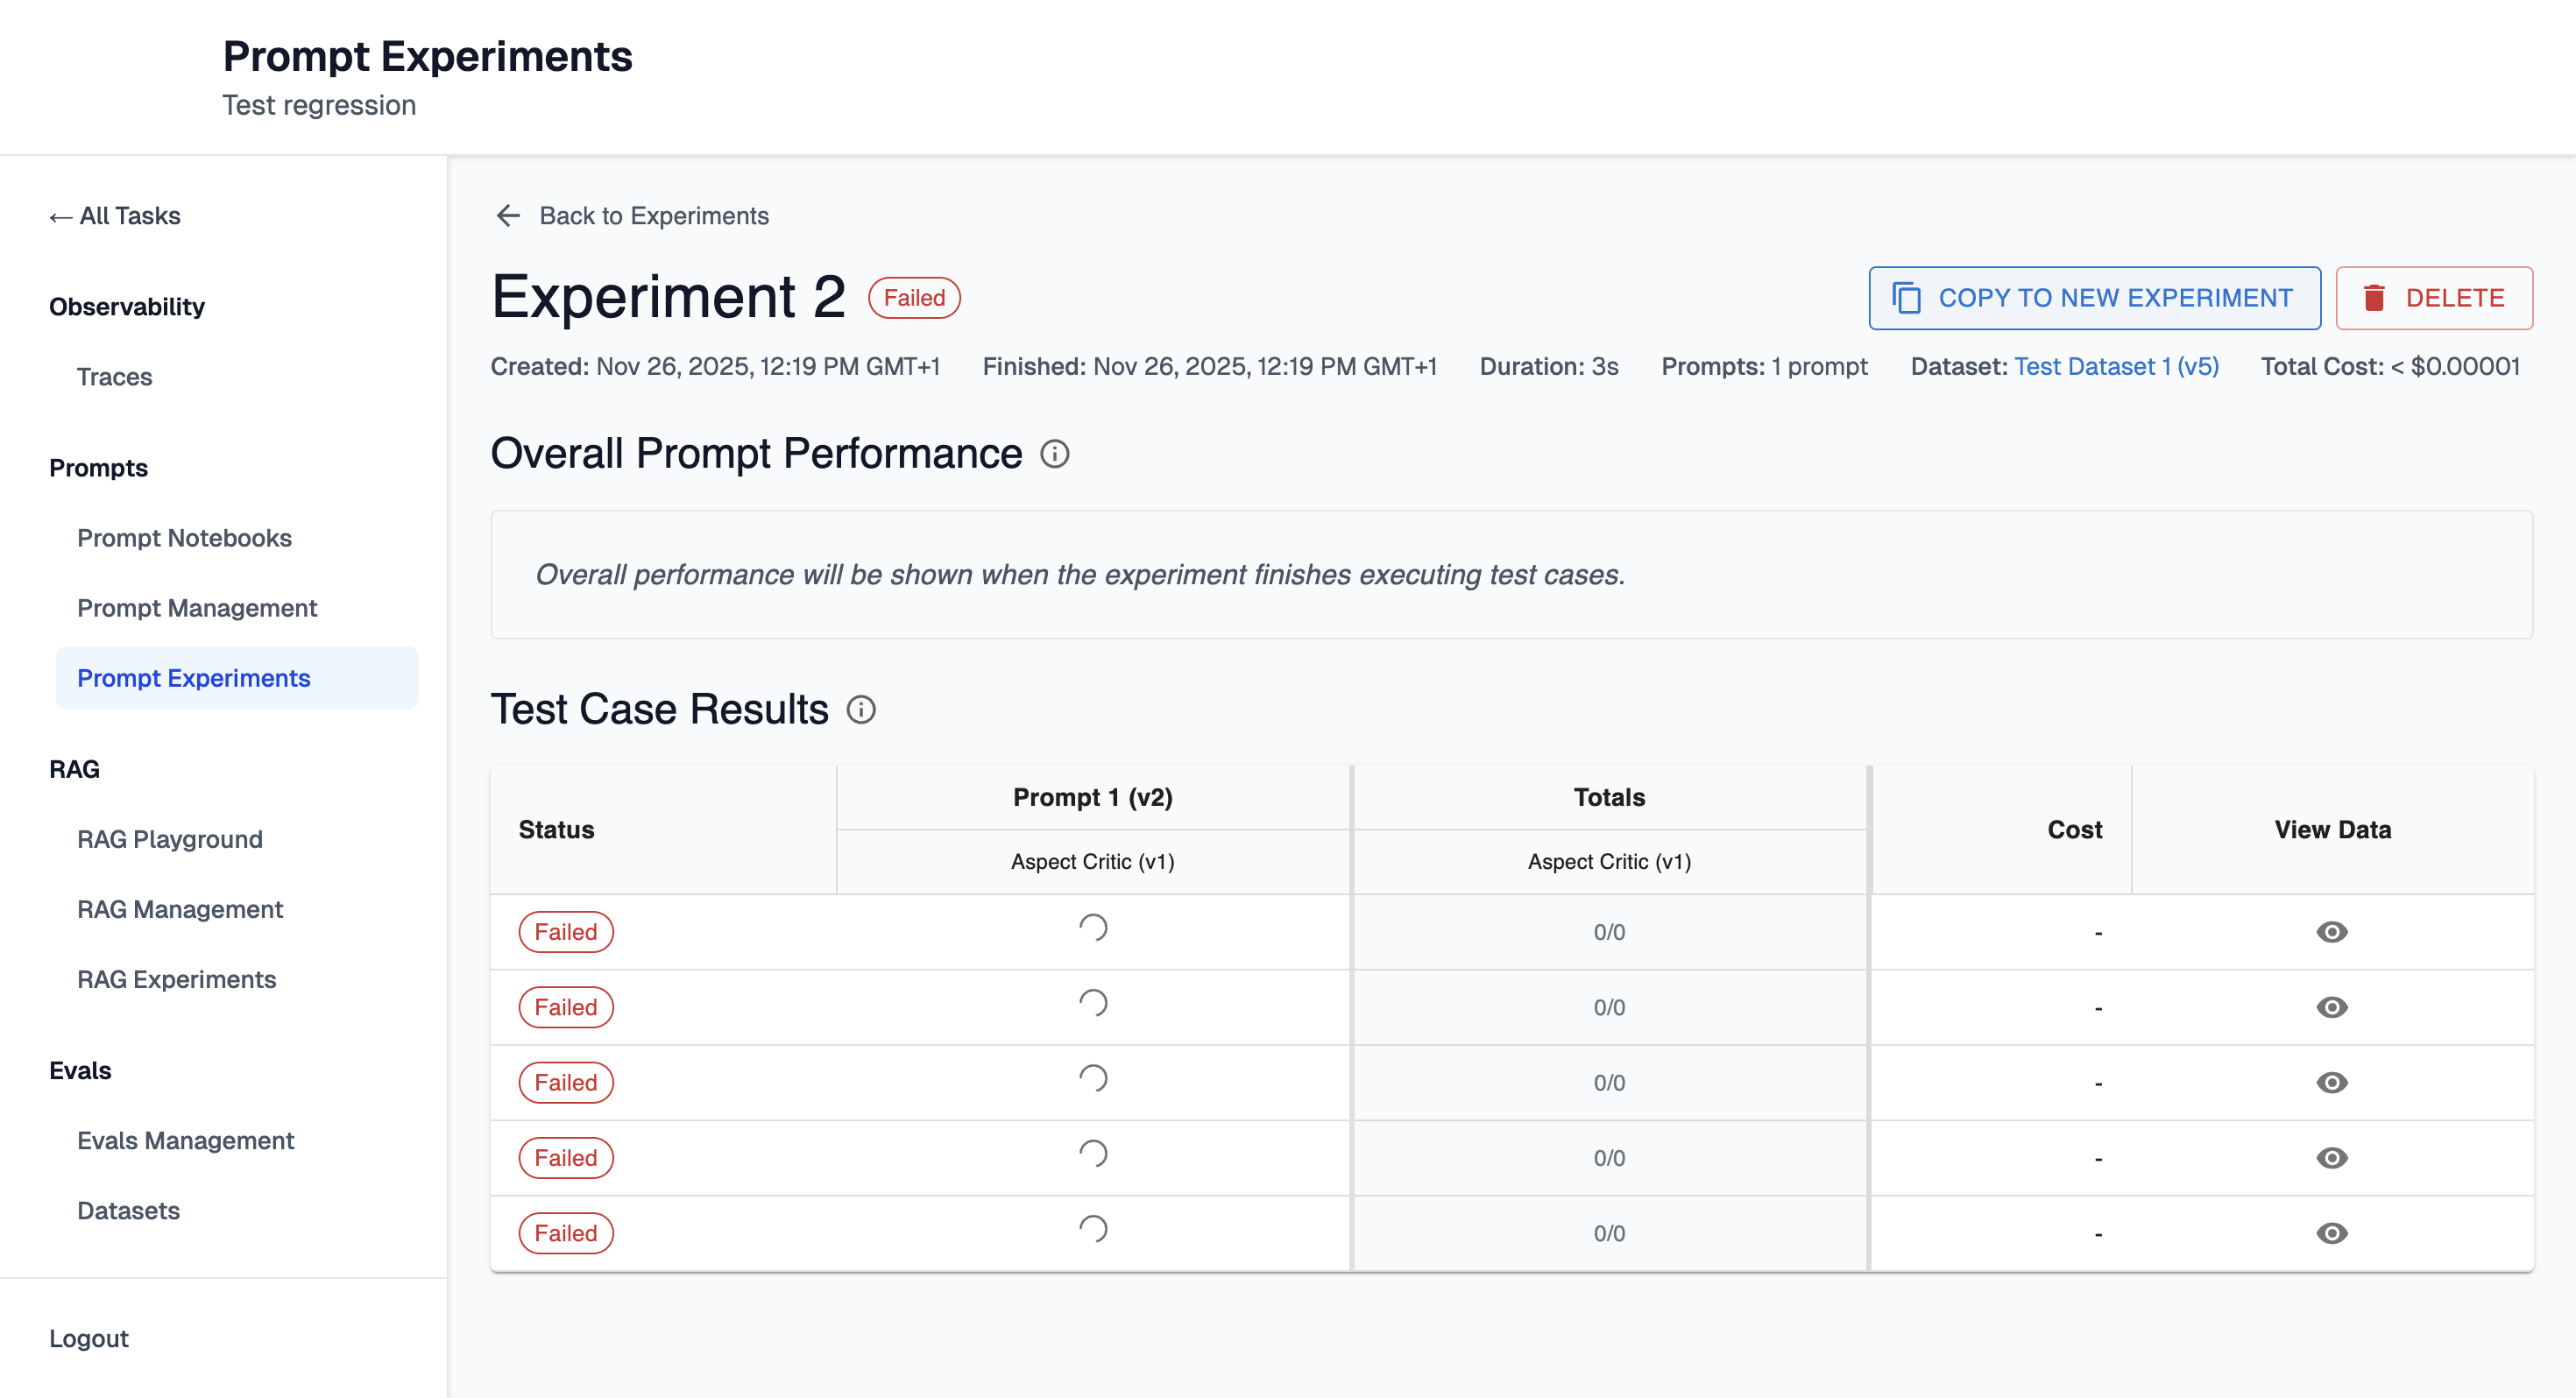
View the experiment detail page to see results as they populate
-
Review summary statistics and per-prompt performance once complete
-
Click on individual prompts to see detailed results
-
Click on test cases to see inputs, outputs, and evaluation scores
Step 9: Iterate
-
Clone the experiment by clicking button "Copy to new experiment" to create a new version with modifications.
-
Or create a new experiment based on what you learned
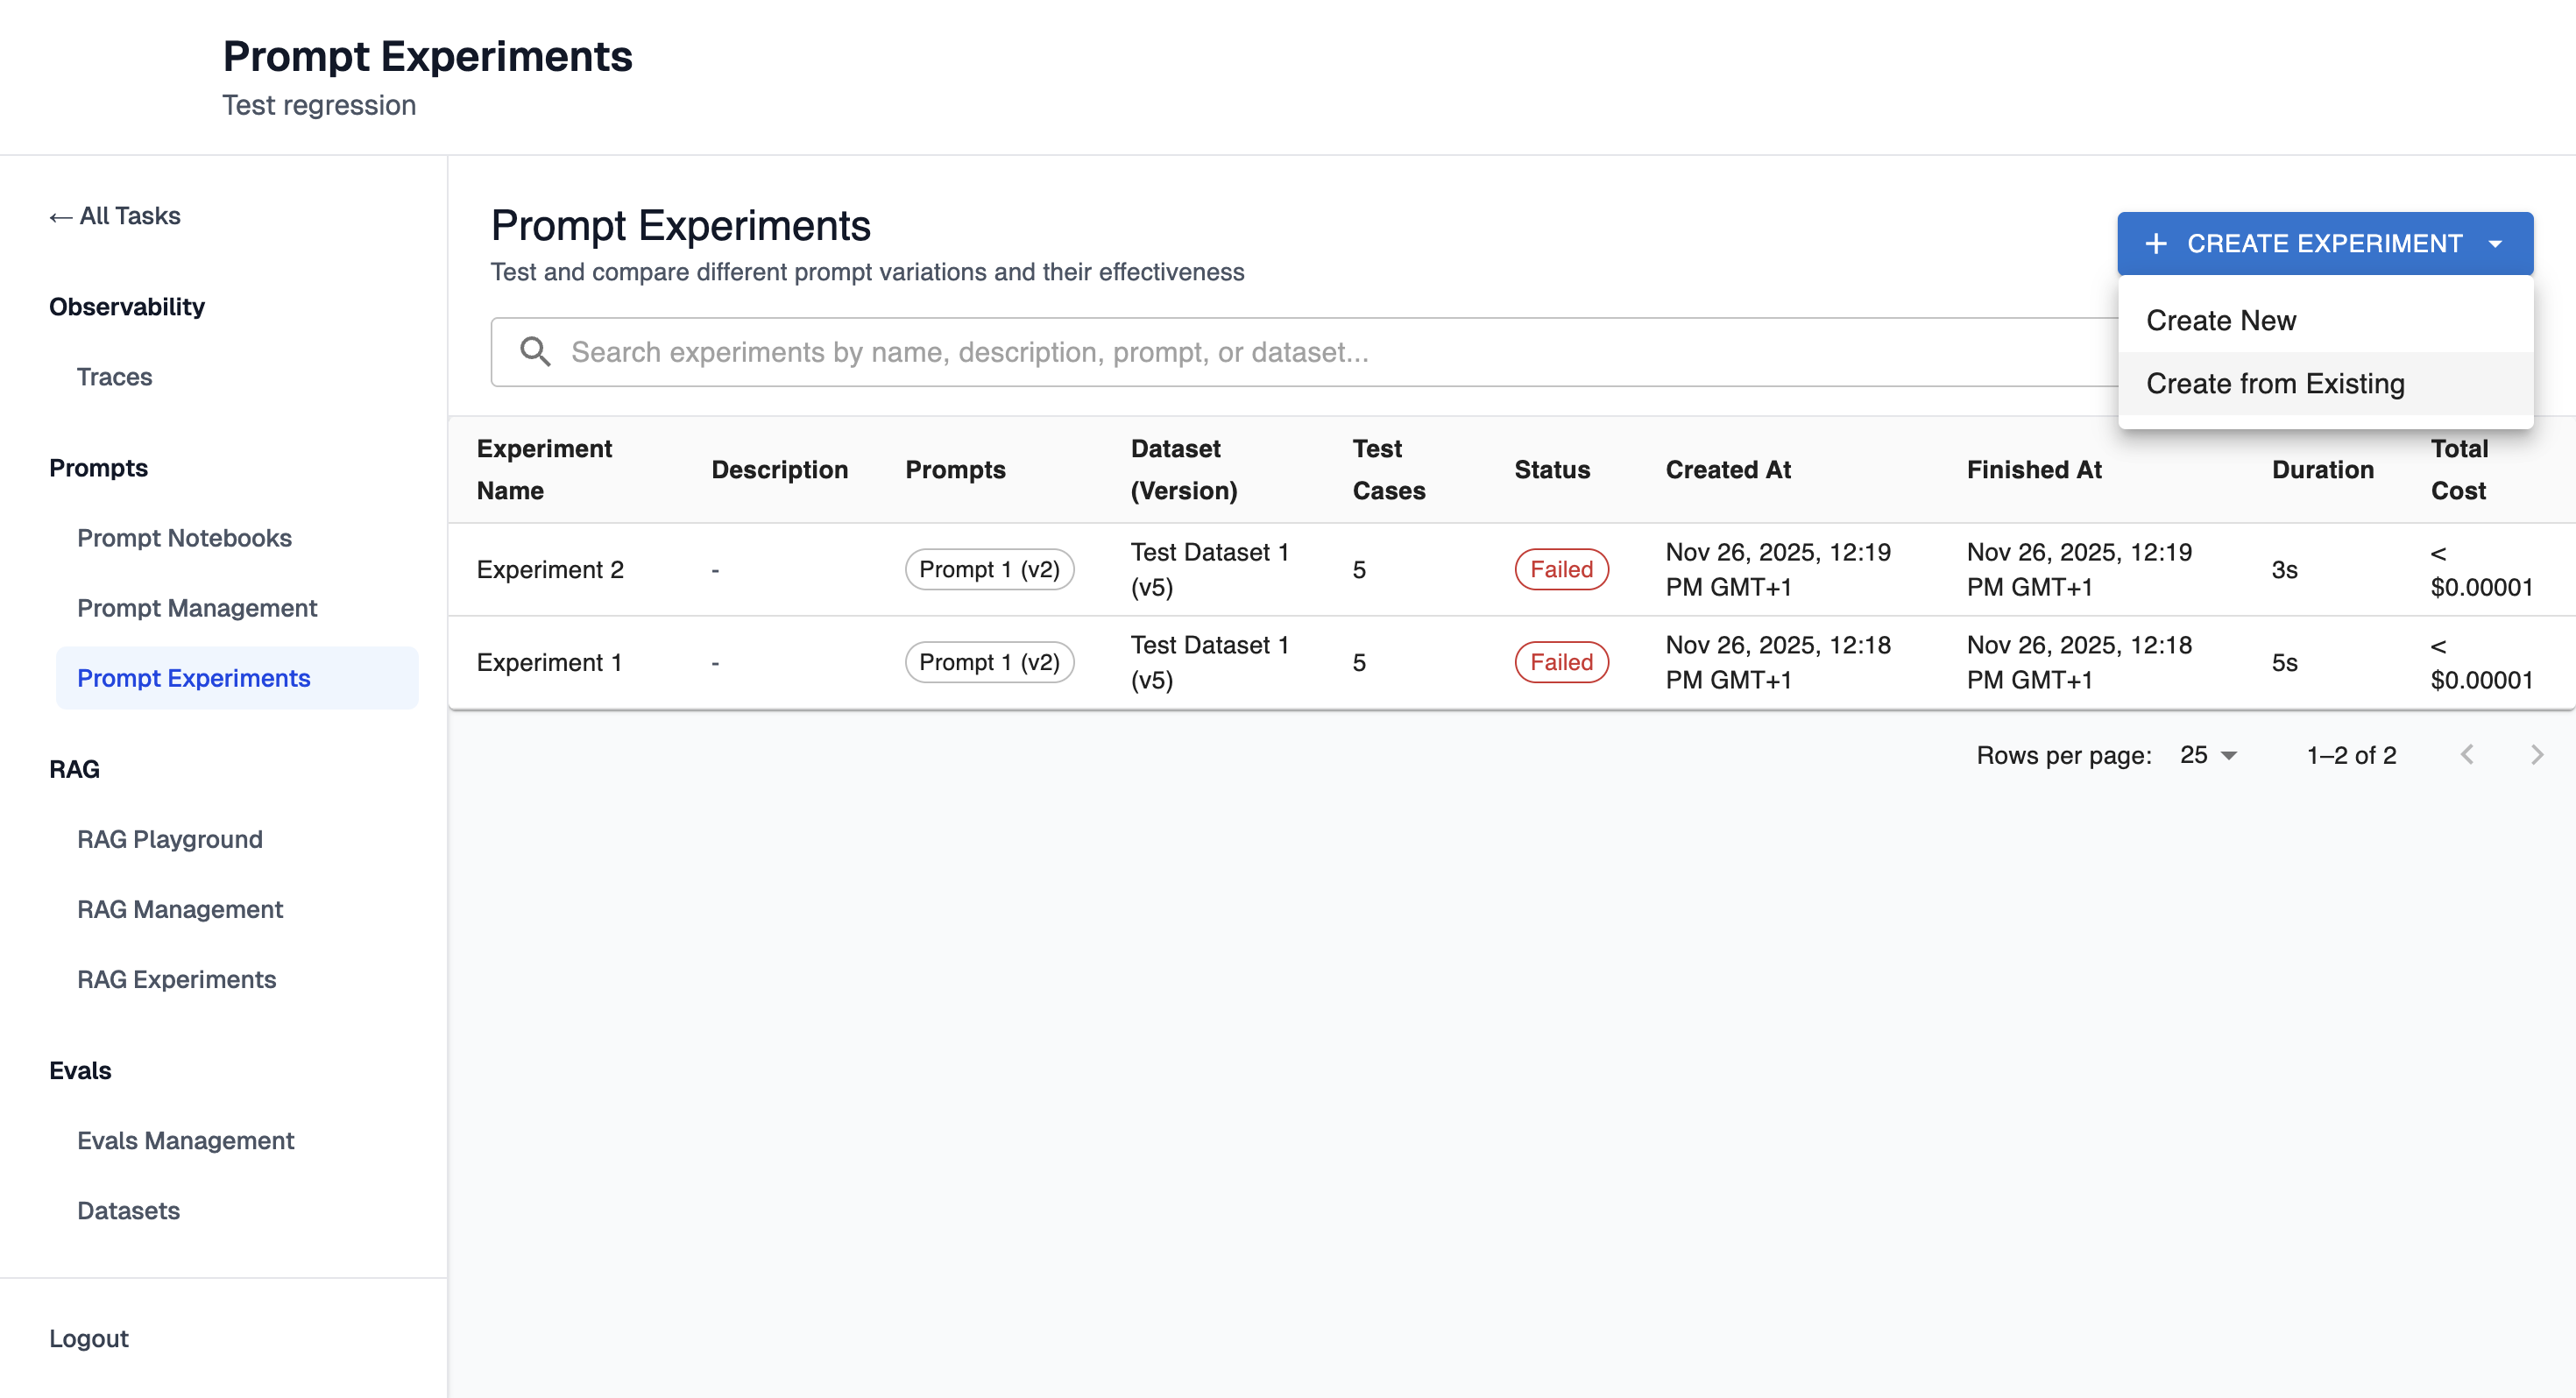
Workflow 2: Load Existing Experiment Configuration with New Prompts
This workflow is useful when you want to test new prompts using a proven experiment setup.
Step 1: Start from Existing Experiment
-
Navigate to an Prompt Experiments page.
-
Click "Create from Existing" button.
-
Select an existing experiment based on which new experiment should be created.
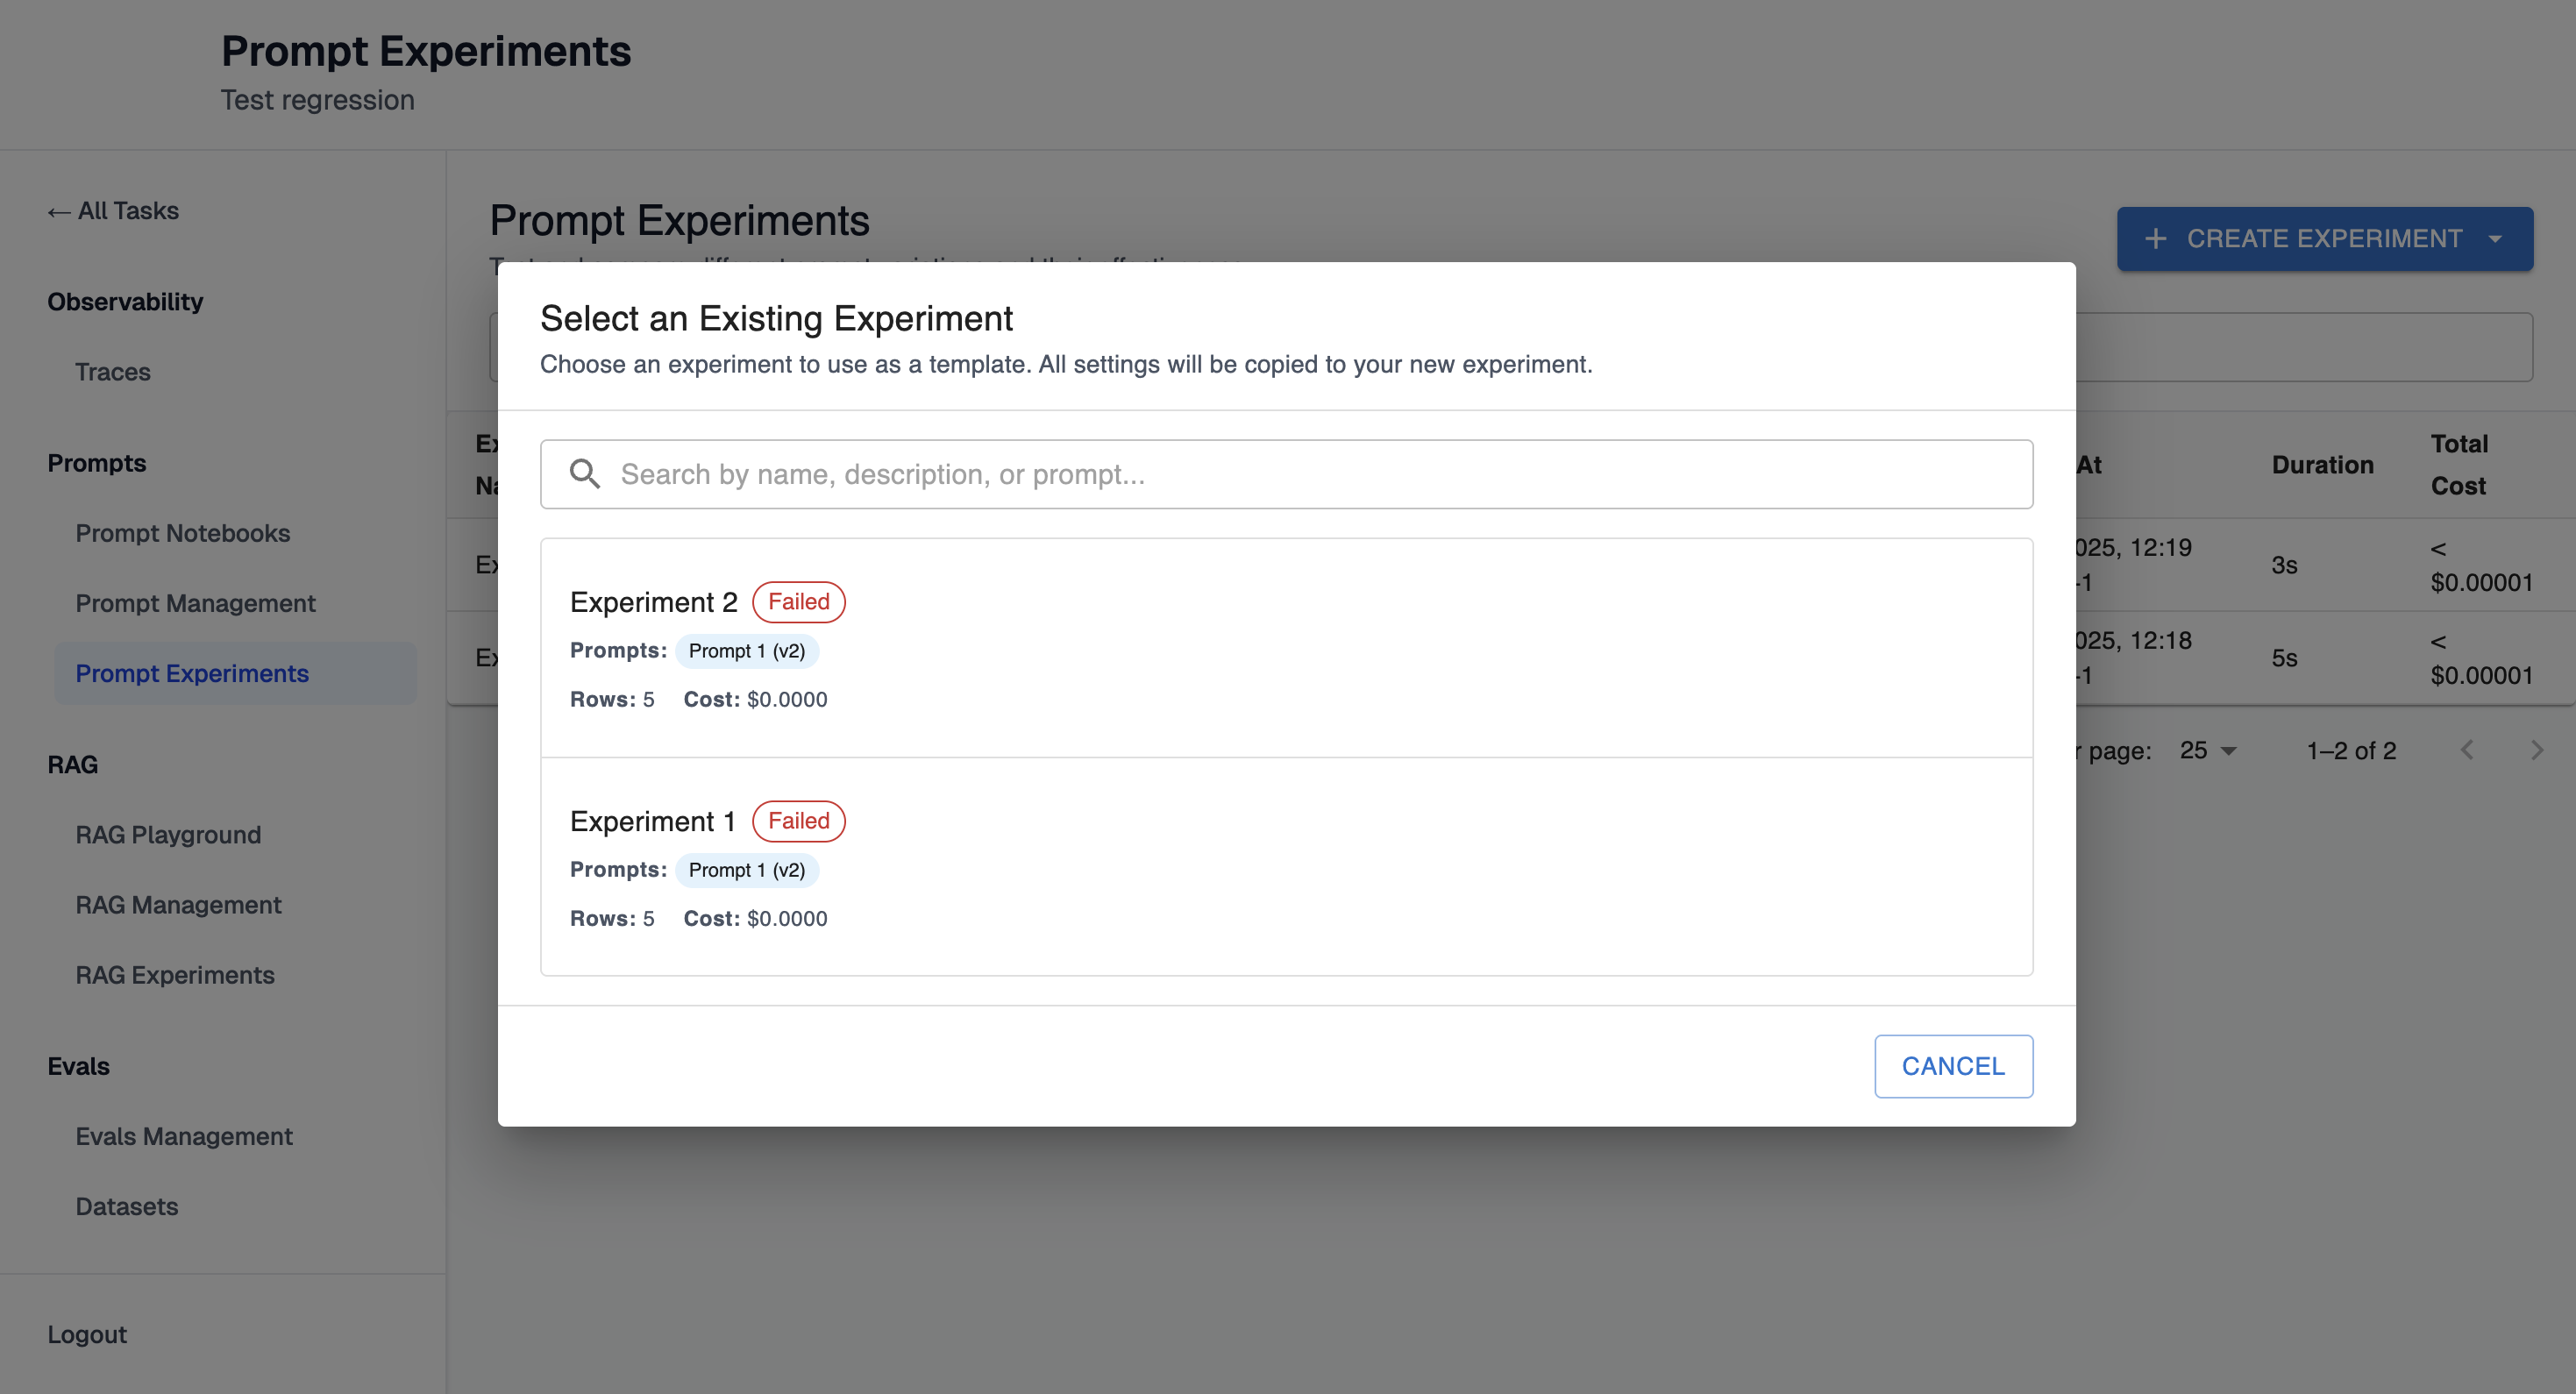
-
The experiment configuration will be pre-filled
Step 2: Modify Prompts
- Add new prompts (saved or unsaved) to test alongside existing ones
- Remove prompts you no longer want to test
- Keep the same dataset, evaluators, and mappings
Step 3: Adjust as Needed
- Review variable mappings (may need updates if new prompts have different variables)
- Verify evaluator configurations still make sense
- Update experiment name and description
Step 4: Run and Compare
- Create the new experiment
- Compare results with the original experiment to see how new prompts perform
Workflow 3: Deep Dive into a Single Prompt
This workflow helps you understand how a specific prompt performs across all test cases.
Step 1: Open Experiment Results
- Navigate to a completed experiment
- Review the summary statistics
Step 2: Select a Prompt
- Click on a prompt card in the summary view to see detailed results for all test cases
- Or click "Open in Notebook" on the prompt card to open the prompt in a notebook with the experiment configuration (dataset, evaluators, mappings) pre-loaded, allowing you to iterate directly
Step 3: Analyze Performance
- Review evaluation performance metrics (pass rates, scores)
- Browse test case results in the table
- Use pagination to navigate through all test cases
Step 4: Inspect Individual Test Cases
- Click on a test case row to see full details
- Review:
- Input variables used
- Rendered prompt (with variables filled in)
- Prompt output (content, tool calls, cost)
- Evaluation results (scores, explanations)
Step 5: Identify Patterns
- Filter or search for specific patterns
- Look for common failure modes
- Identify inputs where the prompt excels or struggles
Step 6: Take Action
- Open in Notebook: Click the "Open in Notebook" button on the prompt card to open the prompt in a notebook with the existing experiment configuration pre-loaded. This allows you to iterate on the prompt directly while preserving the dataset, evaluators, and variable mappings from the experiment.
- Use insights to refine prompts
- Create new experiments to test improvements
- Document findings for your team
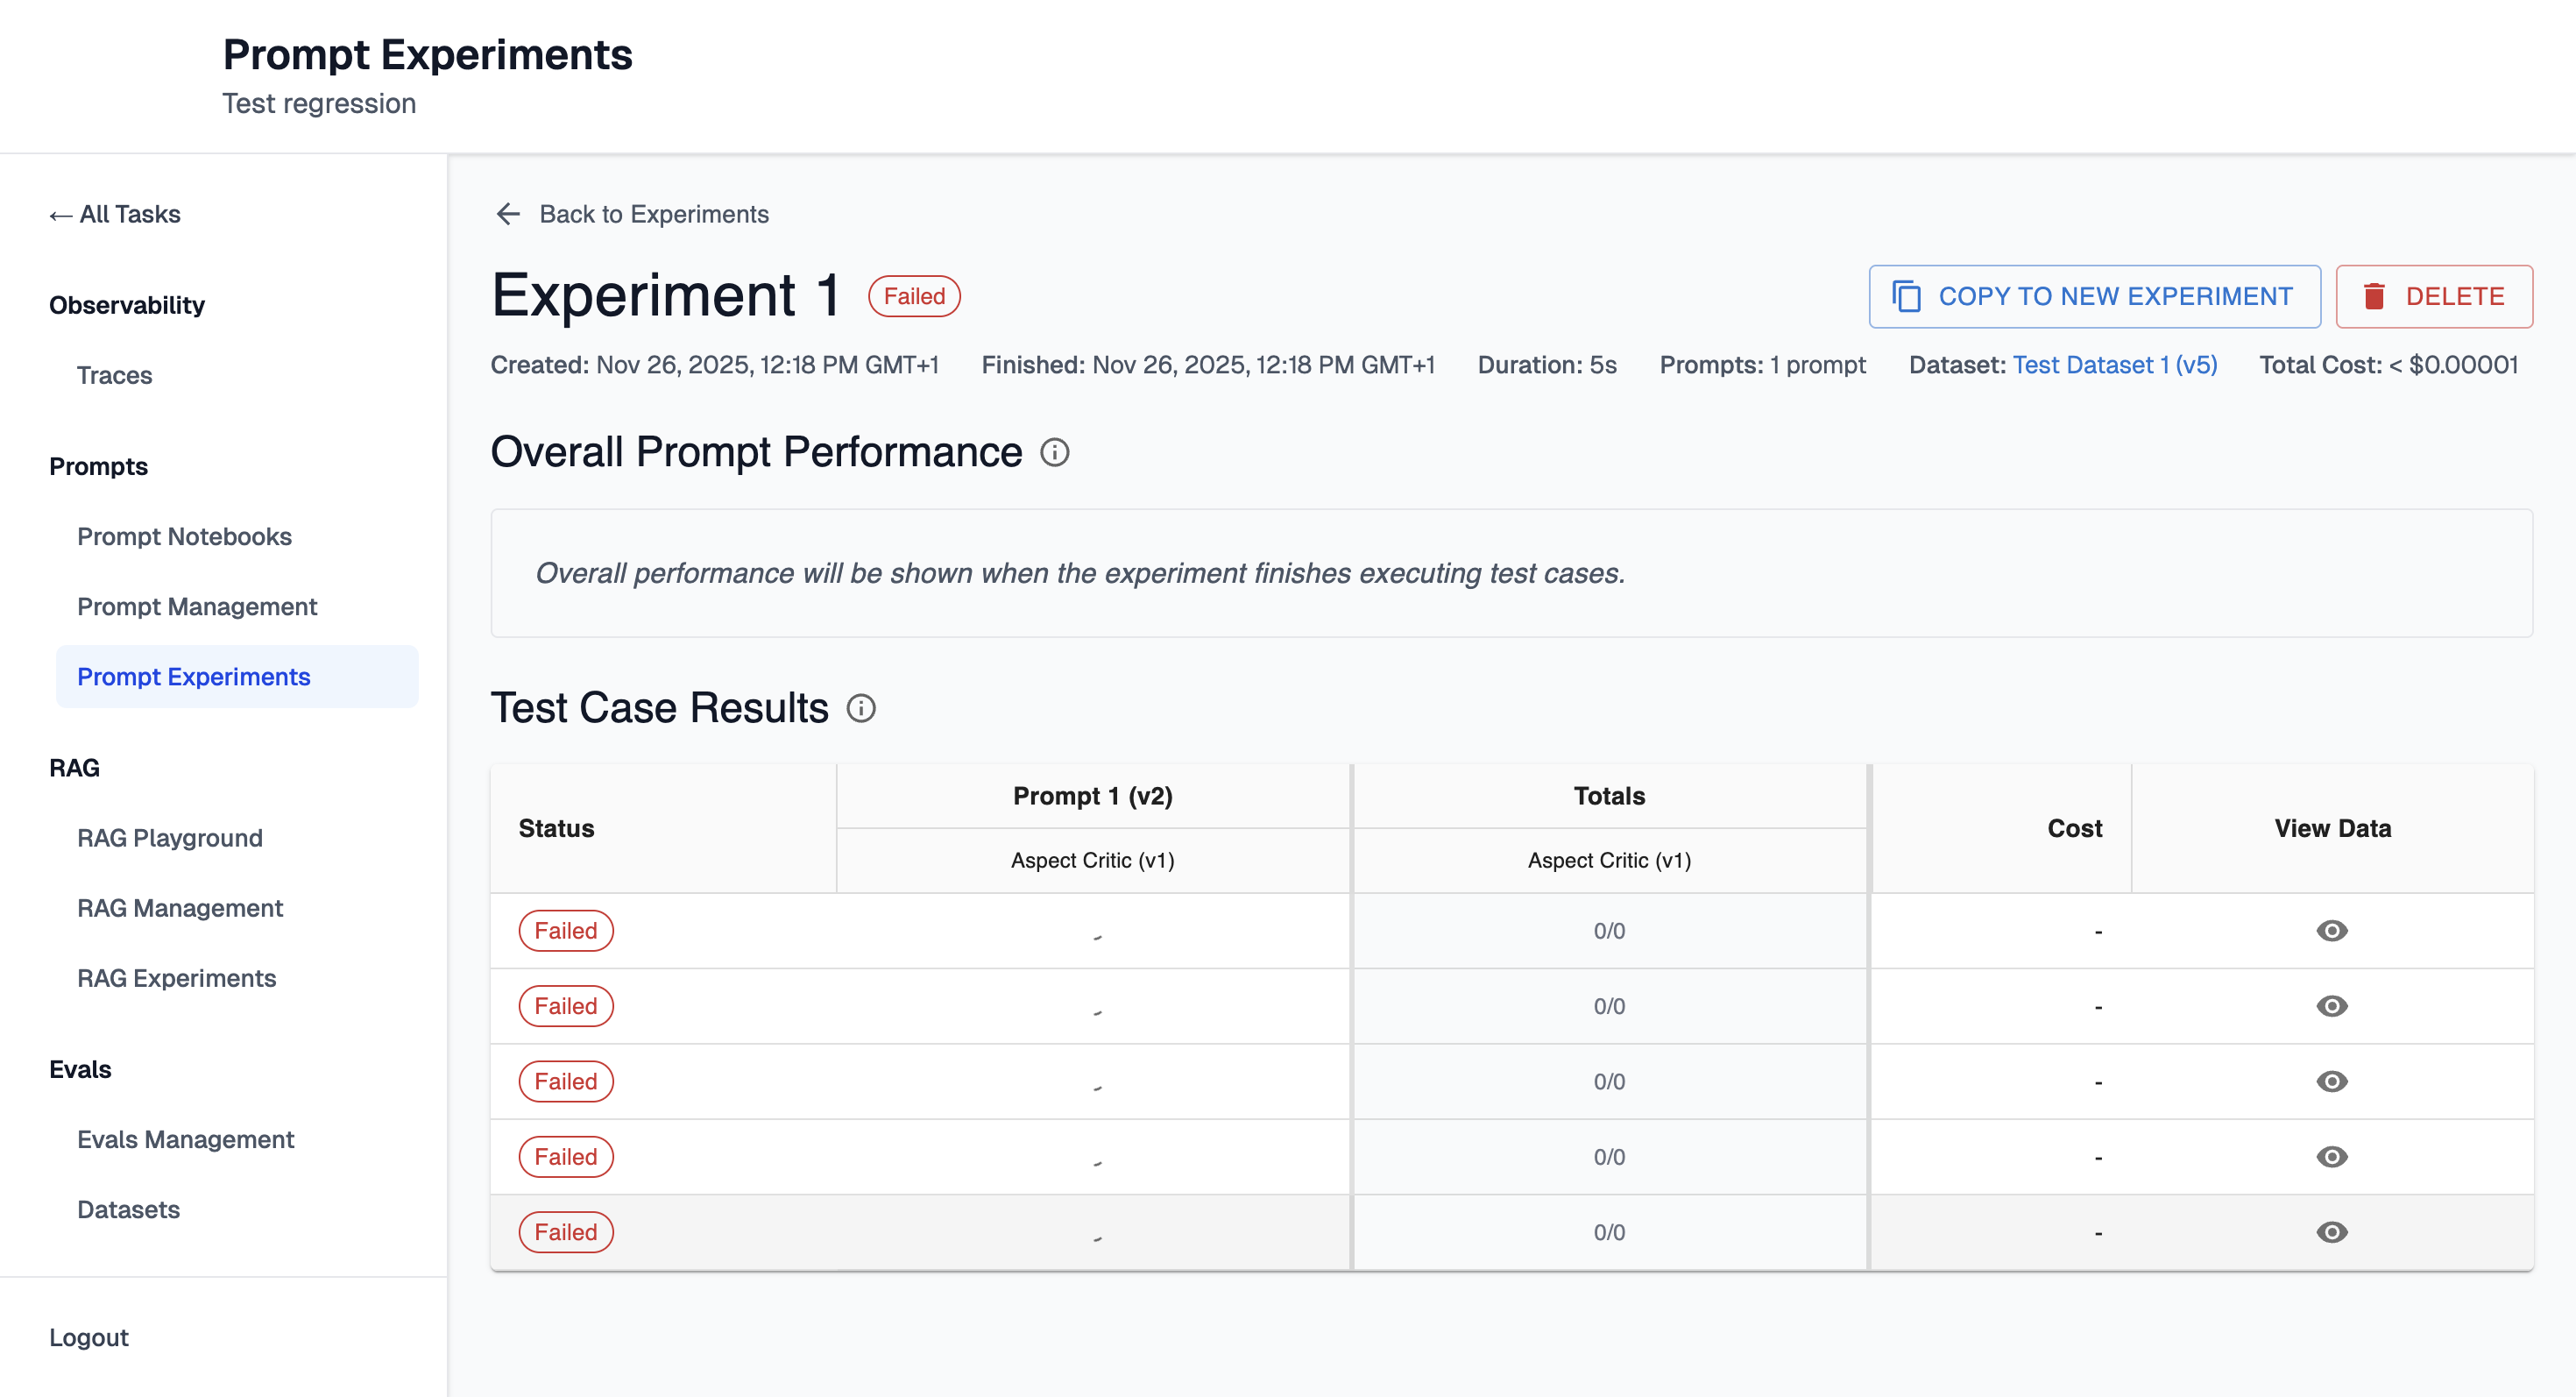
Understanding Experiment Status
Experiments progress through several statuses:
- Queued: Experiment is waiting to start execution
- Running: Experiment is actively executing prompts and evaluations
- Completed: All test cases finished successfully
- Failed: Experiment encountered an error and stopped
Individual test cases also have statuses:
- Queued: Waiting to be processed
- Running: Prompt execution in progress
- Evaluating: Evaluations running on prompt output
- Completed: Test case finished successfully
- Failed: Test case encountered an error
You can monitor progress in real-time - the UI auto-refreshes while experiments are running.
Best Practices
- Iterate Incrementally: Make small changes and test them systematically rather than large overhauls
- Compare Systematically: Test multiple prompt versions in the same experiment for fair comparison
- Review Explanations: Don't just look at pass/fail - read evaluator explanations to understand why prompts succeed or fail
- Document Findings: Use experiment descriptions to note what changed and what you learned
Relationship to Notebooks
Prompt Experiments can be created from and linked to Prompt Notebooks. Notebooks provide a workspace for iterating on prompt configurations before running experiments. Key points:
- Notebooks are draft workspaces where you can develop and test prompts
- Experiments are formal runs that test prompts against datasets
- You can create experiments from notebook configurations
- Experiments can be linked back to notebooks for organization
Updated 7 months ago