How to use Prompts
This section describes how to work with Prompts.
What can be done with Prompts?
Quick test without saving prompt
Quick testing can be performed without creating a saved prompt. Ad-hoc prompts can be defined directly in the Prompt Playground. To do this, follow the steps below.
Create Notebook
-
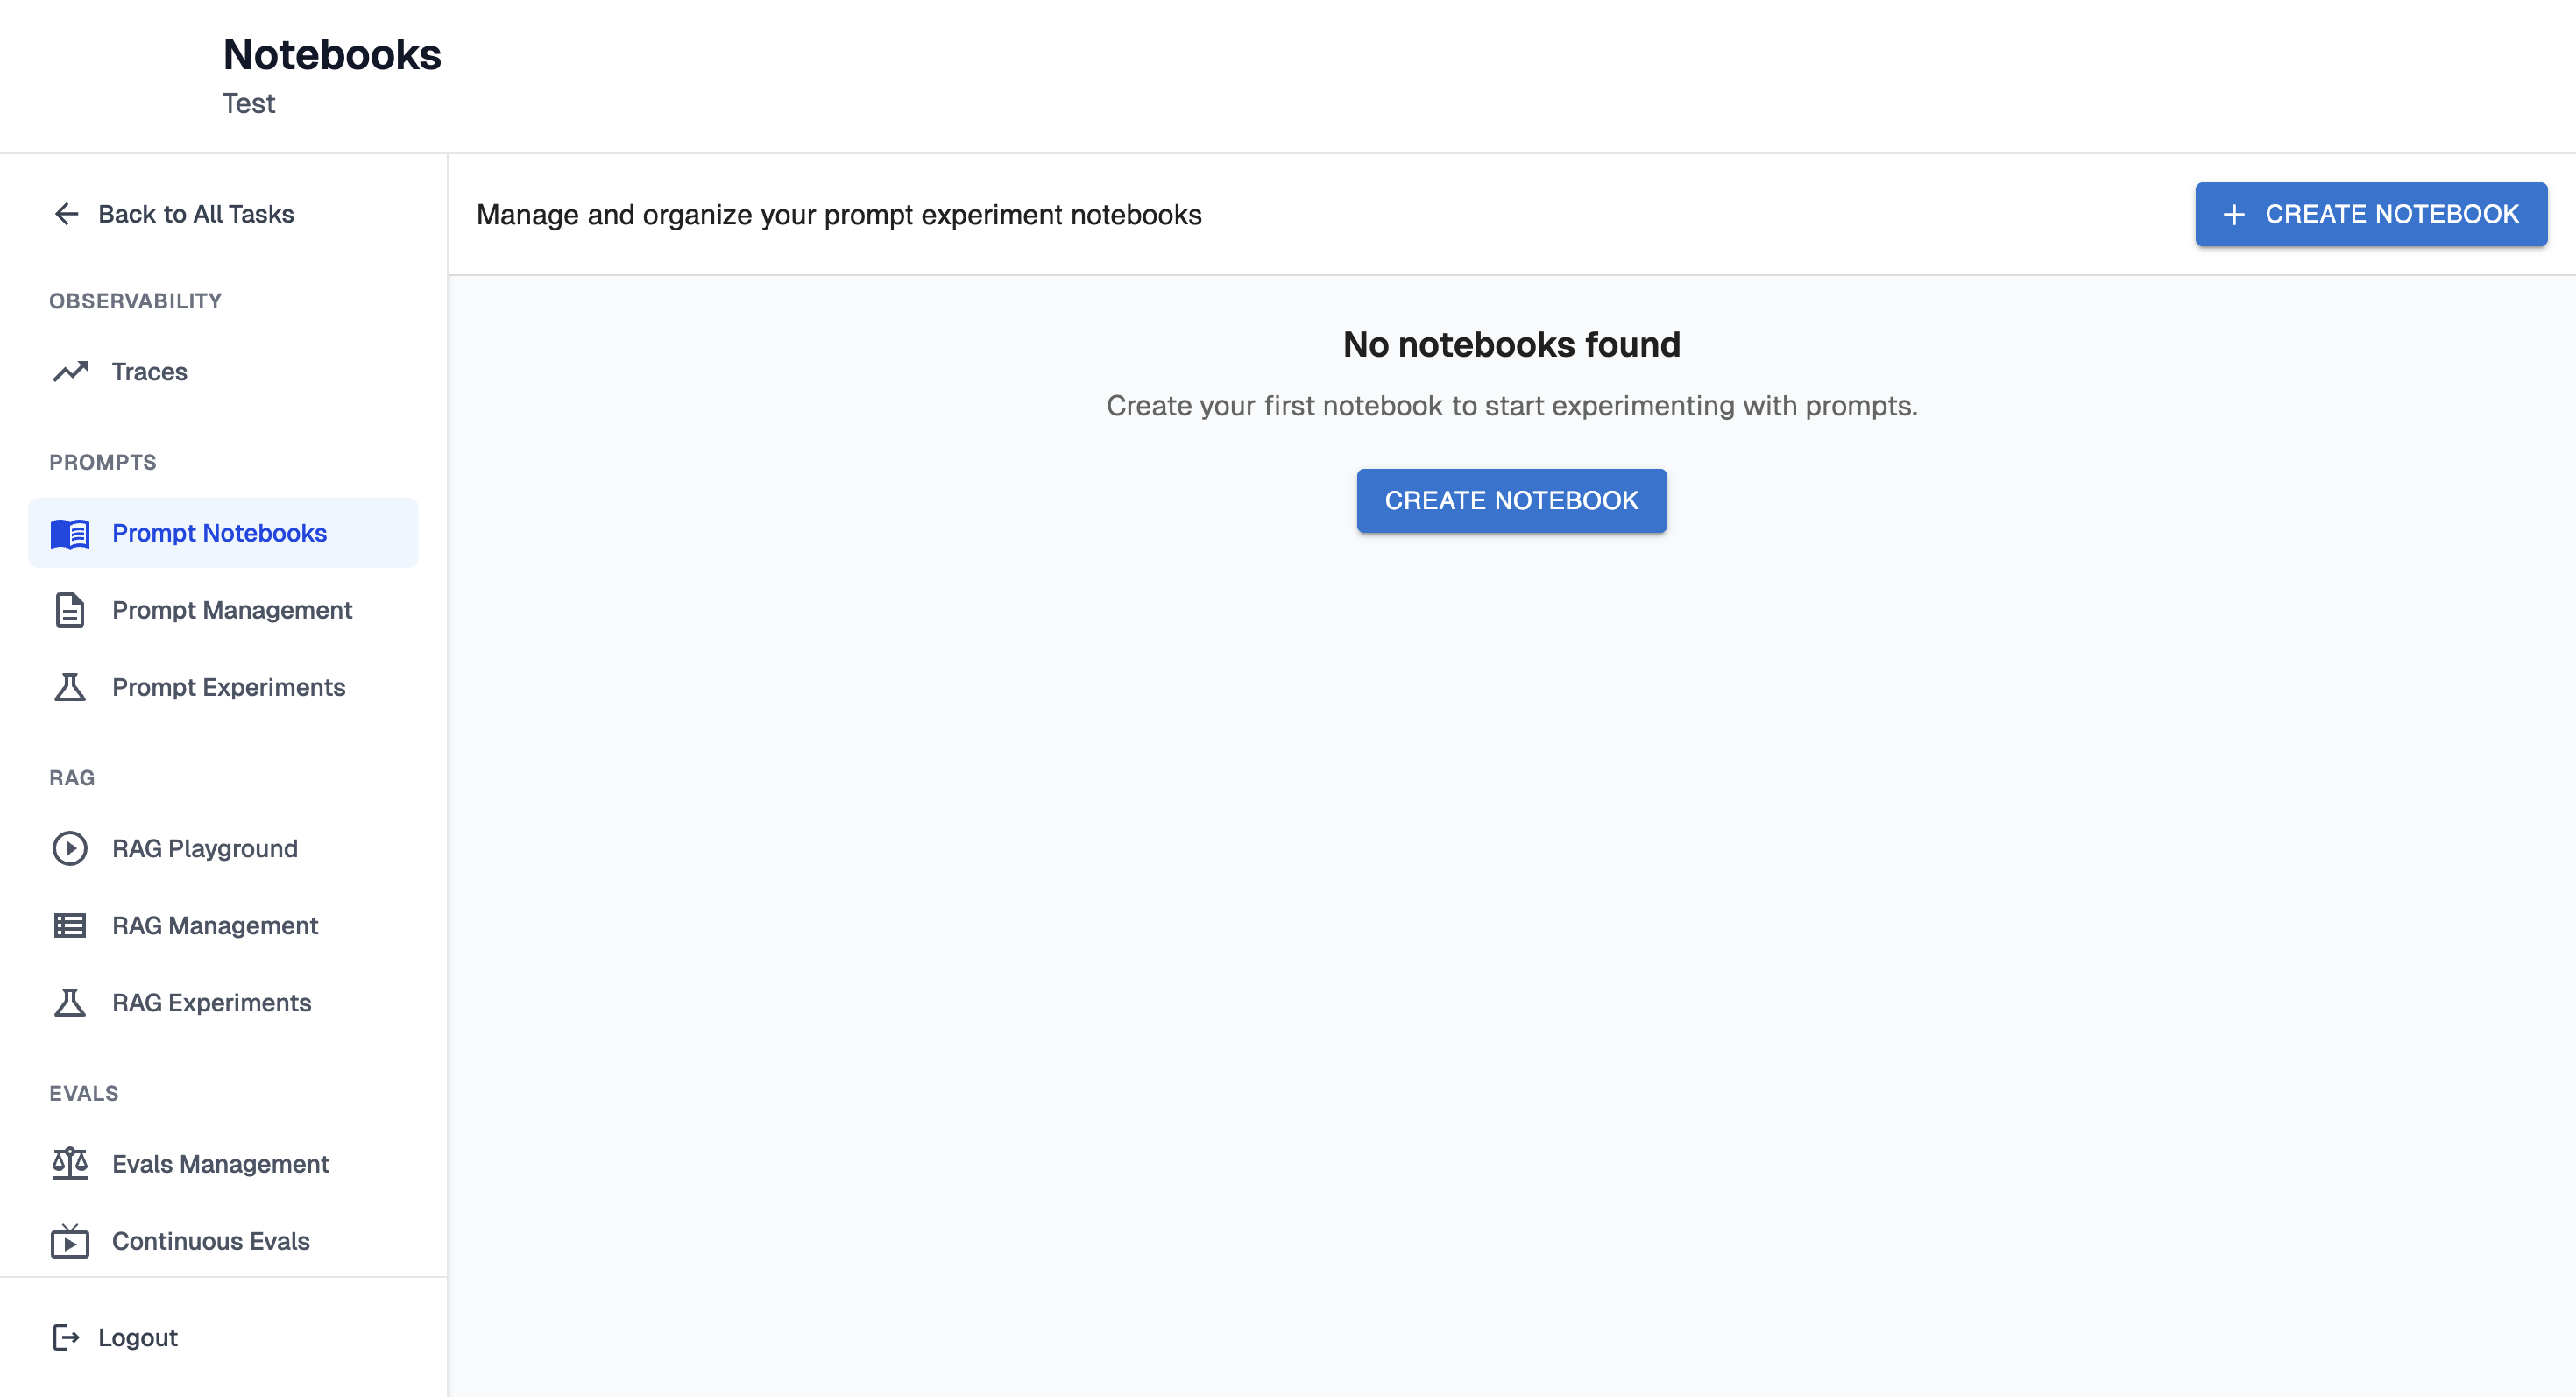
Navigate to the Prompt Notebooks page.
-
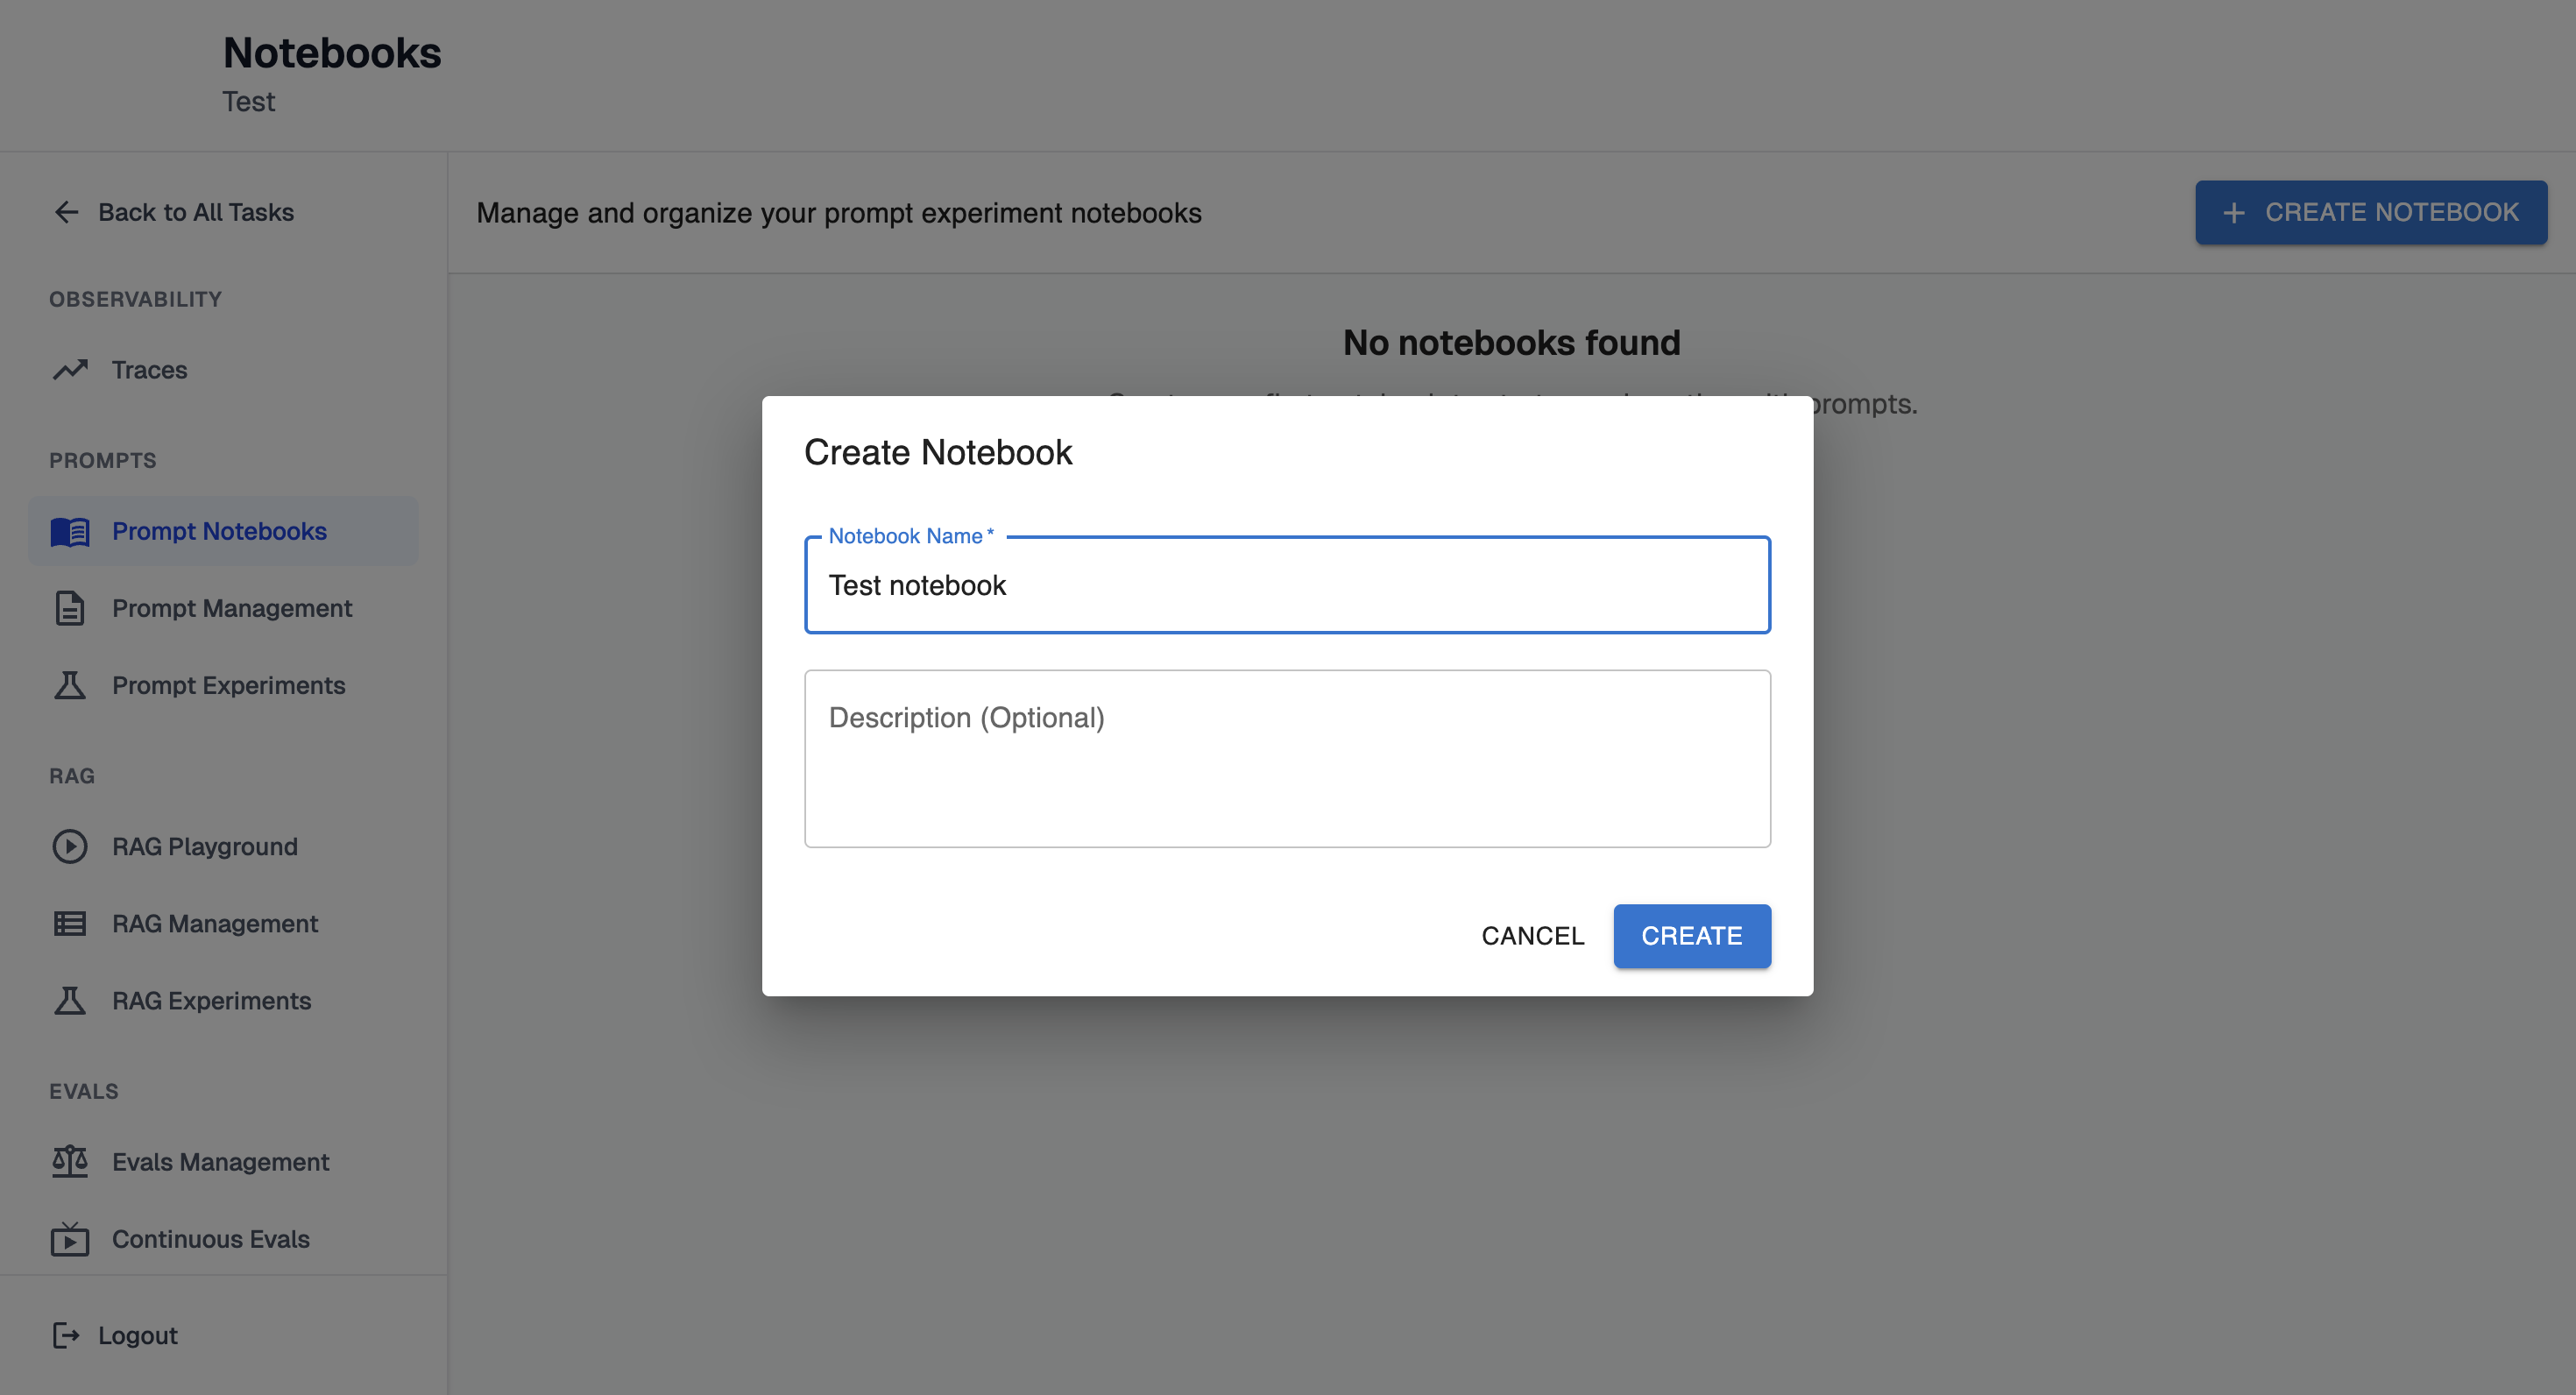
Click "Create Notebook" button. It will open configuration form:
-
Enter a name and optional description. Click "Create" button.
Prompt Playground
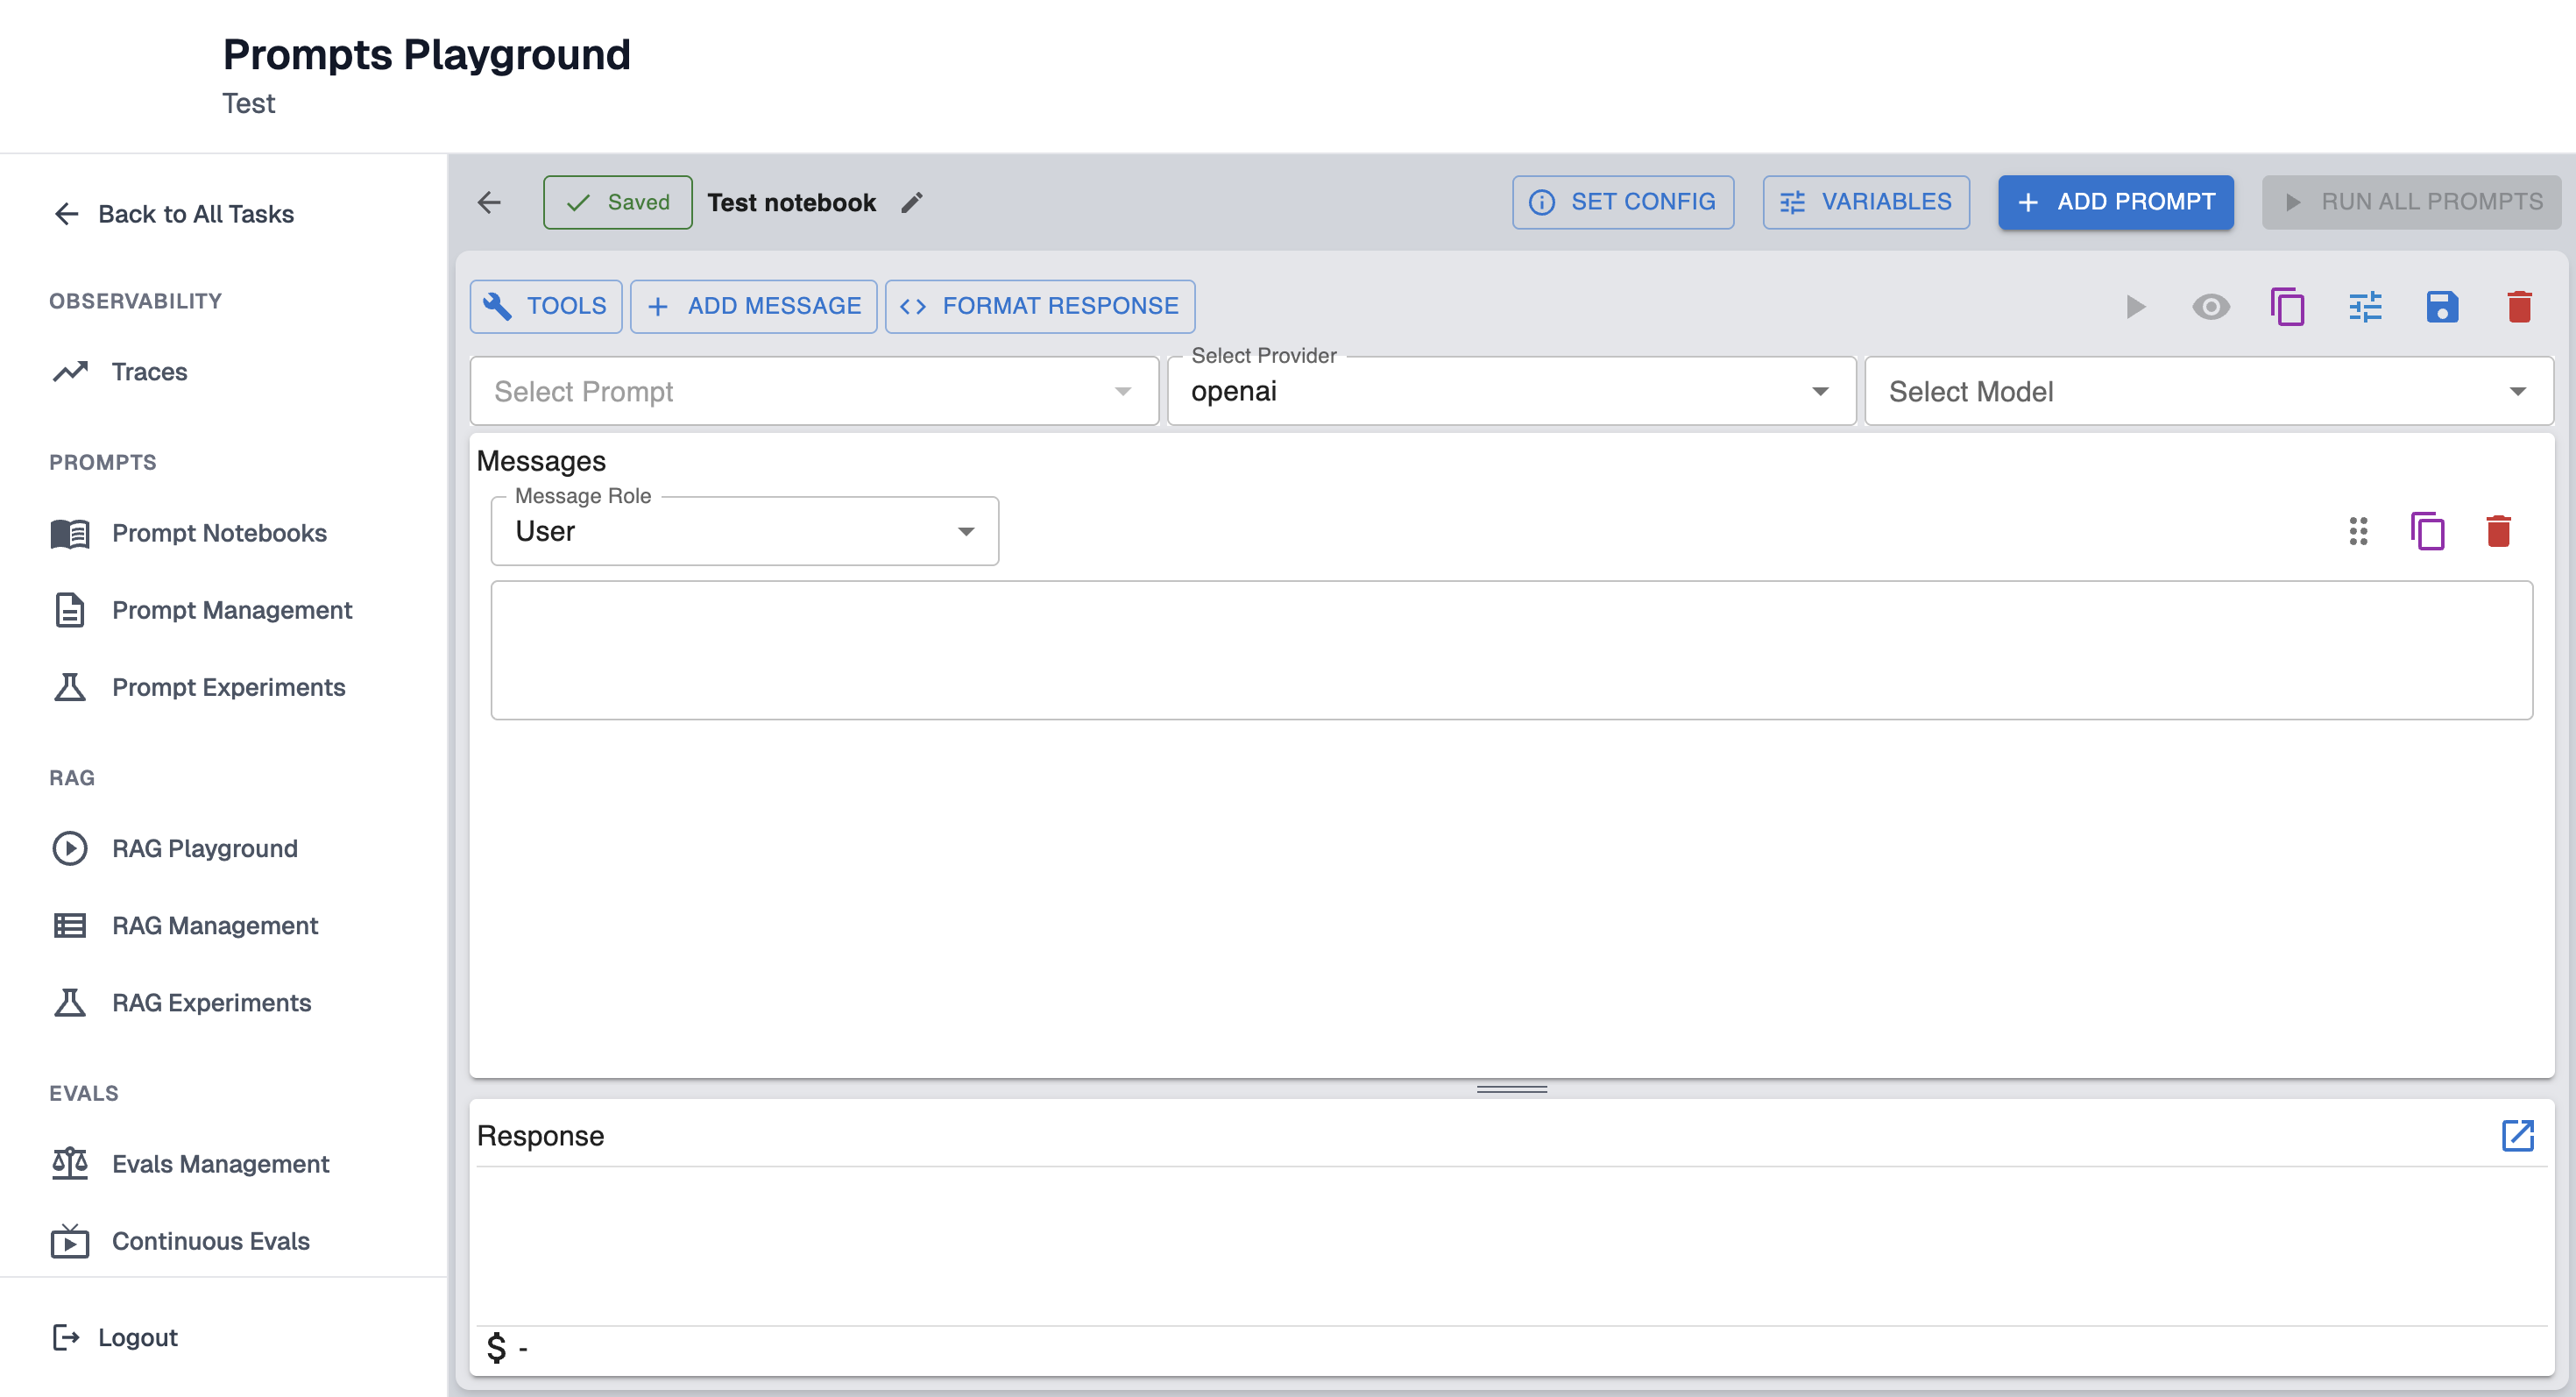
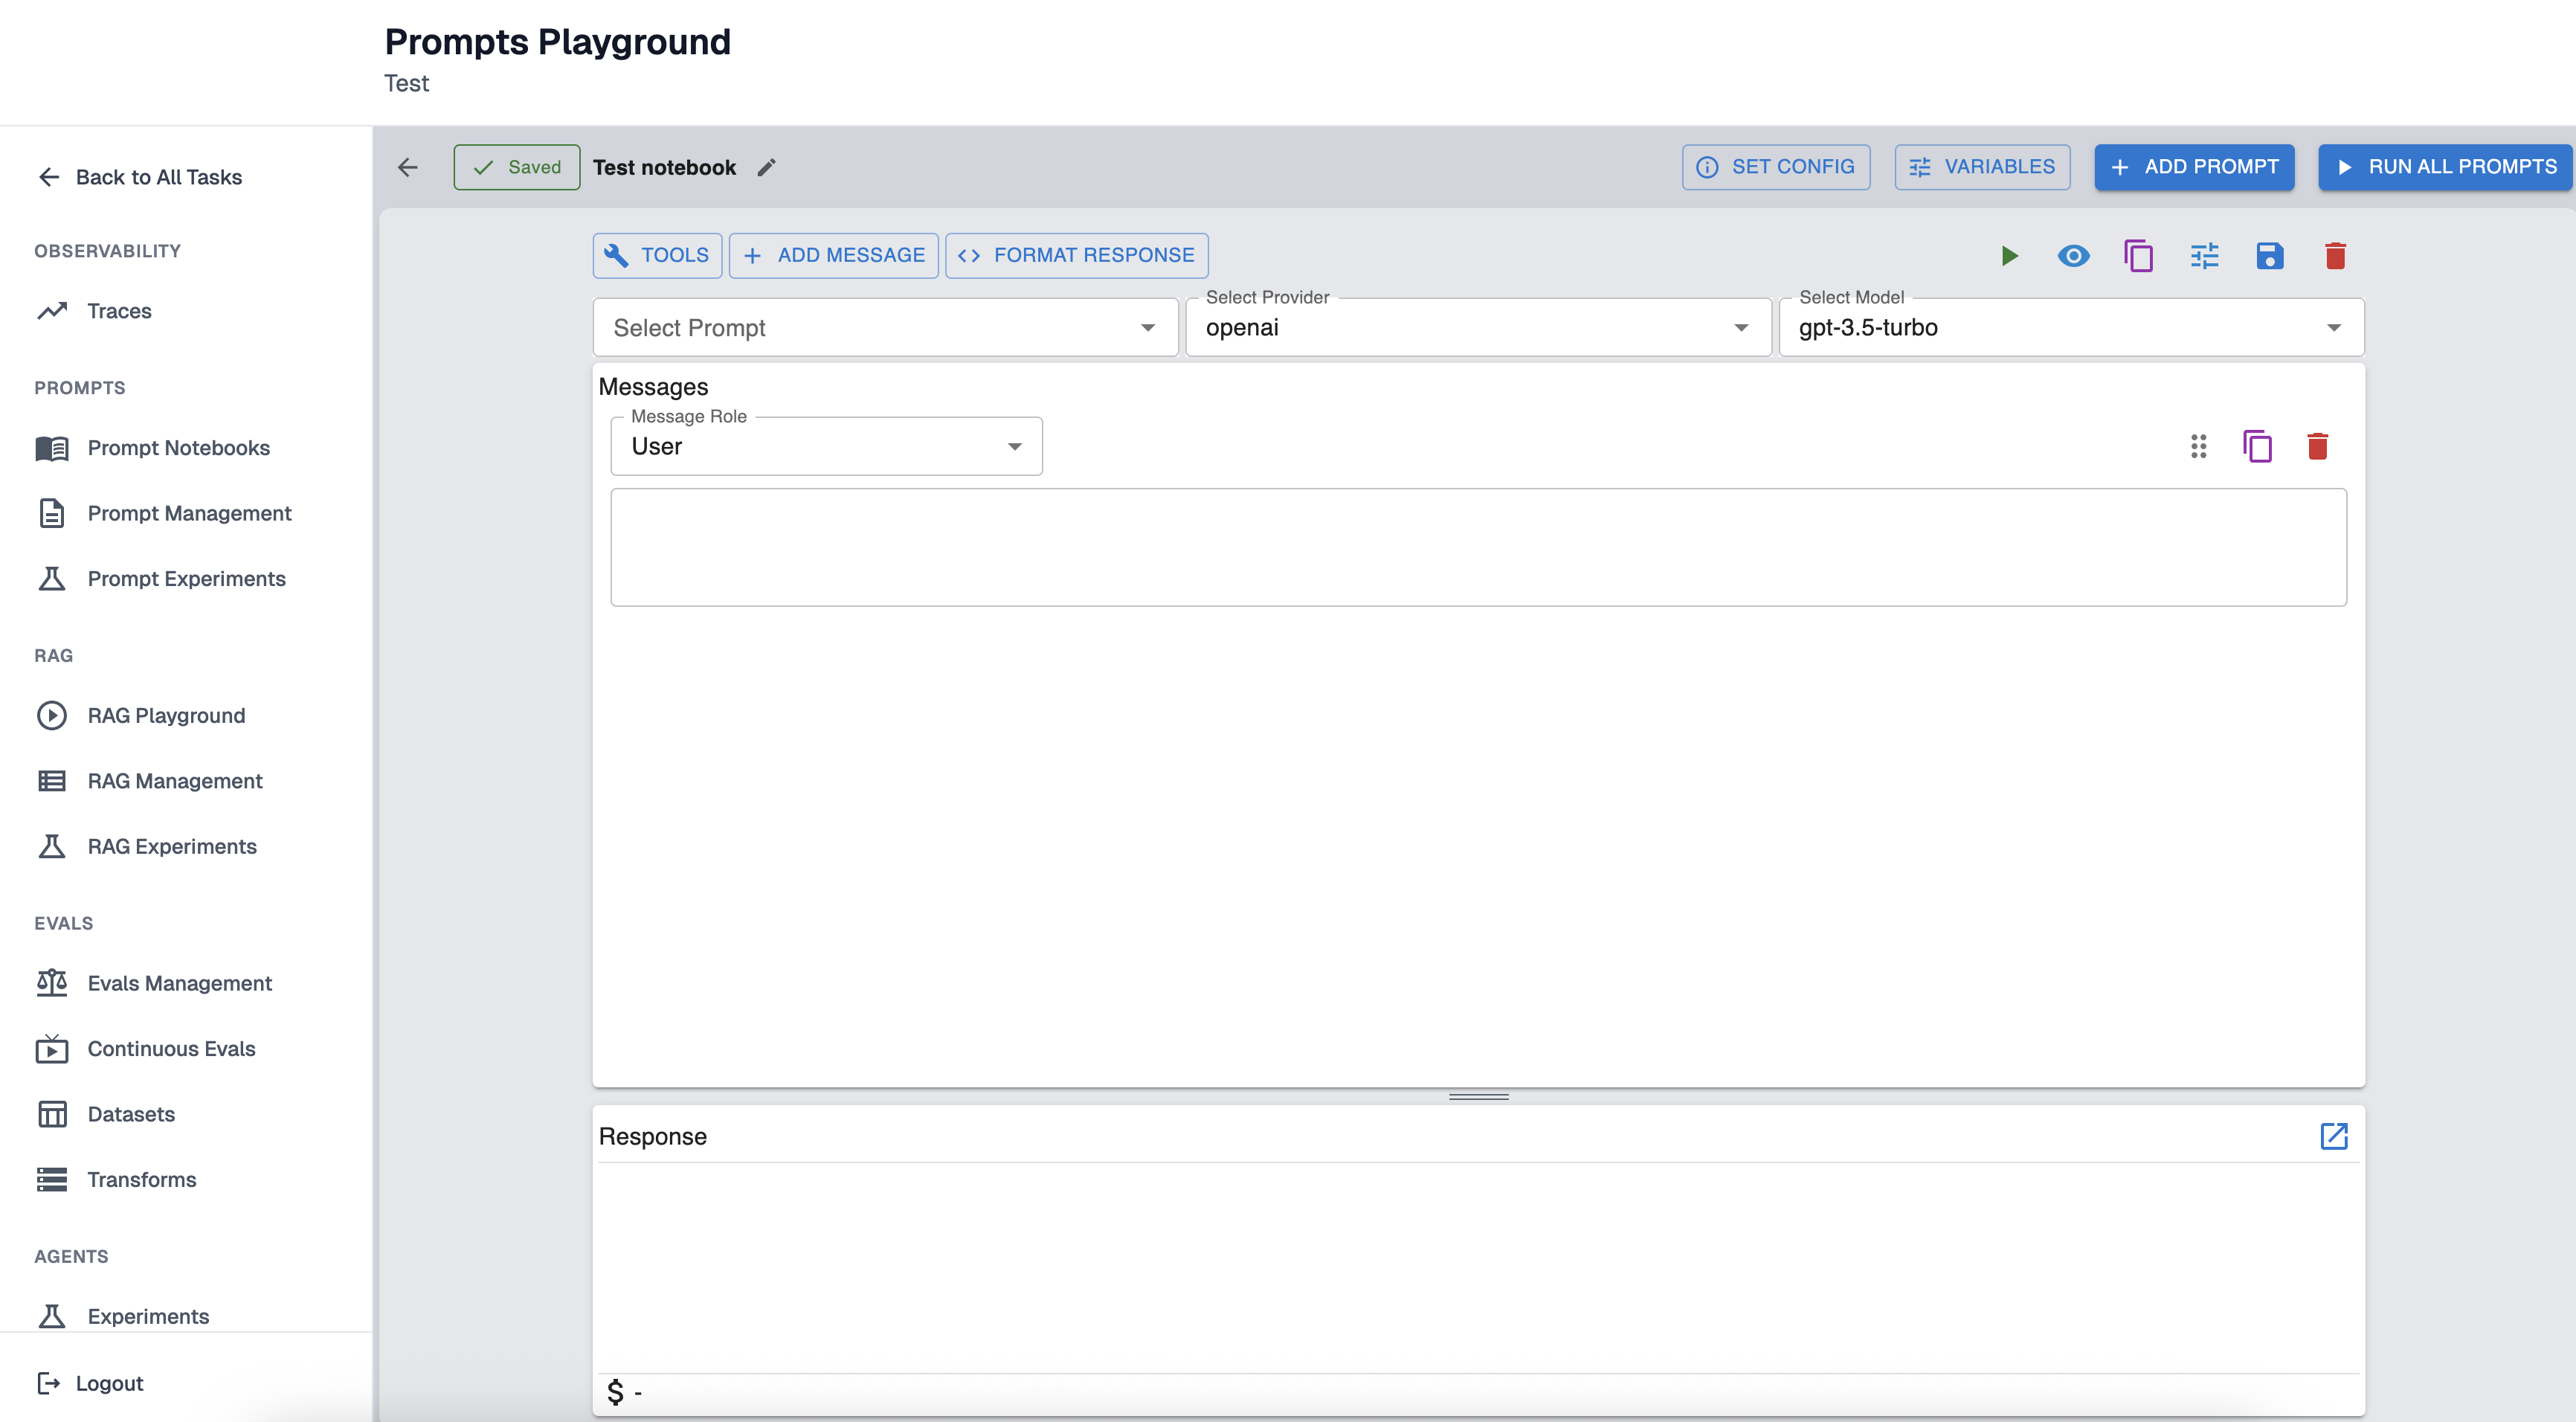
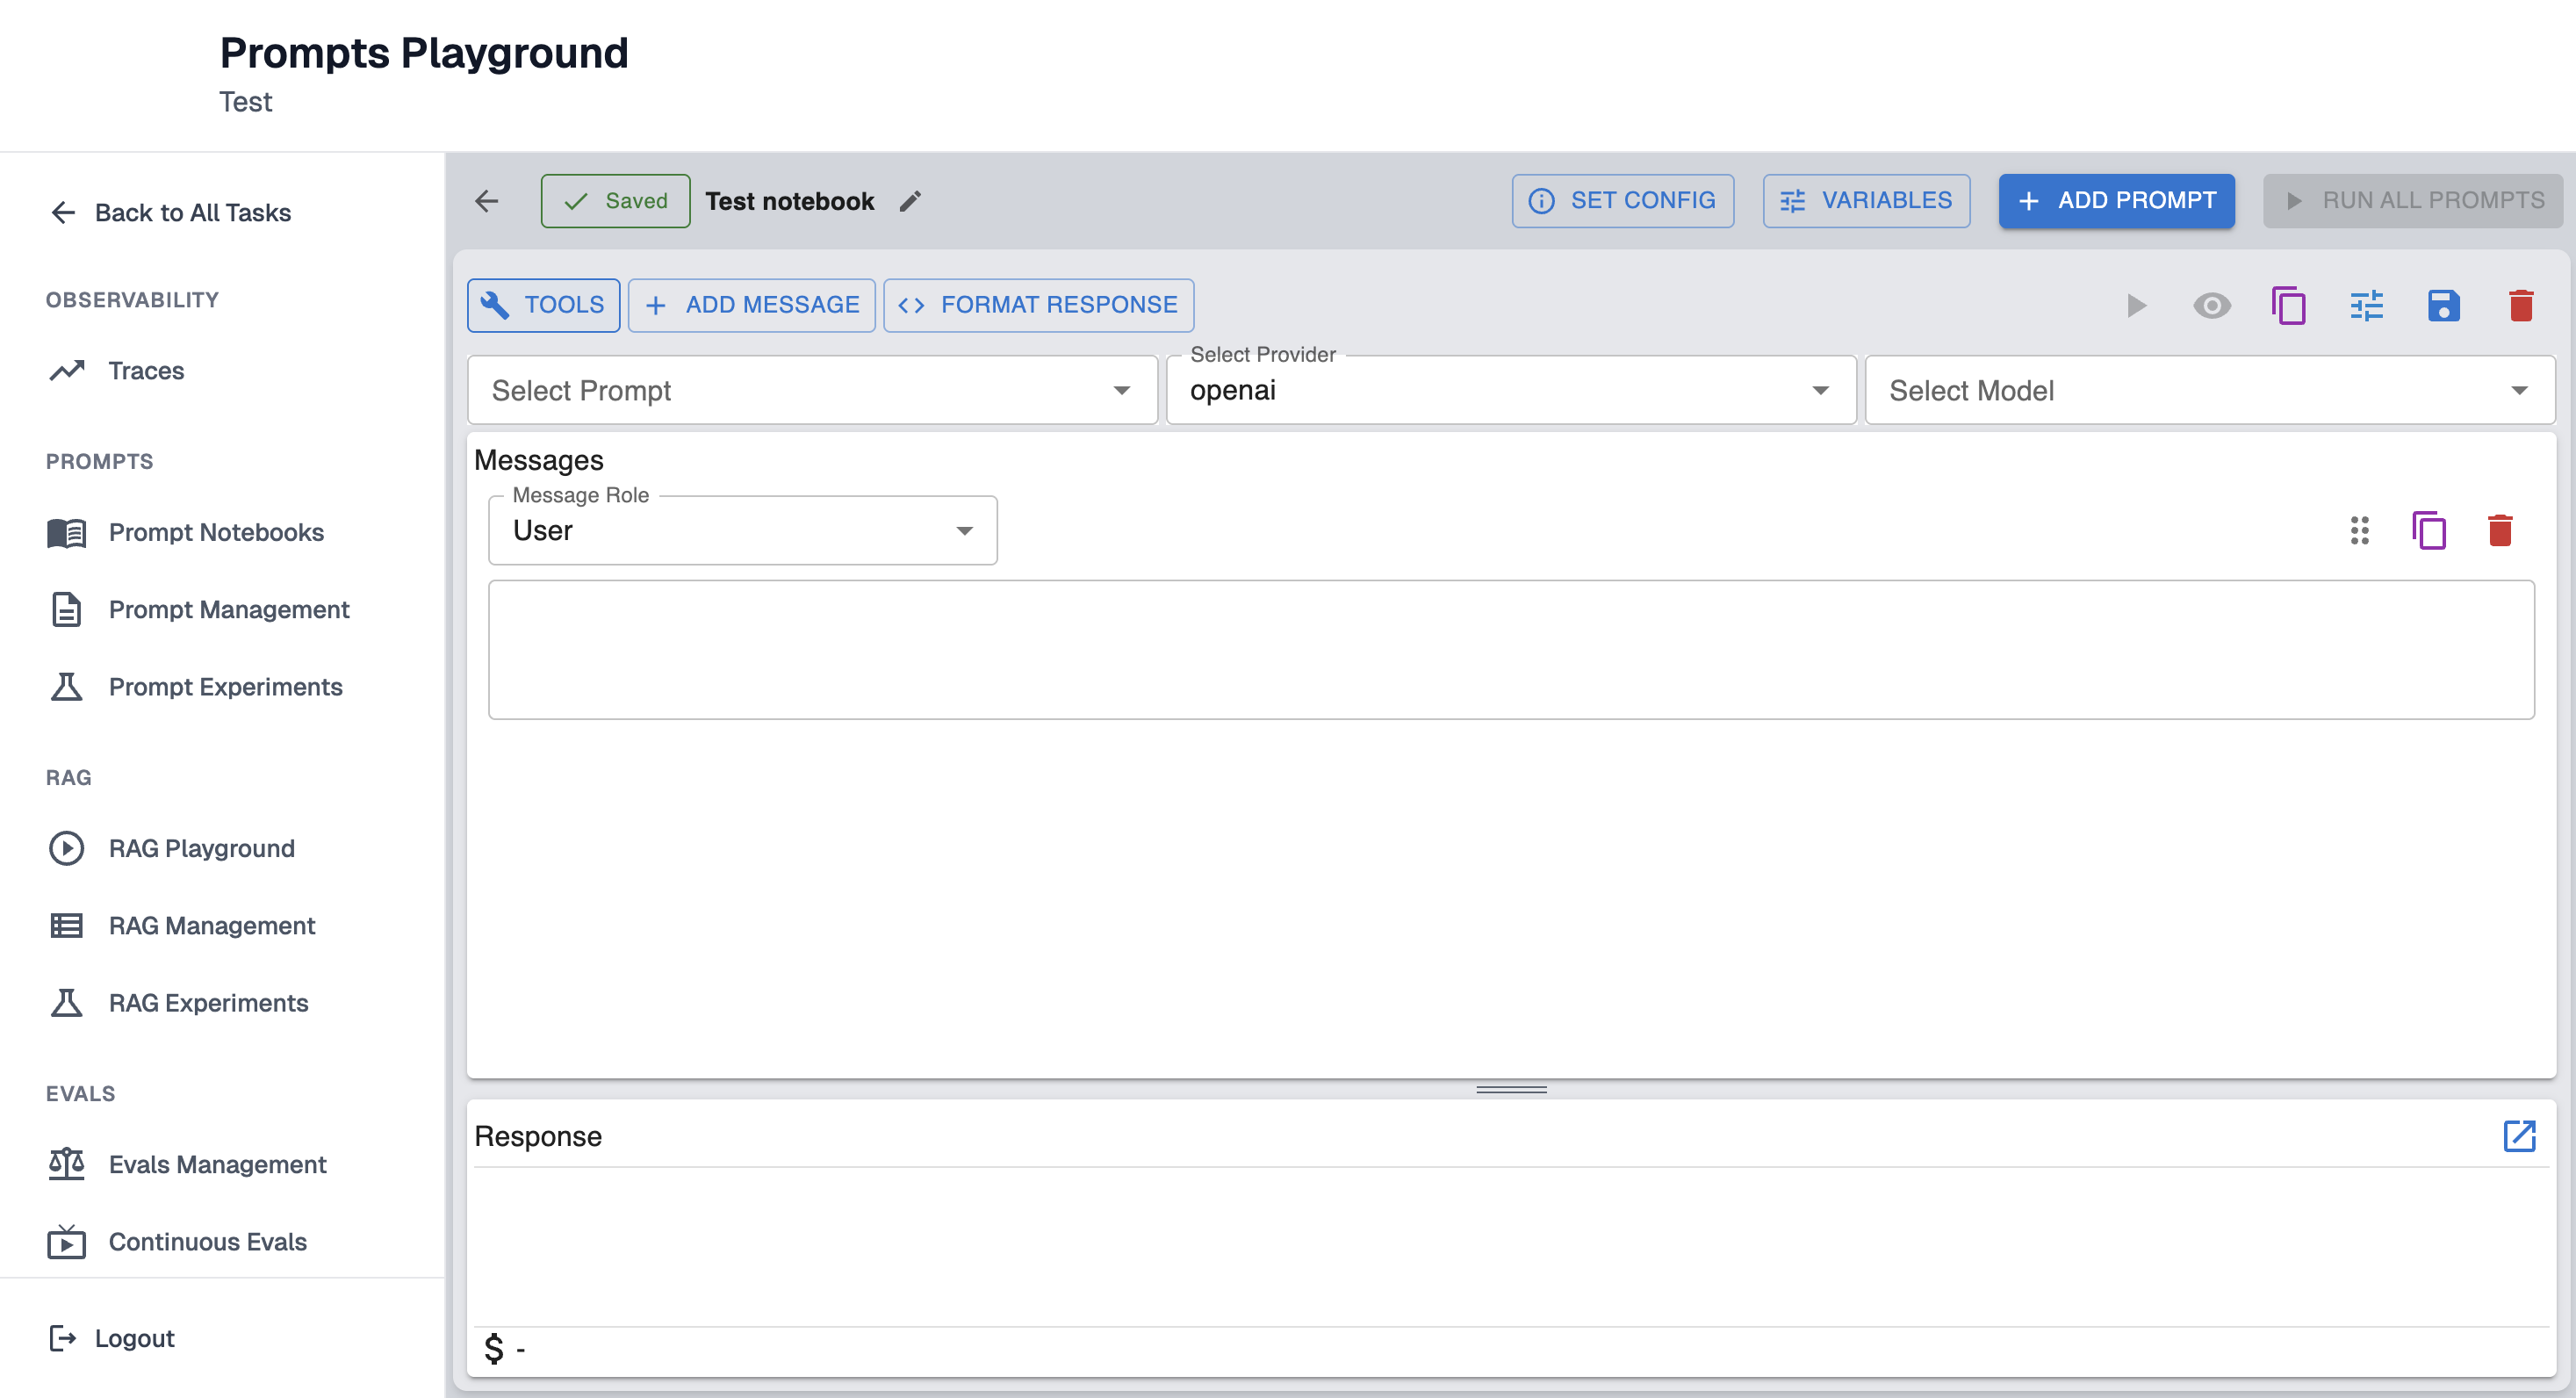
After creating new Notebook you will be redirected to Prompt Playground page where prompts can be created.
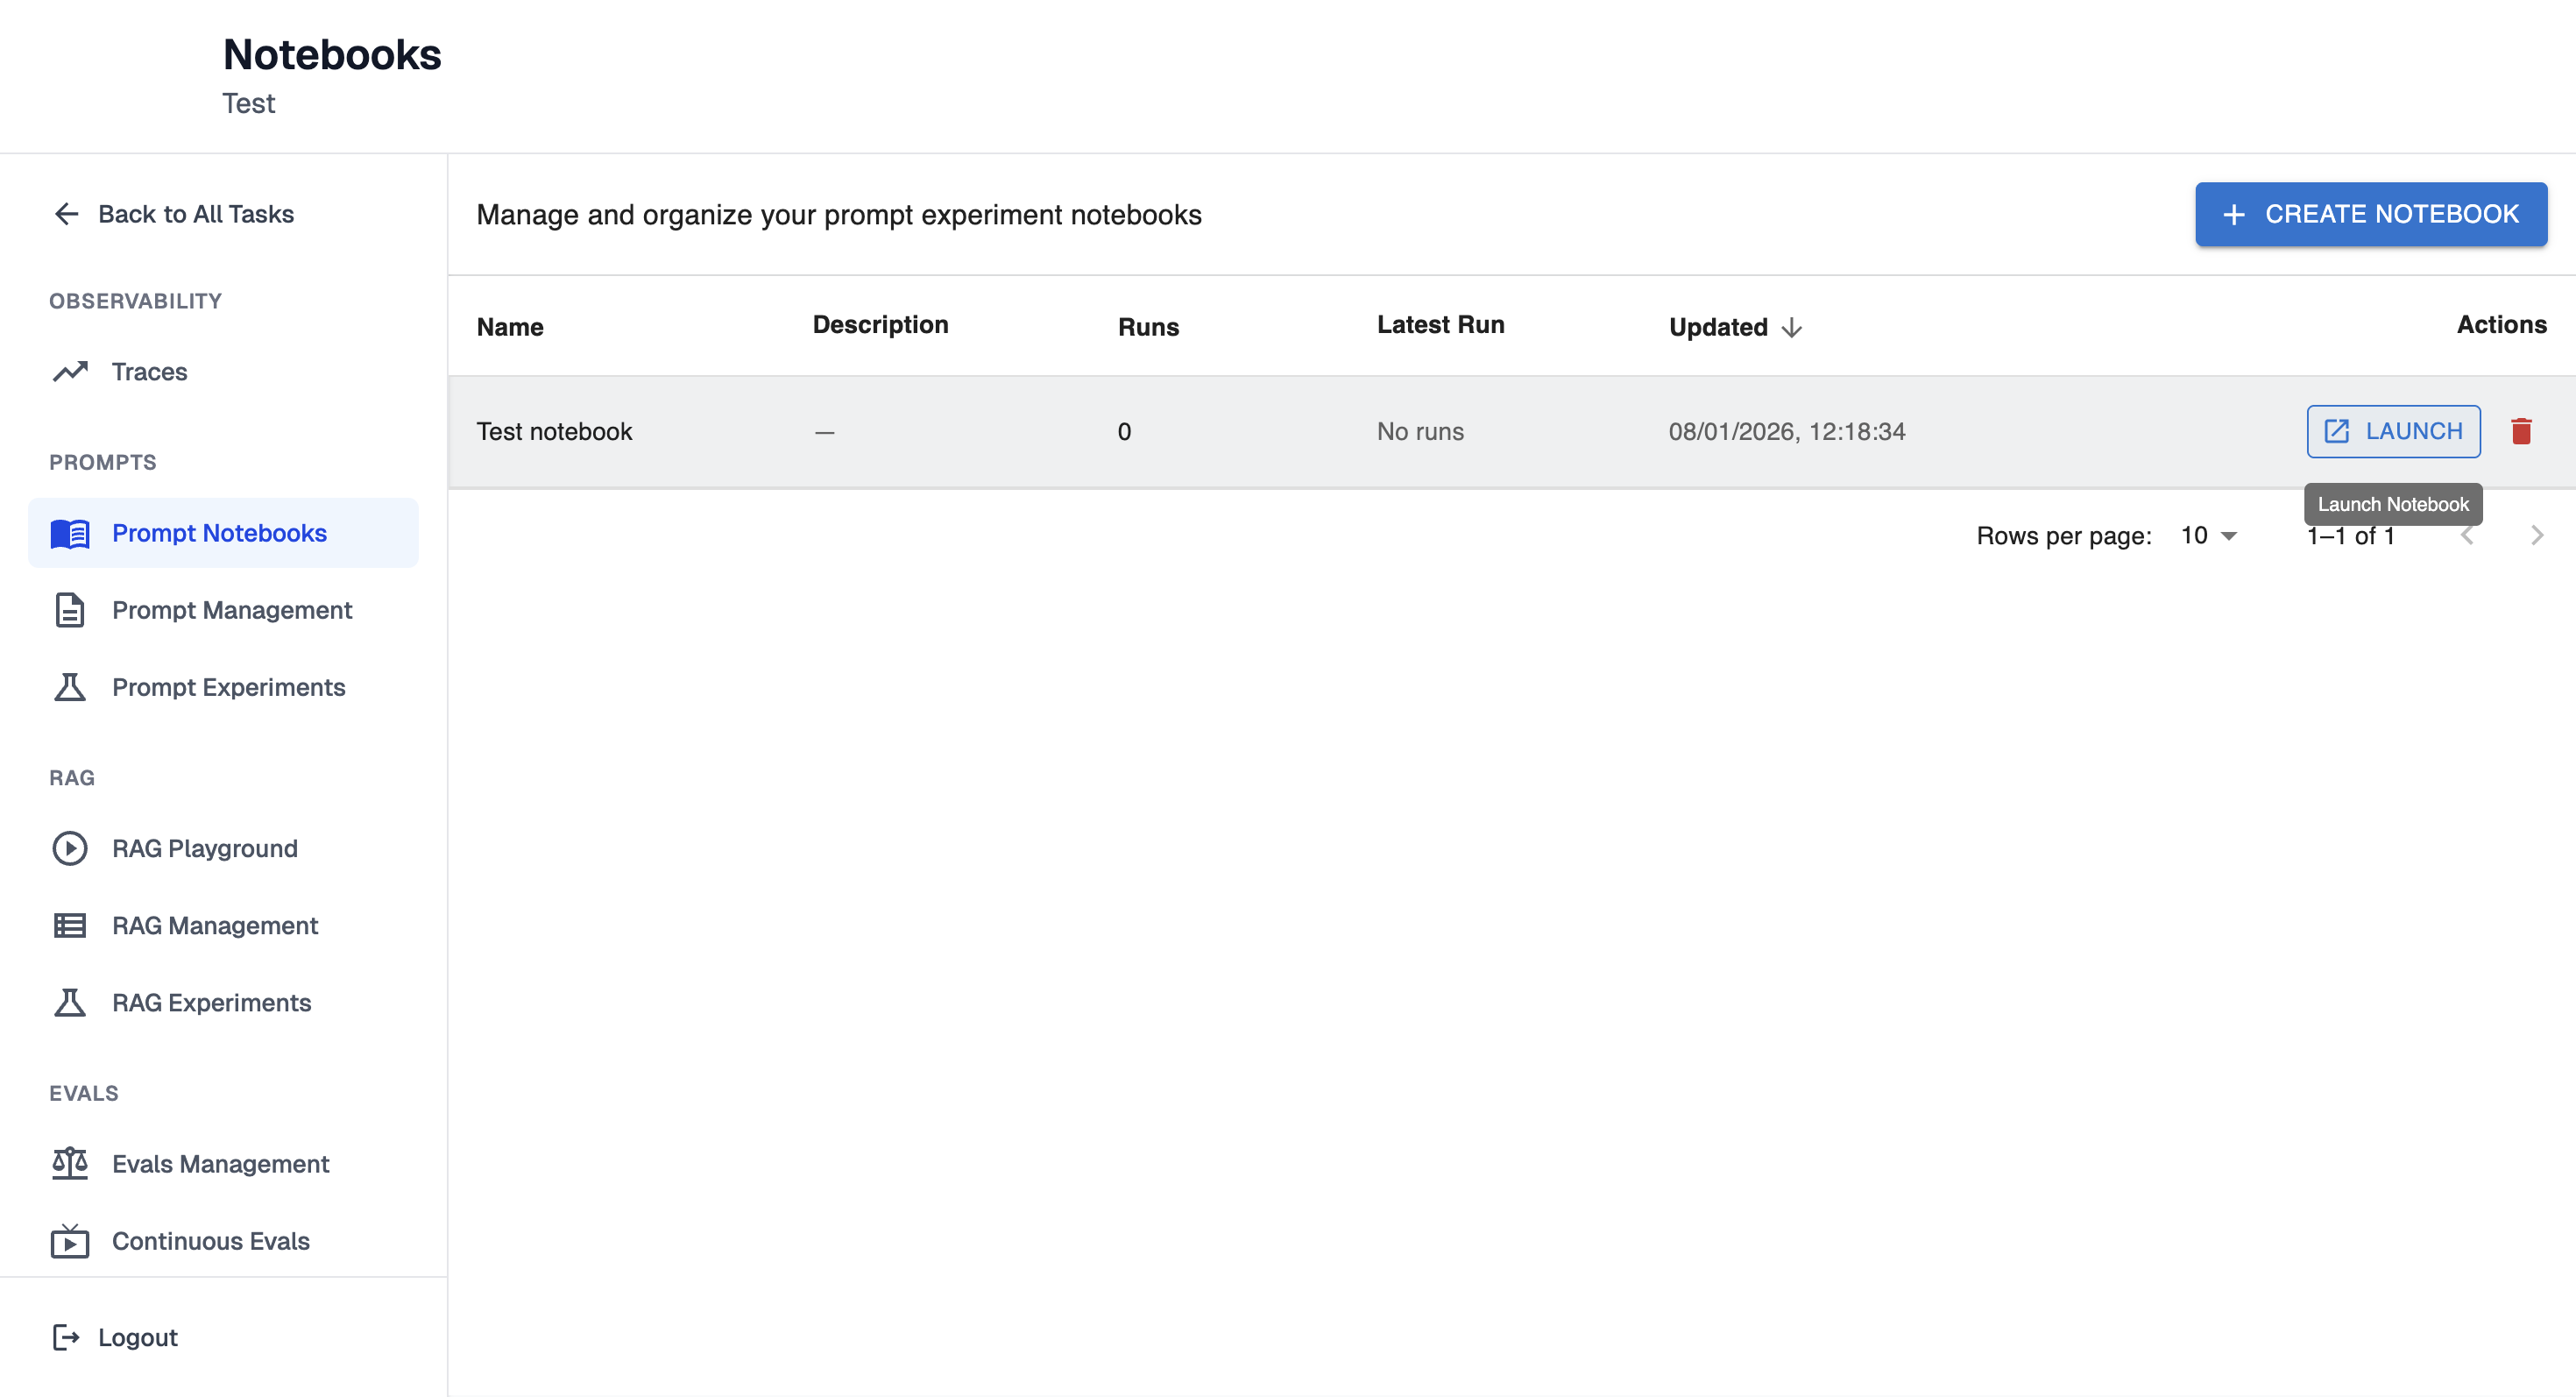
To navigate to Prompts Playground once Notebook is created navigate to Prompt Notebooks page and click on particular notebook "Launch" button.
Step 1: Select Provider
See the guide Configure Model Provider.
Select one of the providers for the prompt: openai, anthropic, google gemini.
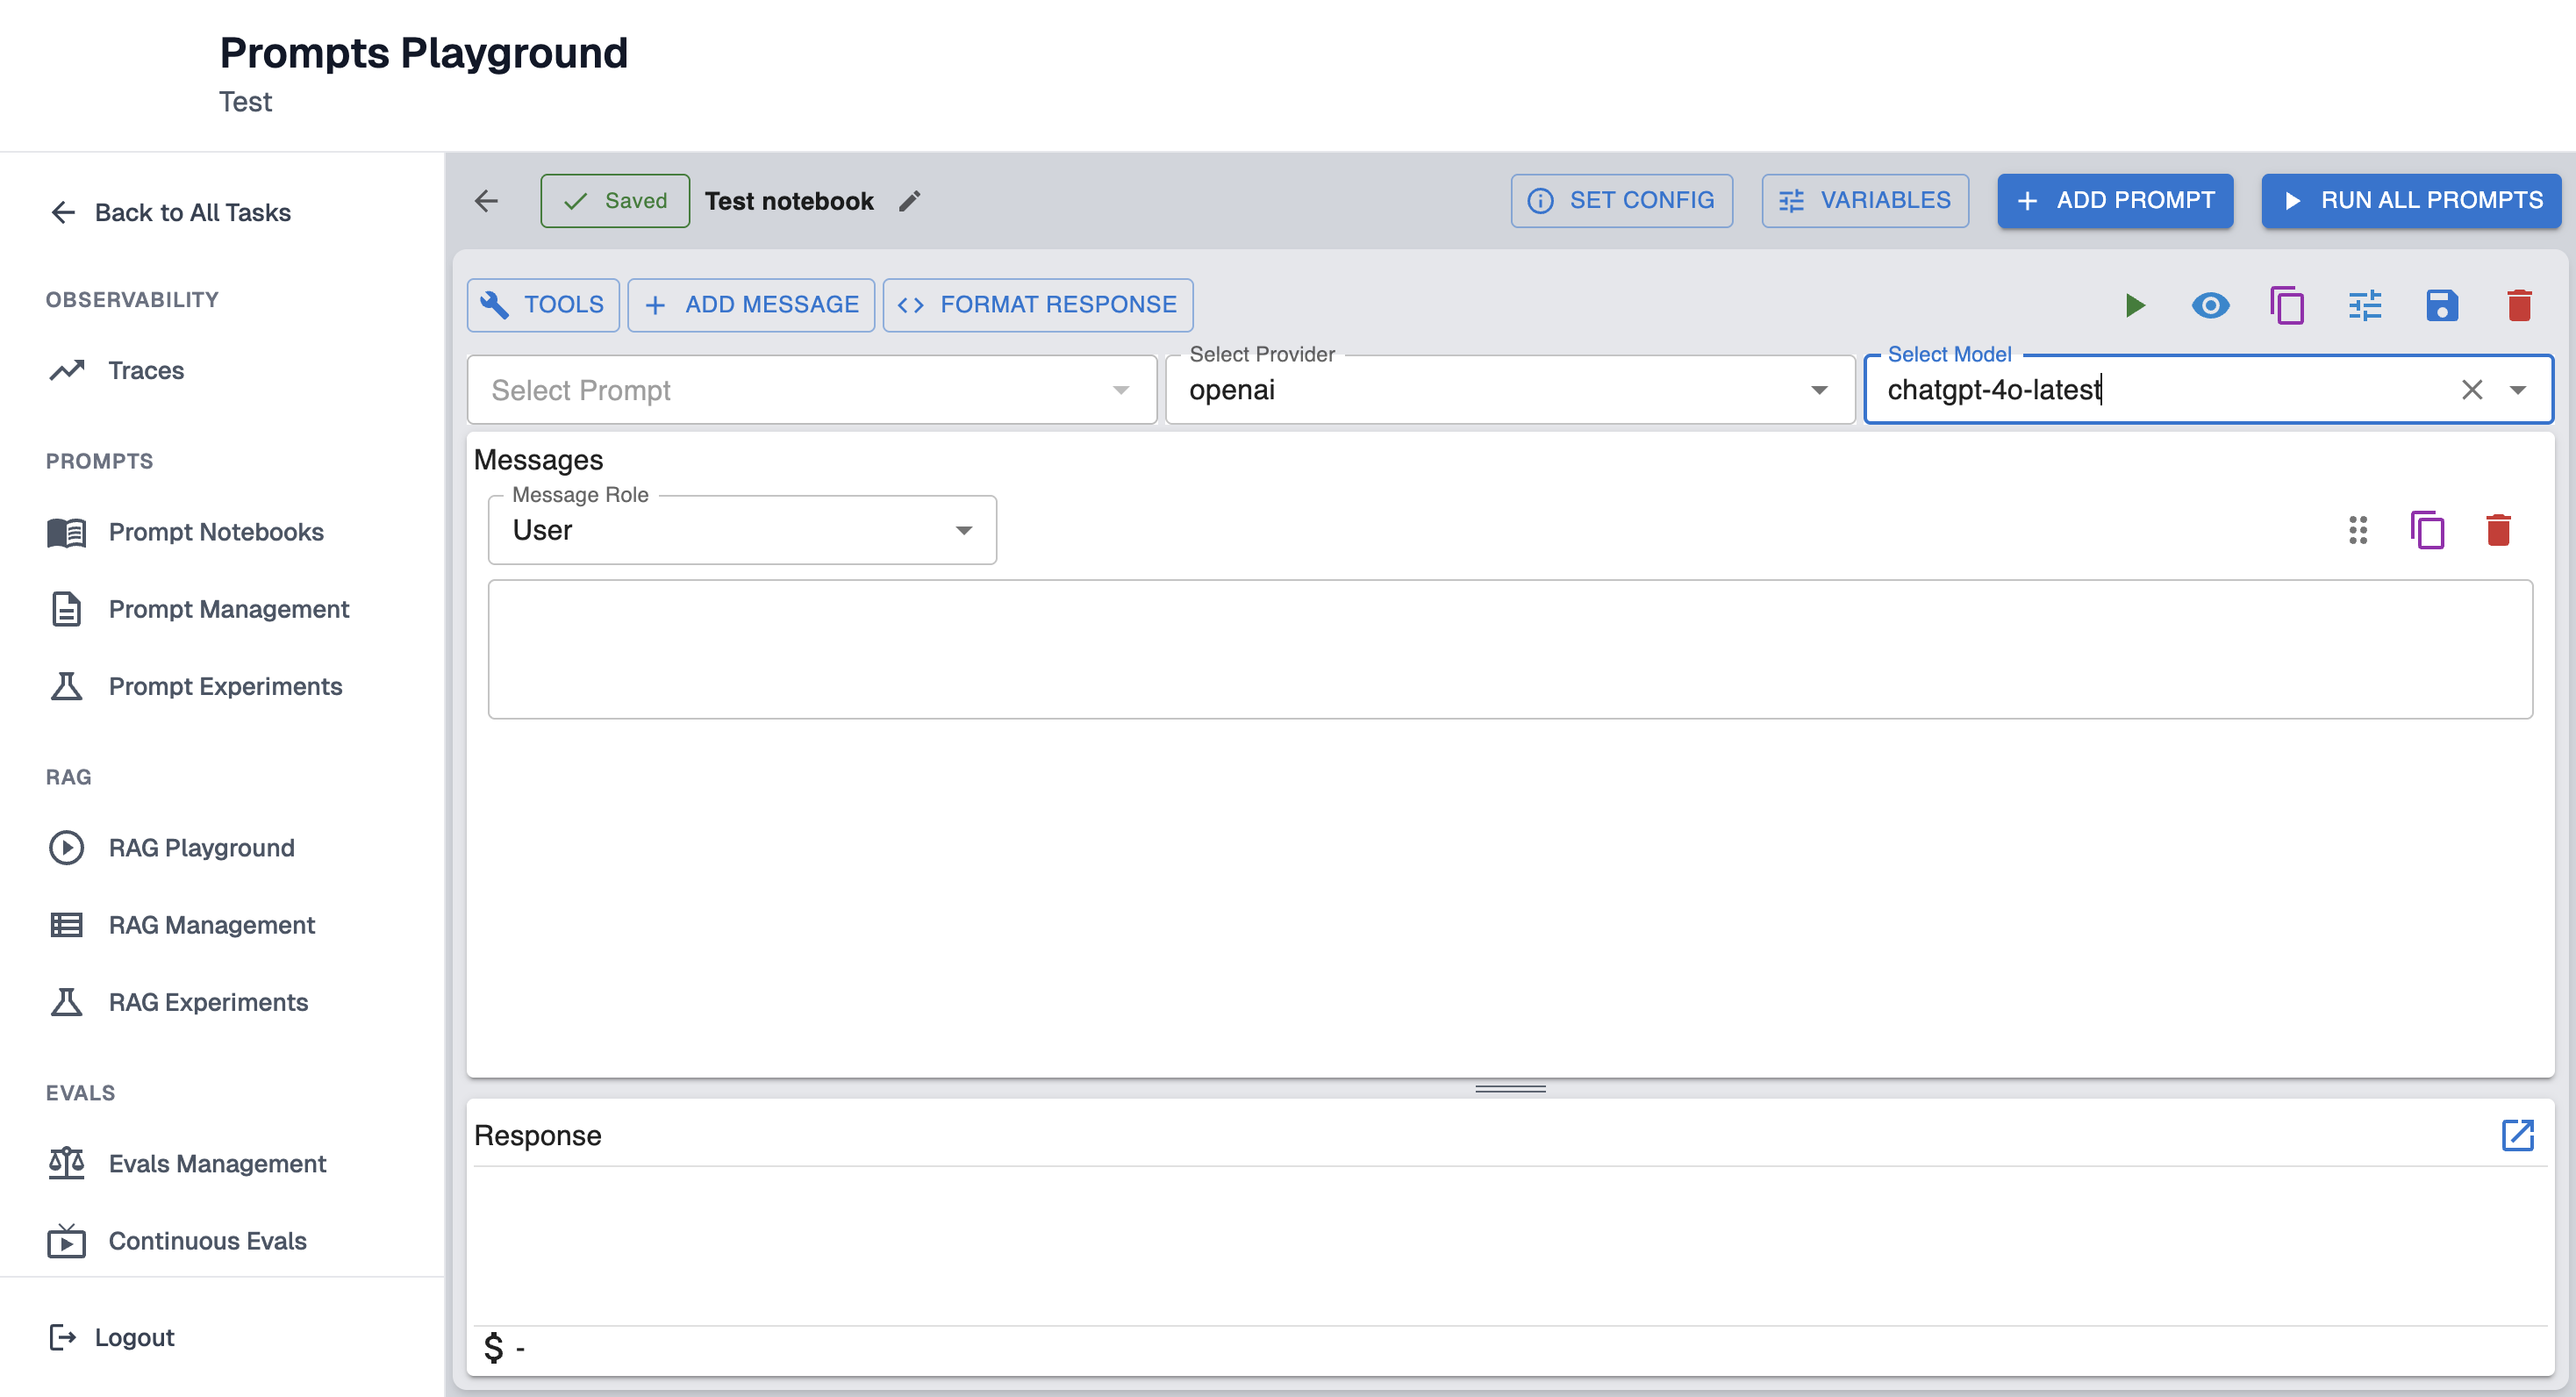
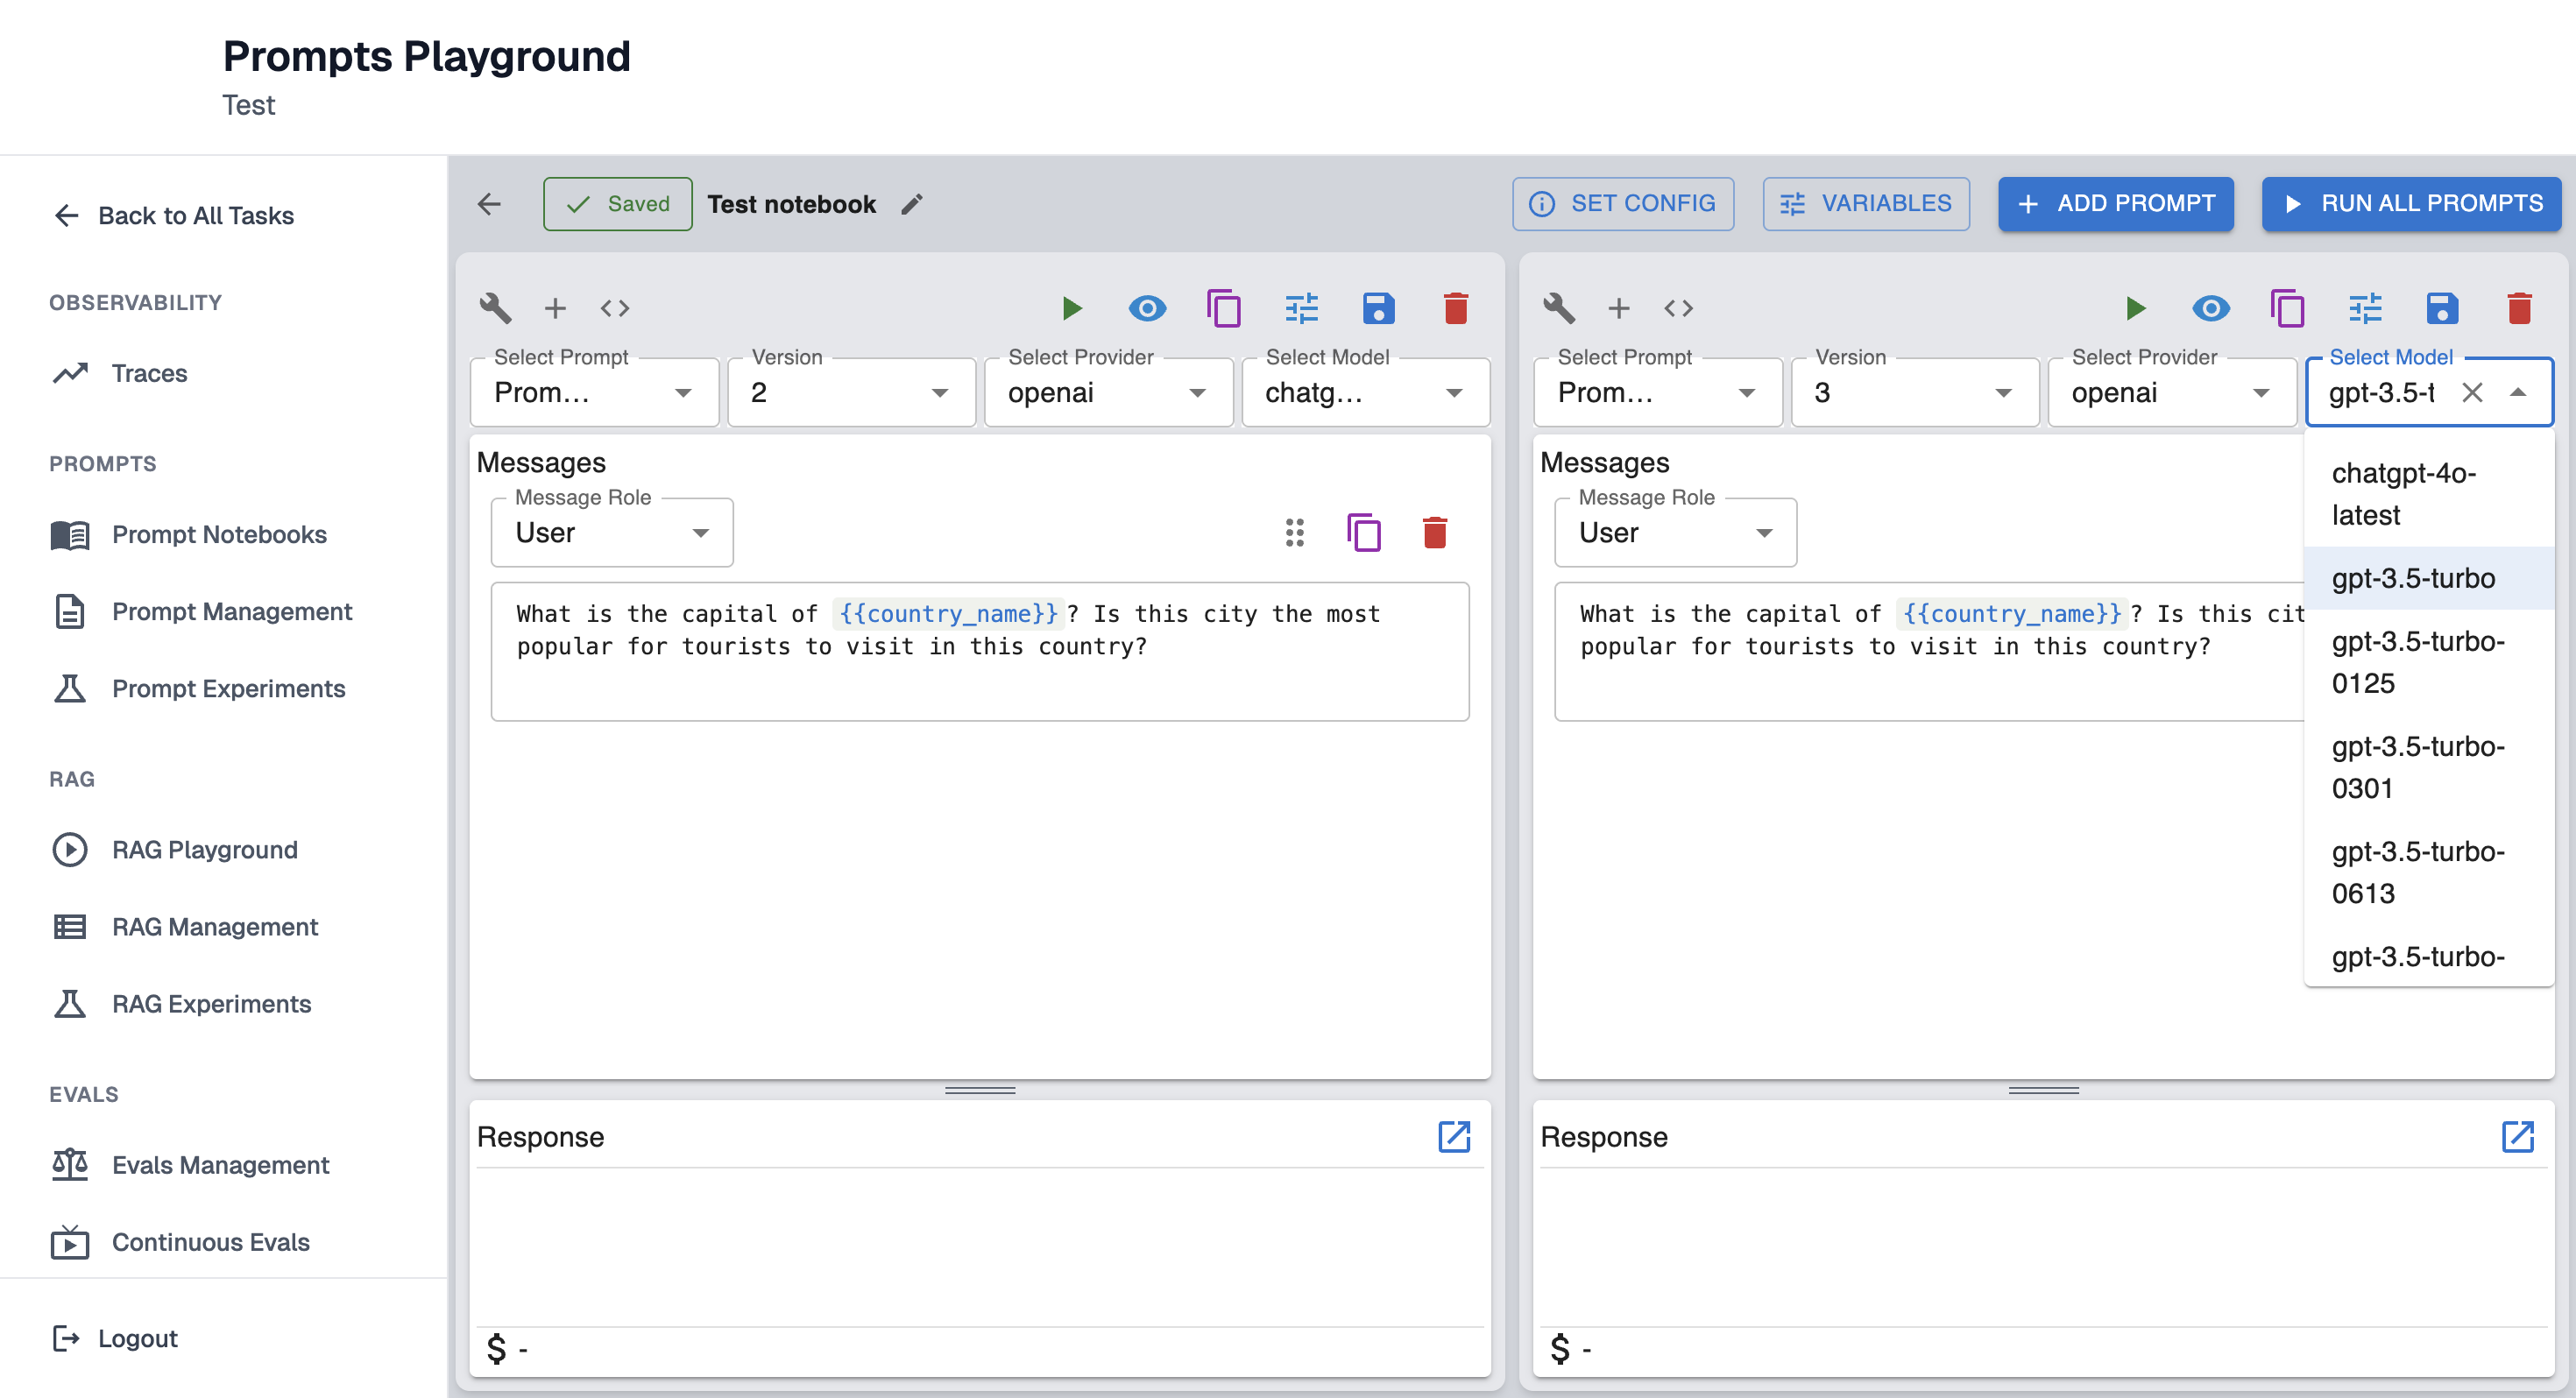
Step 2: Select Model
Select one of the model version to test (e.g., chatgpt-4o-latest, gpt-3.5-turbo)
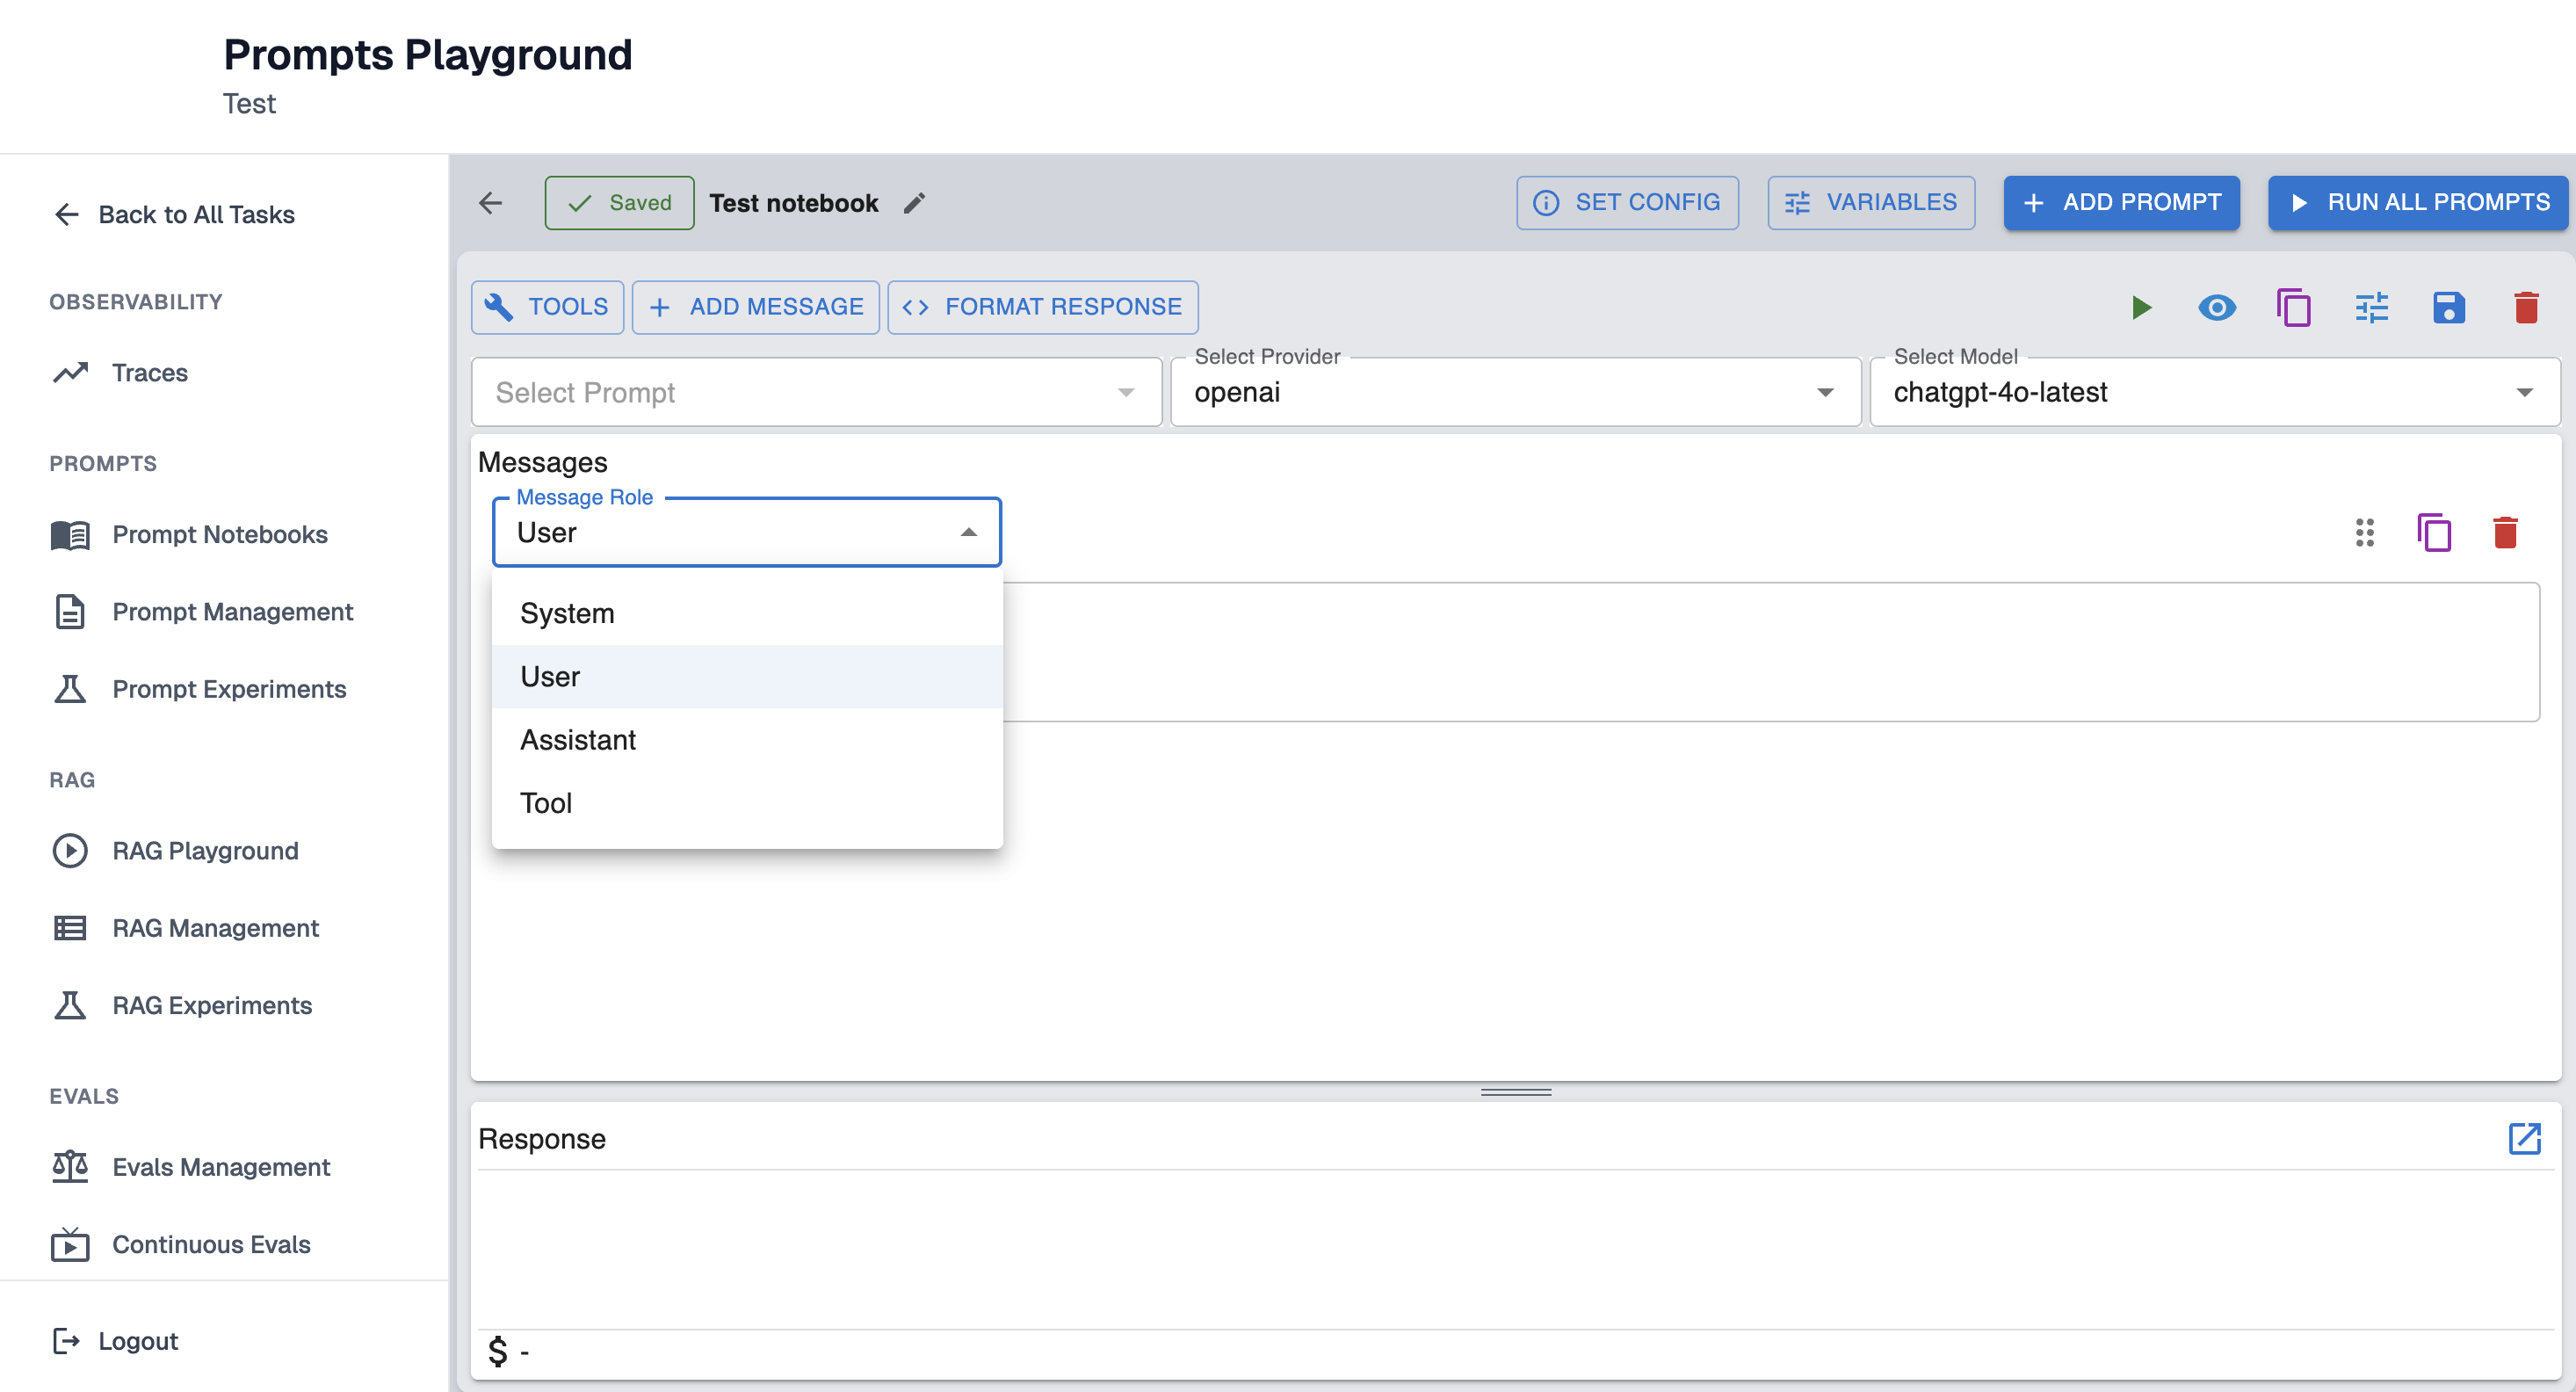
Step 3: Select Message Role
Select one of the Message Role: System, User, Assistant, Tool.
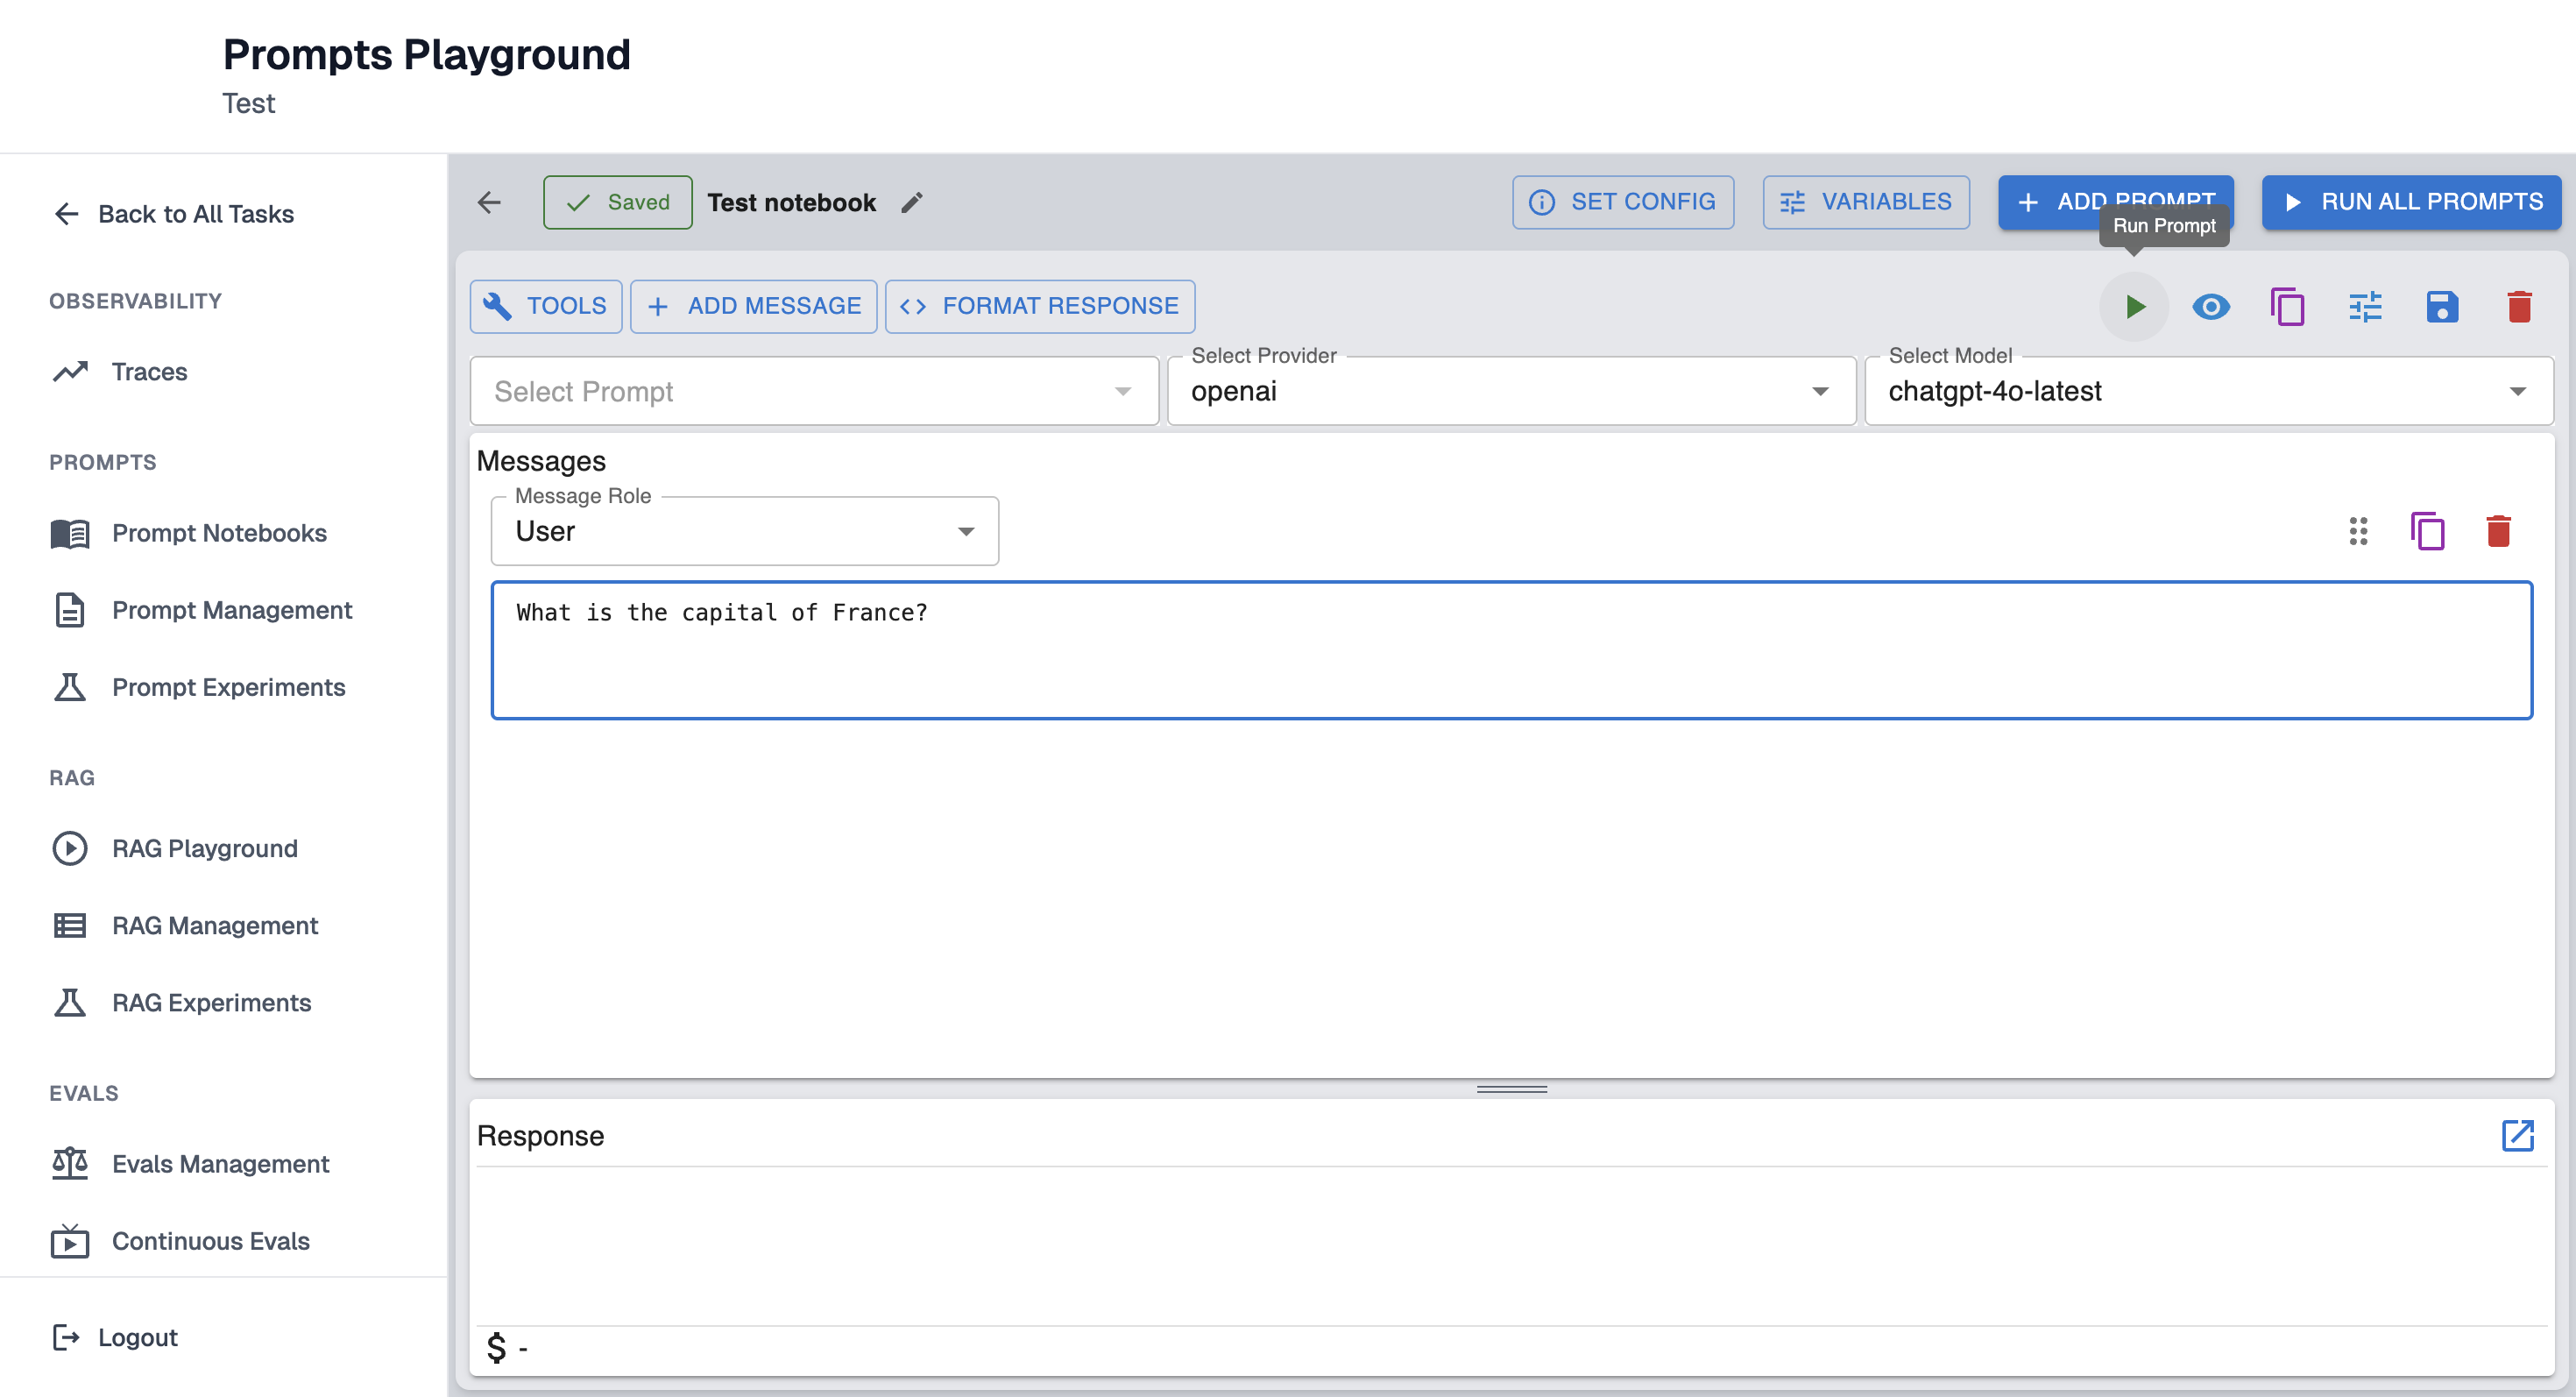
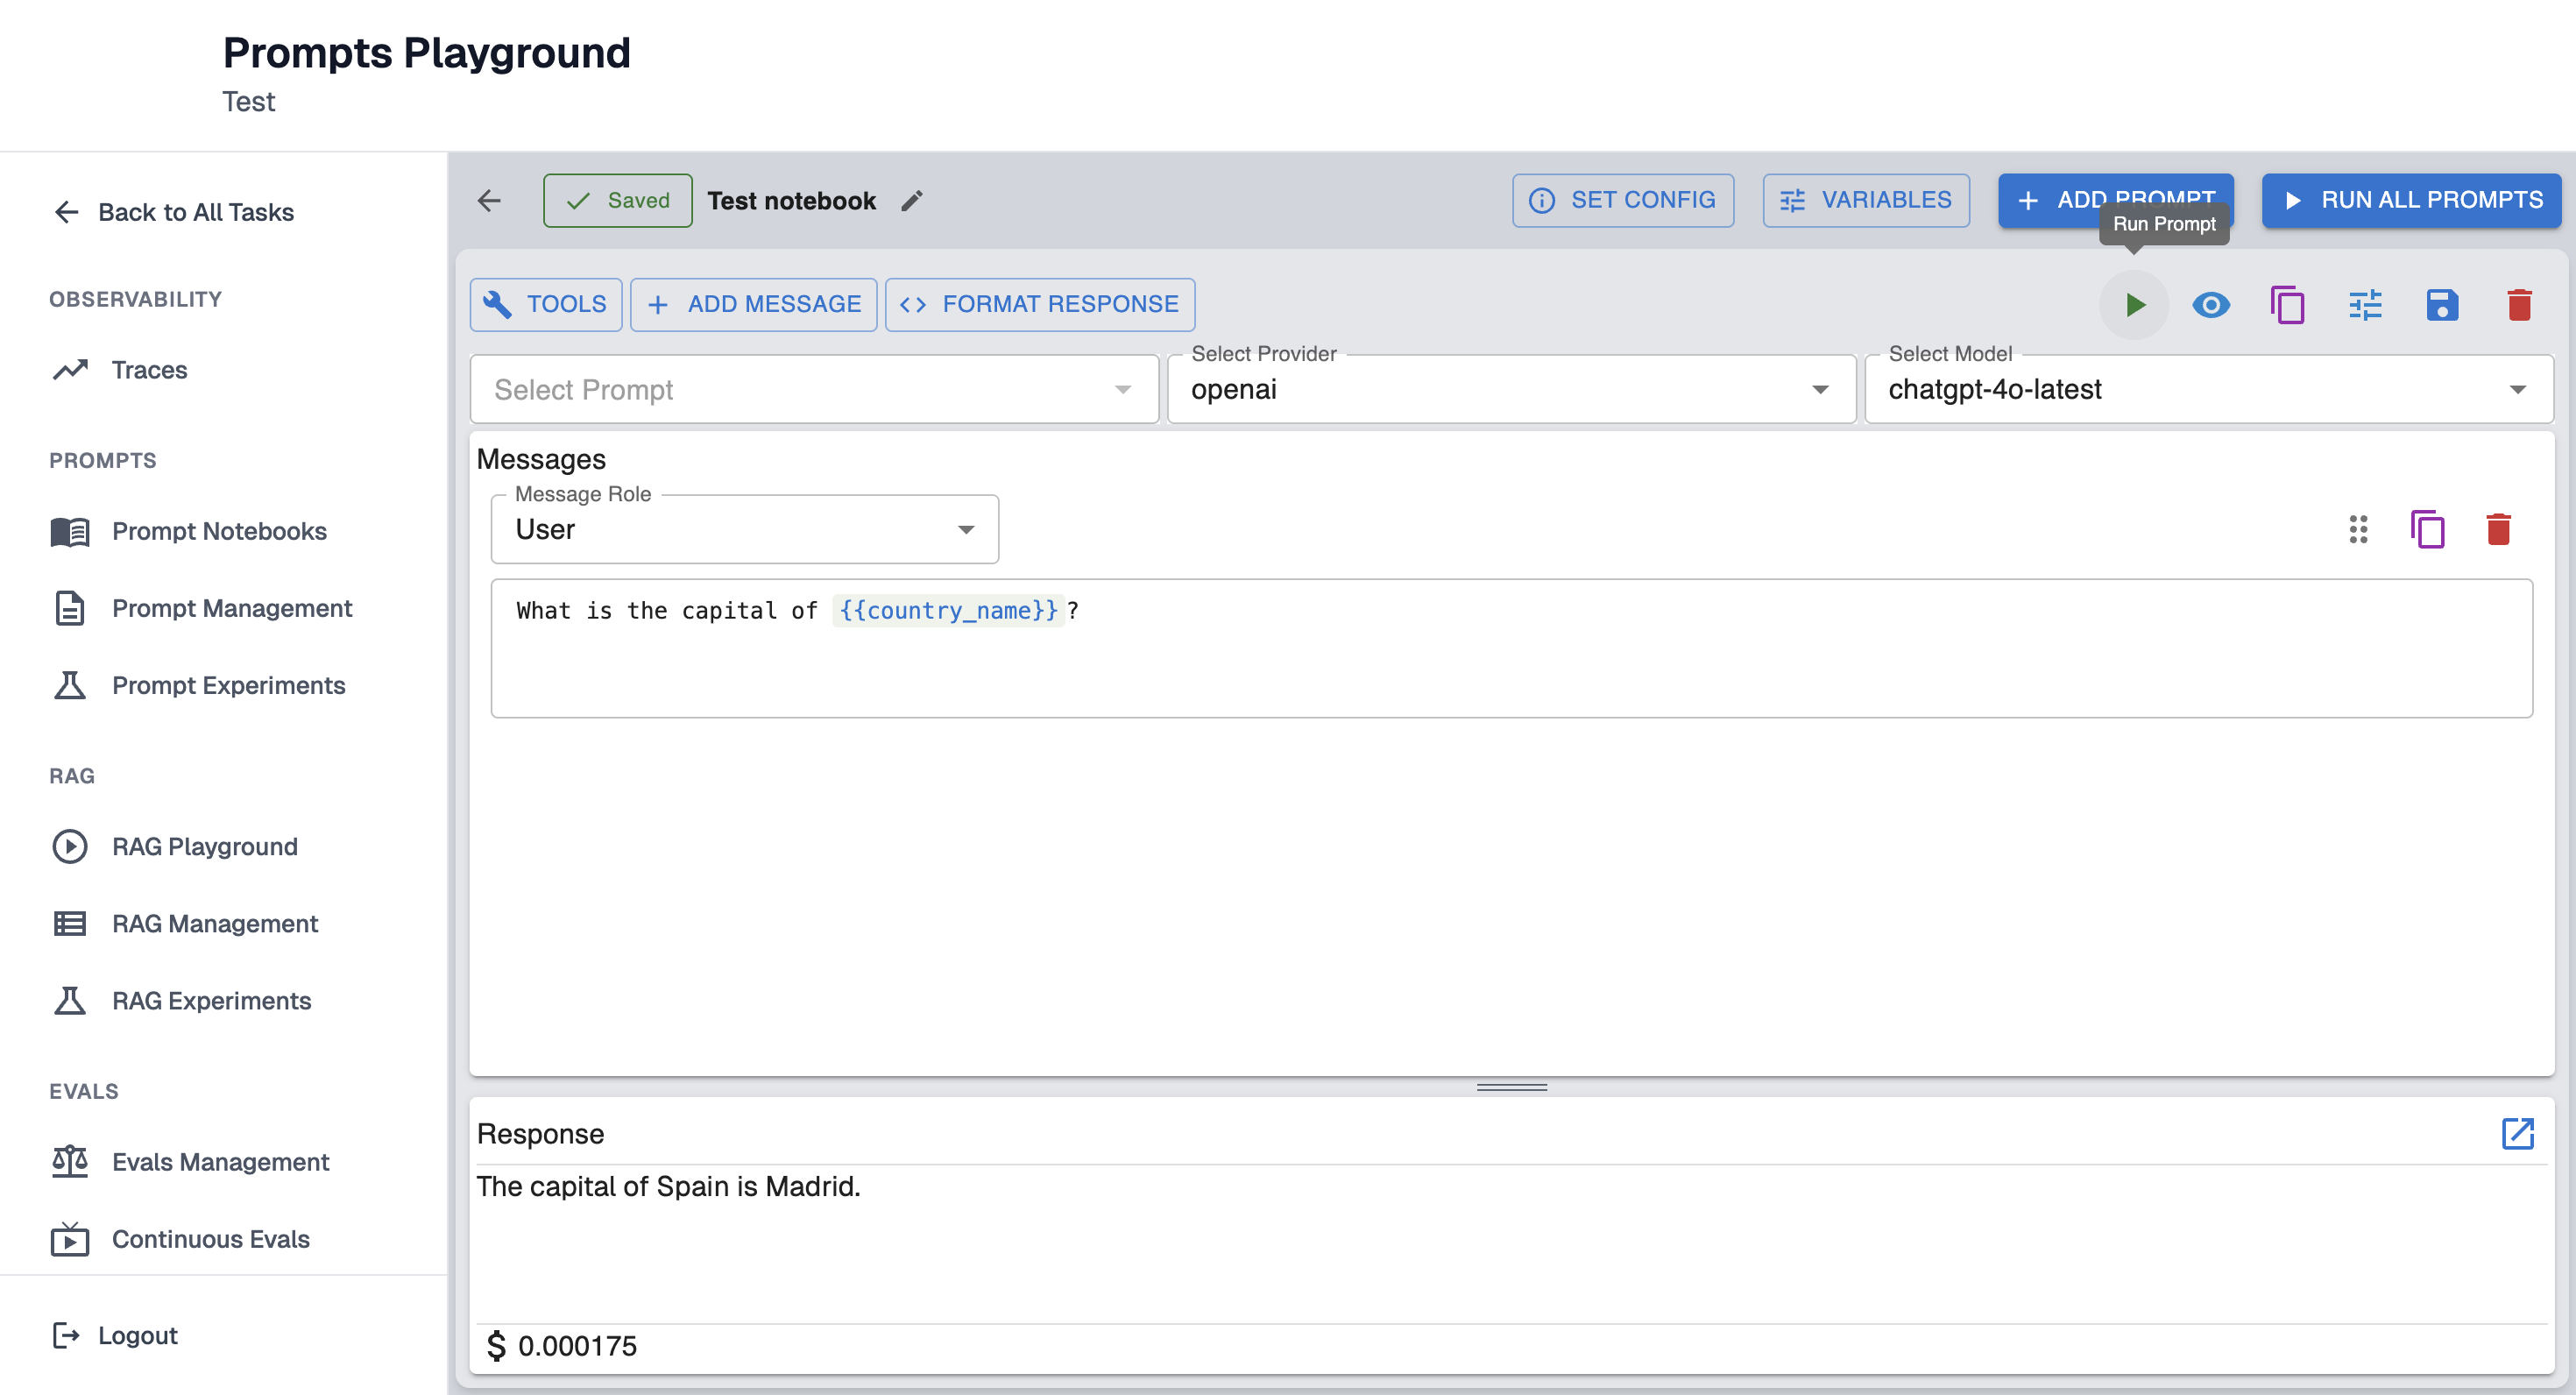
Step 4: Enter the Prompt Message
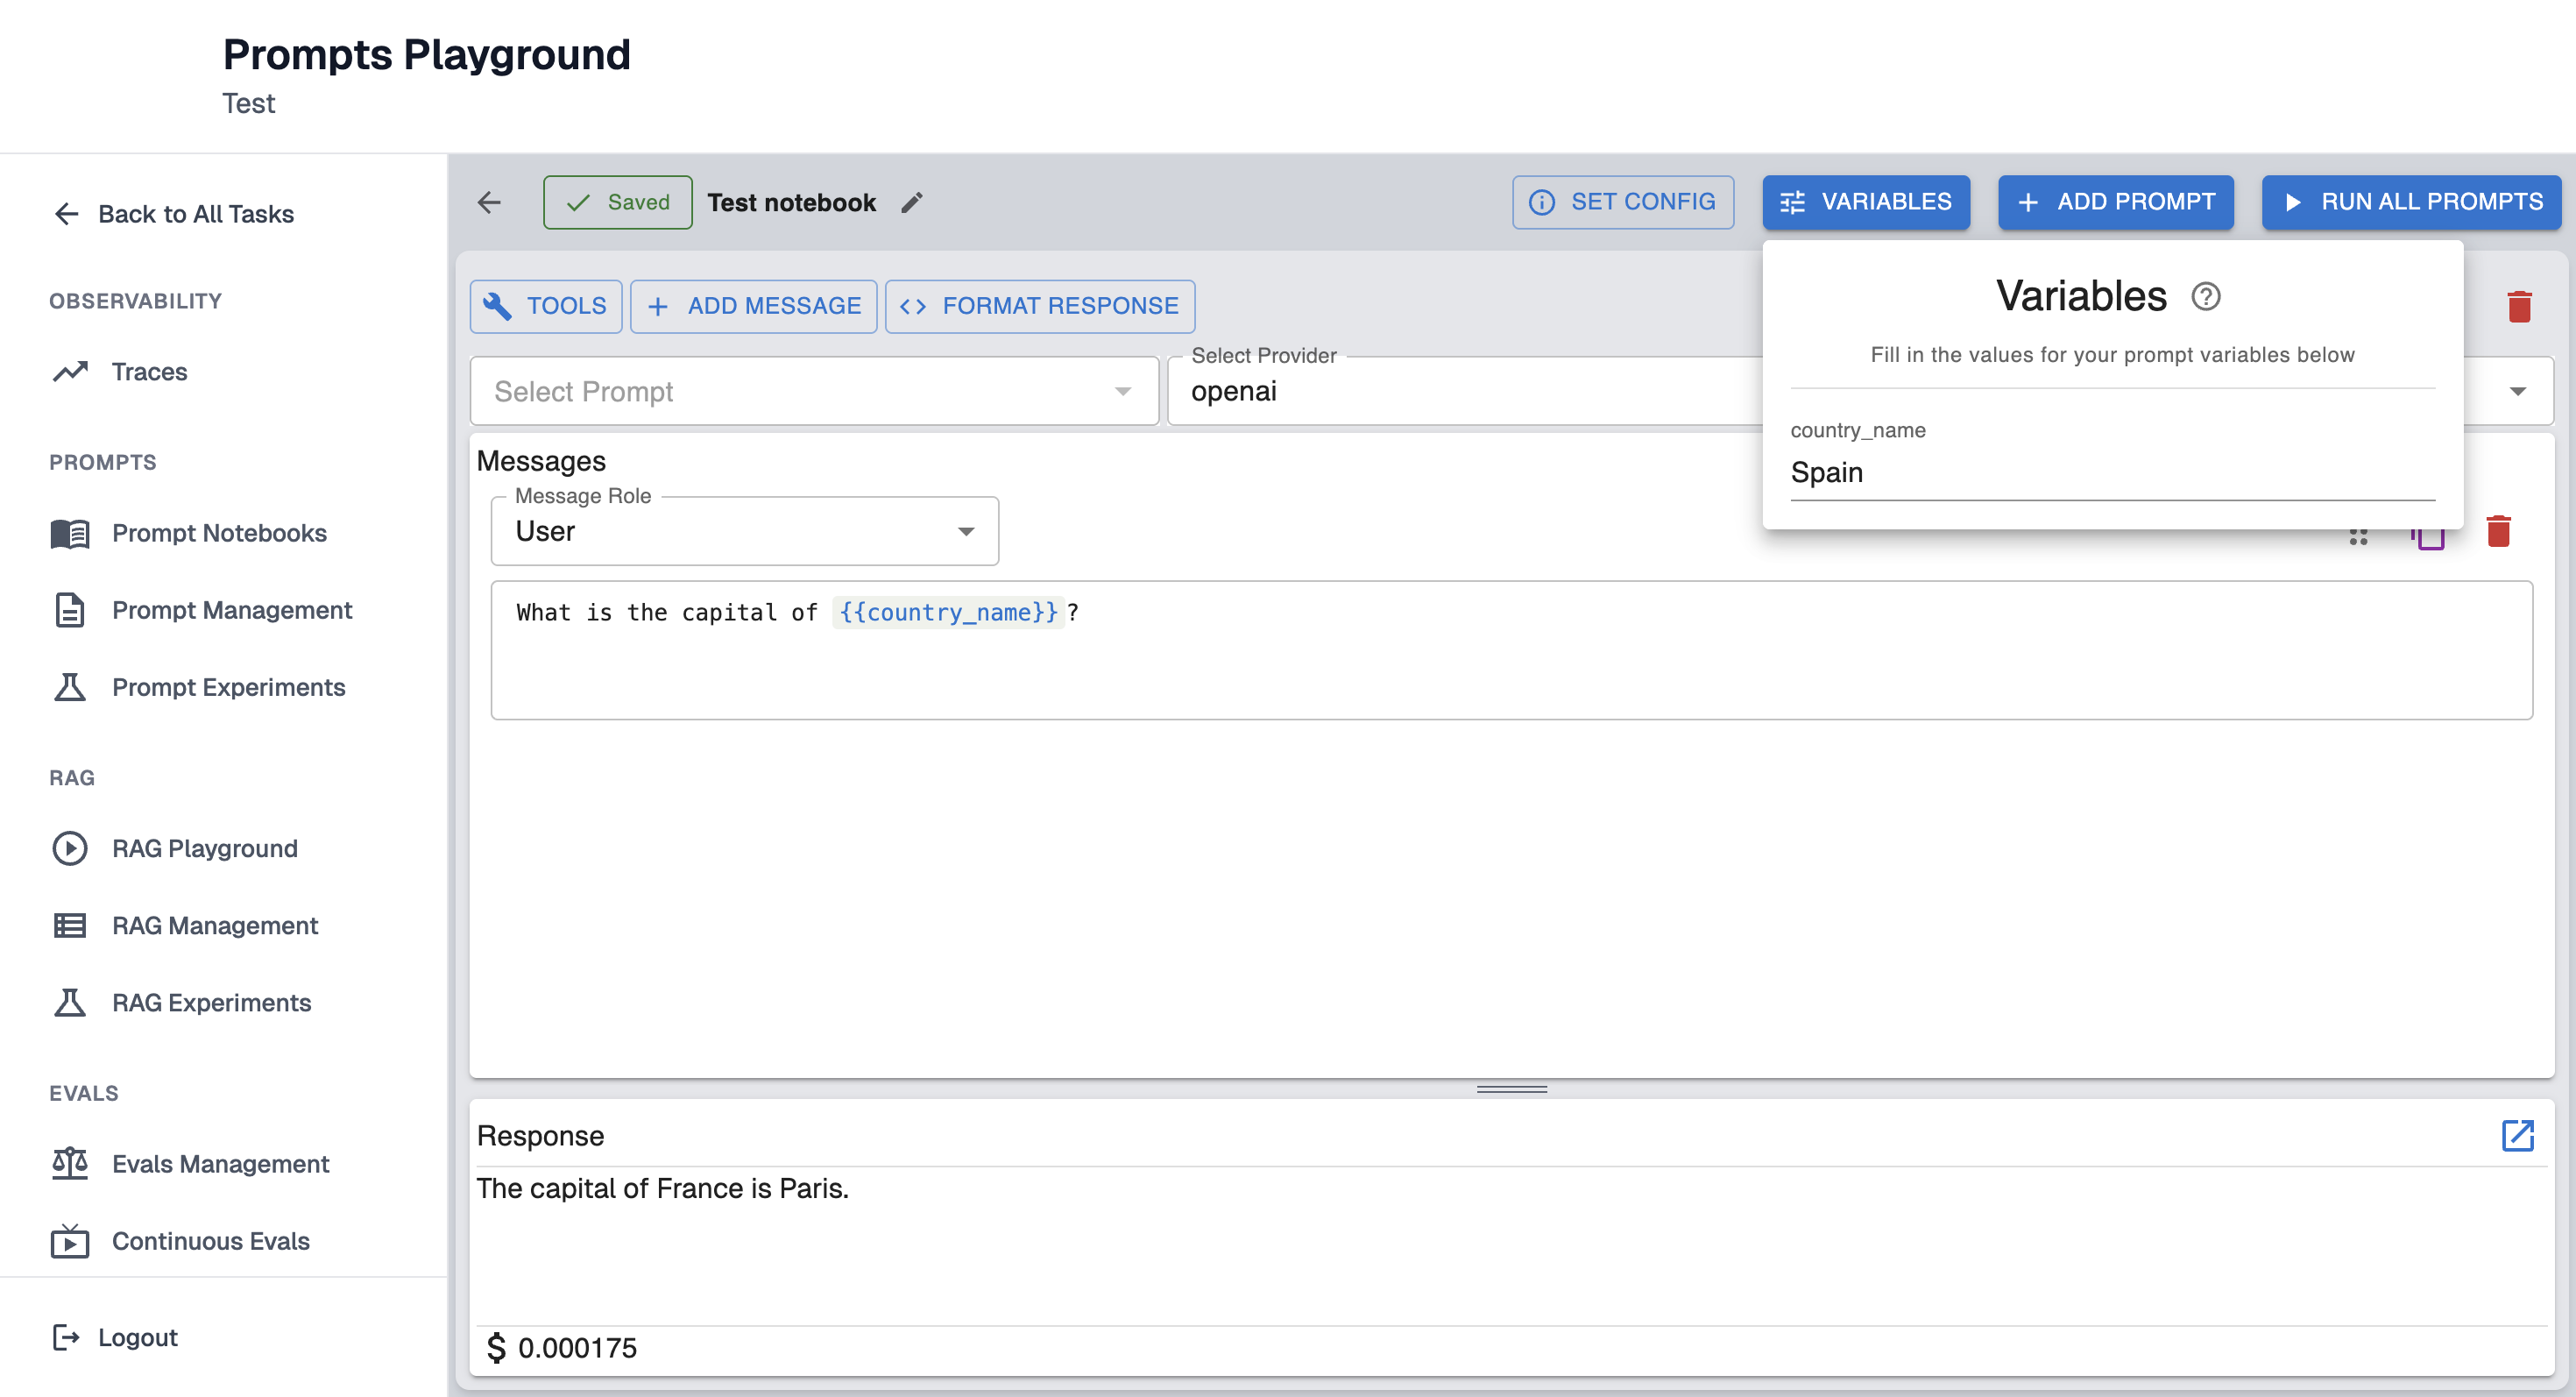
Variables can be used as needed:
User message: "What is the capital of {{country_name}}?"
To run the prompt fill in the values for variables below:
Step 5: Run Prompt
Run the prompt to retrieve the response output.
Save prompts
Prompts can be saved and reused across experiments.
To save the prompt click on the second icon from the right:

Enter the name of the prompt and click "Save" button:
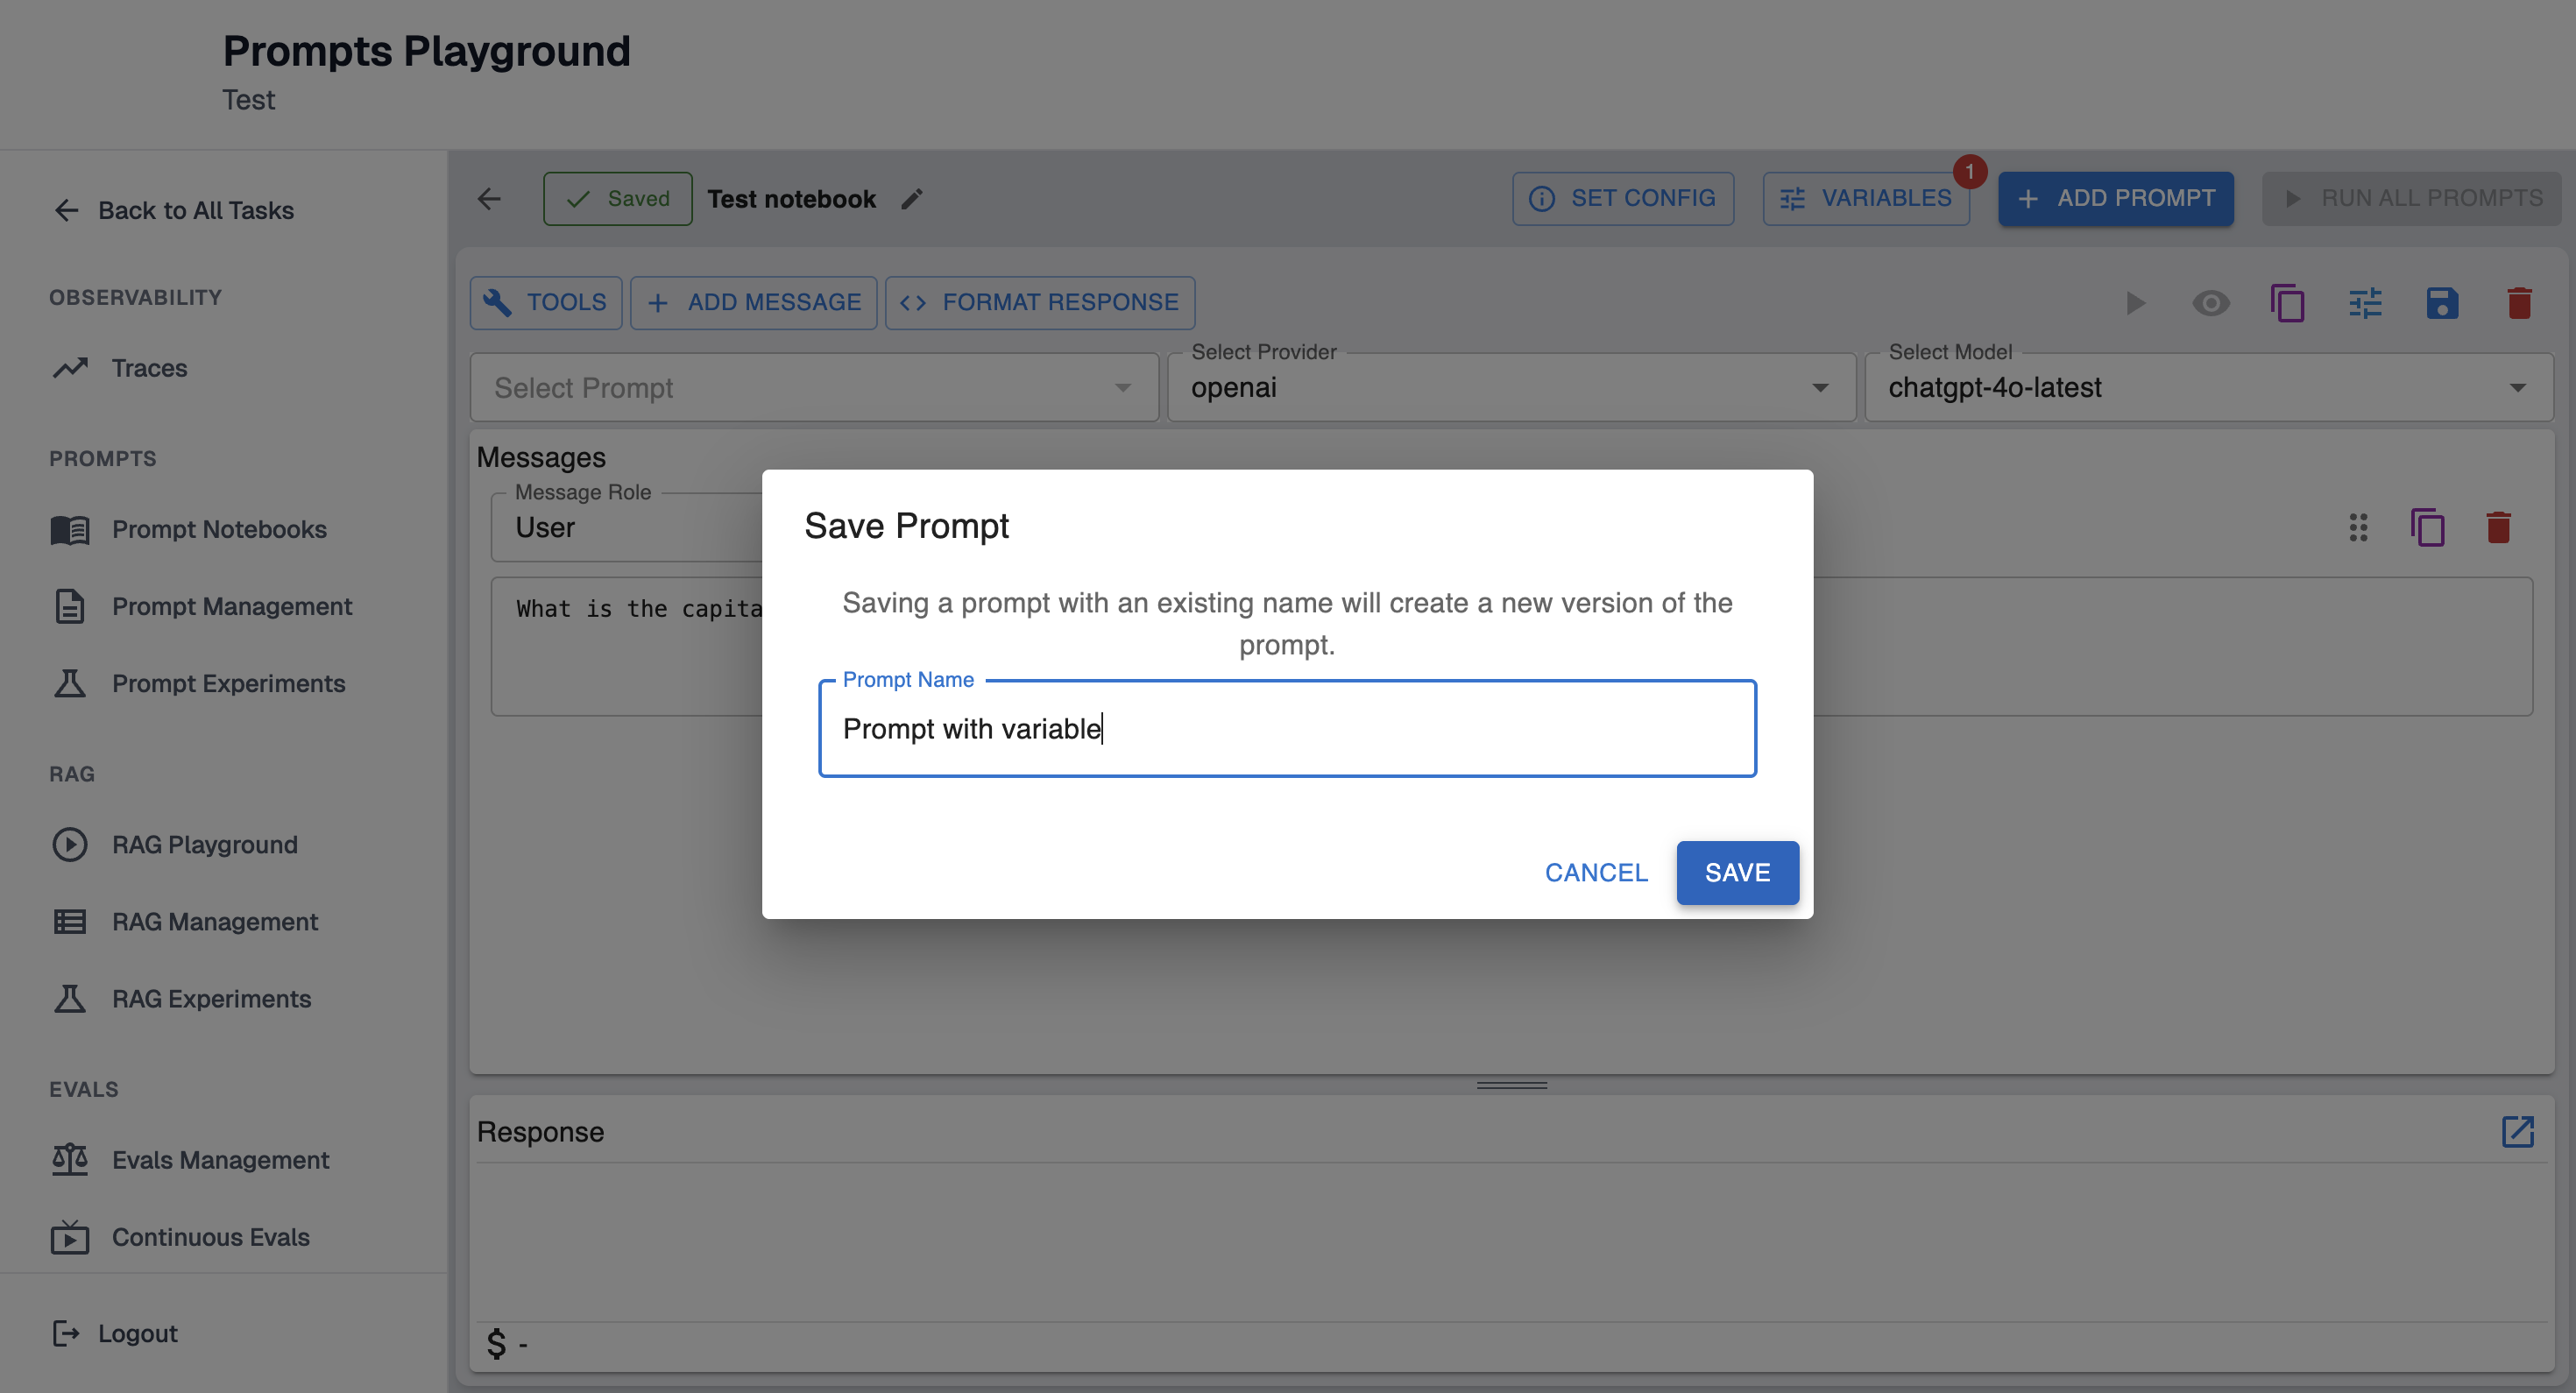
Note: Saving a prompt with an existing name will create a new version of the prompt.
For a clearer understanding, refer to the examples below:
- If you have a saved prompt named "Prompt with variable" and edit it, then click "Save" without changing the name, it will remain as the same prompt ("Prompt with variable") but will increment to version 2.
- If you change the name to "Prompt with different variable", it will be saved as a new, separate prompt.
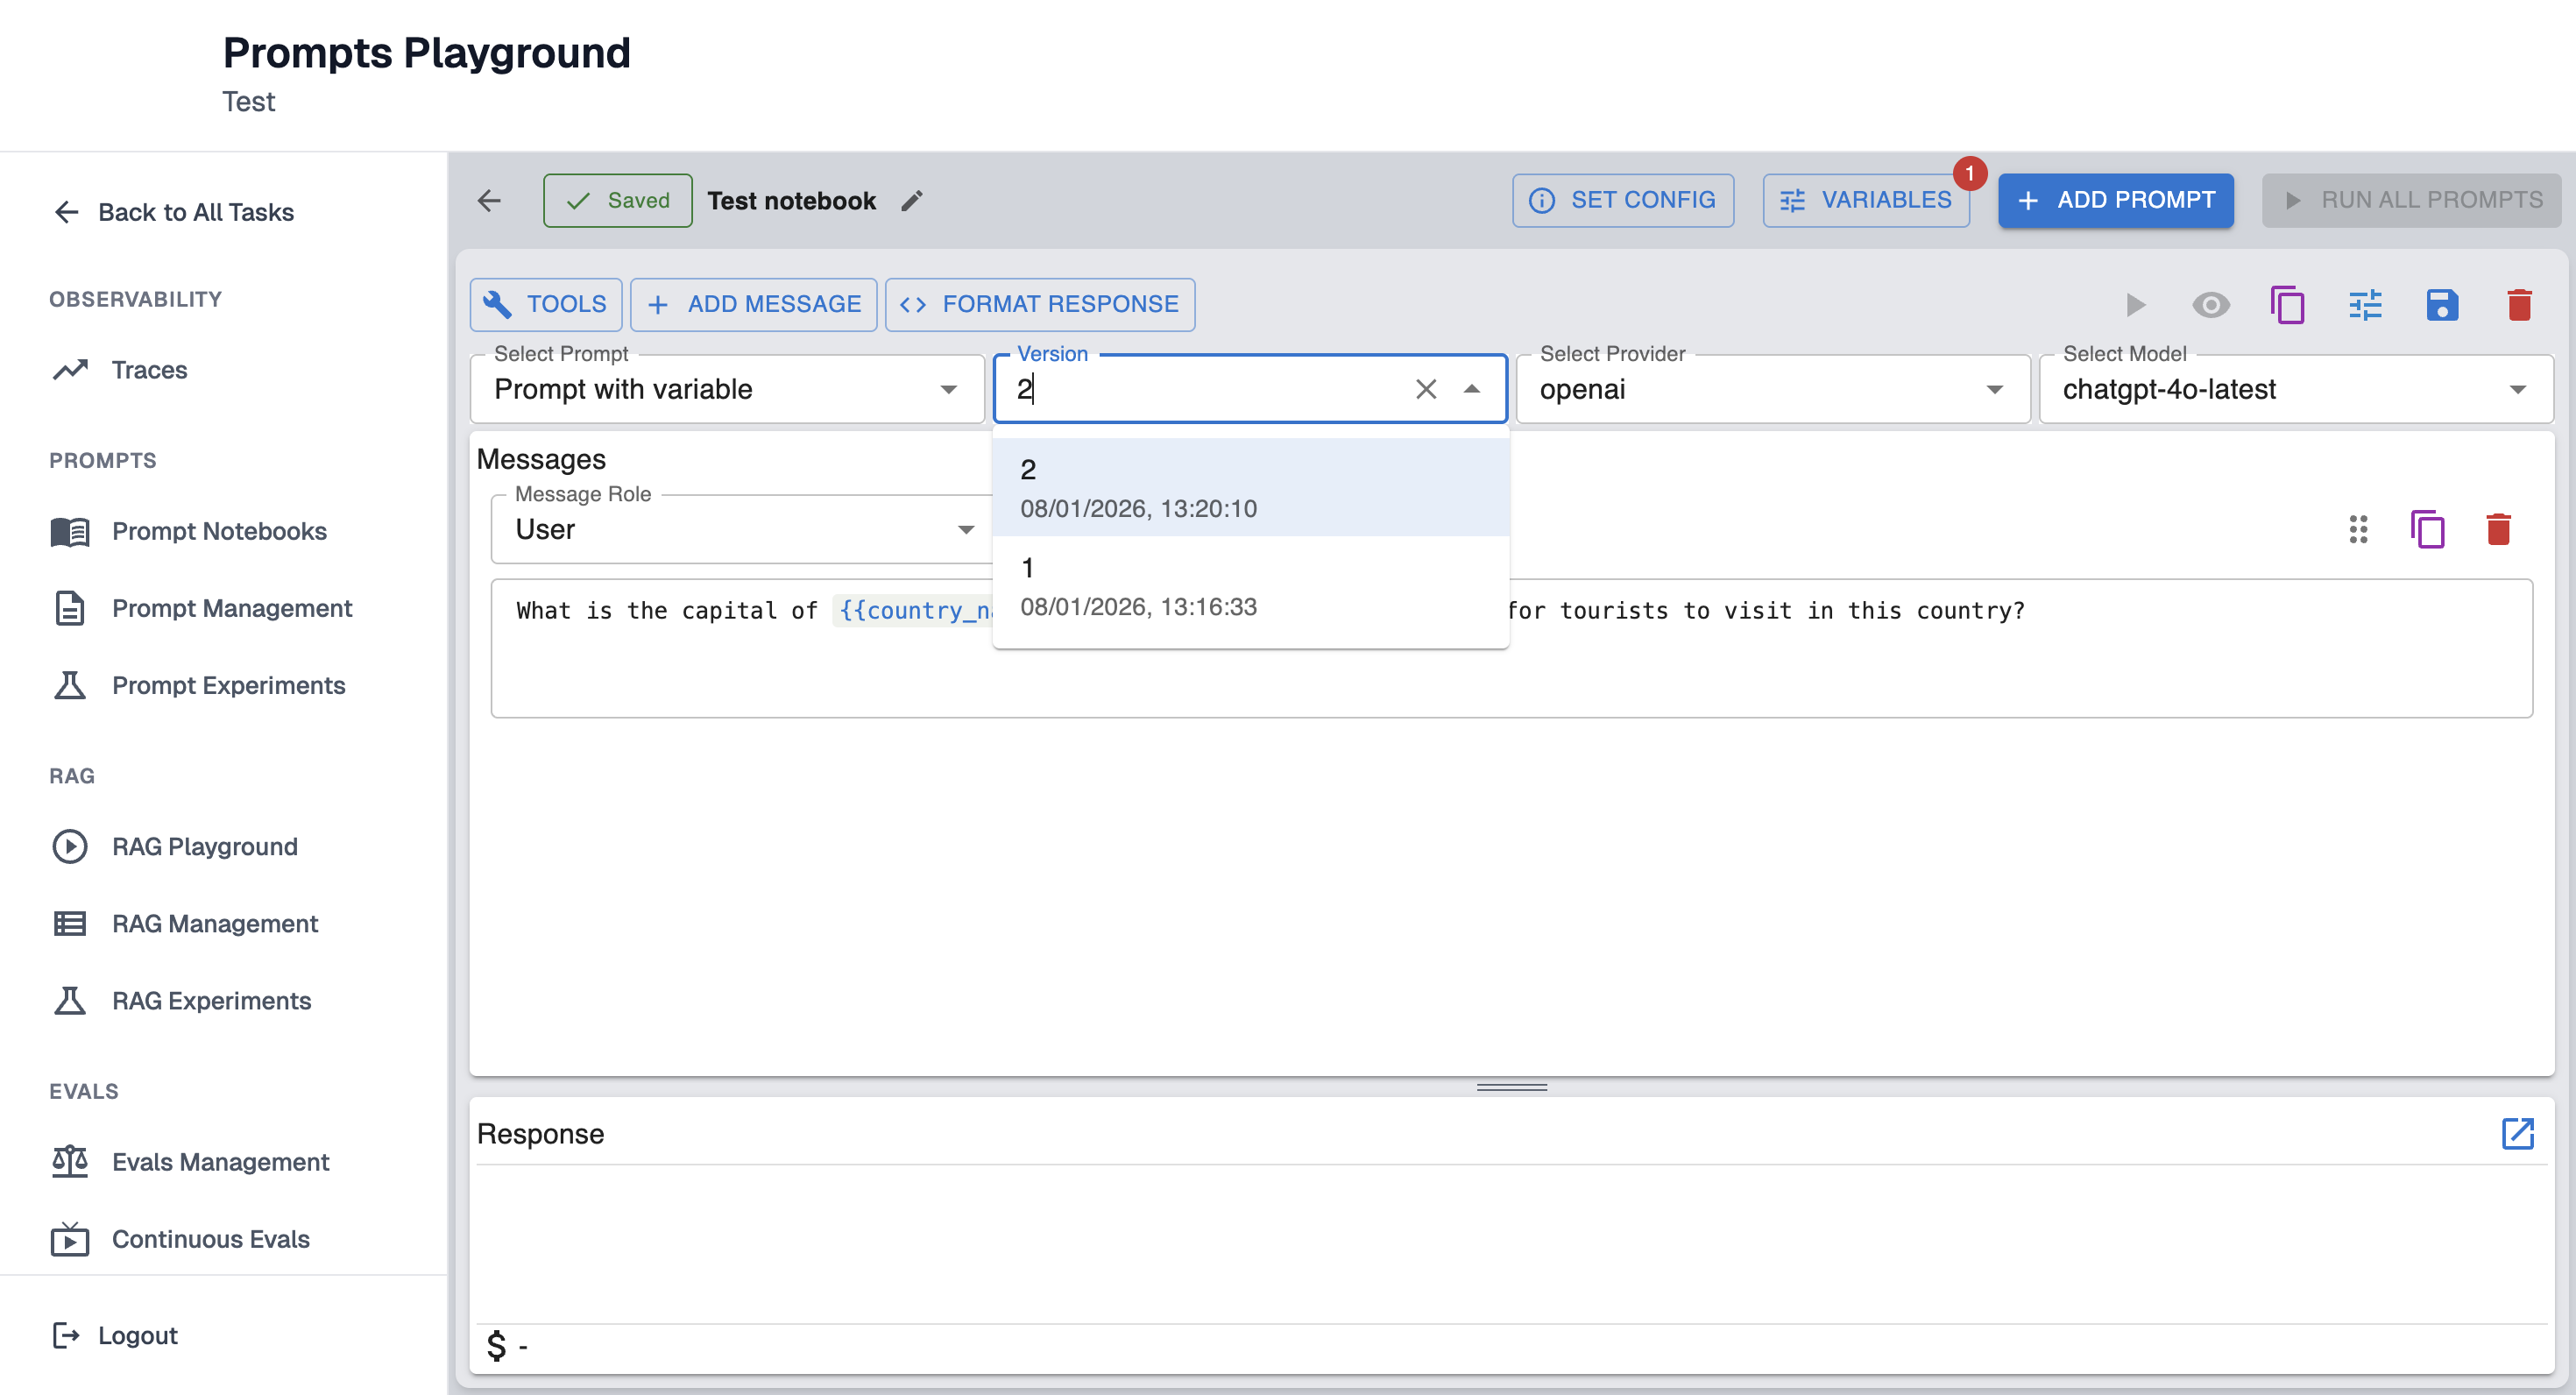
Saved prompts will appear in dropdown:

Prompts can be referenced by name and version.
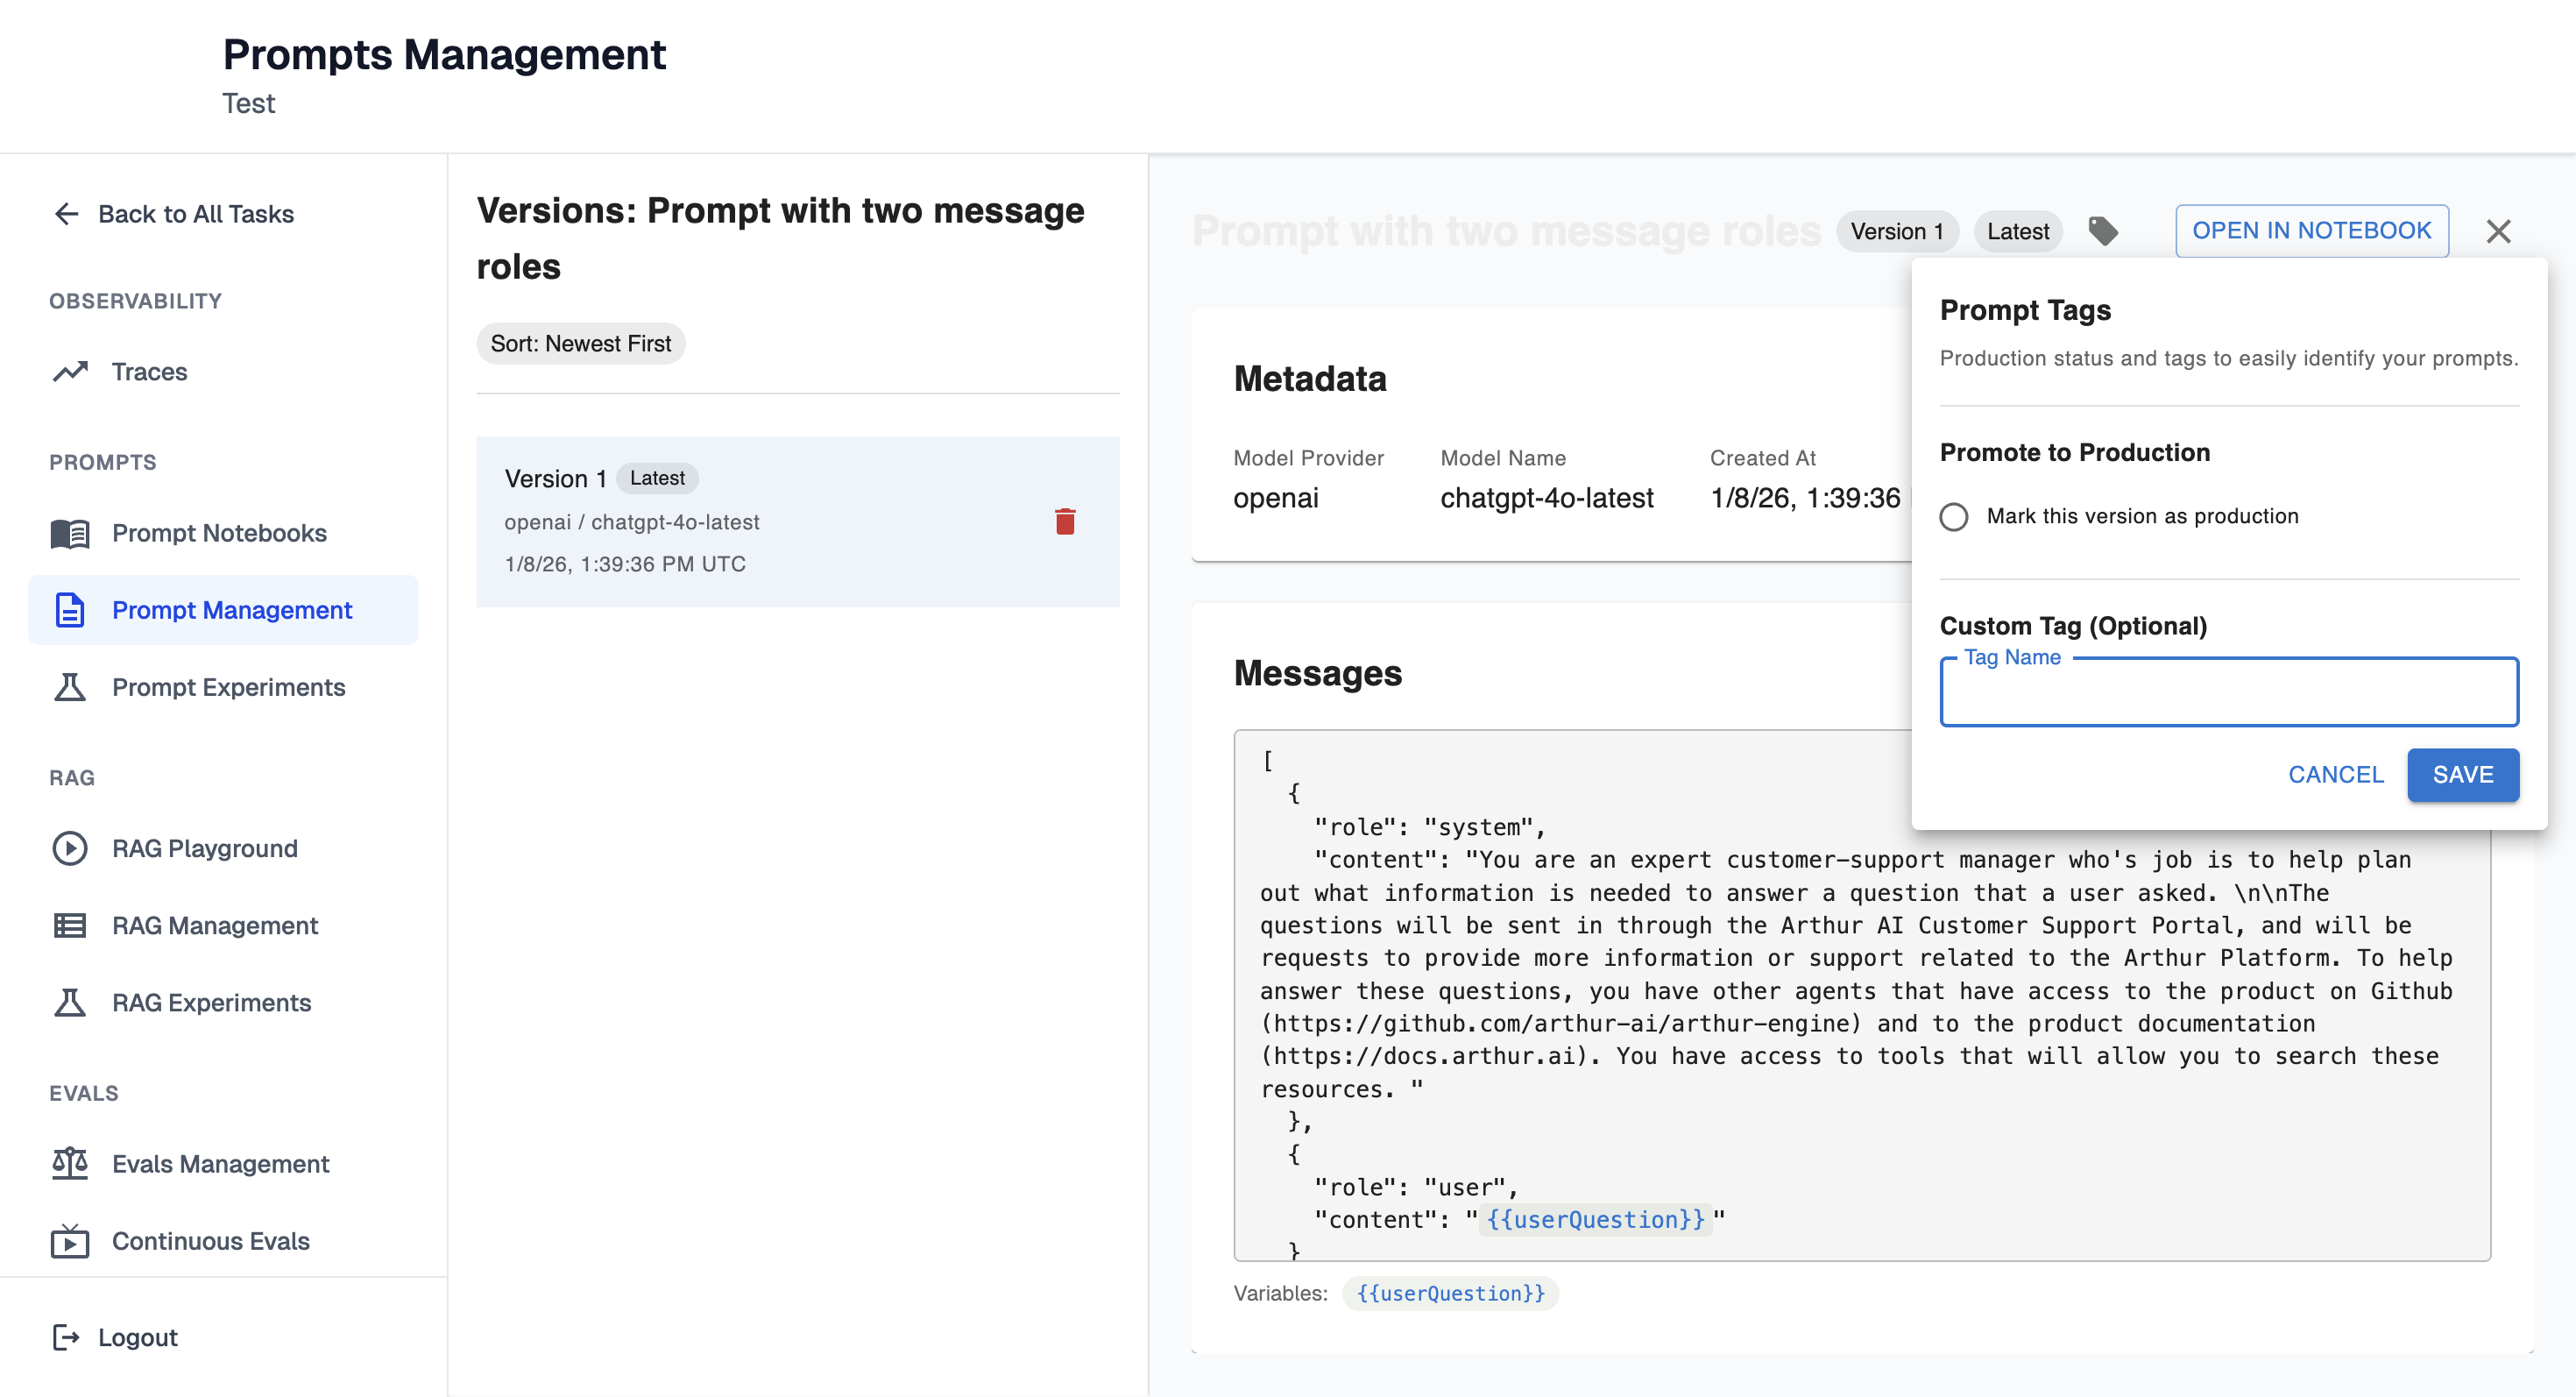
Saved prompts are stored in Prompt Management.
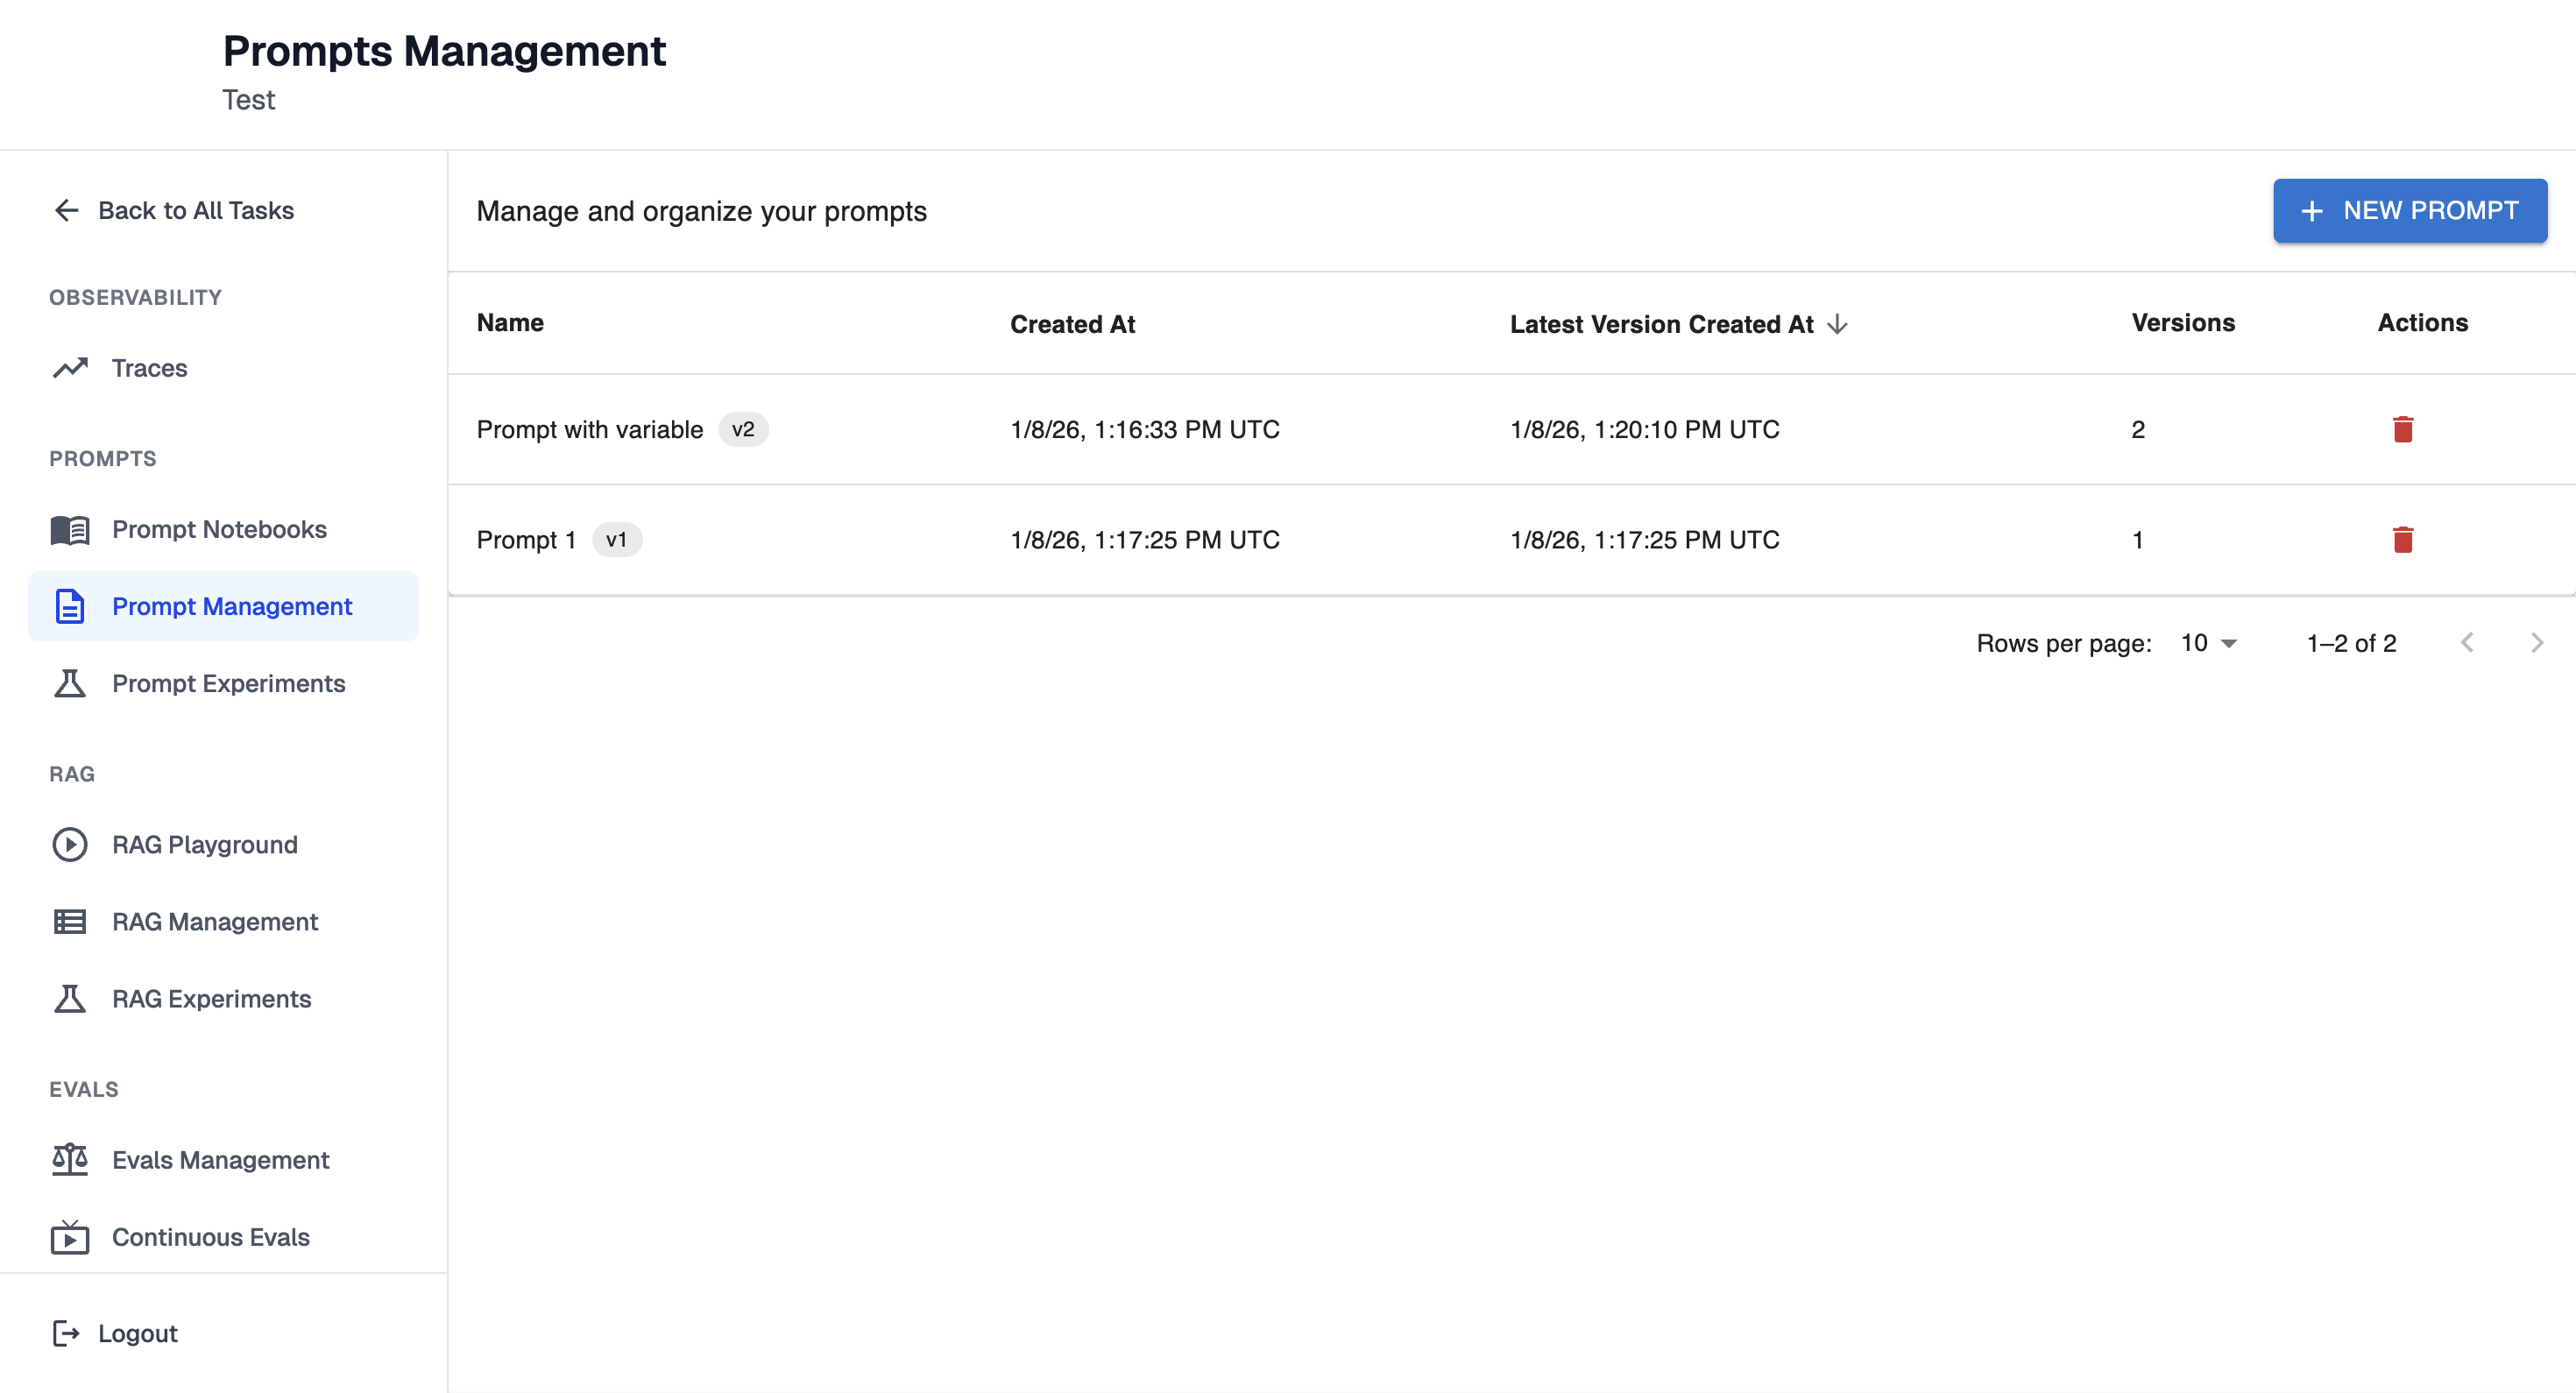
Once in the prompt details, prompts can be tagged.
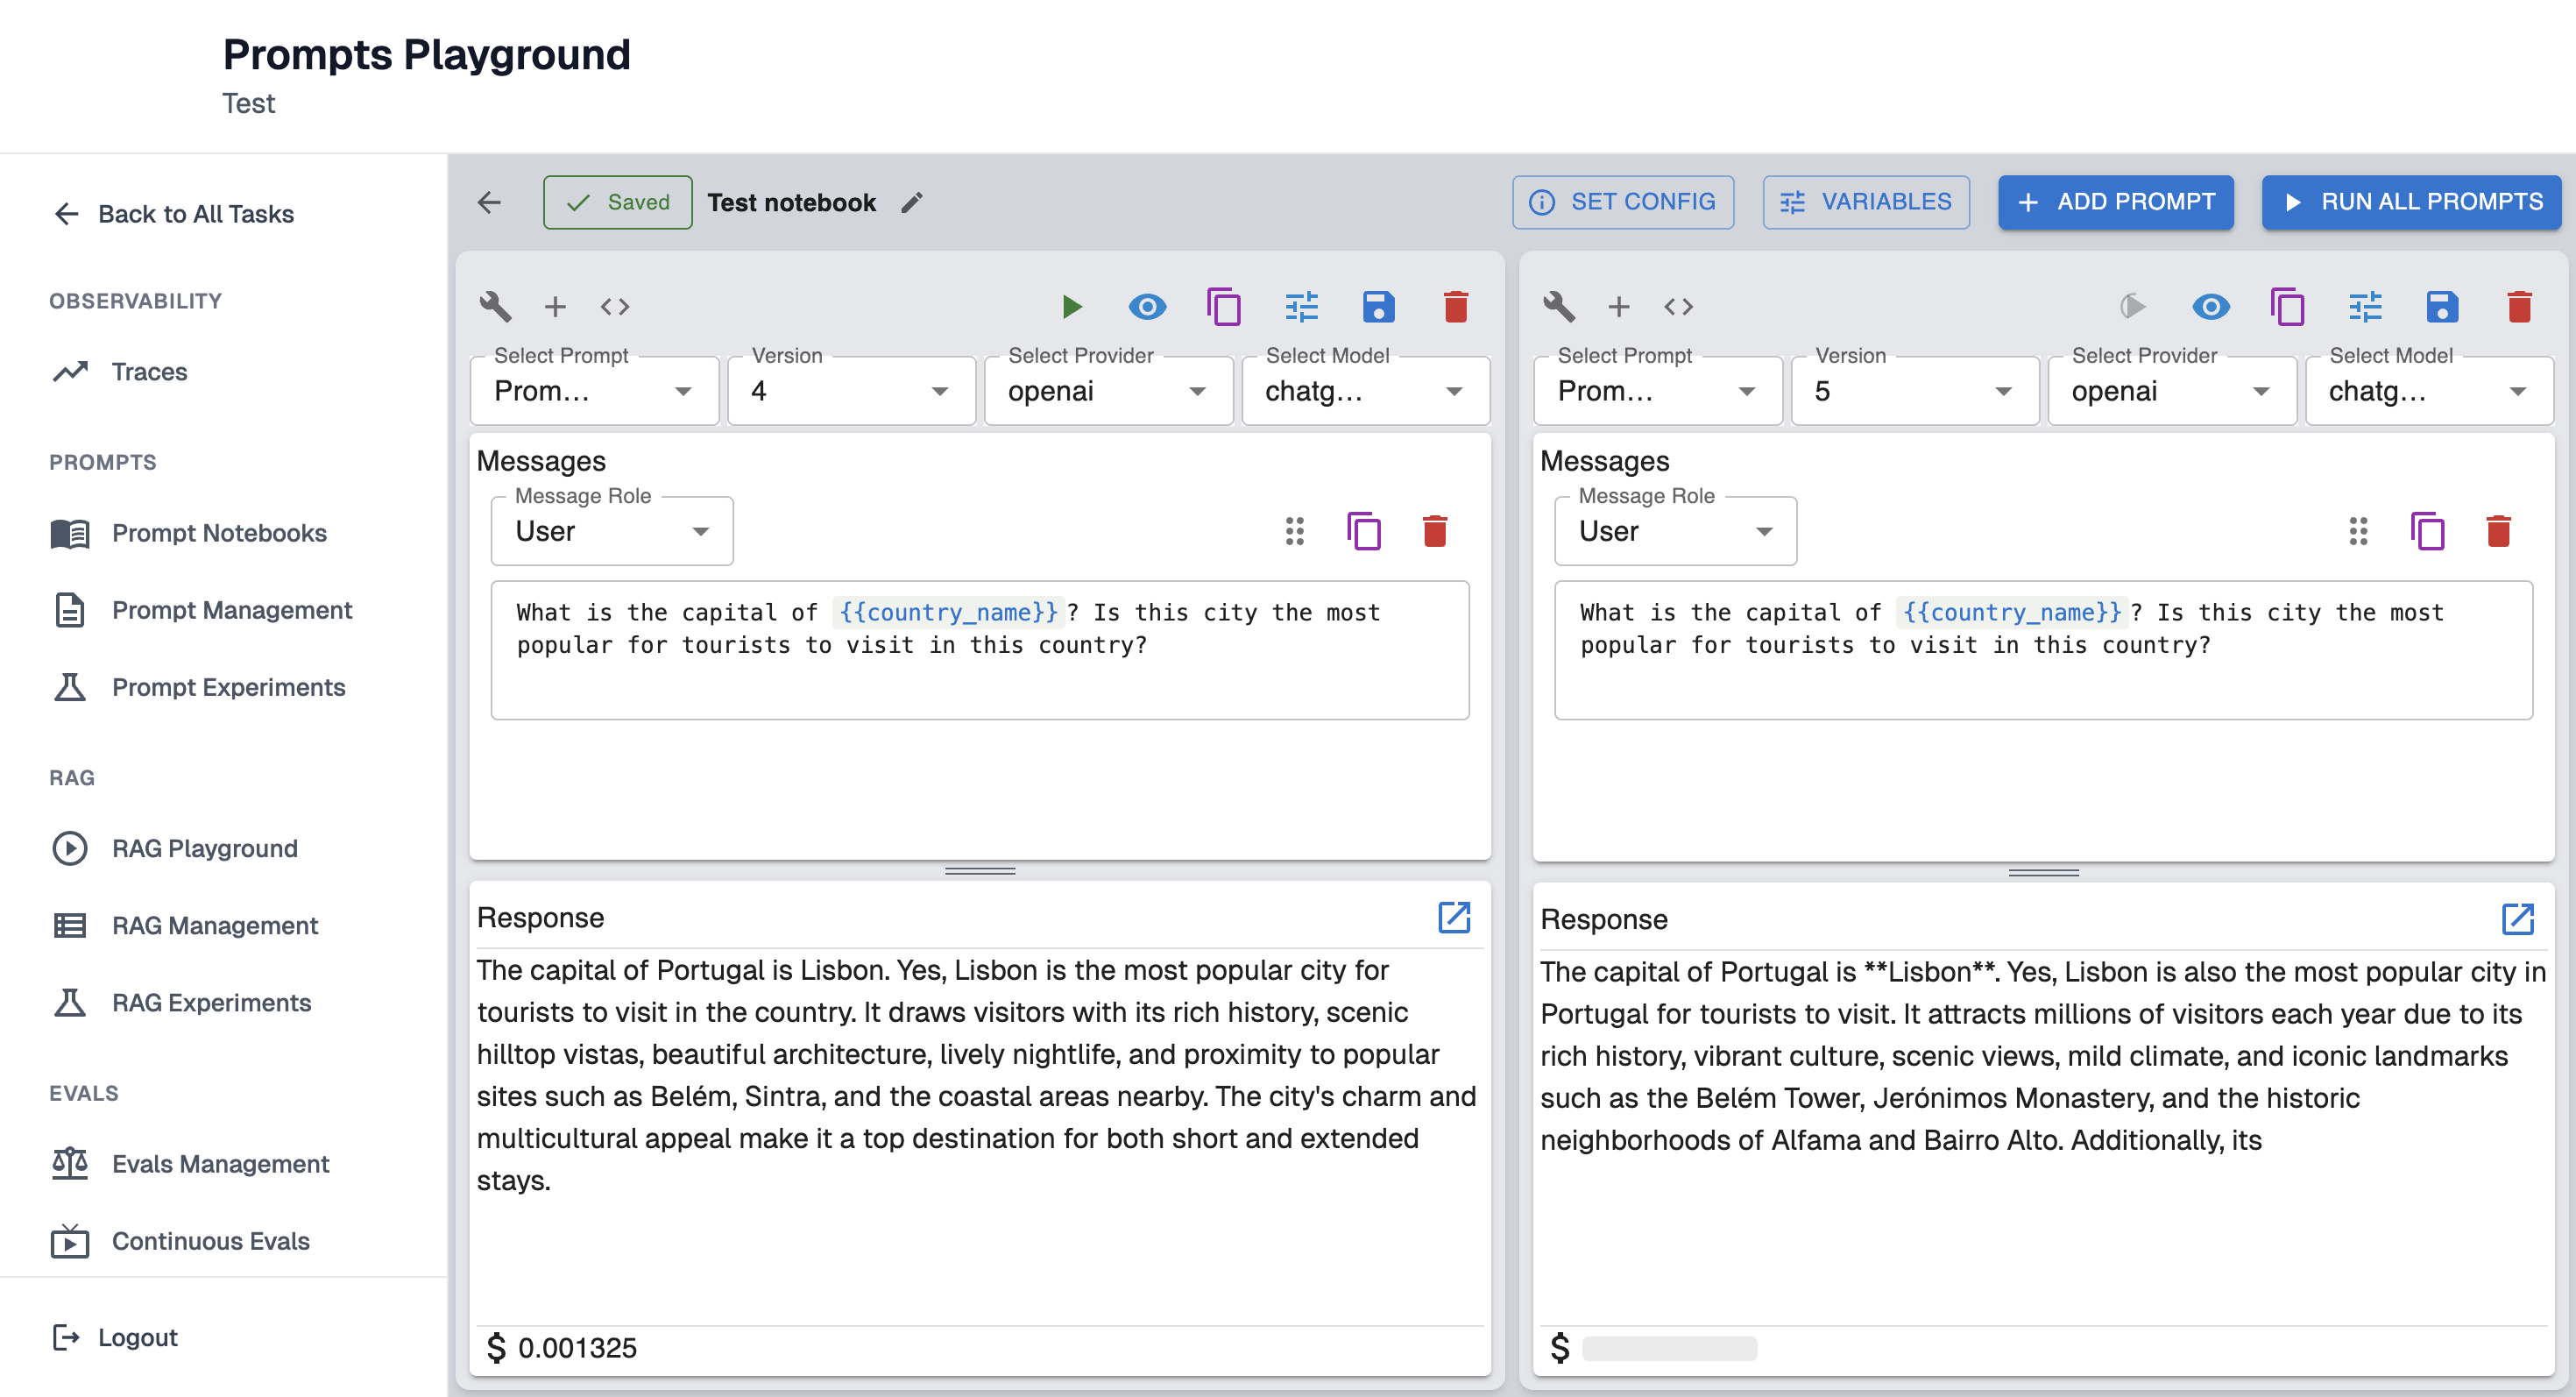
Test prompt with multiple models
Prompts can be tested with multiple models to compare the results.
To do this faster, simply duplicate the prompt:
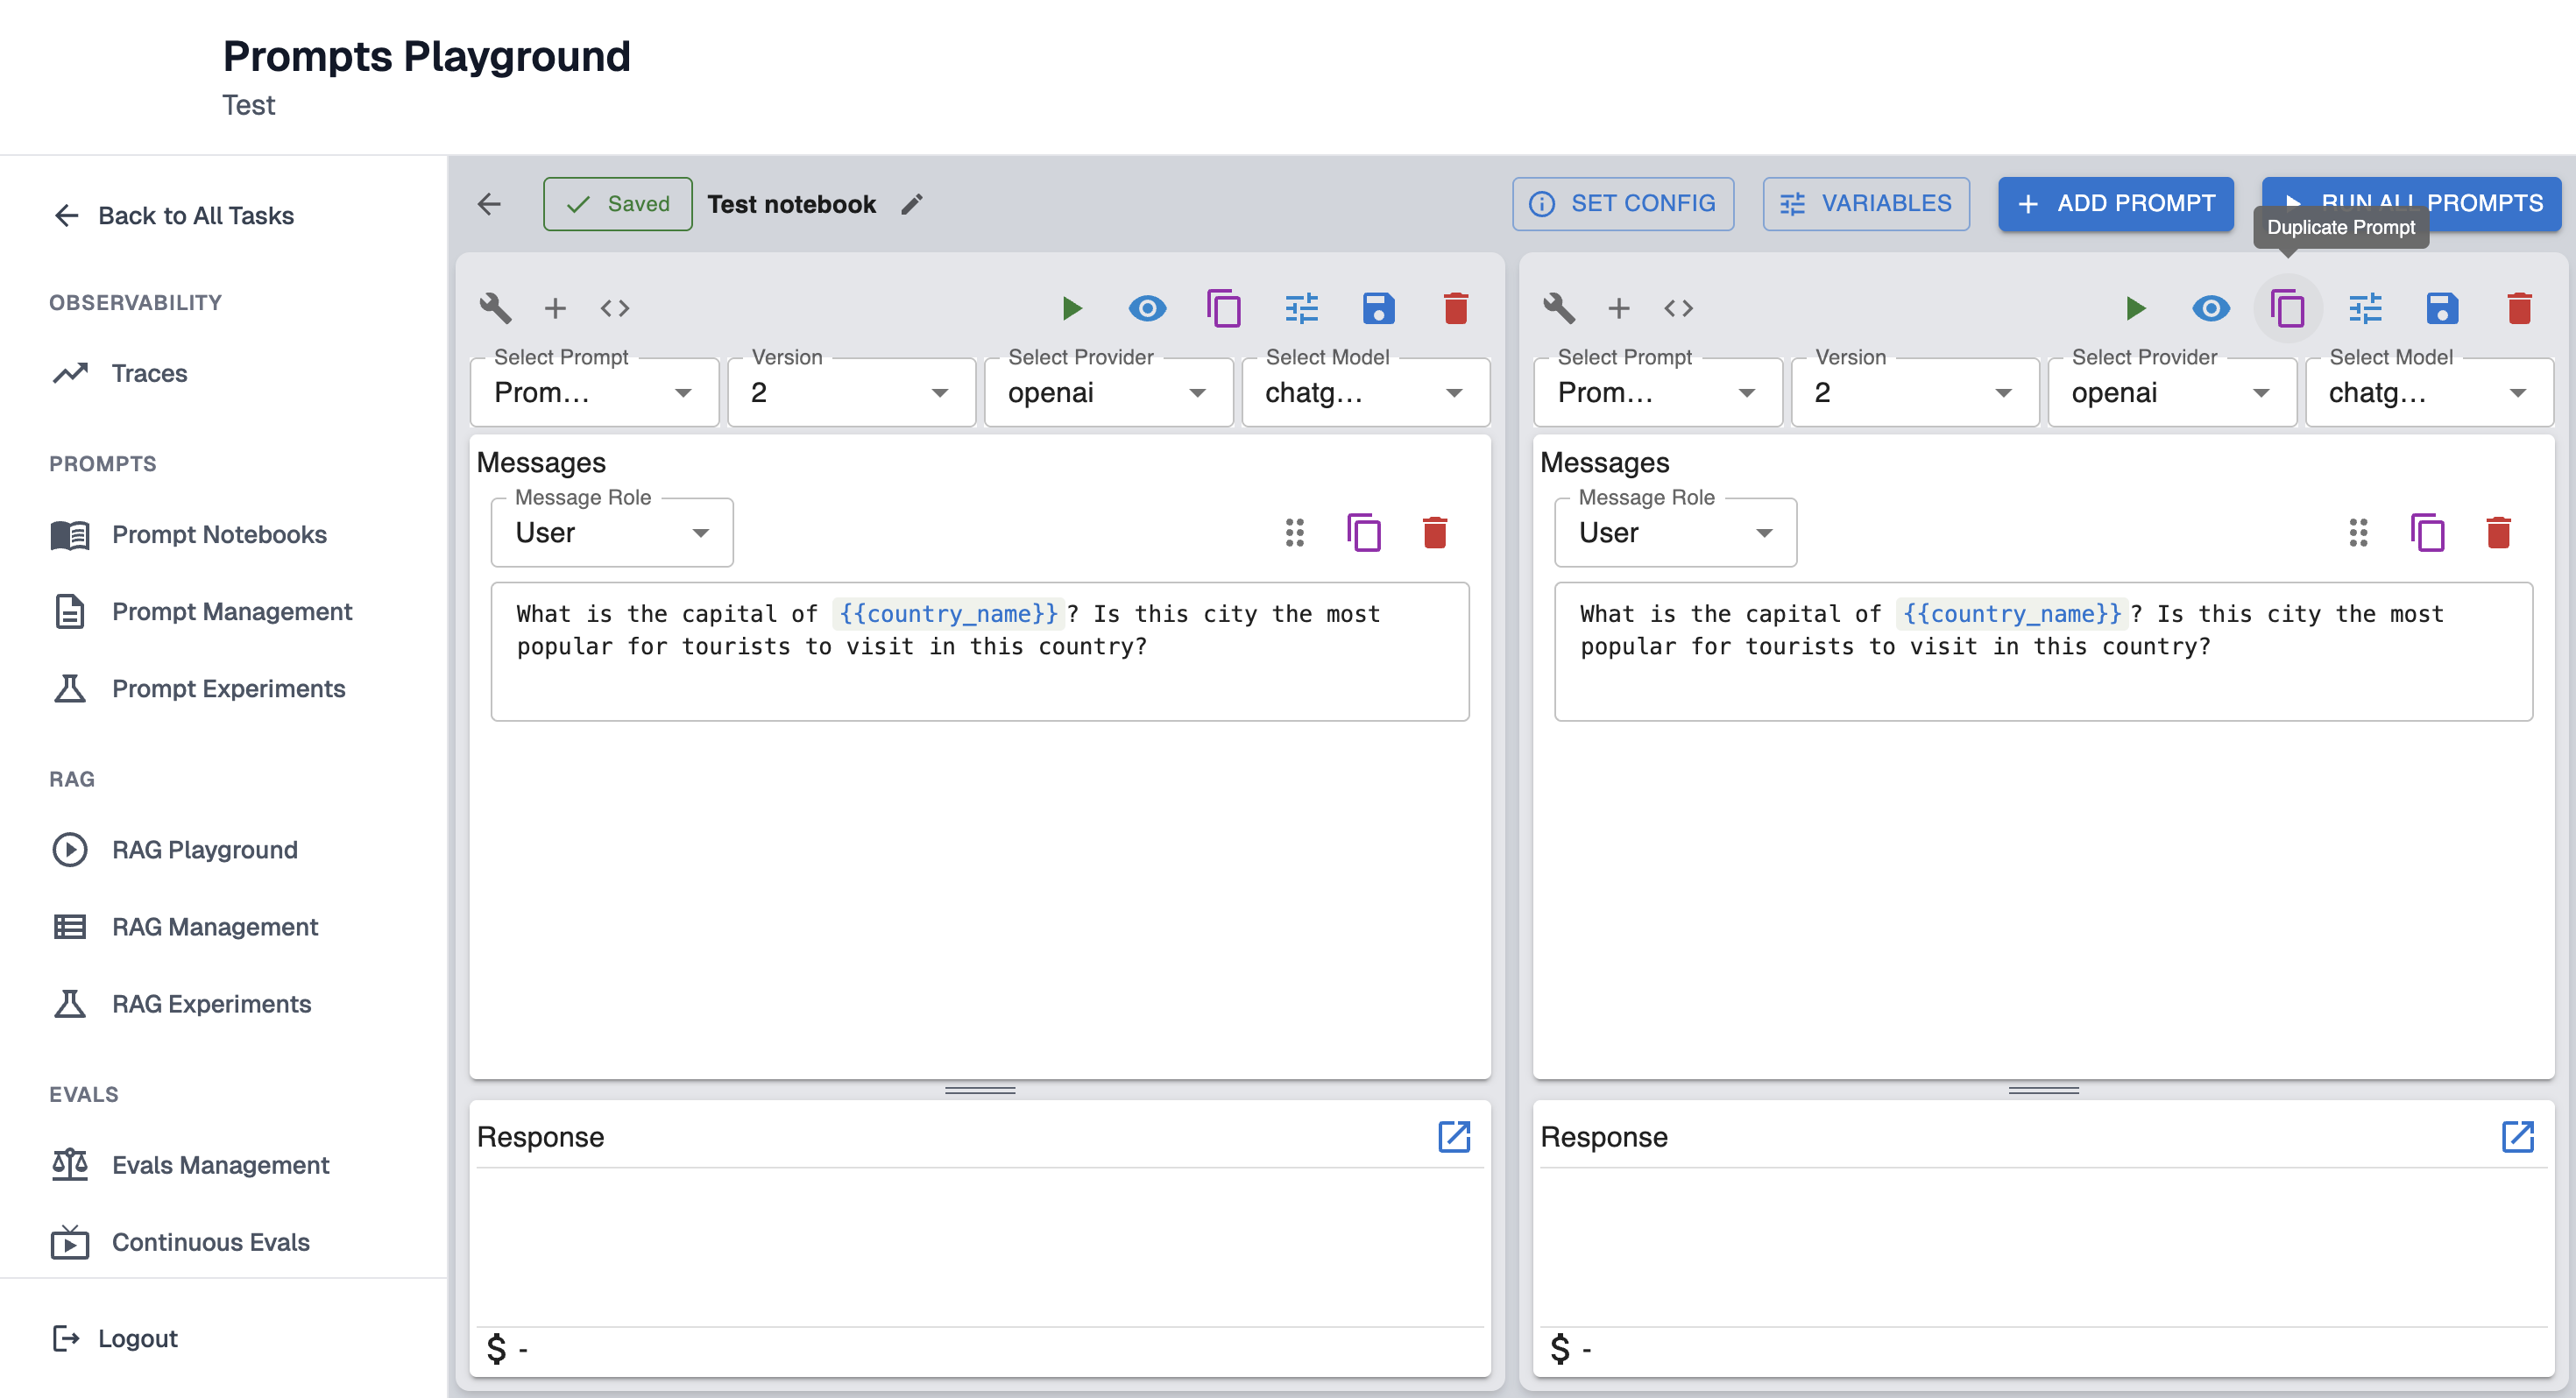
Select a different model for duplicated prompt and save the prompt; it will increment to the next version while keeping the same name, or create a new prompt if the name is changed.
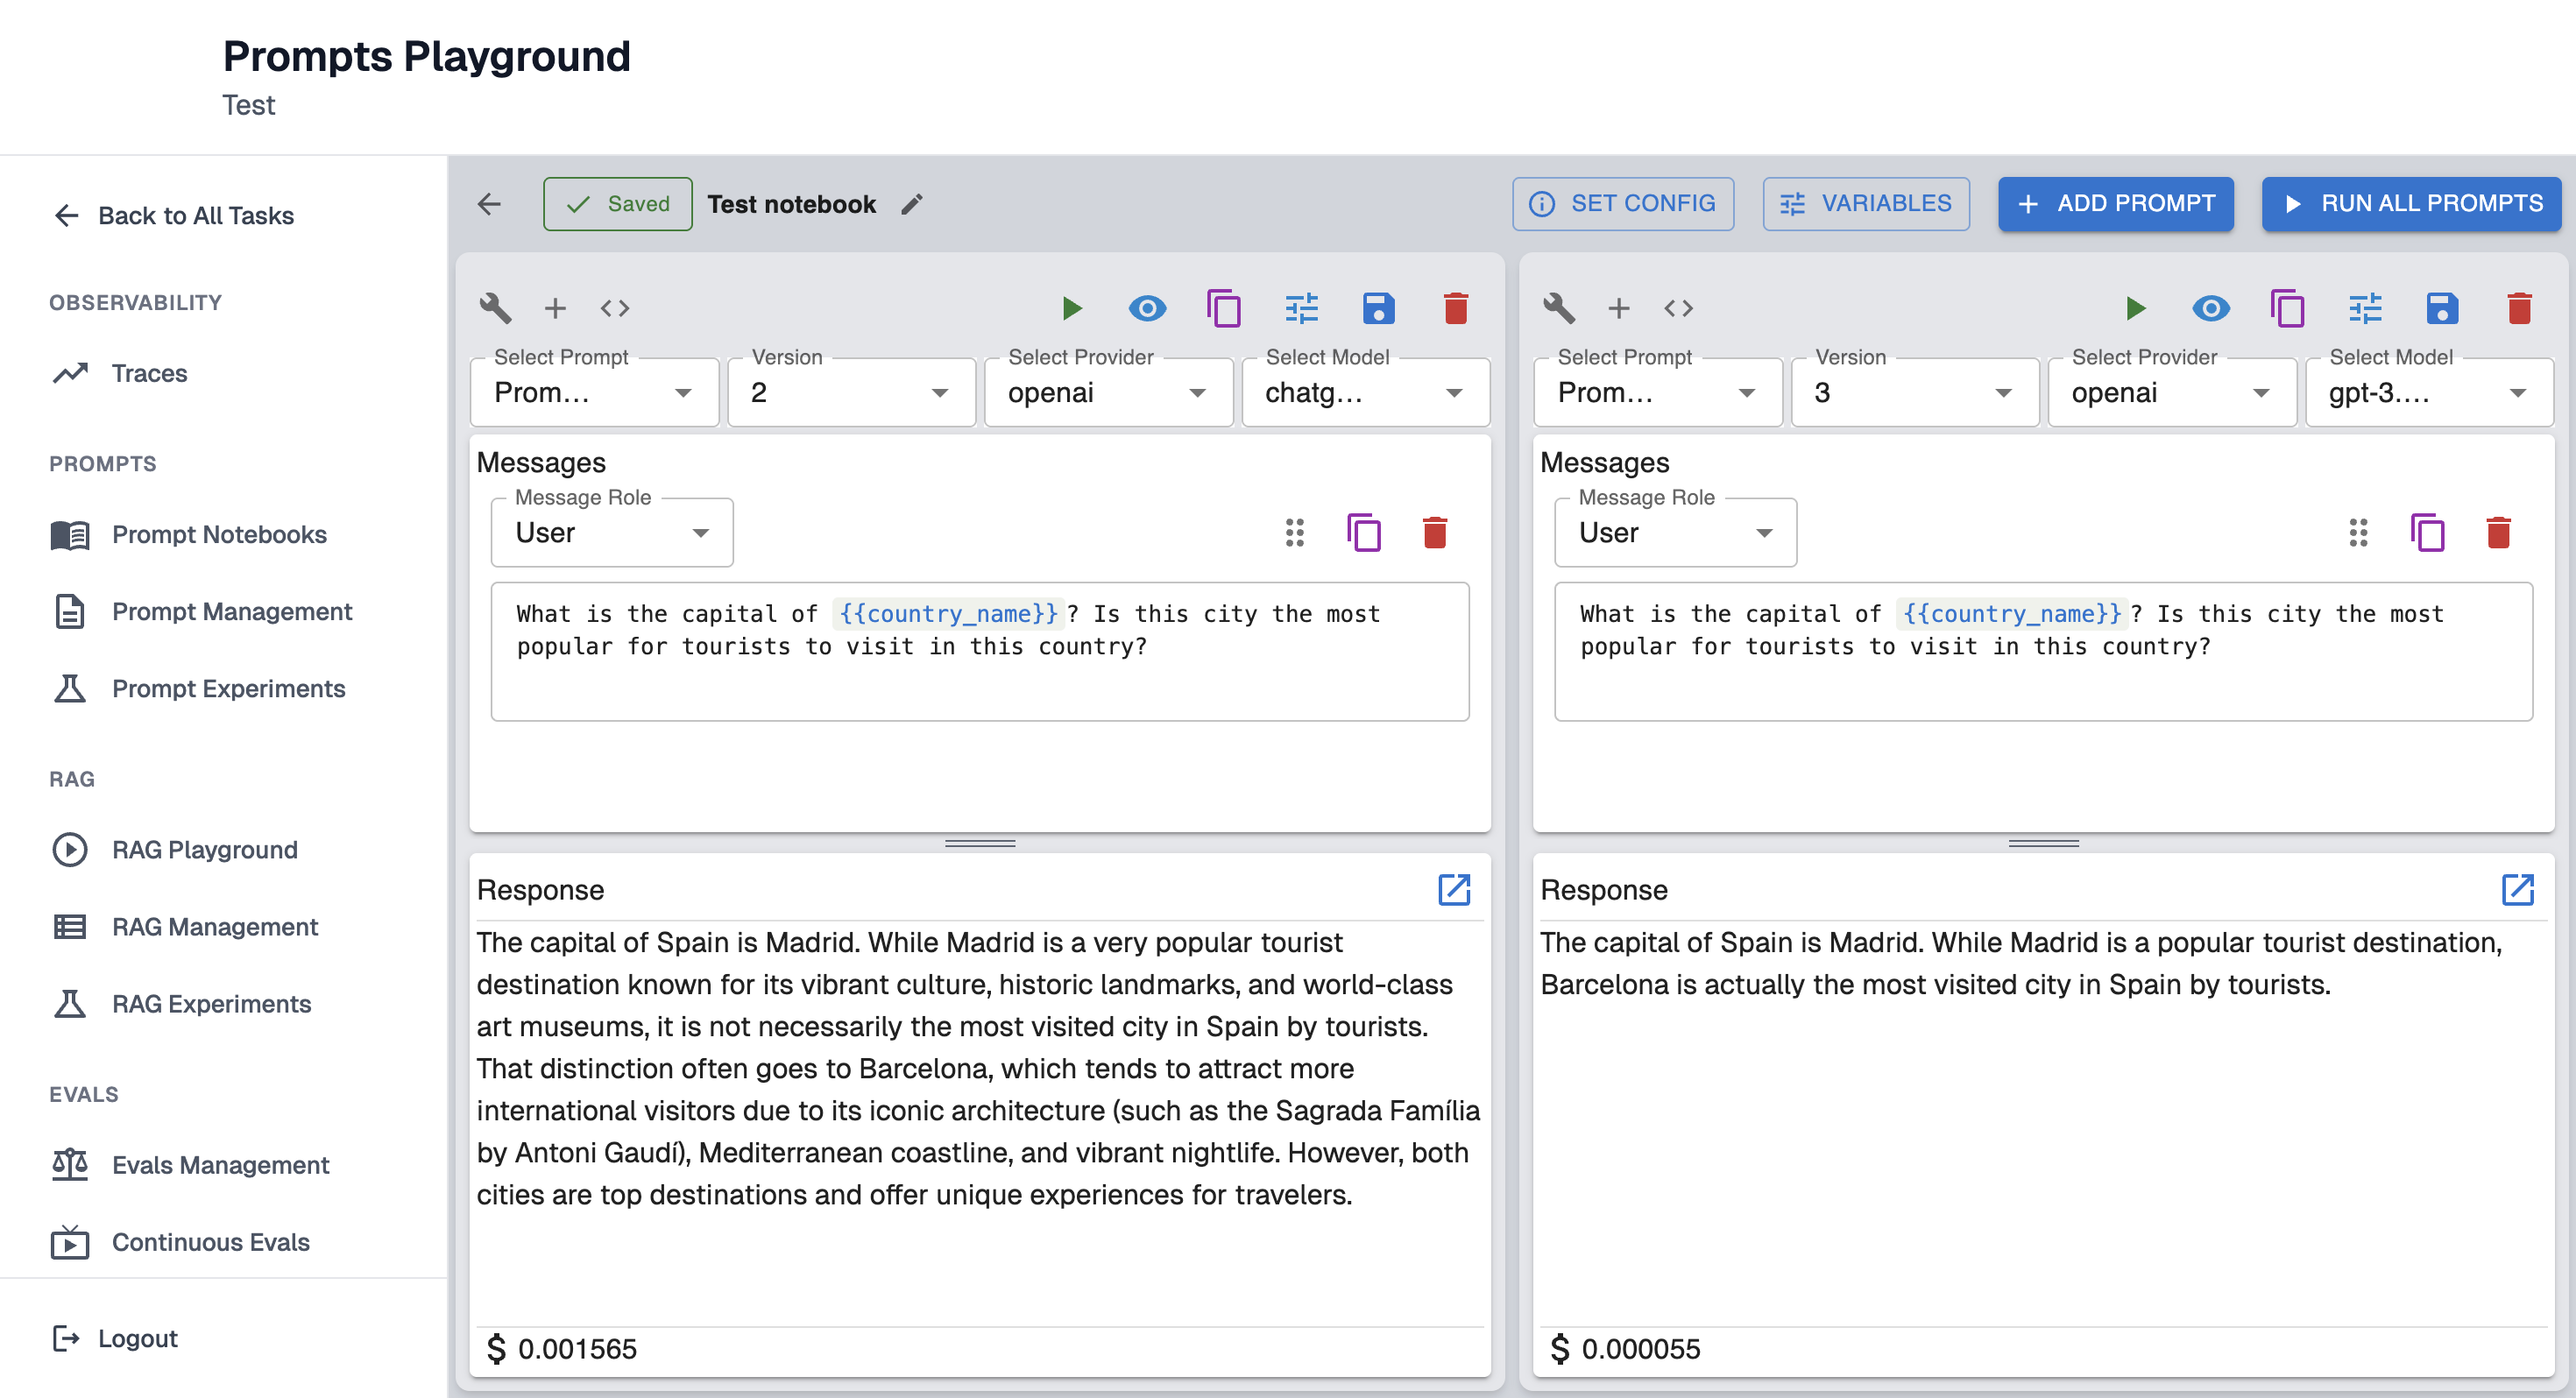
Click "Run All Prompts" to obtain results from both models for comparison:
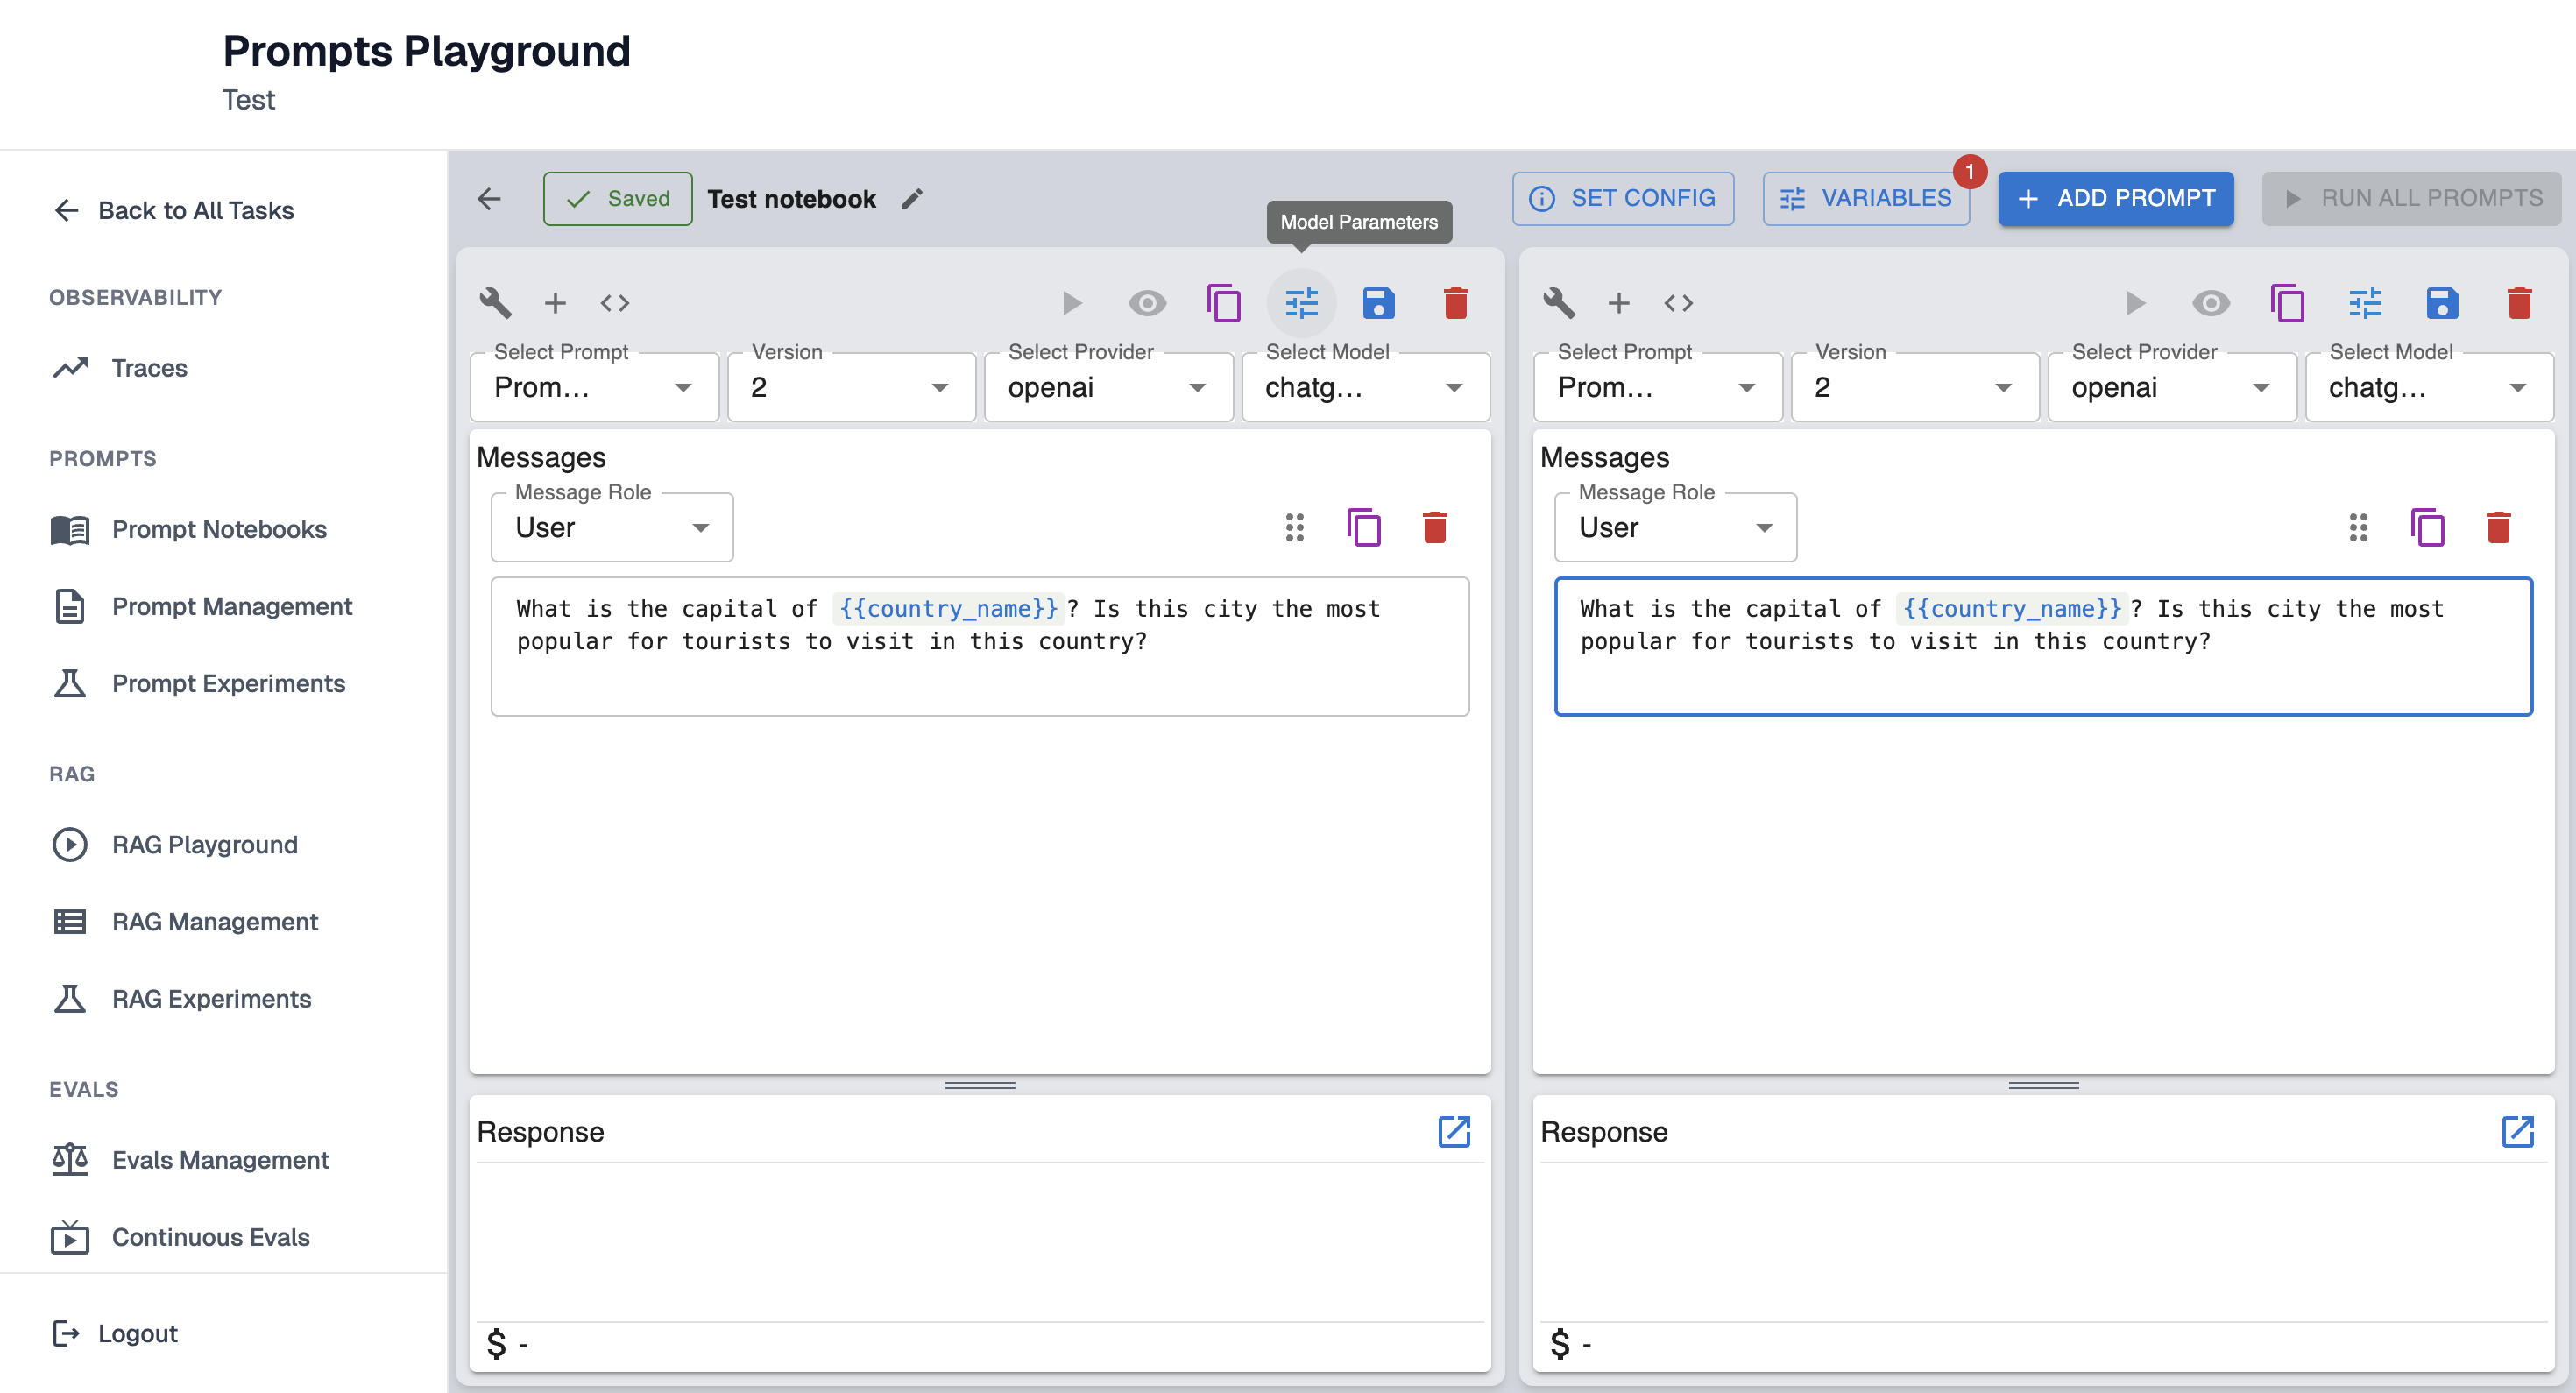
Test the same prompt with different parameters
Prompt can be tested with different parameters to compare the results.
Add two prompts with the same version. To do that click "Add prompt".
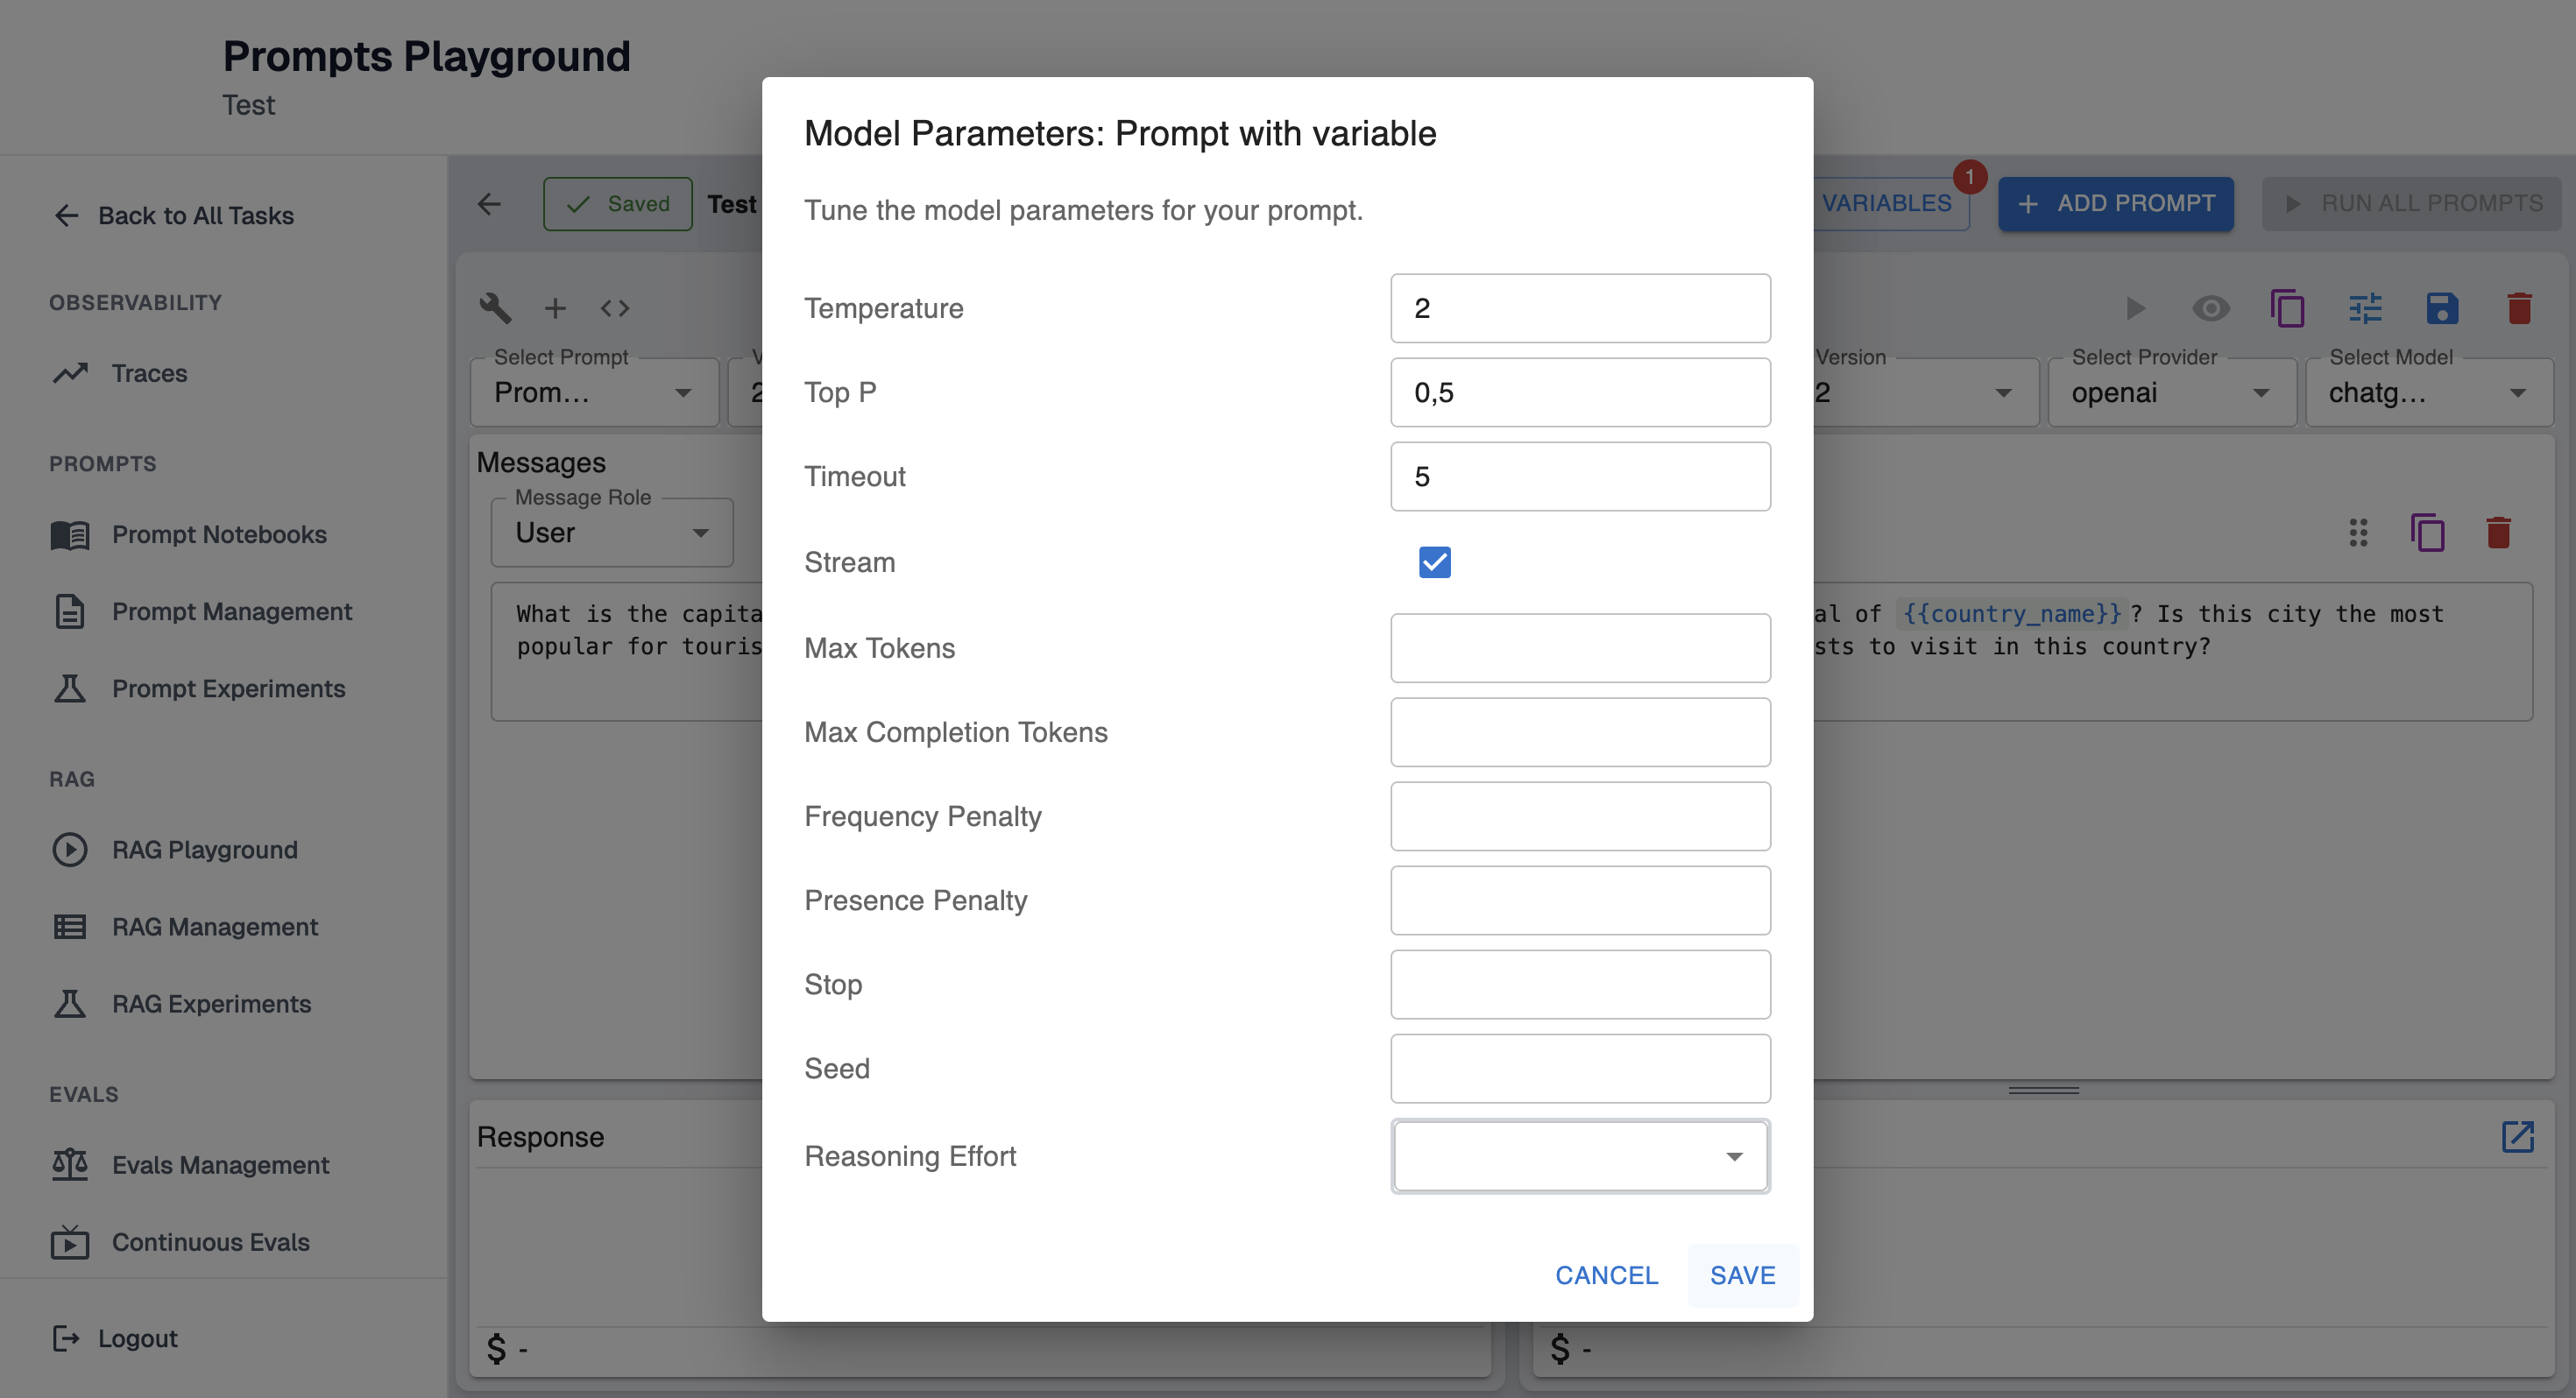
Select the same saved prompt for both and change the parameters for both prompts. To do that click "Model Parameters" button.
It will open a modal in which you can tune the model parameters for your prompt.
Save both prompts with different parameters. It will increment to the next version while keeping the same name, or create a new prompt if the name is changed.
Click "Run All Prompts" to generate results from both providers for comparison.
Test the same prompt with different providers
Prompts can be tested with different providers to compare the results.
To speed up the process, you can duplicate the prompt. For the duplicated prompt, select a different provider and save it. It will increment to the next version while keeping the same name, or create a new prompt if the name is changed. Click "Run All Prompts" to generate results from both providers for comparison.
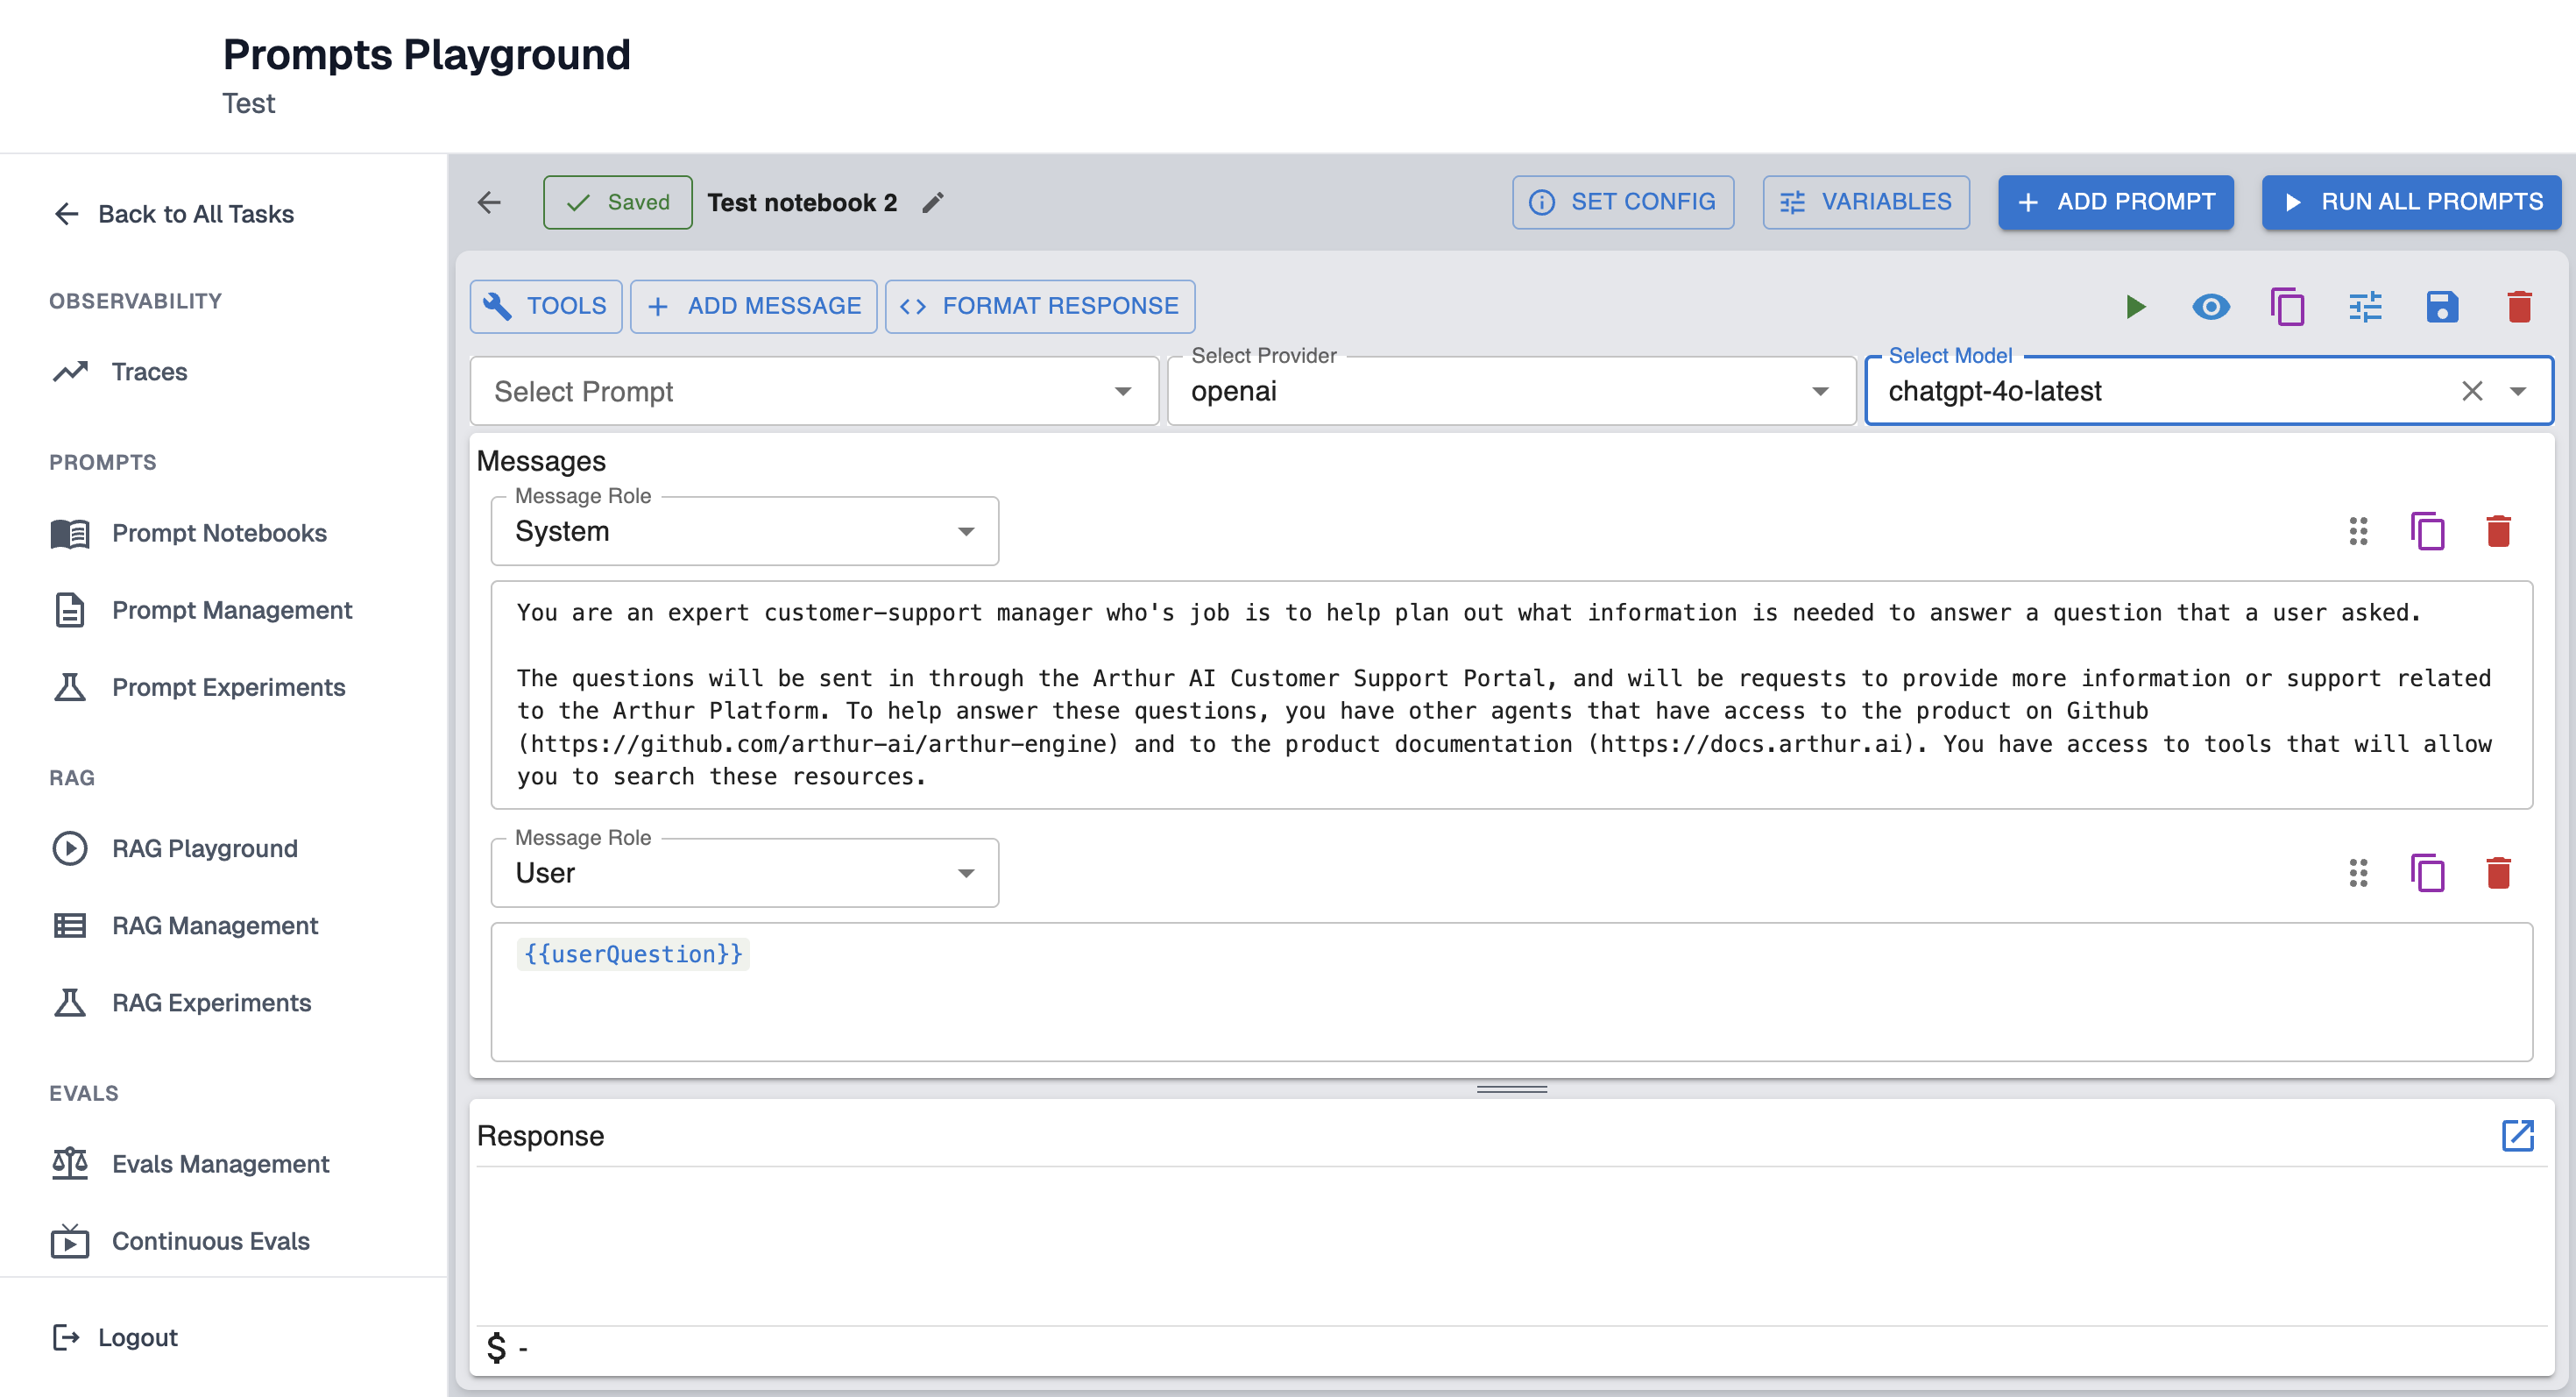
Test prompt with different message roles
Test prompts with different message roles - user, system, assistant, tool.
Experiment Mode - test prompts against datasets and evals
Notebooks can be used in two modes:
- Iteration Mode: no dataset/eval configuration; you run prompts with manually provided variables.
- Experiment Mode: dataset + evaluators are configured; “Run All Prompts” creates an experiment run across dataset rows and computes eval metrics.
Create an experiment configuration in a notebook
Open your notebook in the Prompt Playground. Click “Set Config” button.
Choose one of the options:
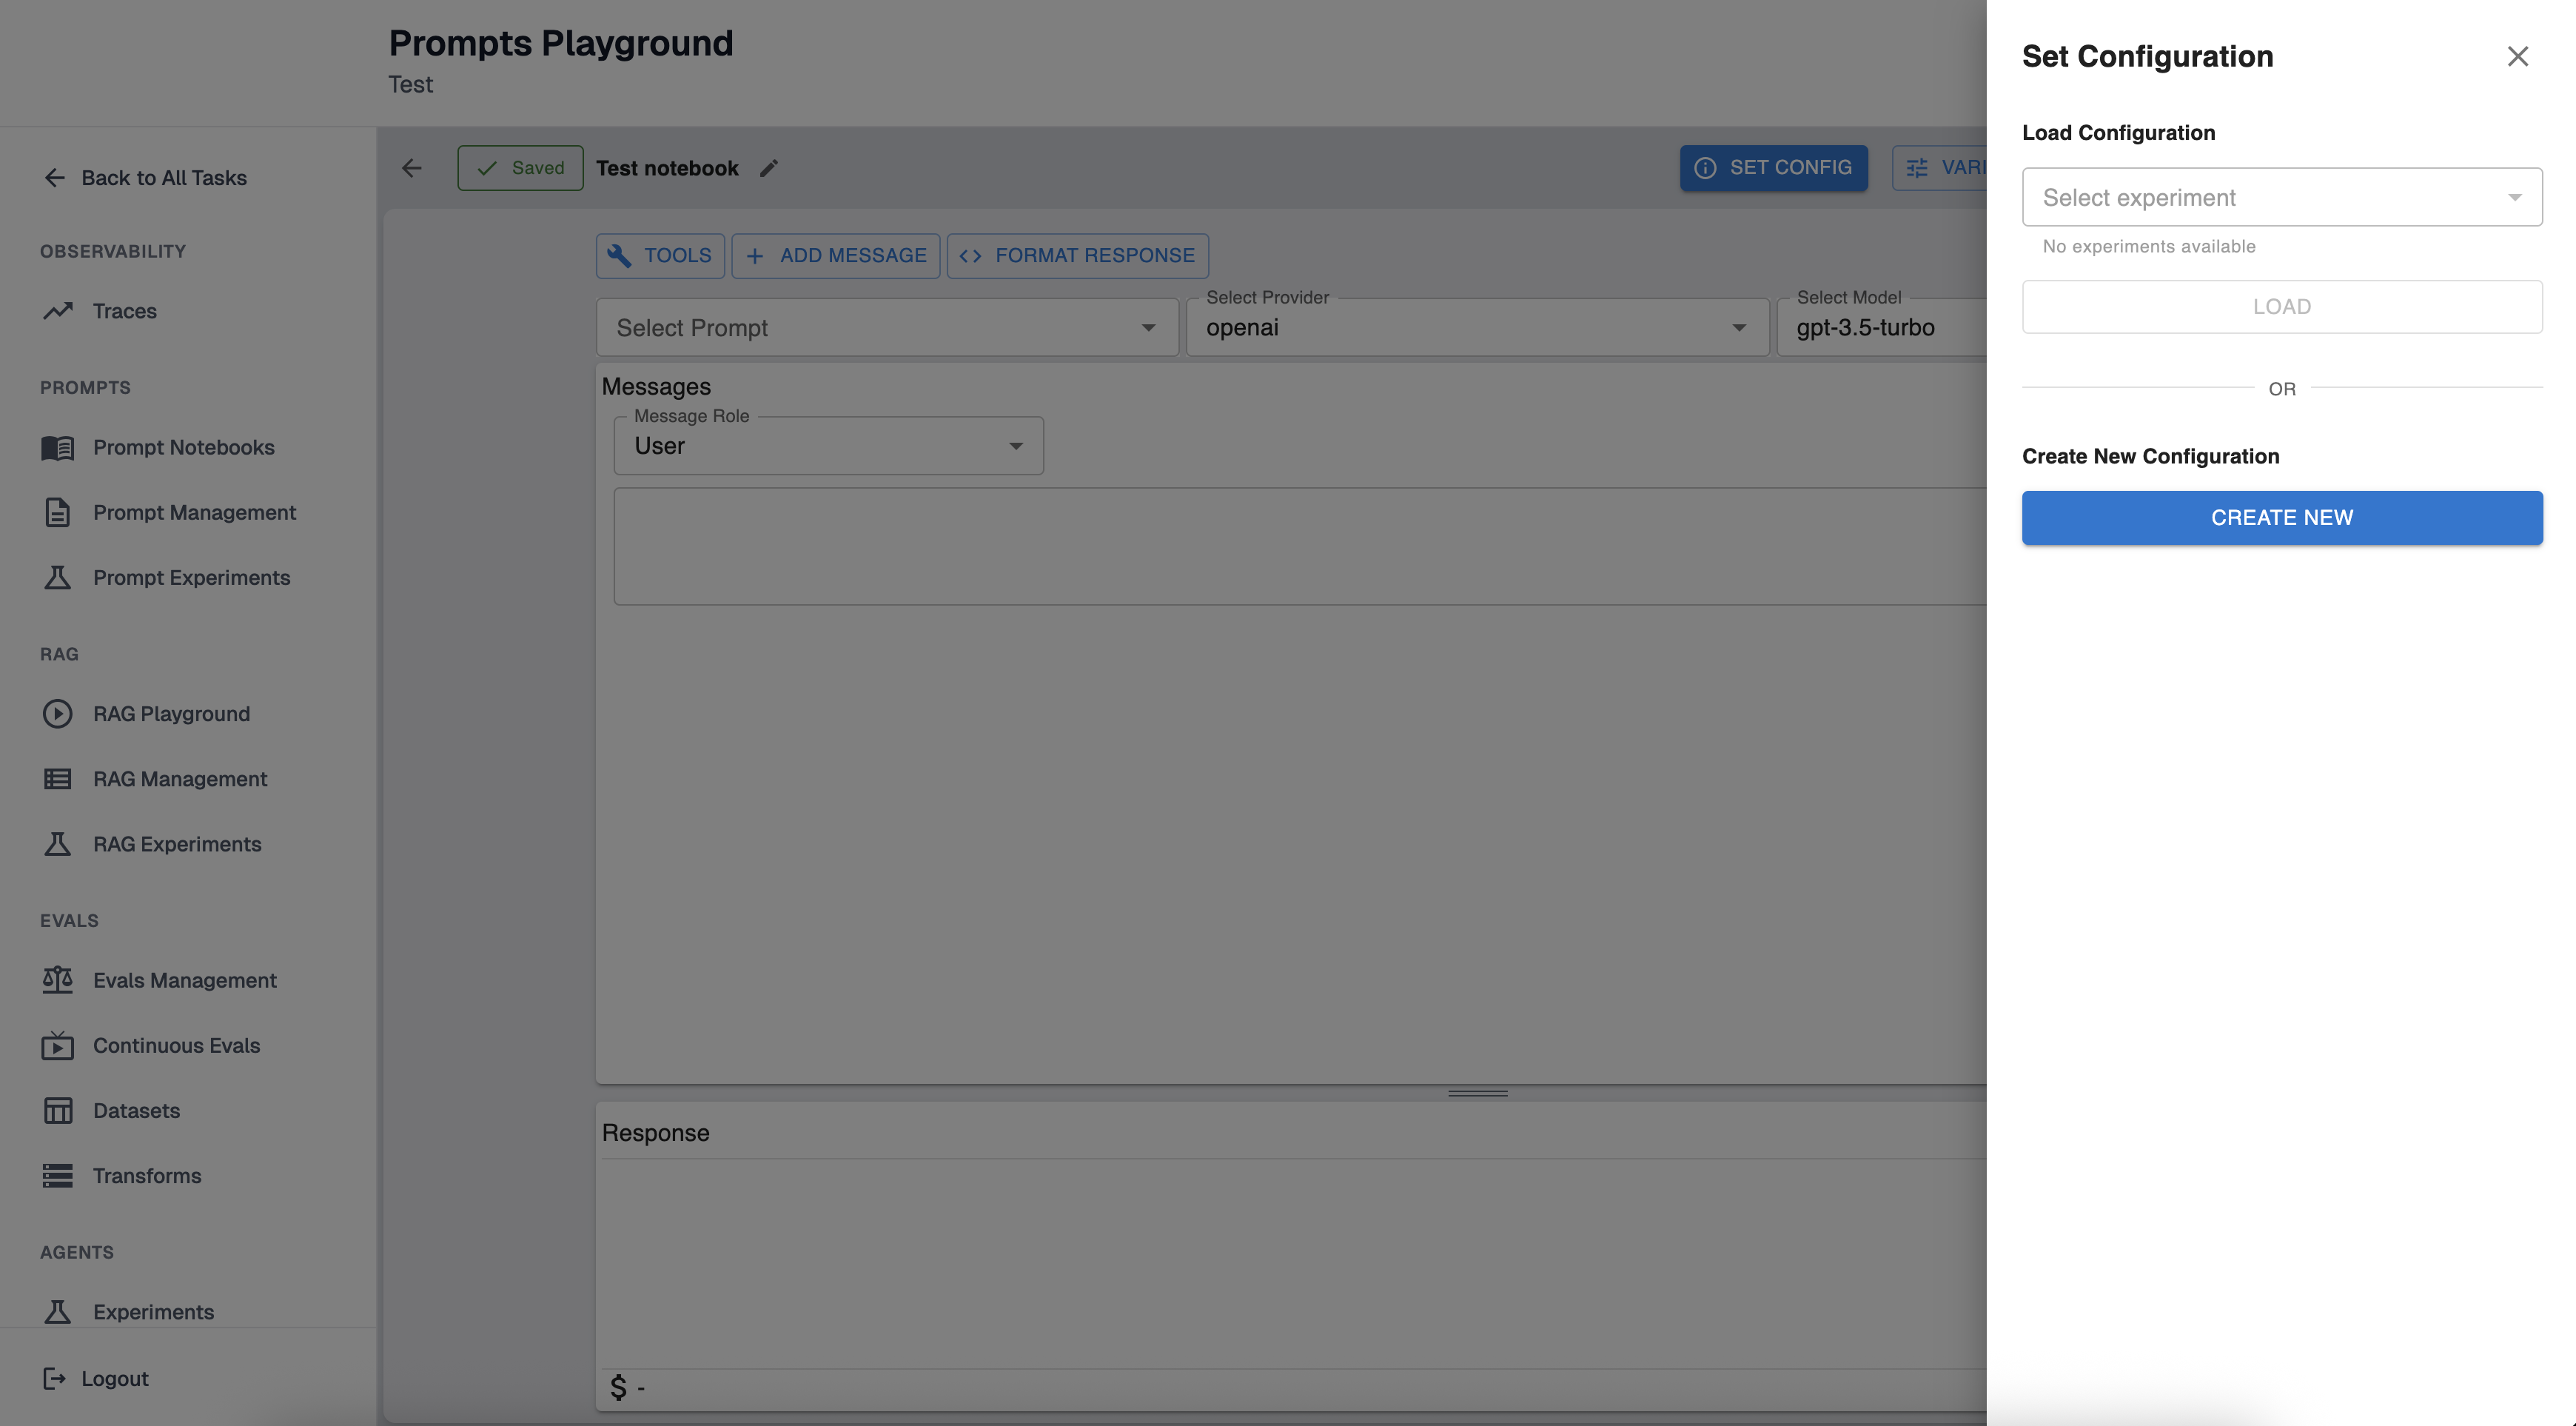
- Load an existing experiment configuration (to reuse dataset/evals/mappings).
- Create a new configuration (recommended).
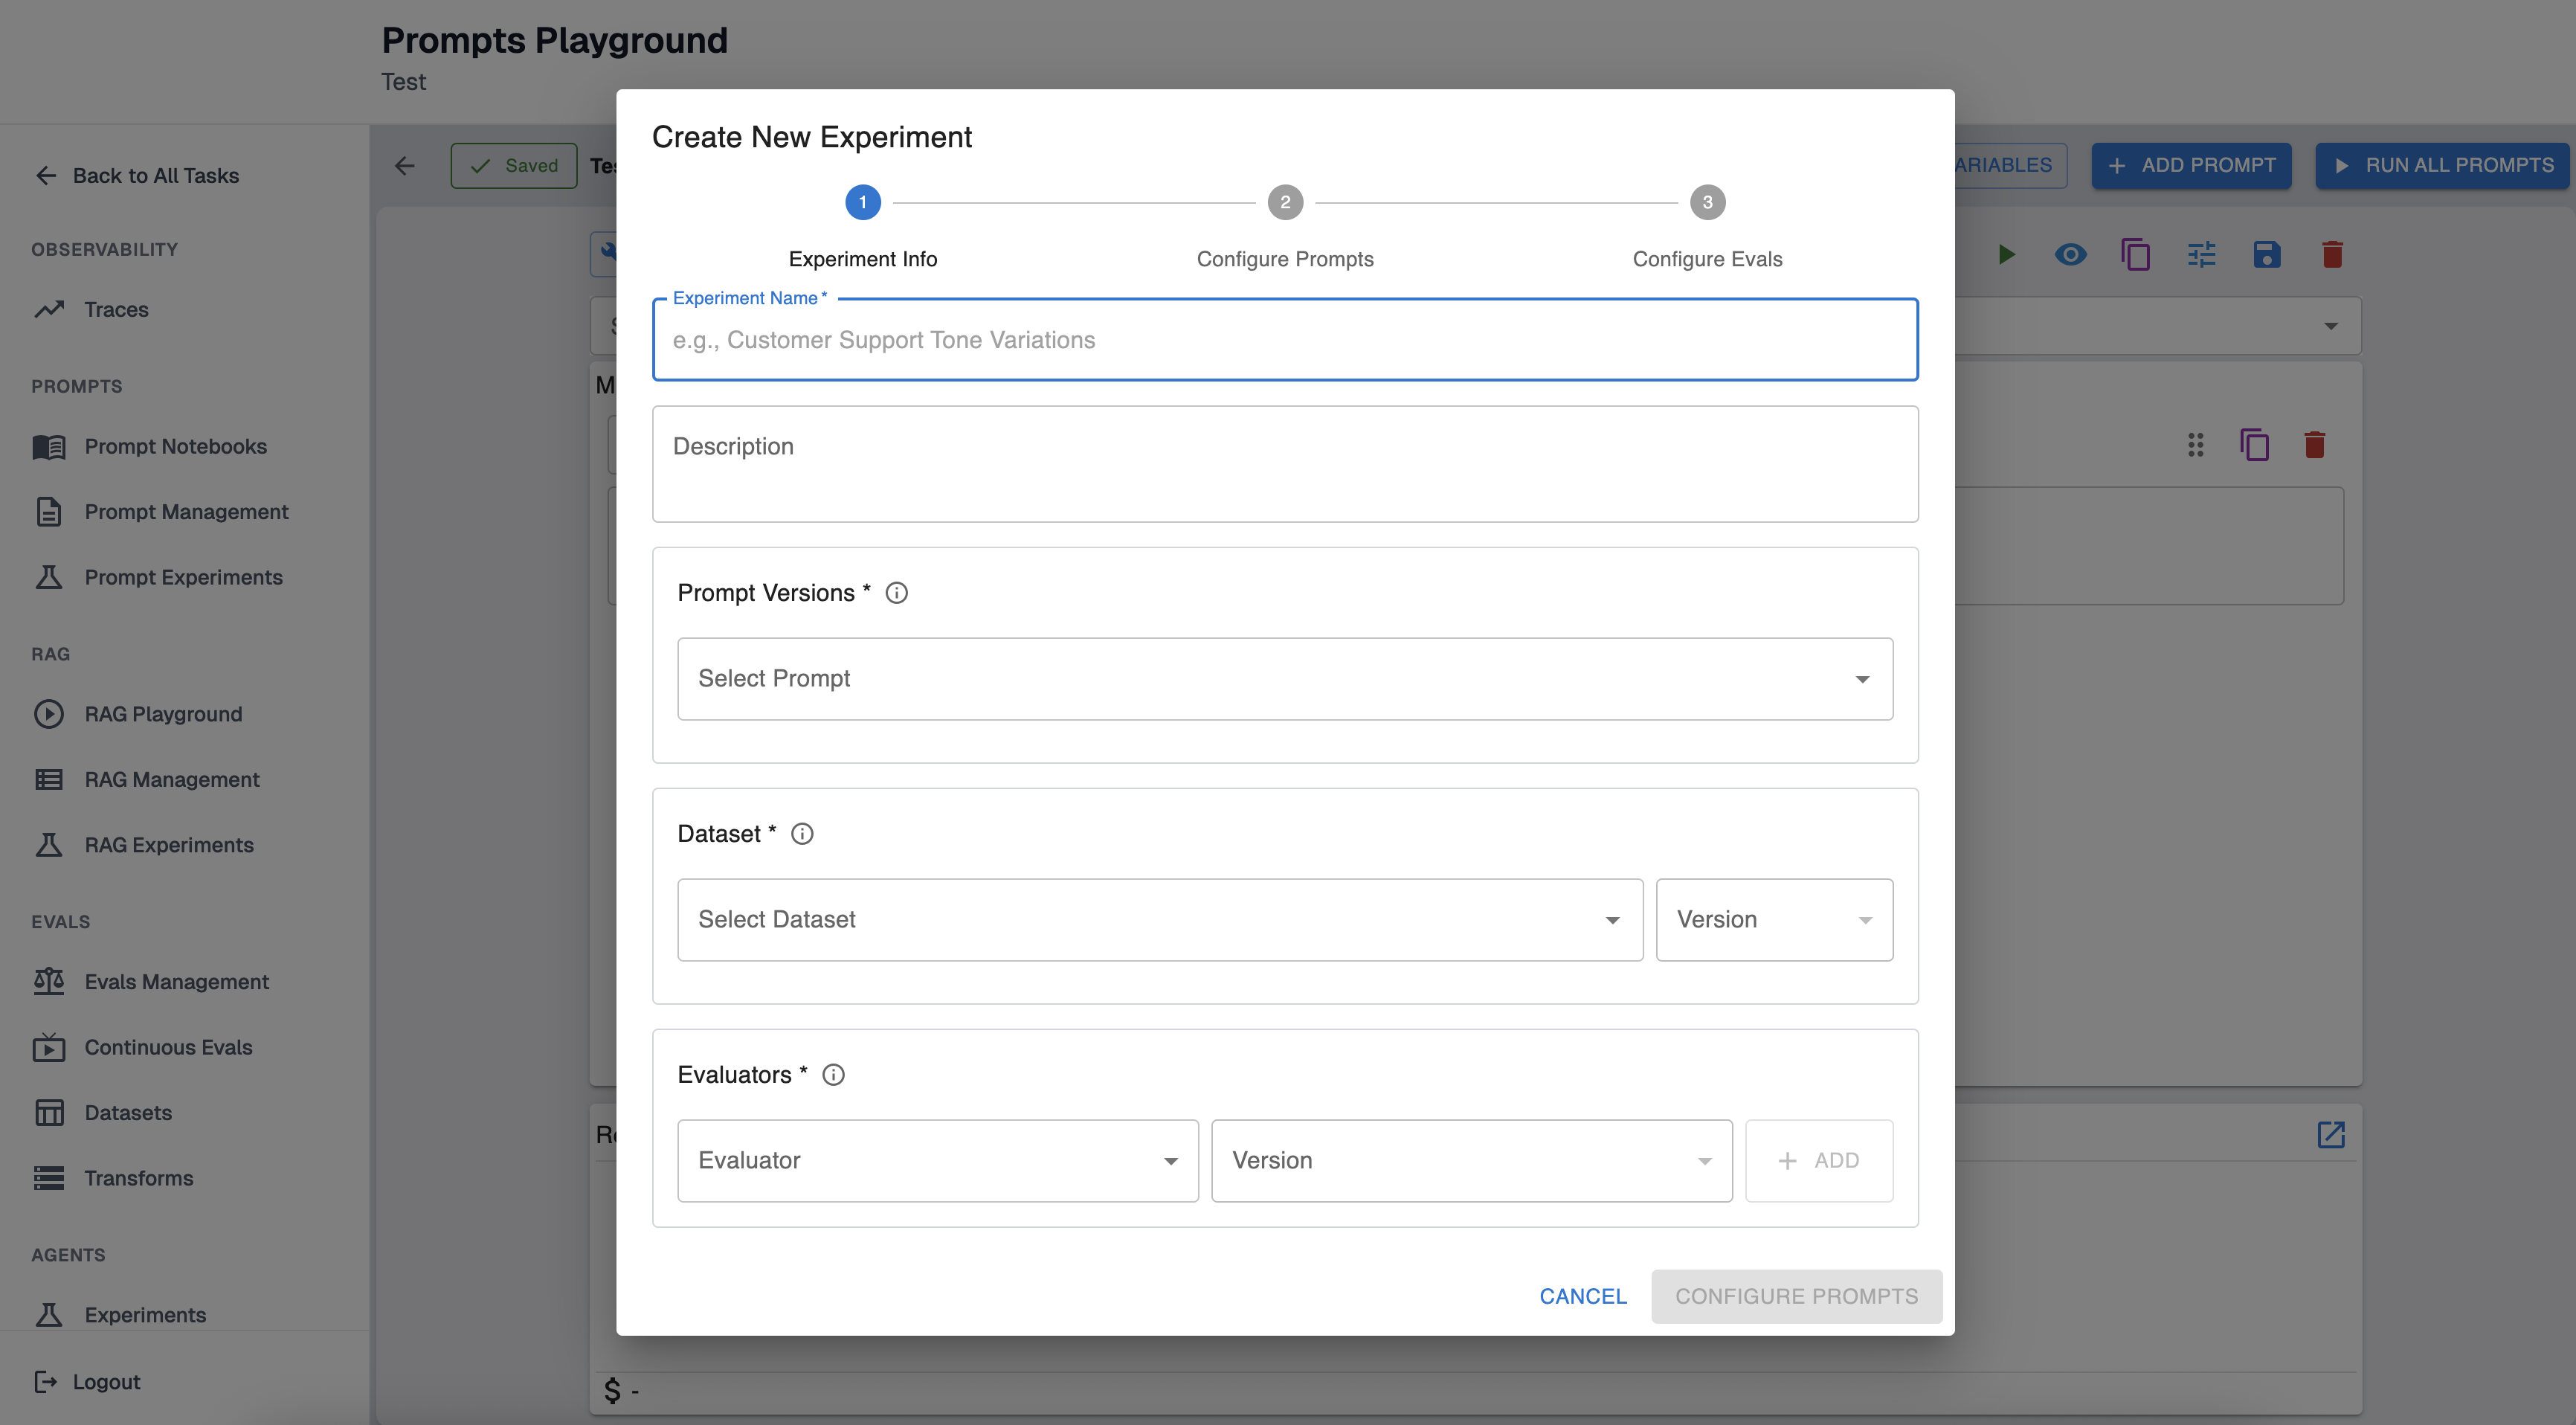
When creating a configuration you will select:
-
Dataset reference: the dataset and dataset version to run against.
-
Prompt versions: the saved prompt versions you want to compare (you can overwrite existing notebook prompts with these, or keep your existing prompts and only load the config).
-
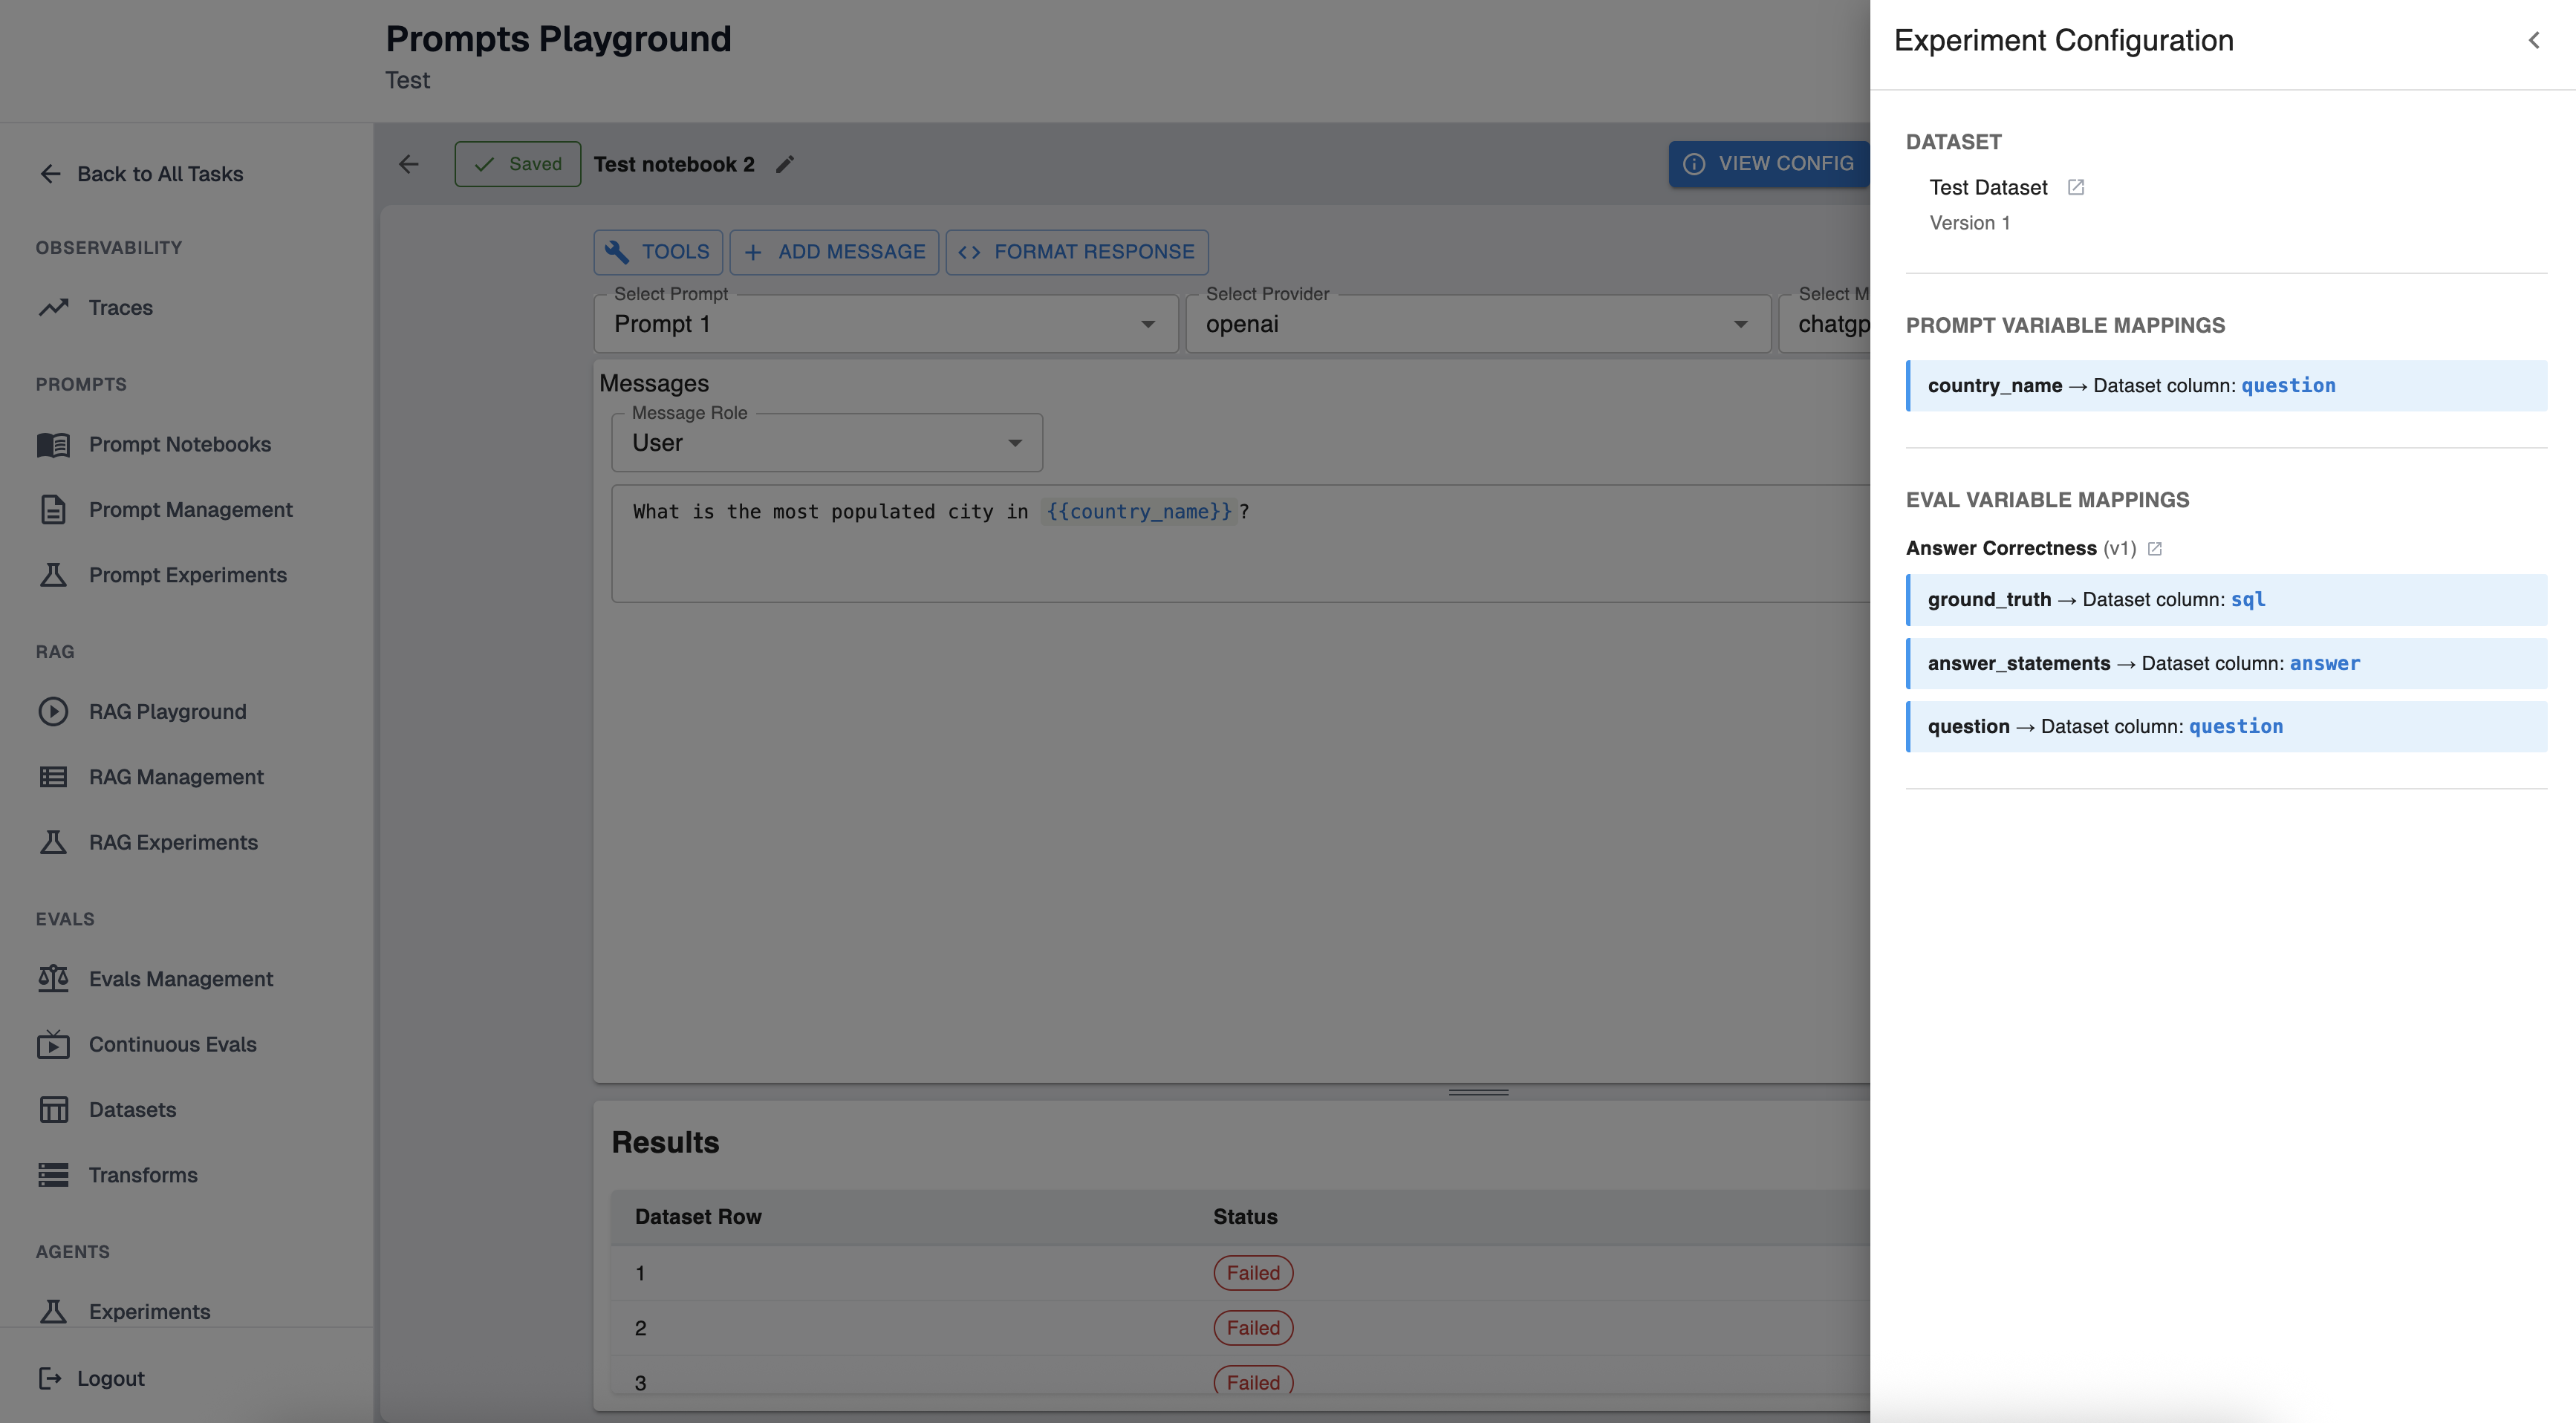
Prompt variable mapping: map each prompt variable (e.g.,
question) to a dataset column. Mapped variables will be pulled automatically from each dataset row during the experiment. -
Evaluators (evals): the evaluator versions to run for each prompt result.
-
Eval variable mapping: map evaluator variables to either:
- a dataset column,
- or an experiment output JSON path (advanced; used when an evaluator depends on model output fields).
-
Dataset row filter (optional): add one or more column=value constraints. Only dataset rows matching ALL conditions (AND) will be included
Run an experiment from a notebook
Once Config is set, click “Run All Prompts”.
This will:
- Create a new experiment run using your current notebook prompts/config
- Execute each prompt across the filtered dataset rows
- Compute evaluator results
- Track total cost and completion status
View experiment history from a notebook
When a notebook is in Experiment Mode, “View Config” includes “Experiment History” with:
- Status (Queued/Running/Completed/Failed)
- Completed rows / total rows
- Failed rows
- Total cost (when available)
- Summary performance per prompt + evaluator (pass/total and percent)
Open an experiment in a notebook (from Prompt Experiments)
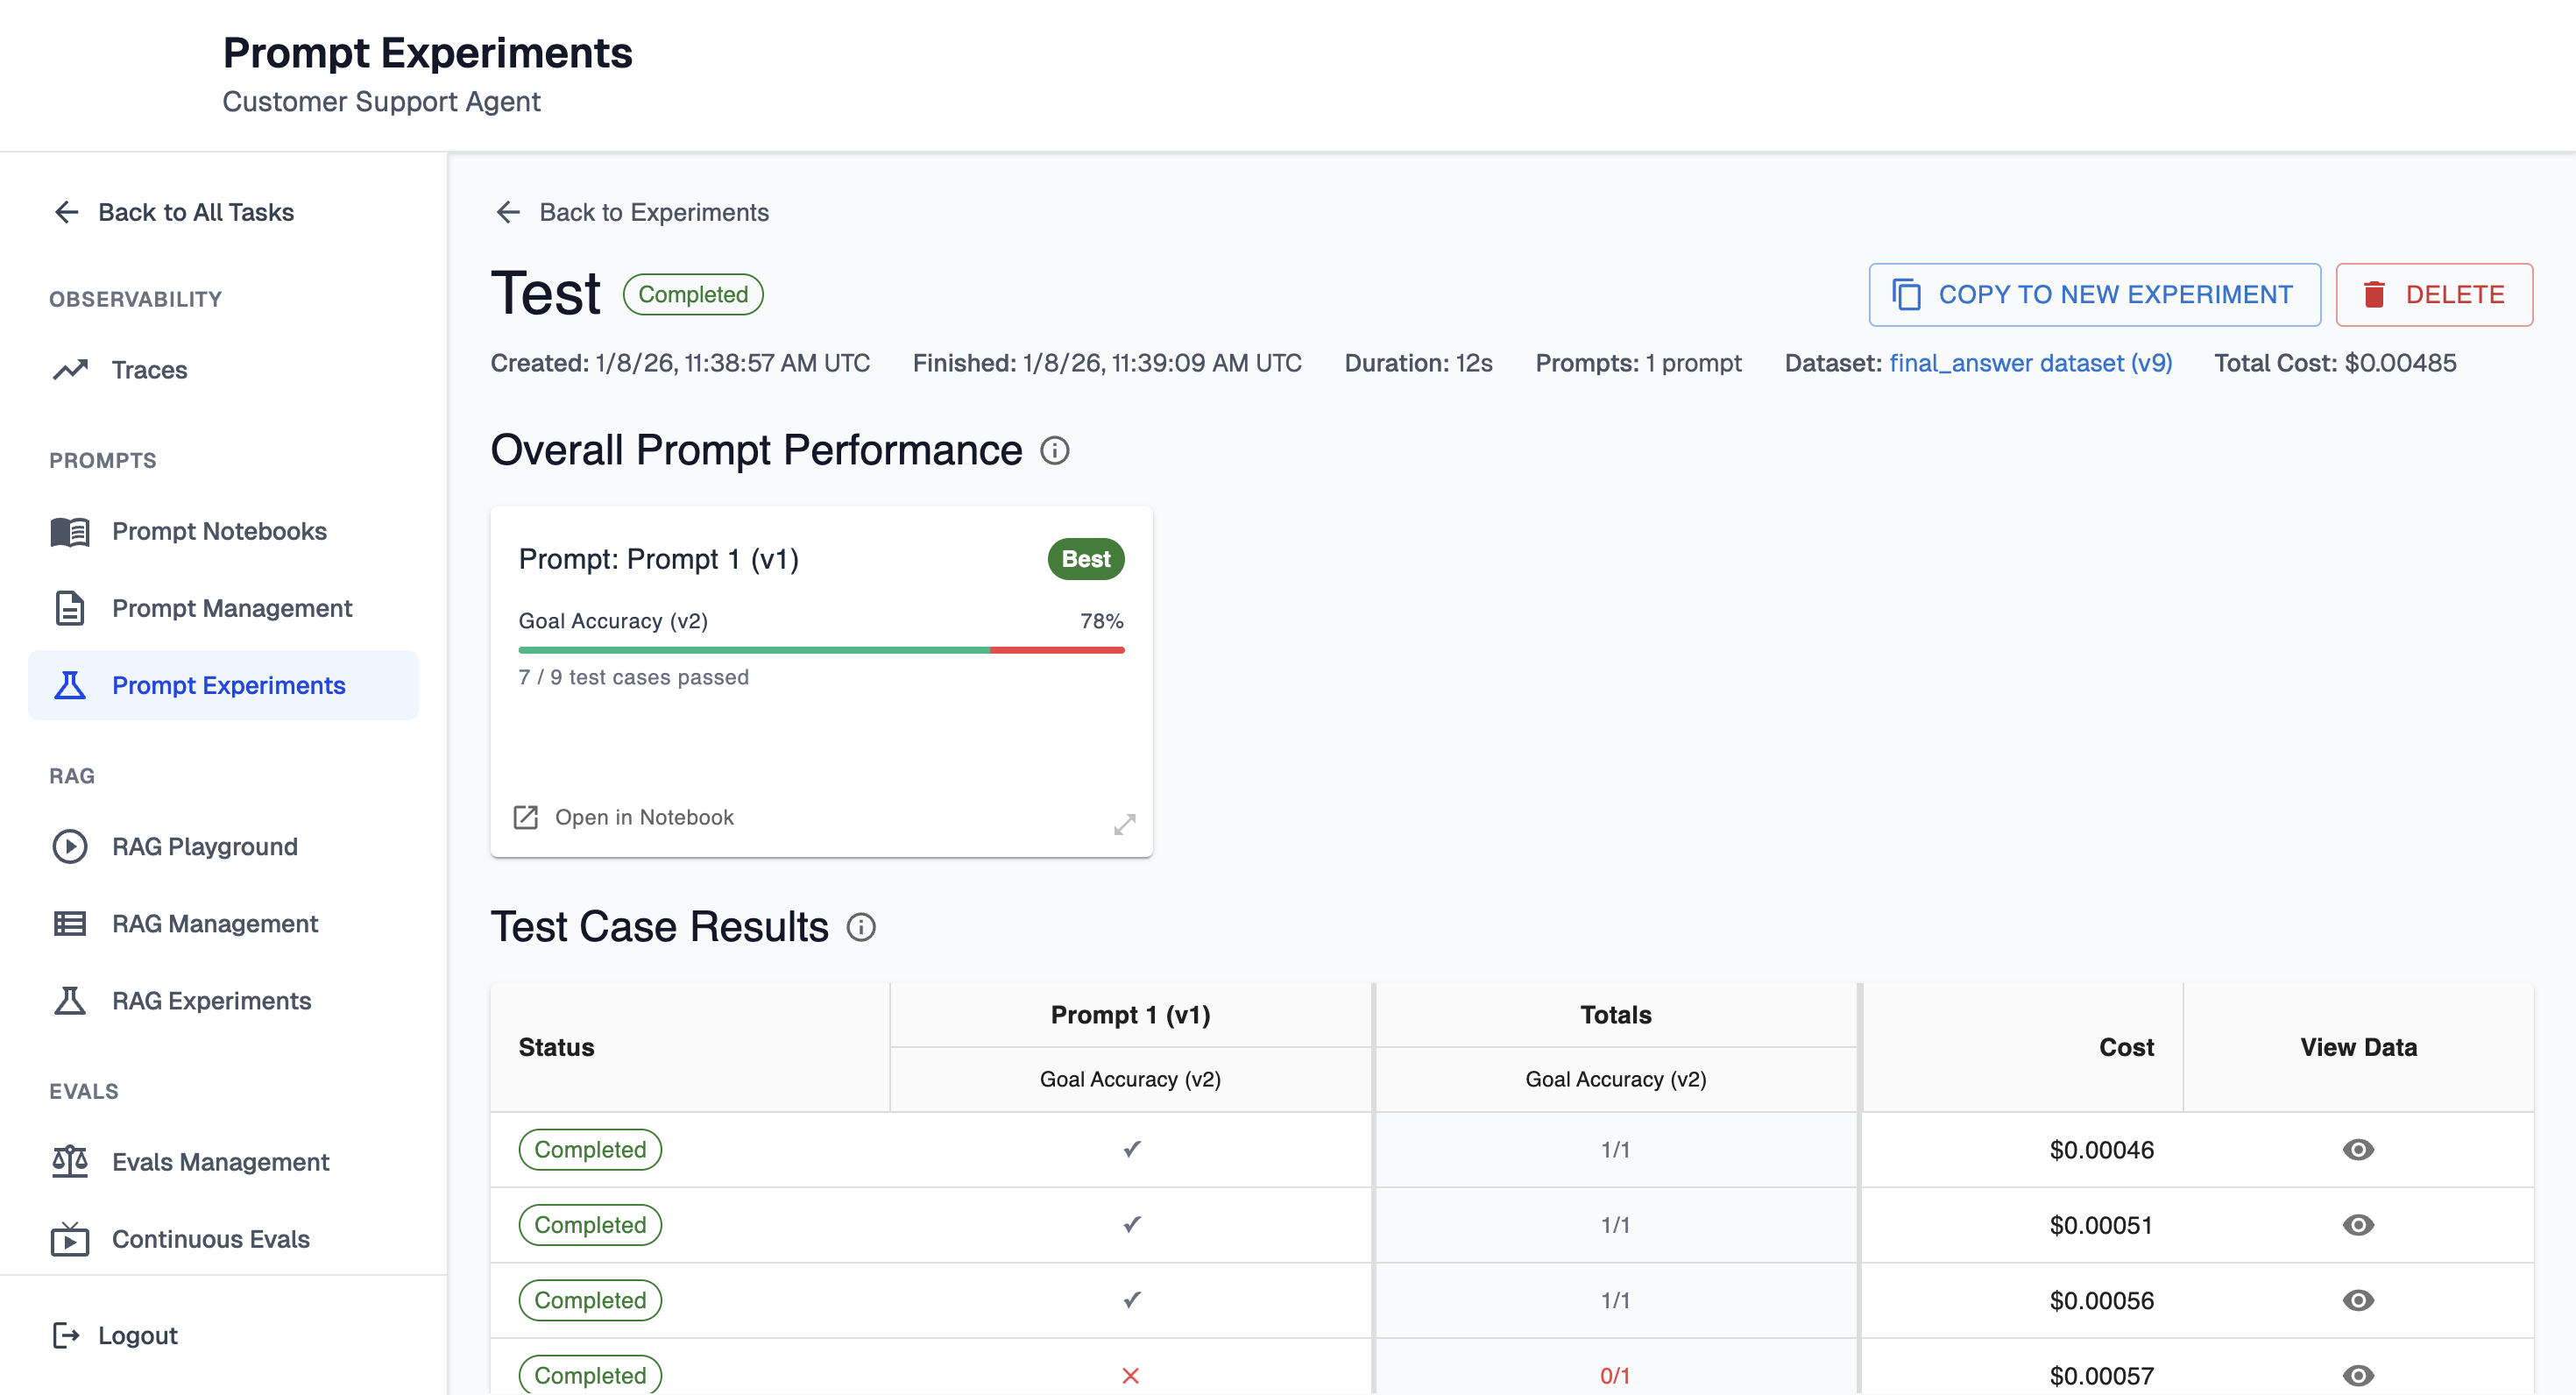
You can also start from a completed experiment. To do that navigate to Prompt Experiments and open an experiment detail page.
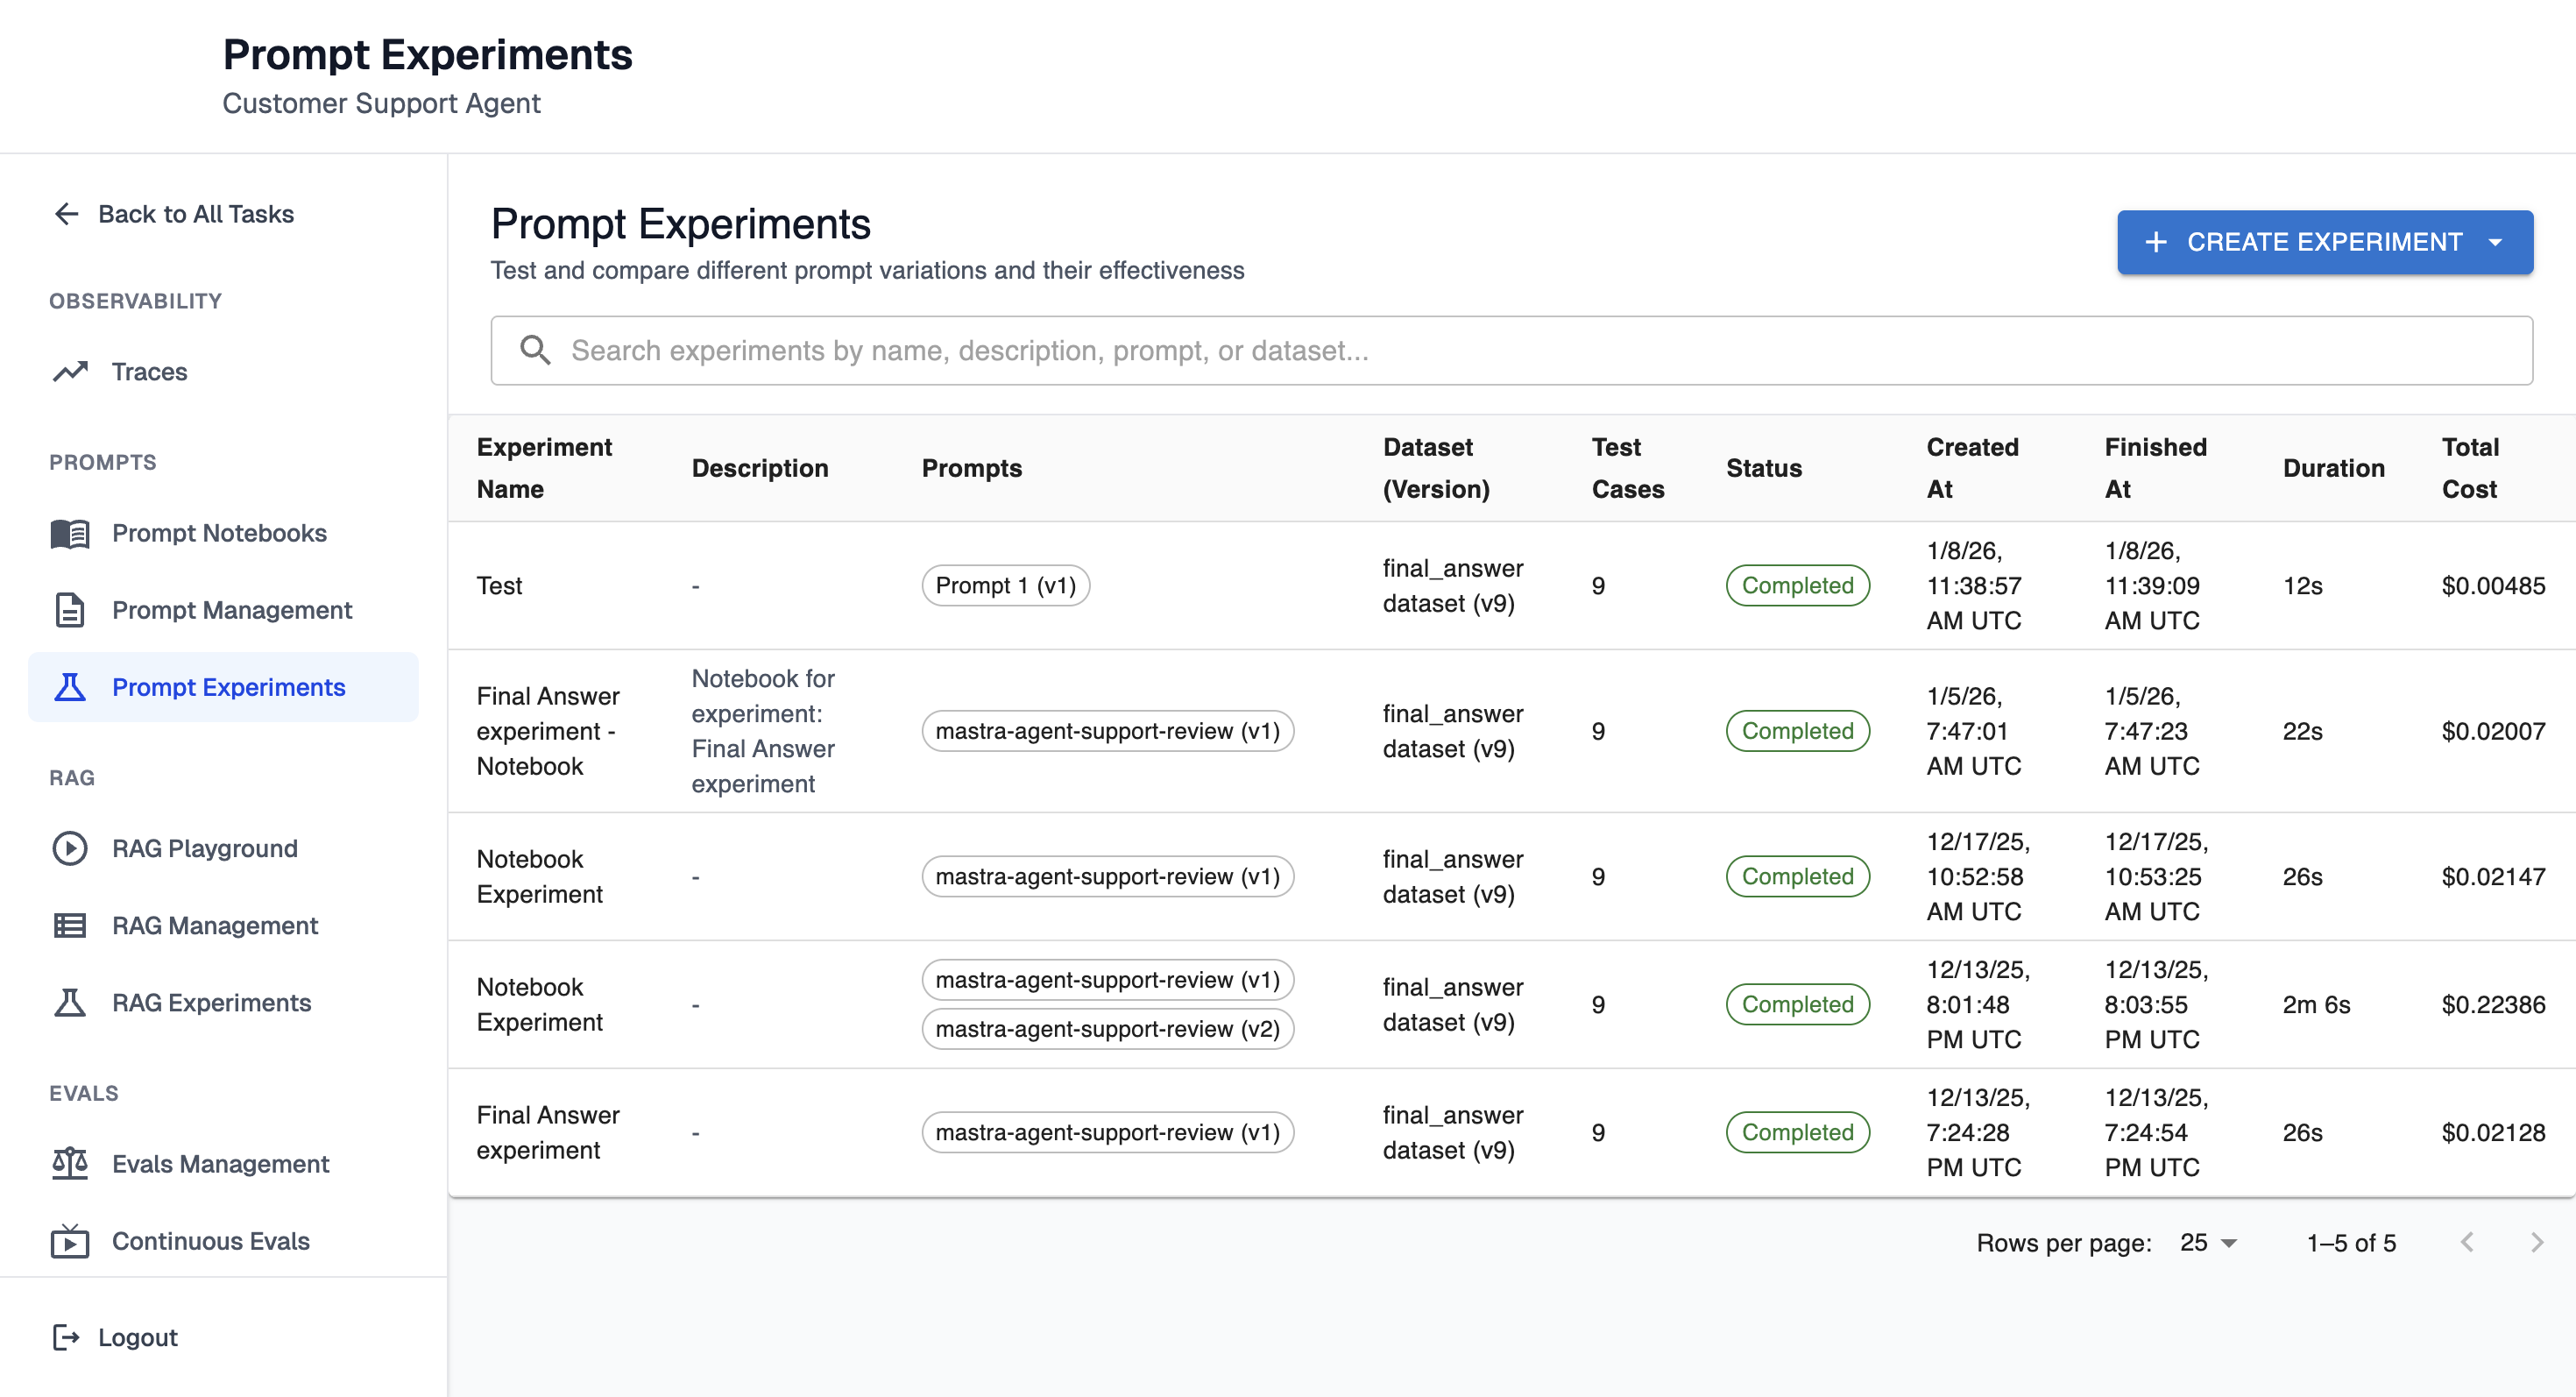
In “Overall Prompt Performance”, click “Open in Notebook” on a prompt tile.
This will create a notebook (if needed), attach it to the experiment, save the experiment configuration into notebook state, and open the notebook in Prompt Playground for iteration and re-running.
Delete notebook behavior
Deleting a notebook removes the notebook, but experiments created from it are preserved (they will no longer be linked to the deleted notebook).
Test prompts with different tools
Tools are optional function/tool schemas that can be provided to the model. When tools are enabled, the model may return tool calls (instead of, or in addition to, plain text). This is useful for workflows like “extract entities”, “call search”, “fetch user”, etc.
Important notes: Tools in Prompt Playground do not execute automatically. The Playground sends tool definitions to the model and shows any tool calls returned. Tool calls returned by the model will appear in the Response panel under “Tool Calls”.
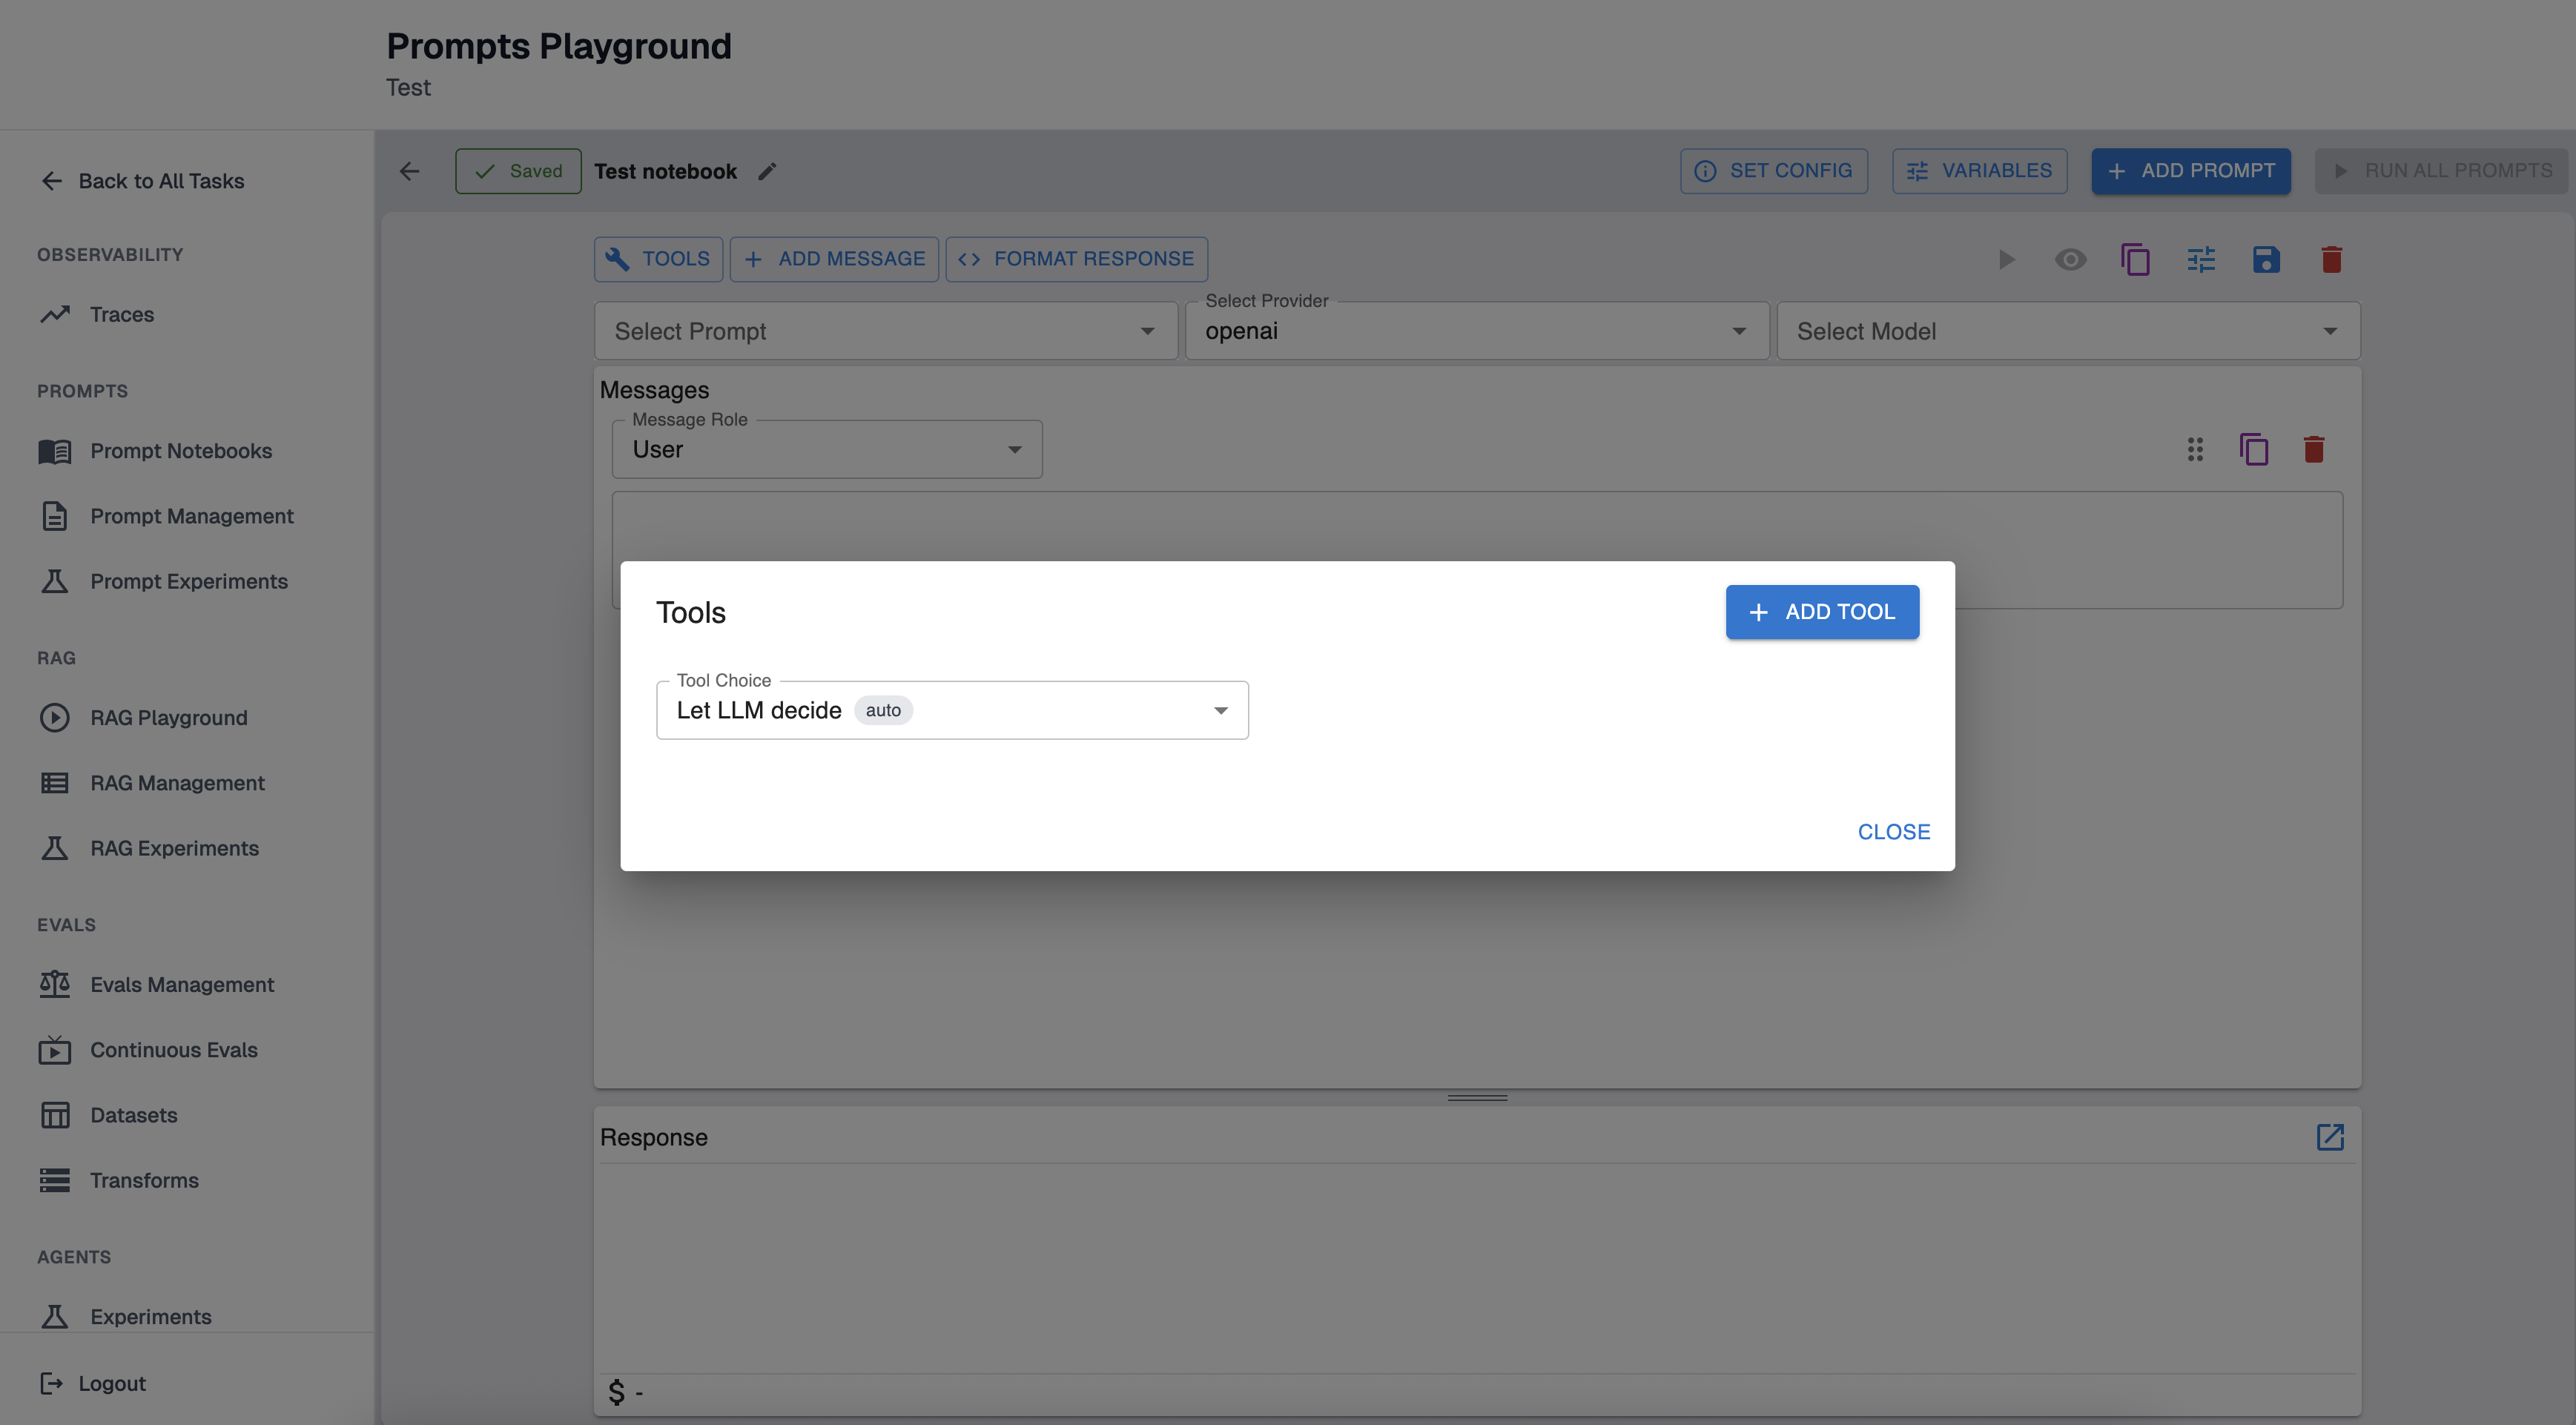
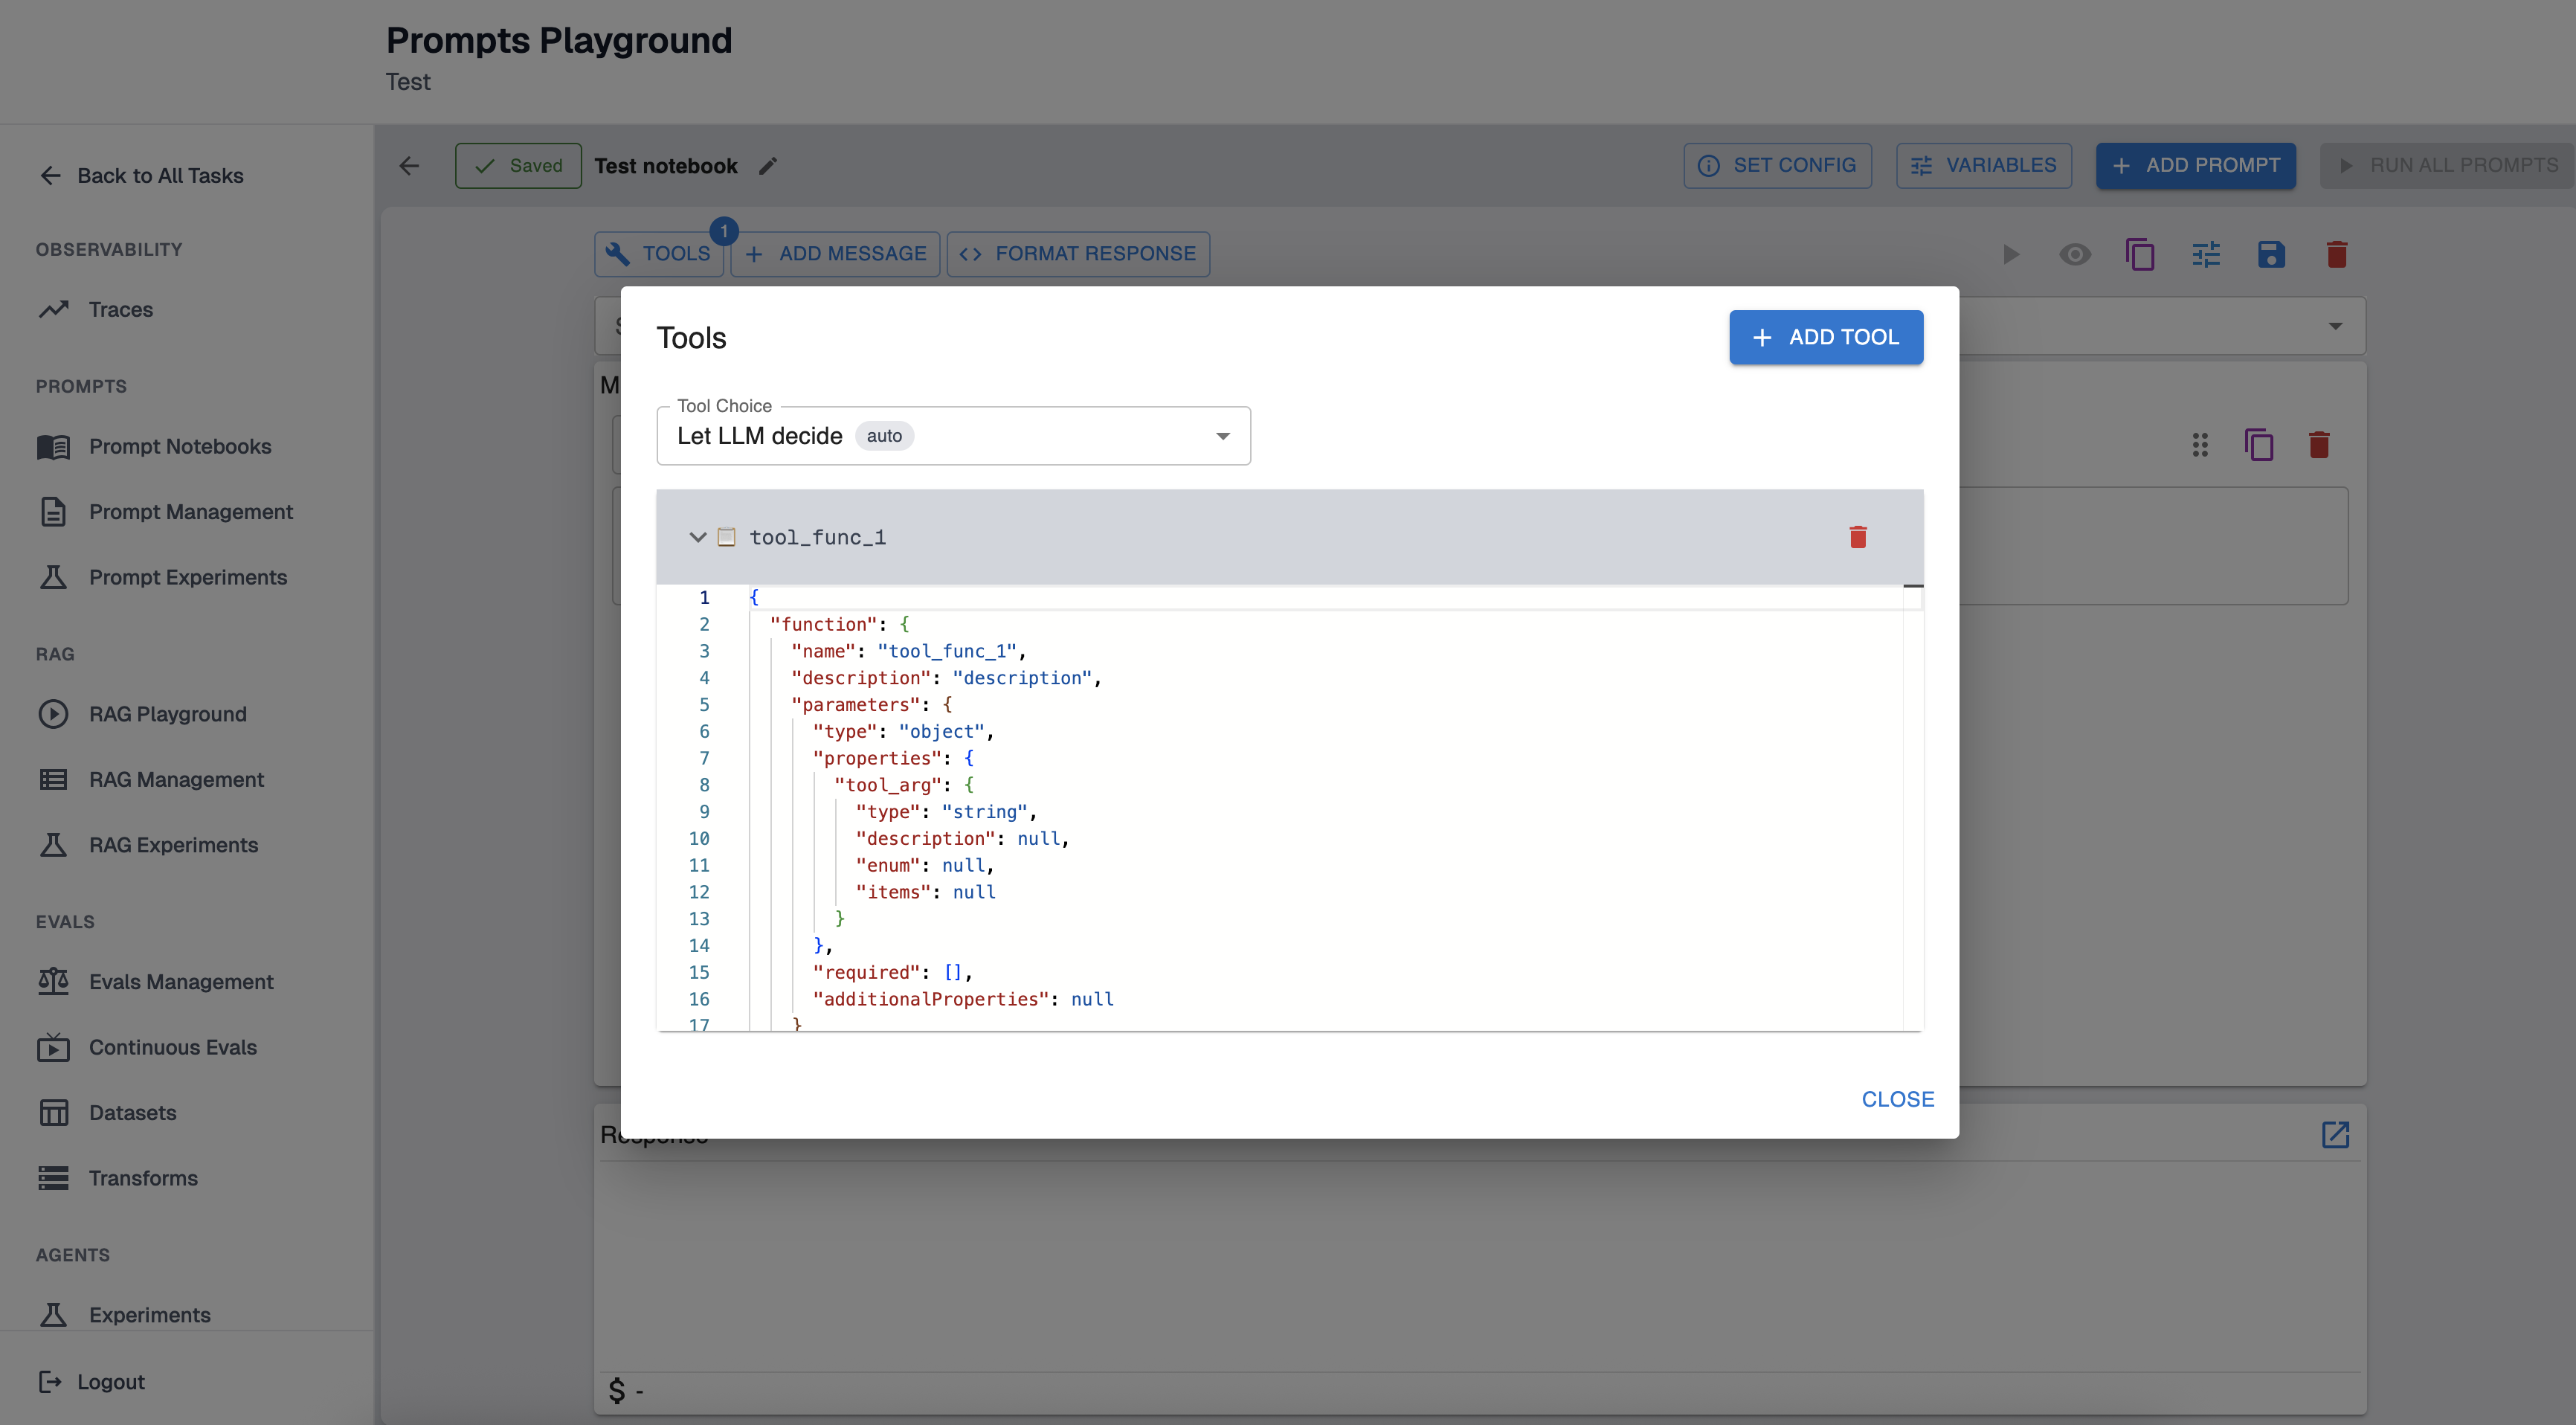
Add tools to a prompt
Click the "Tools" button on the prompt.
It will open configuration form. Click “Add Tool” button.
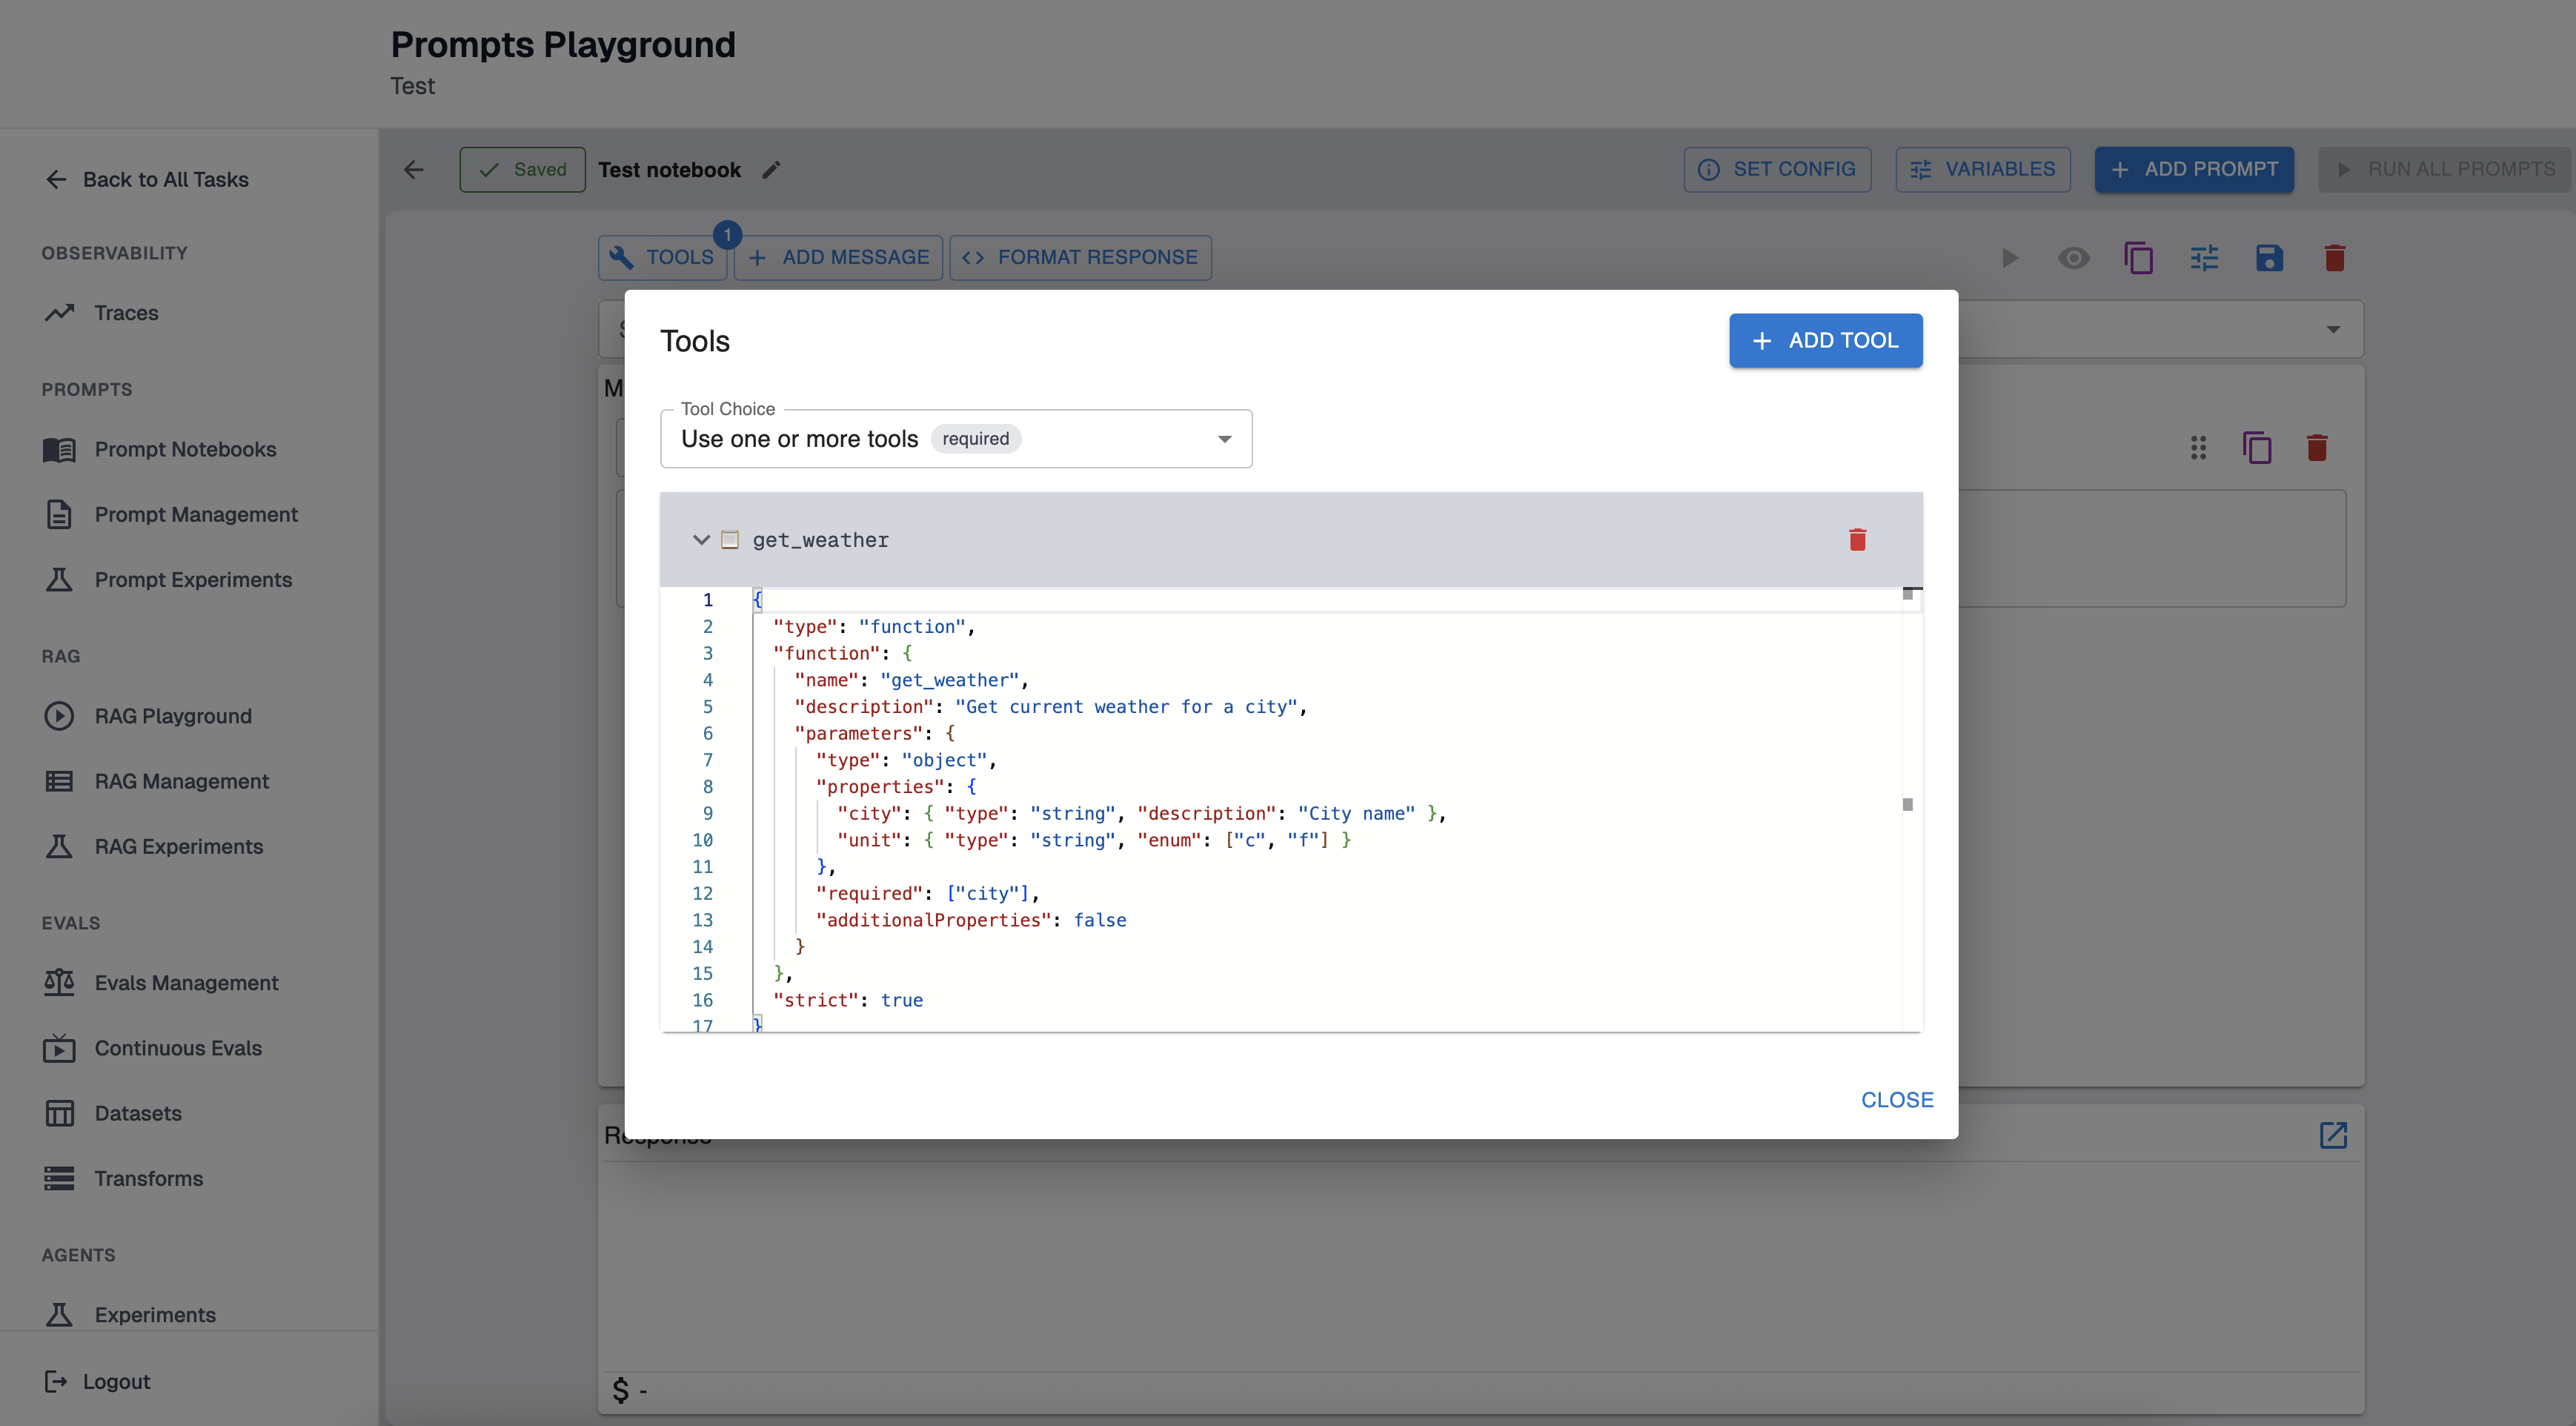
Define your tool in JSON. Tools are provided in function-calling format (JSON Schema for parameters). A typical tool looks like:
{
  "function": {
    "name": "get_weather",
    "description": "Get current weather for a city",
    "parameters": {
      "type": "object",
      "properties": {
        "city": {
          "type": "string",
          "description": "City name"
        },
        "unit": {
          "type": "string",
          "enum": [
            "c",
            "f"
          ]
        }
      },
      "required": [
        "city"
      ],
      "additionalProperties": false
    }
  },
  "strict": true,
  "type": "function"
}
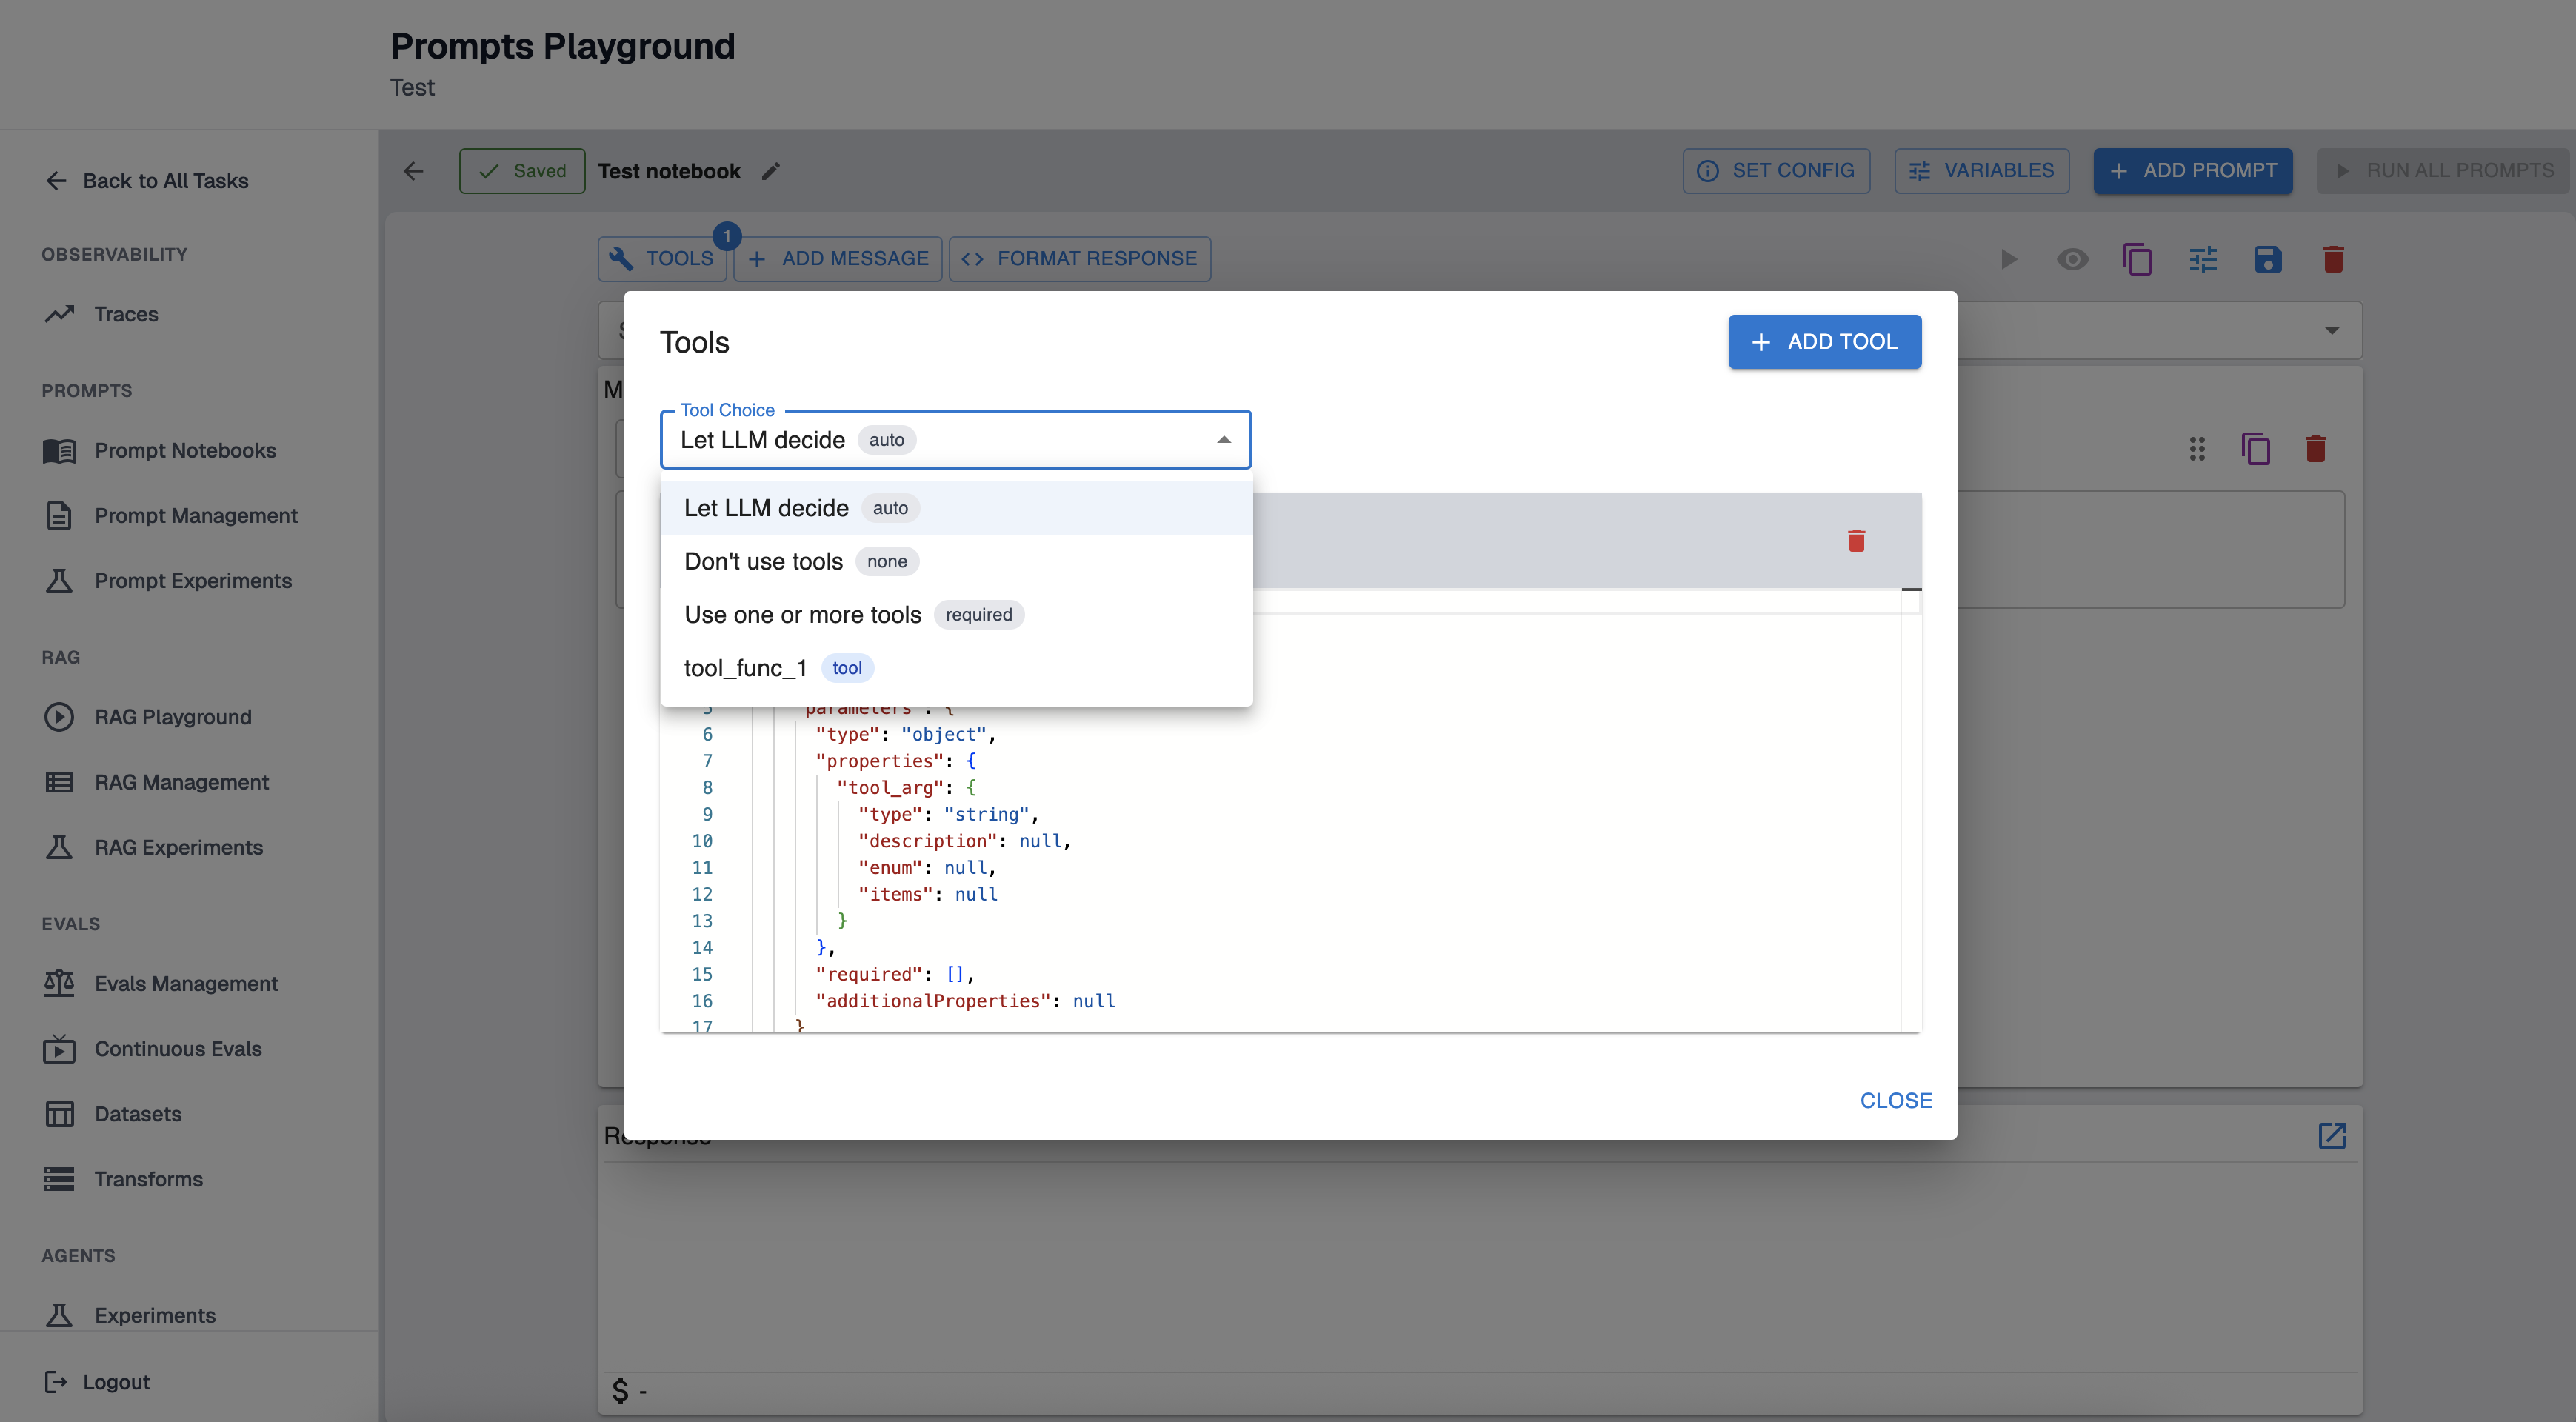
Tool Choice (how the model uses tools)
In the Tools dialog, set “Tool Choice” to control tool usage:
-
Auto: Let the model decide whether to call tools.
-
None: Do not allow tool calls.
-
Required: Force the model to call one or more tools.
-
A specific tool: Force the model to call that tool.
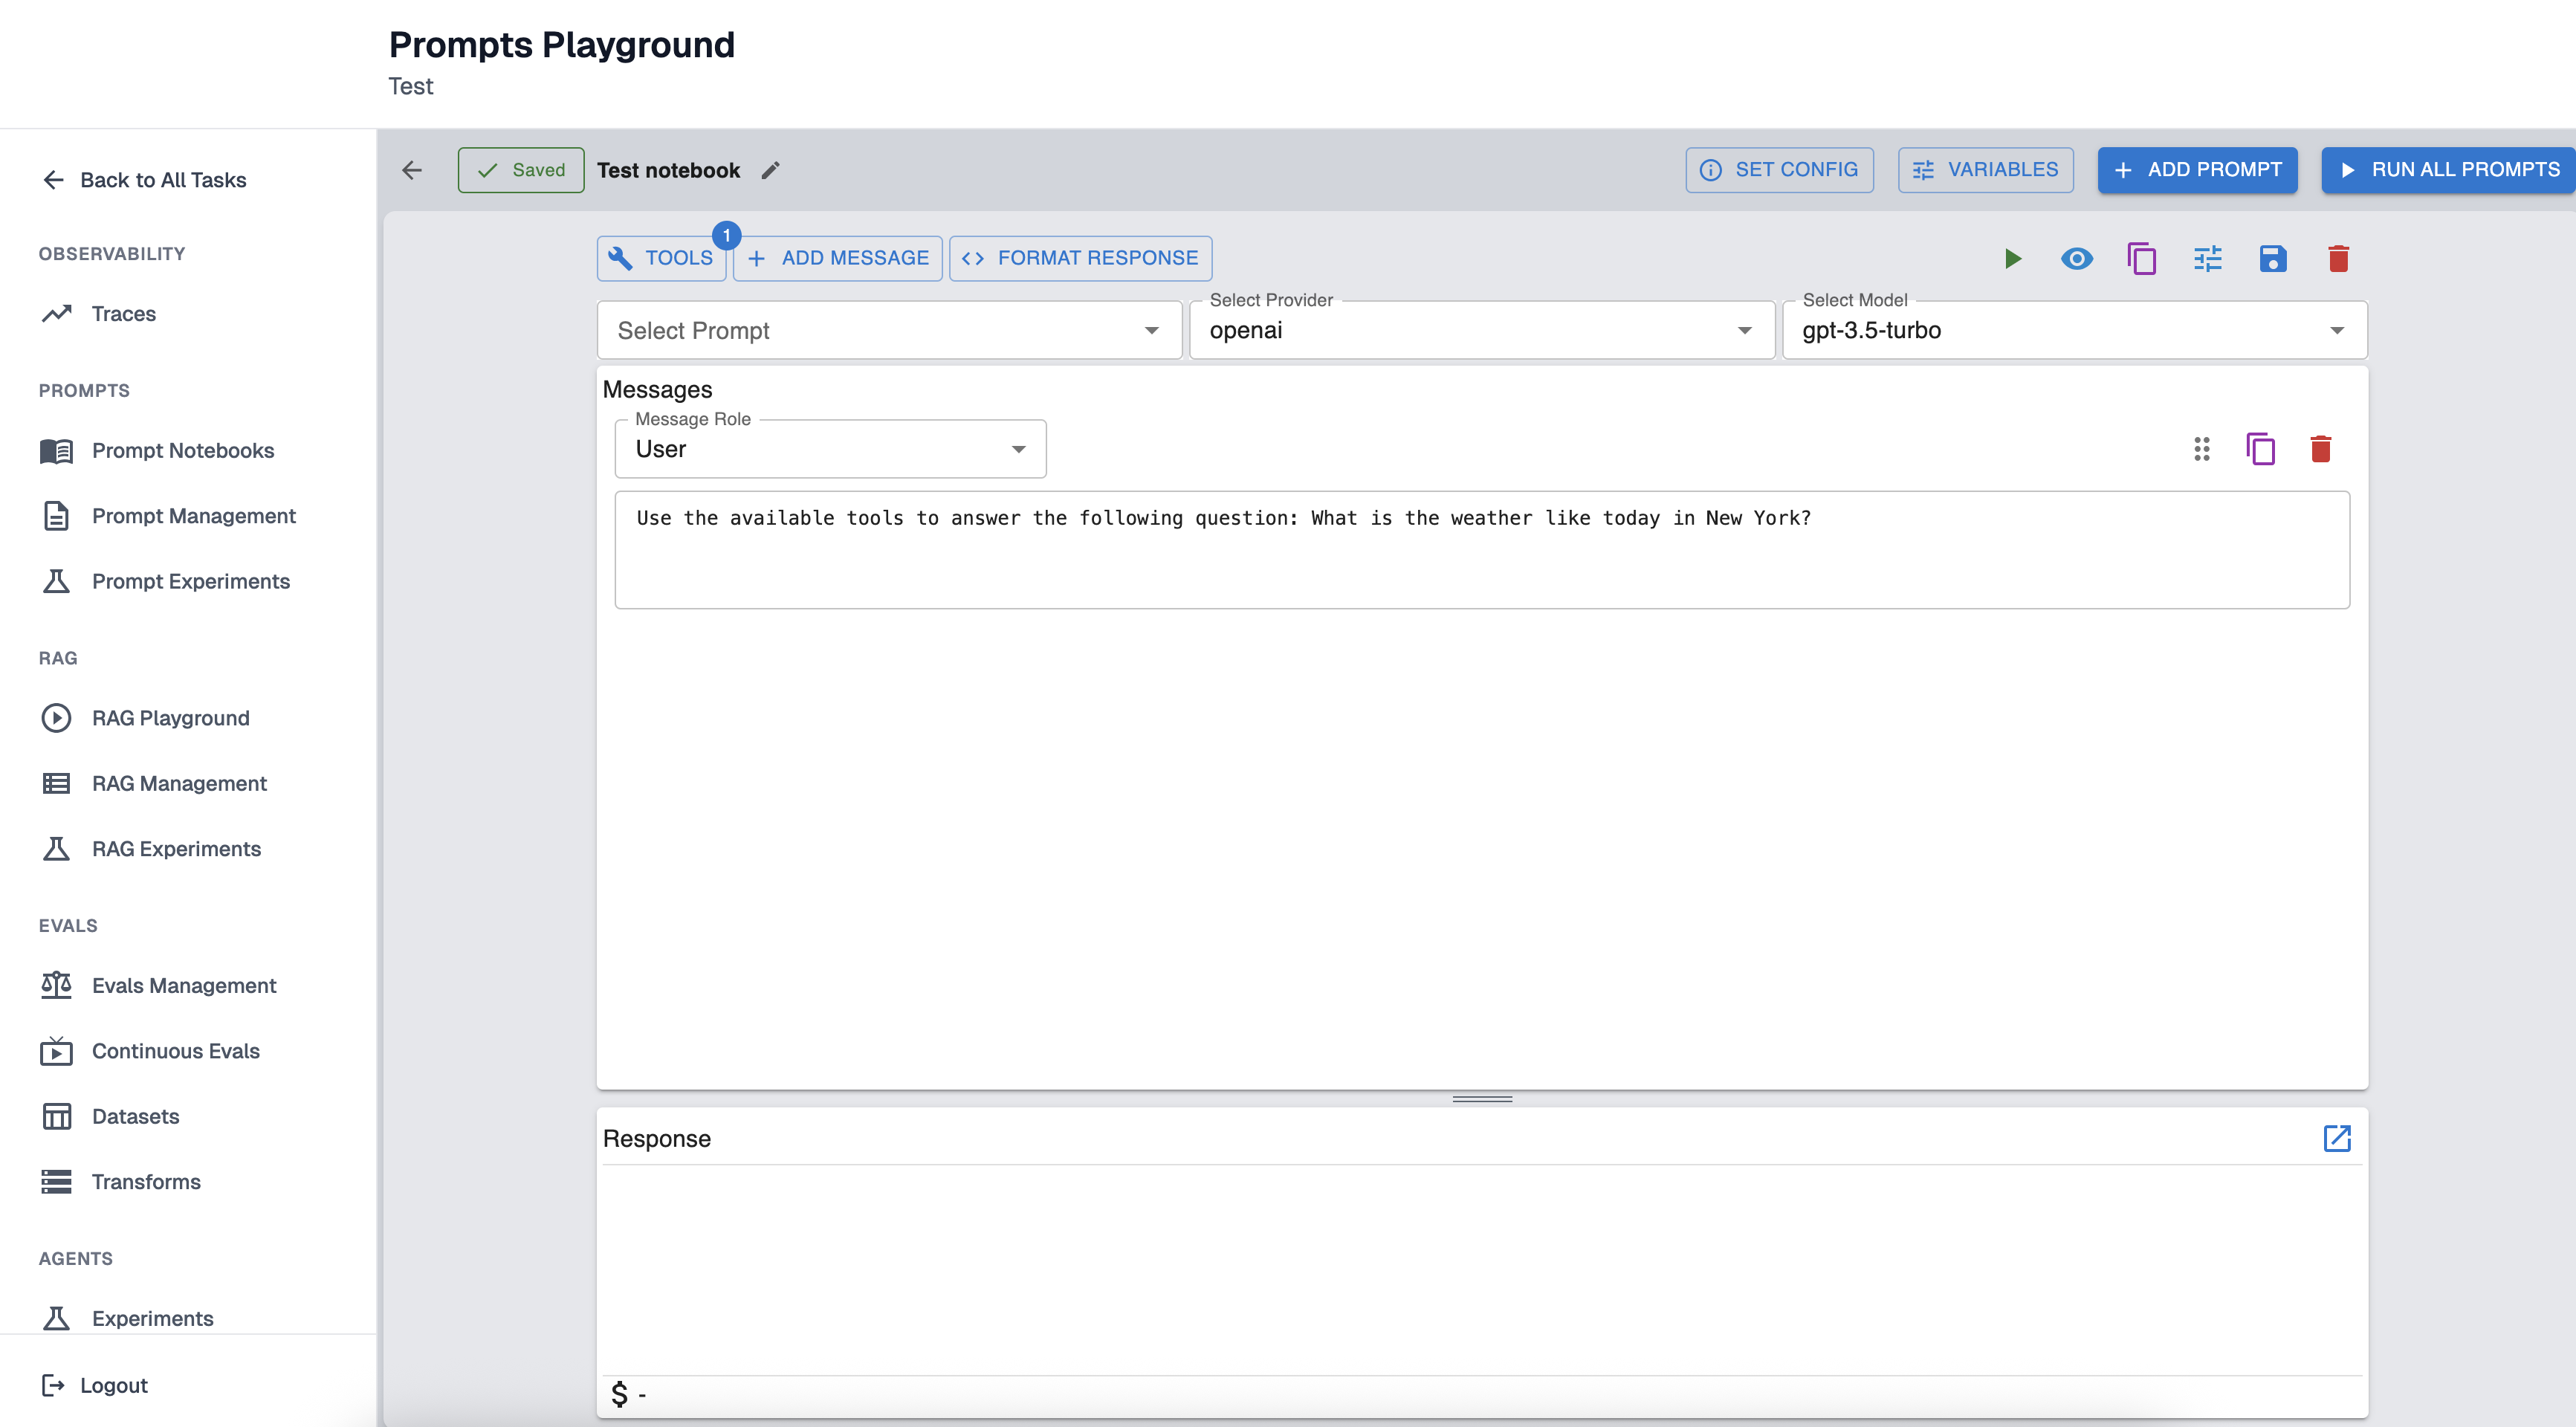
How to test a tool-call workflow end-to-end
-
Add tools and set Tool Choice to “auto” or “required”.
-
Add a User message that encourages tool usage (e.g., “Use the available tools to answer…”).
-
Run the prompt.
-
If the model returns tool calls, copy the tool call arguments and run the tool externally (manually).
-
Add a new message with the role “Tool” containing the tool output, then run again so the model can incorporate the result.
Updated about 12 hours ago