Data Connectors
Arthur's Data Connectors let you point Arthur at your existing data warehouse or object storage — BigQuery, AWS S3, or Google Cloud Storage — so Arthur can read inference data, ground truth labels, and reference datasets directly from where they already live. You never need to migrate or duplicate data into Arthur's own storage.
How do I connect Arthur to an external data source — BigQuery, S3, GCS, Snowflake, Databricks, or ODBC — to monitor models whose data lives outside Arthur?
Overview
Most production ML teams store inference logs, ground truth labels, and feature data in systems they already operate — a Snowflake warehouse, a BigQuery dataset, an S3 bucket, or a Databricks Delta Lake table. Moving that data into a separate observability platform creates pipeline complexity, storage costs, and latency.
Arthur connectors solve this by acting as a bridge: you grant Arthur read access to your existing data store, configure which tables or paths contain your model's data, and Arthur handles the rest. Metrics are computed on a schedule against your live data without requiring any ETL.
This page covers every supported connector type, the exact credentials and permissions you need to provision, and the configuration fields Arthur expects.
How Connectors Work
flowchart LR
    A["External Data Store"] -->|credentials| B["Connector (per project)"]
    B --> C[Dataset]
    C -->|Scheduled read| D[Arthur]
    D --> E[Metrics & Drift Detection]
    E --> F[Alerts & Dashboards]
- You create a connector — supplying credentials and connection parameters for your data store.
- Arthur validates the connection — it performs a lightweight test query to confirm access.
- You create a dataset from the connector — specifying which table, path, or query contains your inference data. The dataset is then attached to an application within the project.
- Arthur queries on a schedule — pulling new records since the last watermark and computing the metrics you've configured.
- Alerts fire as normal — all downstream alerting, dashboards, and drift detection work identically regardless of whether data came from a connector or was pushed directly.
Arthur stores your credentials encrypted at rest. Credentials are never logged or returned in plaintext after initial creation.
Prerequisites
Before configuring any connector, ensure the following:
- Arthur ML Engine is installed and running. Connectors execute on the data plane — the engine must be deployed before any connector can read data. See Getting Started if you haven't set this up.
- You have Admin or Editor permissions in the Arthur workspace where the model lives.
- You have access to your cloud provider's IAM console (for GCP/AWS connectors) or your data warehouse's admin interface (for Snowflake/Databricks).
- Your Arthur deployment can reach the external data source over the network. For self-hosted deployments, confirm that egress firewall rules allow outbound connections to the relevant endpoints.
- You have a project created in Arthur. Connectors are scoped to a project and can be used by any application within it.
To retrieve available connector types programmatically:
import requests

response = requests.get(
    "https://<your-arthur-host>/api/v1/connector_schemas/connector_types",
    headers={"Authorization": "Bearer <your-api-token>"}
)
print(response.json())
const response = await fetch(
"https://<your-arthur-host>/api/v1/connector_schemas/connector_types",
{
headers: { Authorization: "Bearer <your-api-token>" }
}
);
const connectorTypes = await response.json();
console.log(connectorTypes);curl -X GET "https://<your-arthur-host>/api/v1/connector_schemas/connector_types" \
-H "Authorization: Bearer <your-api-token>"BigQuery Connector
What Arthur needs
Arthur connects to BigQuery using a GCP Service Account with a JSON key. The service account requires the following IAM roles on the project or dataset:
| Role | Purpose |
|---|---|
roles/bigquery.dataViewer | Read rows from tables and views |
roles/bigquery.jobUser | Execute query jobs |
Least-privilege tip: Grant
roles/bigquery.dataViewerat the dataset level rather than the project level so Arthur can only read the datasets you explicitly share.
Step 1 — Create a service account
- In the GCP Console, navigate to IAM & Admin → Service Accounts.
- Click Create Service Account. Name it something like
arthur-bigquery-reader. - Grant the roles listed above.
- Create a JSON key and download it. Keep this file secure — you will paste its contents into Arthur.
Step 2 — Configure the connector
Credential inference: If
credentials_jsonis omitted, the connector will attempt to infer credentials from the data plane's runtime environment (e.g., Workload Identity on GKE, or Application Default Credentials). Only omit this field if your engine is running on GCP with the appropriate service account attached.
Via the Arthur UI
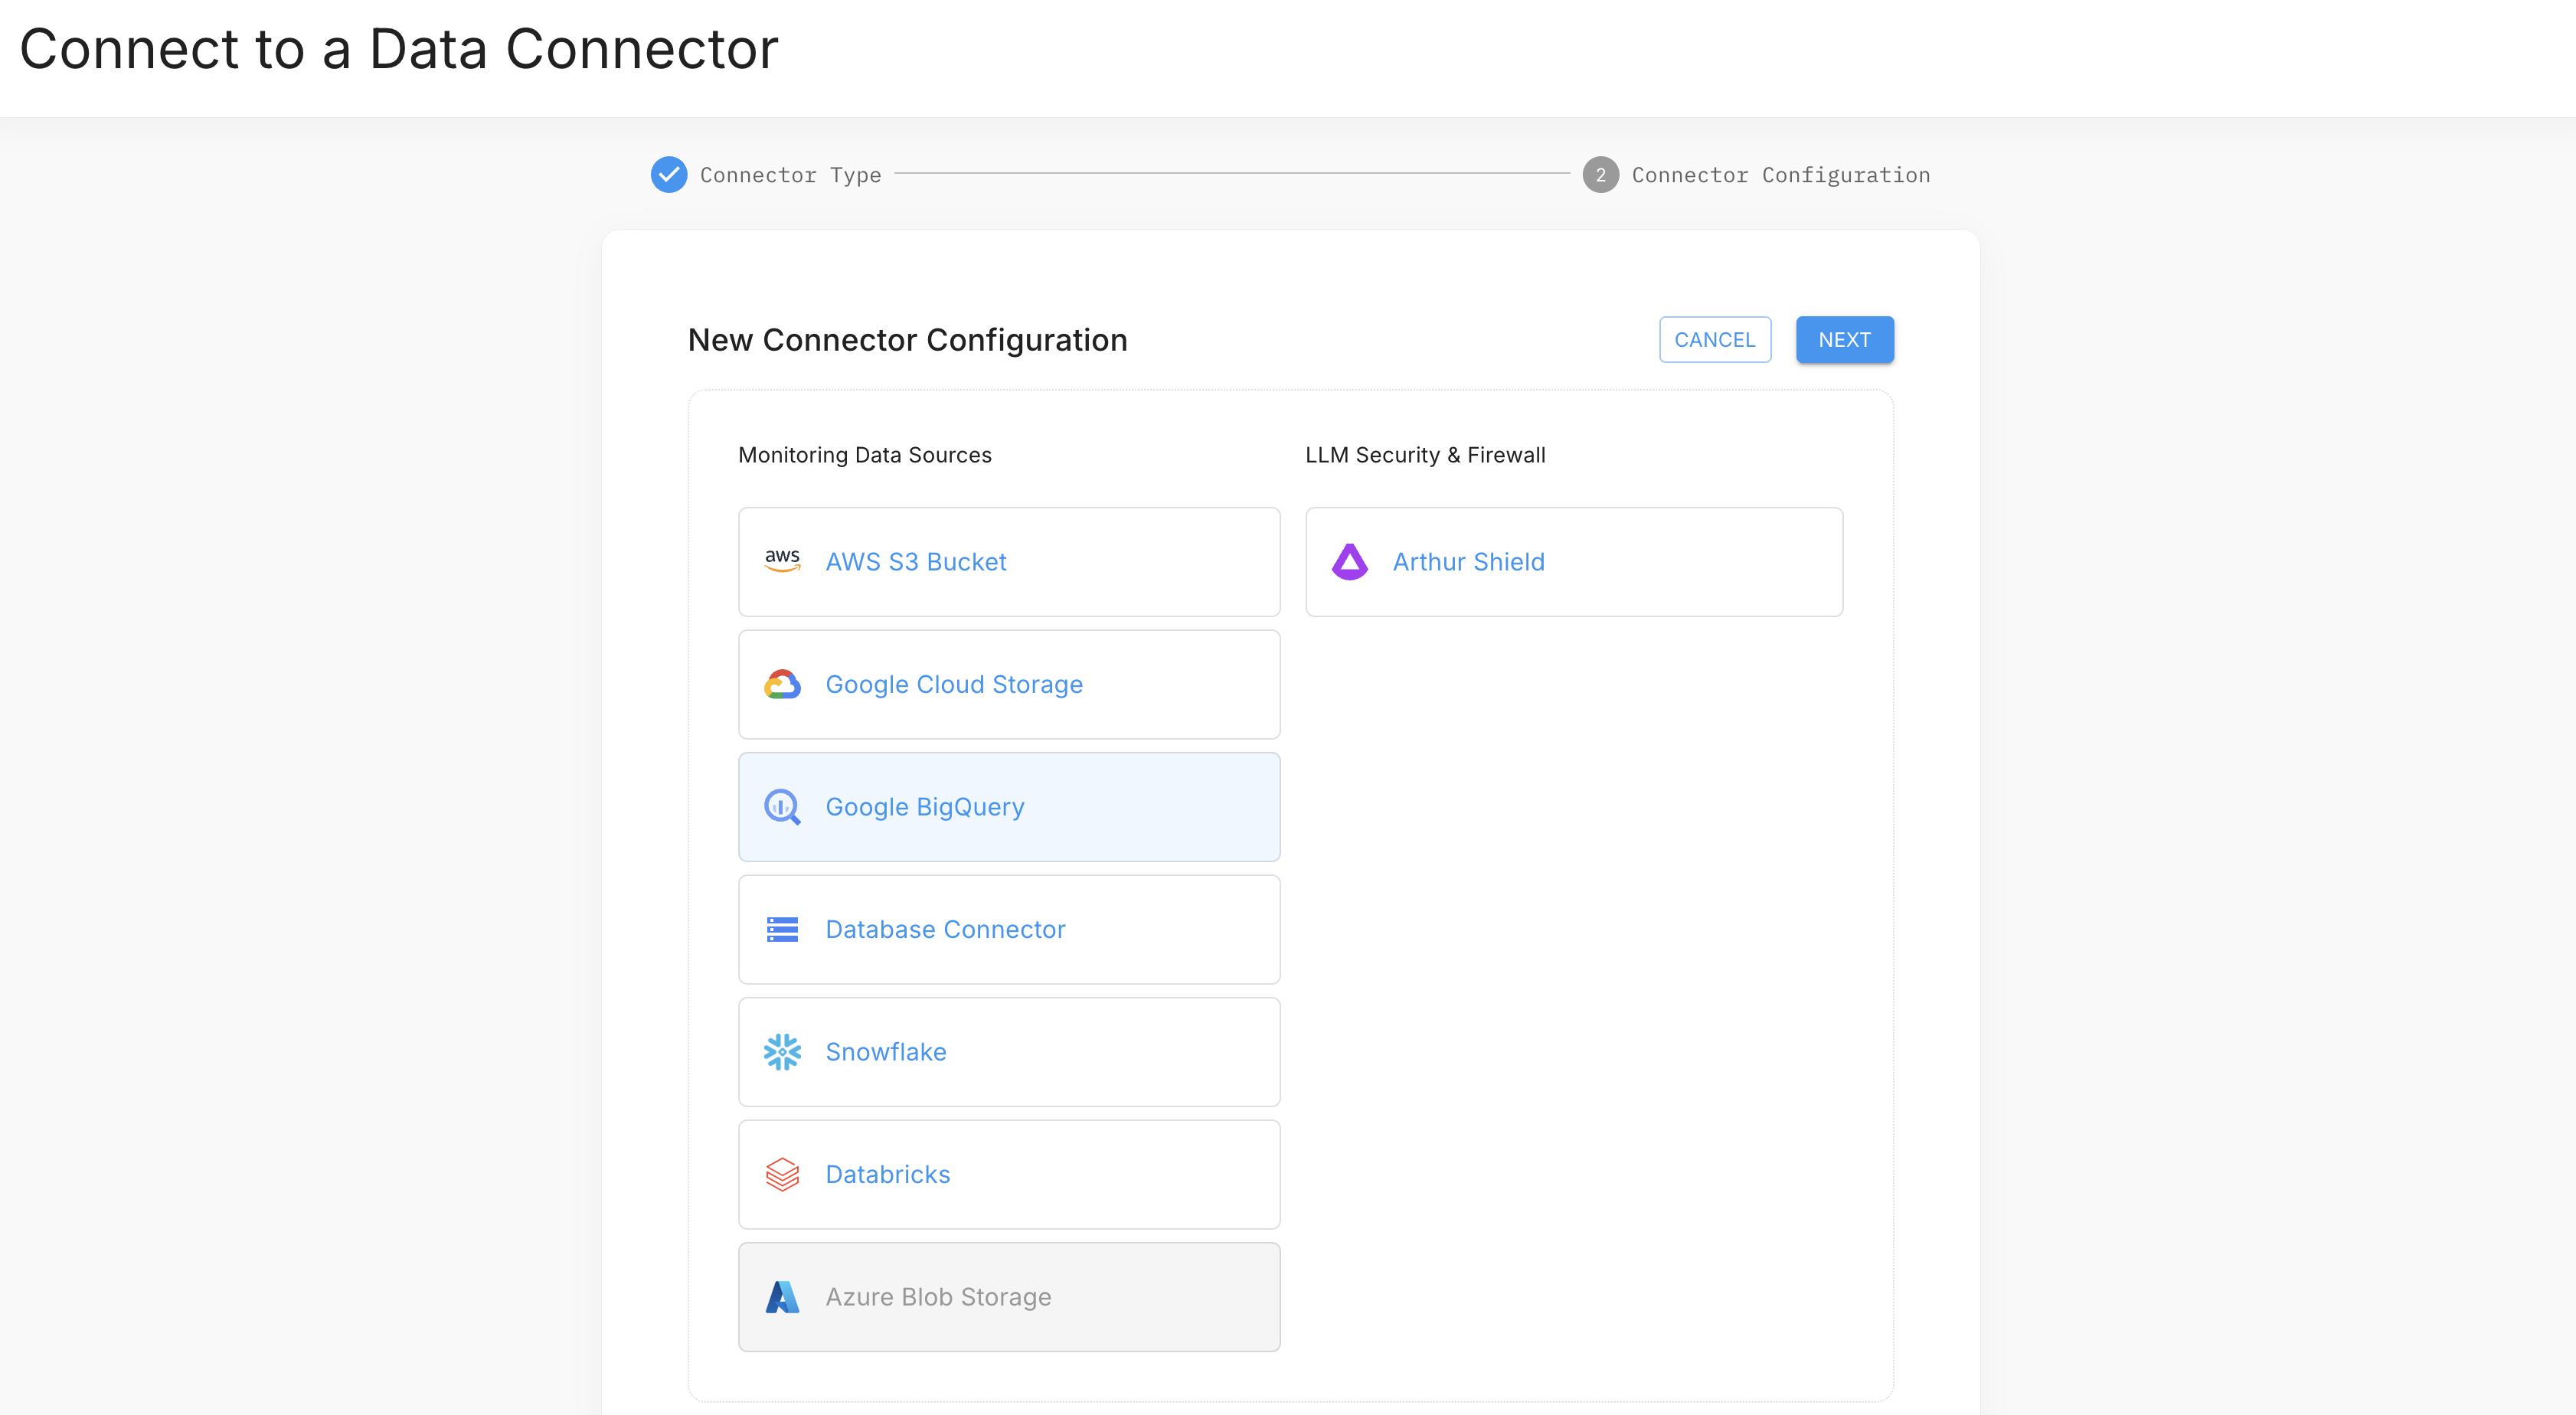
- In your project, open the Data Connectors tab and click Add Data Connector.
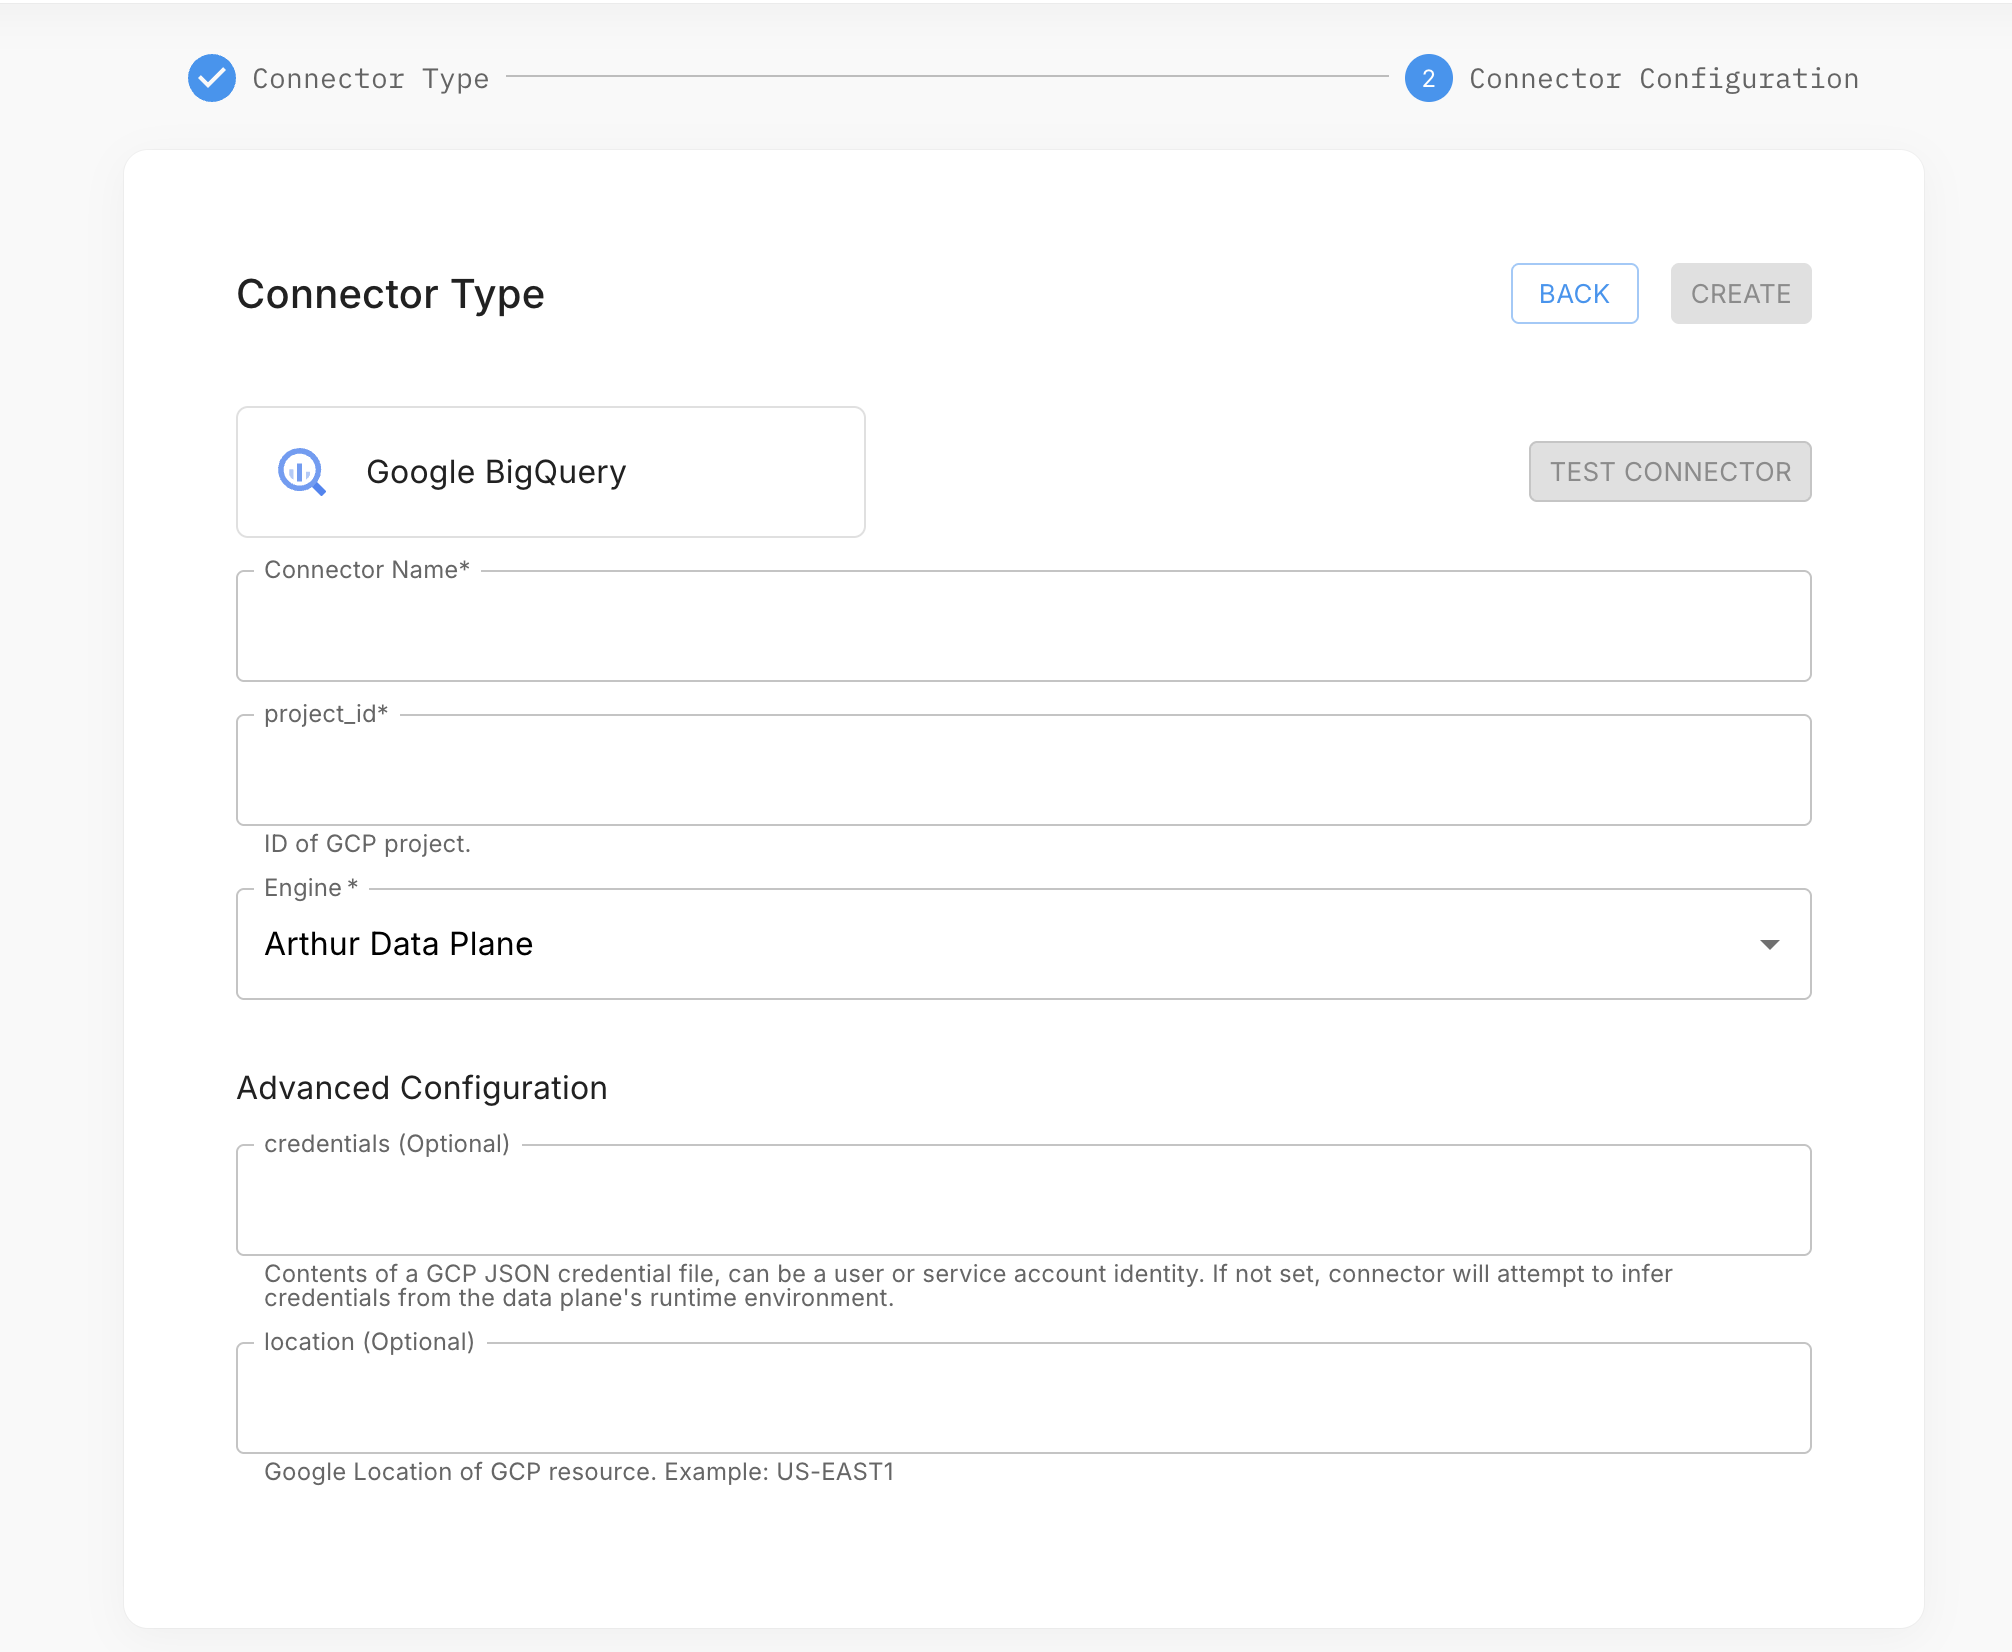
- Select Google BigQuery and click Next.
- Enter a connector name and fill in: Project ID, Dataset ID, and Credentials JSON (paste the full contents of your downloaded service account key file). Leave Credentials JSON blank to use runtime credential inference.
- Select your data plane and click Test Connection.
- Click Create to save the connector.
Via the API
import requests, json

connector_payload = {
    "connector_type": "bigquery",
    "name": "prod-bigquery-connector",
    "config": {
        "project_id": "my-gcp-project",
        "dataset_id": "ml_inference_logs",
        "credentials_json": json.dumps(<parsed_service_account_dict>)
    }
}

response = requests.post(
    "https://<your-arthur-host>/api/v1/connectors",
    headers={
        "Authorization": "Bearer <your-api-token>",
        "Content-Type": "application/json"
    },
    json=connector_payload
)
print(response.json())
const connectorPayload = {
connector_type: "bigquery",
name: "prod-bigquery-connector",
config: {
project_id: "my-gcp-project",
dataset_id: "ml_inference_logs",
credentials_json: JSON.stringify(serviceAccountObject)
}
};
const response = await fetch("https://<your-arthur-host>/api/v1/connectors", {
method: "POST",
headers: {
Authorization: "Bearer <your-api-token>",
"Content-Type": "application/json"
},
body: JSON.stringify(connectorPayload)
});
const connector = await response.json();
console.log(connector);curl -X POST "https://<your-arthur-host>/api/v1/connectors" \
-H "Authorization: Bearer <your-api-token>" \
-H "Content-Type: application/json" \
-d '{
"connector_type": "bigquery",
"name": "prod-bigquery-connector",
"config": {
"project_id": "my-gcp-project",
"dataset_id": "ml_inference_logs",
"credentials_json": "{\"type\":\"service_account\", ...}"
}
}'AWS S3 Connector
What Arthur needs
Arthur reads files from S3 using either an IAM Role (recommended for AWS-hosted Arthur deployments) or an IAM User with access keys. The principal needs the following S3 permissions on the target bucket and prefix:
{
  "Version": "2012-10-17",
  "Statement": [
    {
      "Effect": "Allow",
      "Action": [
        "s3:GetObject",
        "s3:ListBucket"
      ],
      "Resource": [
        "arn:aws:s3:::my-inference-bucket",
        "arn:aws:s3:::my-inference-bucket/inference-logs/*"
      ]
    }
  ]
}
IAM Role vs. Access Keys: If Arthur runs in AWS (ECS, EKS), prefer an IAM Role attached to the Arthur task/pod via instance profile or IRSA. This avoids long-lived credentials. For non-AWS deployments, create an IAM User and generate access keys.
Step 1 — Provision IAM credentials
Option A — IAM Role (AWS-hosted Arthur):
- Create an IAM Role with the policy above.
- Add a trust relationship allowing Arthur's task role or EC2 instance profile to assume it.
- Note the Role ARN.
Option B — IAM User (non-AWS Arthur):
- Create an IAM User with the policy above.
- Generate an Access Key ID and Secret Access Key.
Step 2 — Configure the connector
Credential inference: If no access keys or role ARN are provided, the connector will attempt to infer credentials from the data plane's runtime environment (e.g., EC2 instance profile or IRSA on EKS). Only omit credentials if your engine is running in AWS with the appropriate IAM role attached.
Via the Arthur UI
- In your project, open the Data Connectors tab and click Add Data Connector.
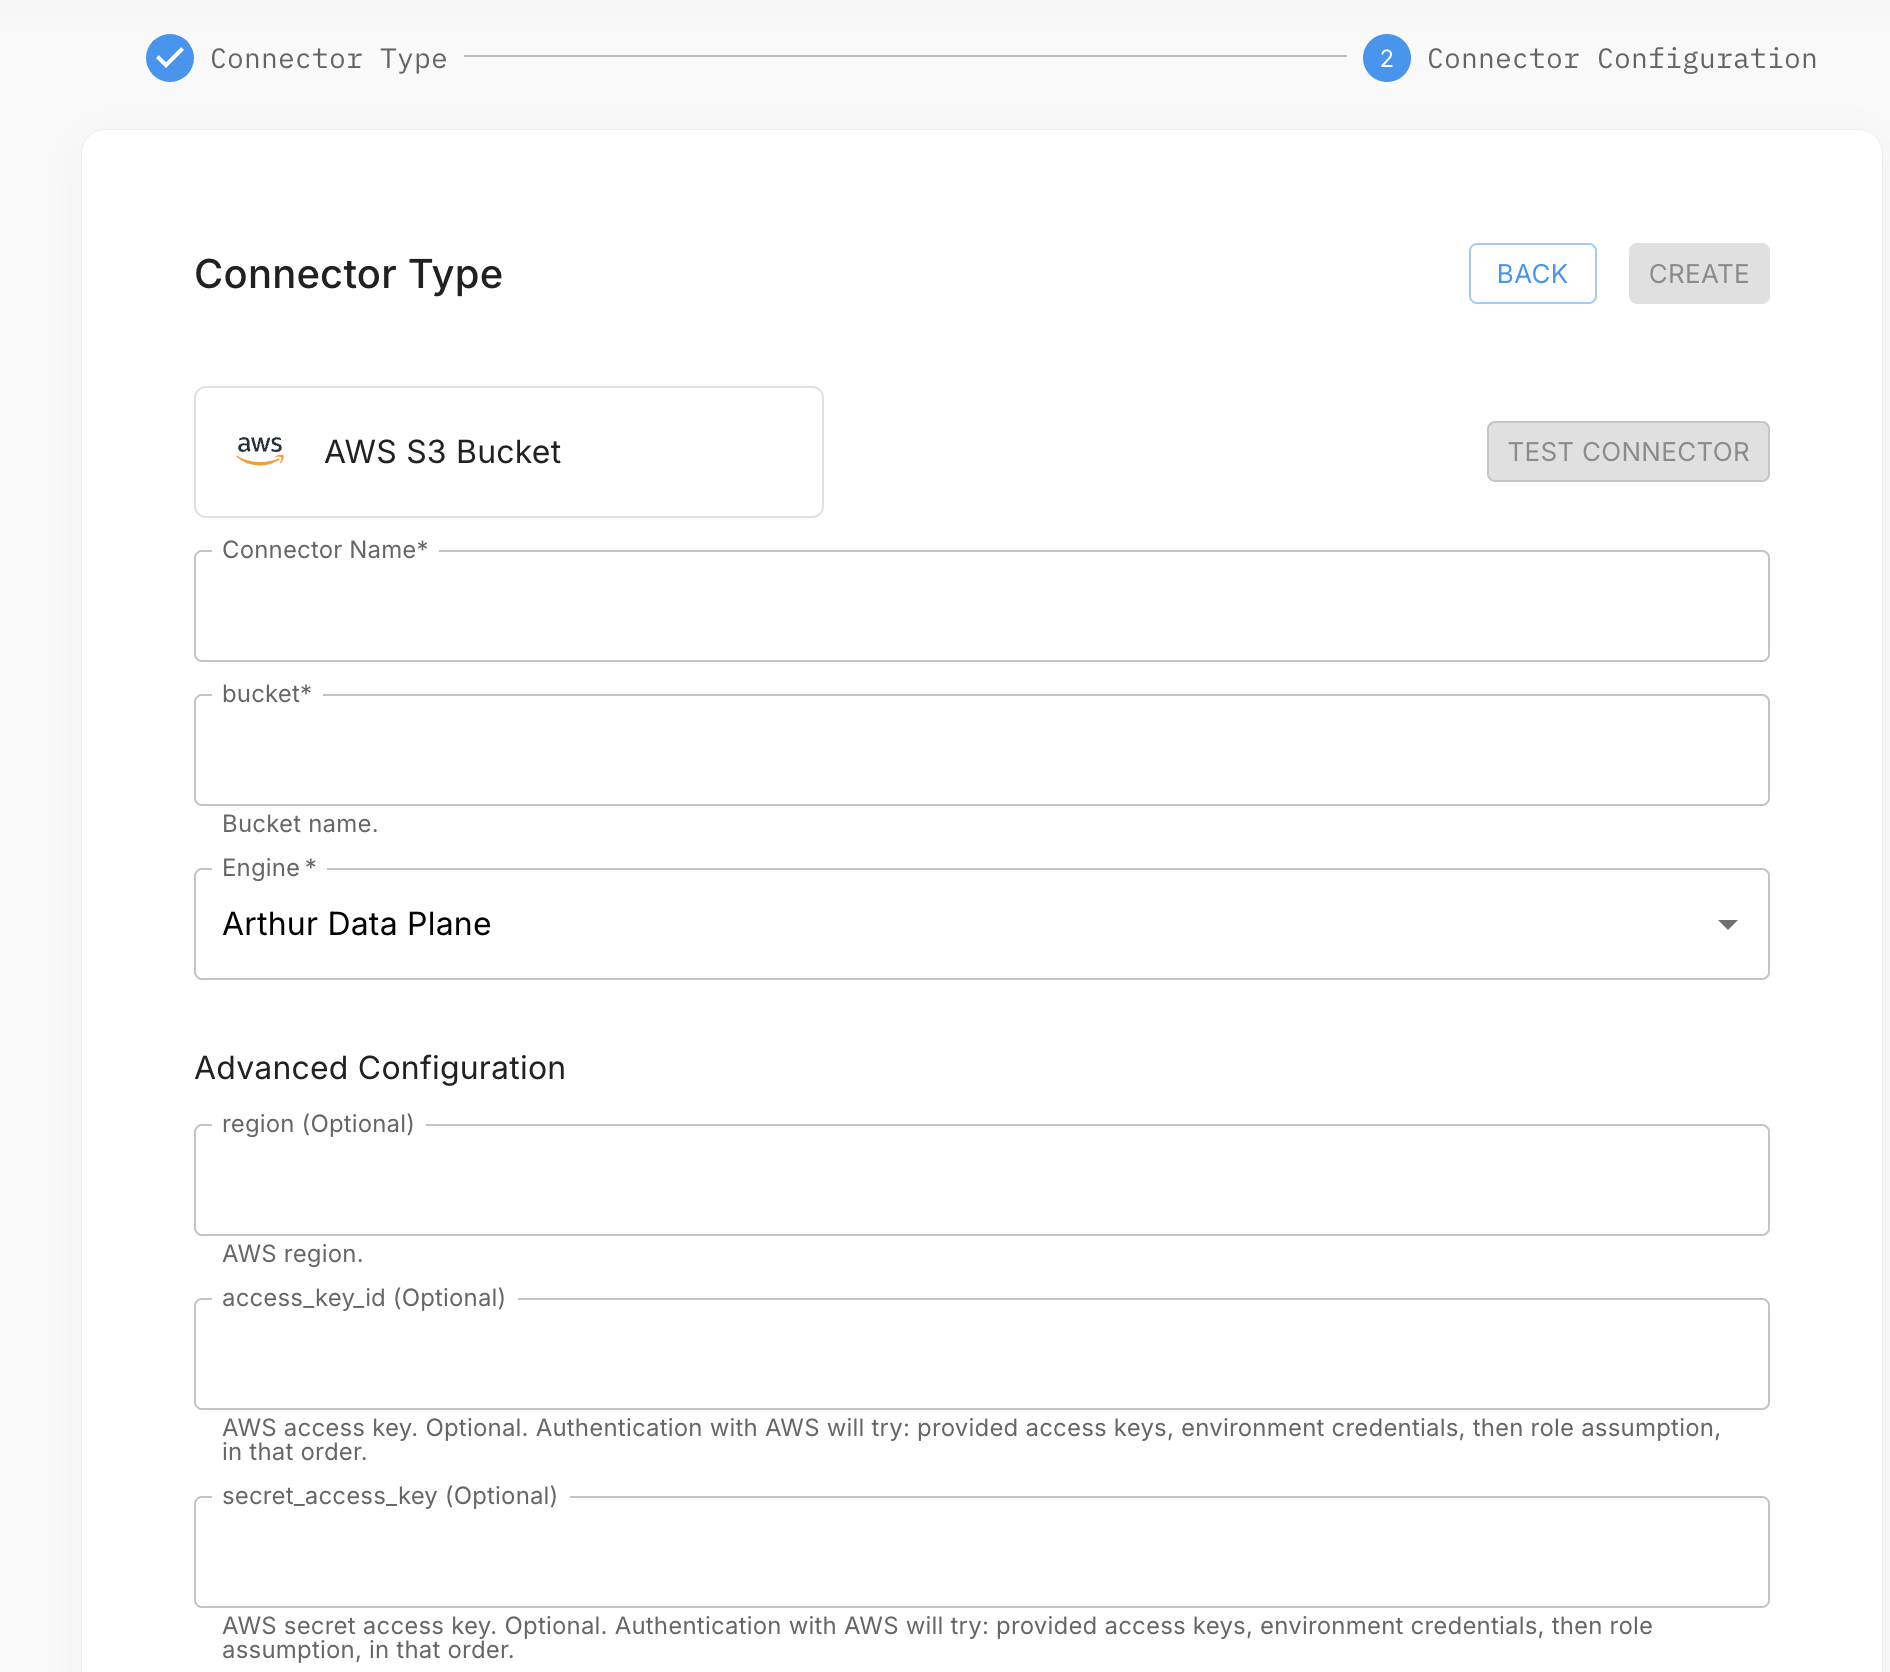
- Select AWS S3 Bucket and click Next.
- Enter a connector name and fill in: Bucket, Prefix, Region, and either the IAM Role ARN or Access Key ID + Secret Access Key. Leave credential fields blank to use runtime credential inference.
- Select your data plane and click Test Connection.
- Click Create to save the connector.
Via the API
# Option B: Access key credentials
connector_payload = {
    "connector_type": "s3",
    "name": "prod-s3-connector",
    "config": {
        "bucket": "my-inference-bucket",
        "prefix": "inference-logs/model-v2/",
        "region": "us-east-1",
        "aws_access_key_id": "AKIA...",
        "aws_secret_access_key": "<secret>",
        "file_format": "parquet"   # or "csv", "json"
    }
}

response = requests.post(
    "https://<your-arthur-host>/api/v1/connectors",
    headers={
        "Authorization": "Bearer <your-api-token>",
        "Content-Type": "application/json"
    },
    json=connector_payload
)
const connectorPayload = {
connector_type: "s3",
name: "prod-s3-connector",
config: {
bucket: "my-inference-bucket",
prefix: "inference-logs/model-v2/",
region: "us-east-1",
aws_access_key_id: "AKIA...",
aws_secret_access_key: "<secret>",
file_format: "parquet"
}
};
const response = await fetch("https://<your-arthur-host>/api/v1/connectors", {
method: "POST",
headers: {
Authorization: "Bearer <your-api-token>",
"Content-Type": "application/json"
},
body: JSON.stringify(connectorPayload)
});curl -X POST "https://<your-arthur-host>/api/v1/connectors" \
-H "Authorization: Bearer <your-api-token>" \
-H "Content-Type: application/json" \
-d '{
"connector_type": "s3",
"name": "prod-s3-connector",
"config": {
"bucket": "my-inference-bucket",
"prefix": "inference-logs/model-v2/",
"region": "us-east-1",
"aws_access_key_id": "AKIA...",
"aws_secret_access_key": "<secret>",
"file_format": "parquet"
}
}'File layout expectations
Arthur scans the configured prefix for files matching the specified file_format. Files should be partitioned by date (e.g., inference-logs/model-v2/2024/01/15/batch_001.parquet) for efficient incremental reads. Arthur uses the file's last-modified timestamp as the watermark for incremental ingestion.
Google Cloud Storage Connector
What Arthur needs
Arthur reads from GCS using the same Service Account JSON key mechanism as BigQuery. The service account requires:
| Role | Purpose |
|---|---|
roles/storage.objectViewer | Read objects from the bucket |
roles/storage.legacyBucketReader | List objects in the bucket |
Grant these roles at the bucket level for least-privilege access.
Step 1 — Create a service account
Follow the same steps as the BigQuery connector (see above), but grant roles/storage.objectViewer and roles/storage.legacyBucketReader on the specific GCS bucket instead of BigQuery roles.
Step 2 — Configure the connector
Credential inference: If
credentials_jsonis omitted, the connector will attempt to infer credentials from the data plane's runtime environment (e.g., Workload Identity on GKE, or Application Default Credentials). Only omit this field if your engine is running on GCP with the appropriate service account attached.
Via the Arthur UI
- In your project, open the Data Connectors tab and click Add Data Connector.
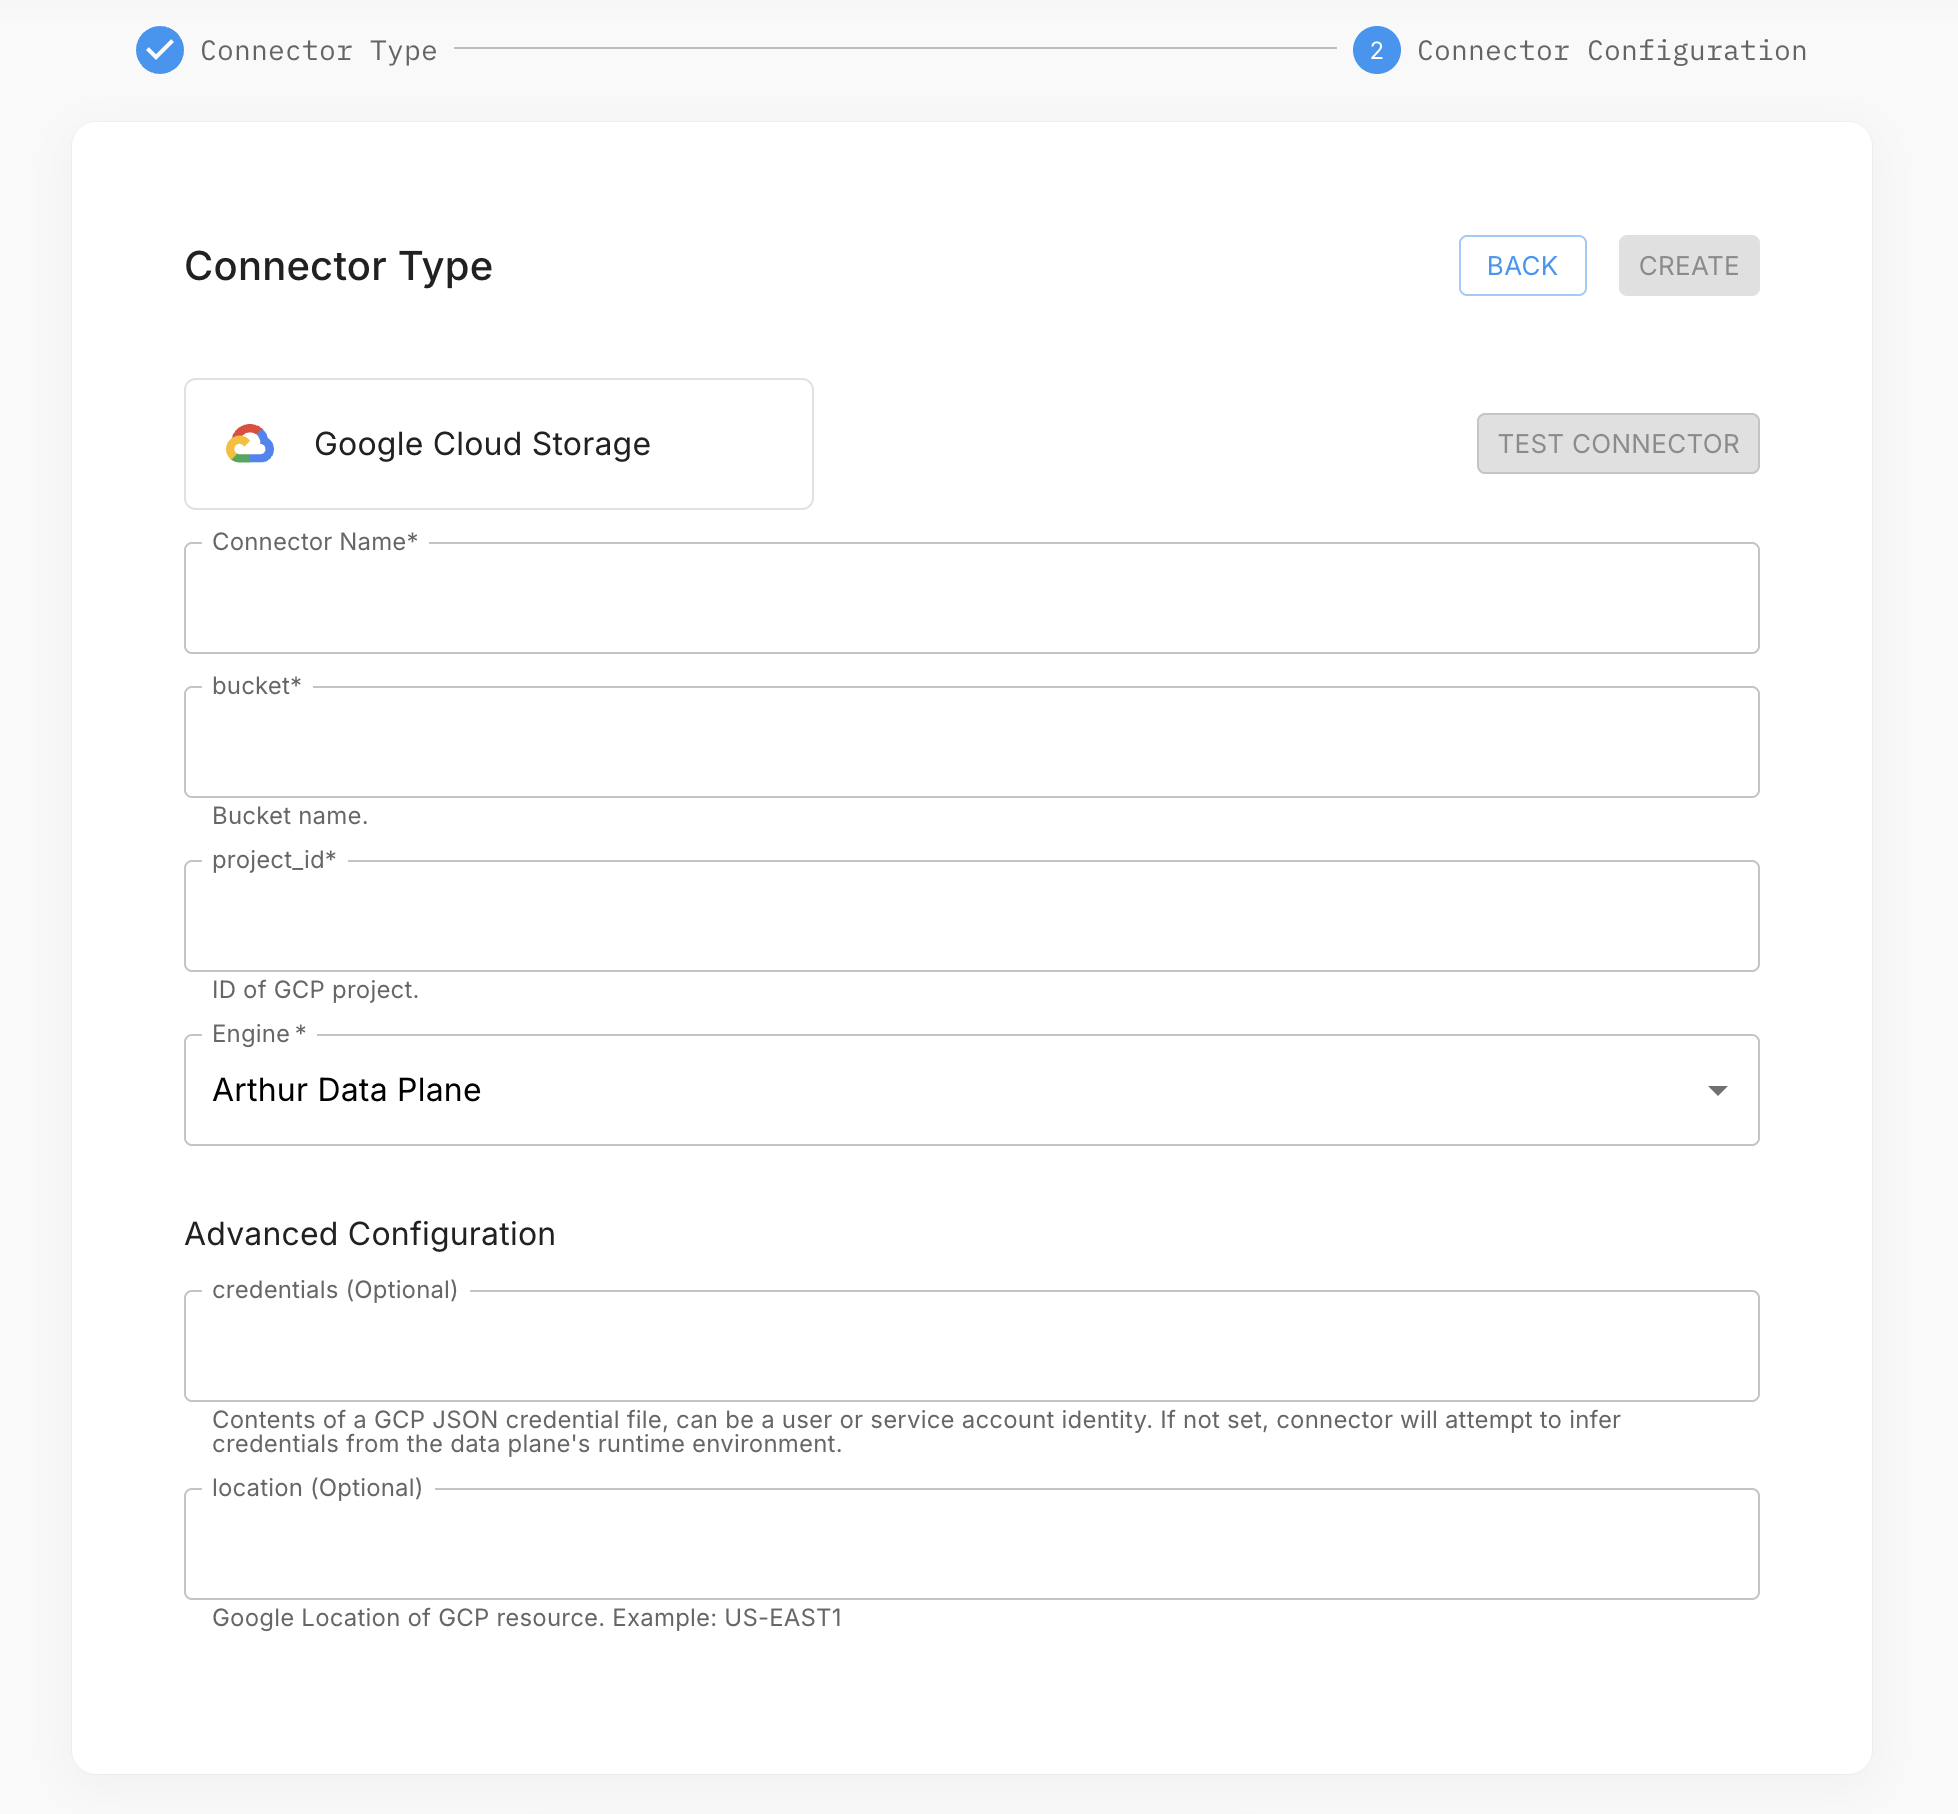
- Select Google Cloud Storage and click Next.
- Enter a connector name and fill in: Bucket, Prefix, File Format, and Credentials JSON (paste your service account key file contents). Leave Credentials JSON blank to use runtime credential inference.
- Select your data plane and click Test Connection.
- Click Create to save the connector.
Via the API
import json

connector_payload = {
    "connector_type": "gcs",
    "name": "prod-gcs-connector",
    "config": {
        "bucket": "my-inference-bucket",
        "prefix": "model-v2/predictions/",
        "file_format": "parquet",   # or "csv", "json"
        "credentials_json": json.dumps(<parsed_service_account_dict>)
    }
}

response = requests.post(
    "https://<your-arthur-host>/api/v1/connectors",
    headers={
        "Authorization": "Bearer <your-api-token>",
        "Content-Type": "application/json"
    },
    json=connector_payload
)
print(response.json())
const connectorPayload = {
connector_type: "gcs",
name: "prod-gcs-connector",
config: {
bucket: "my-inference-bucket",
prefix: "model-v2/predictions/",
file_format: "parquet",
credentials_json: JSON.stringify(serviceAccountObject)
}
};
const response = await fetch("https://<your-arthur-host>/api/v1/connectors", {
method: "POST",
headers: {
Authorization: "Bearer <your-api-token>",
"Content-Type": "application/json"
},
body: JSON.stringify(connectorPayload)
});curl -X POST "https://<your-arthur-host>/api/v1/connectors" \
-H "Authorization: Bearer <your-api-token>" \
-H "Content-Type: application/json" \
-d '{
"connector_type": "gcs",
"name": "prod-gcs-connector",
"config": {
"bucket": "my-inference-bucket",
"prefix": "model-v2/predictions/",
"file_format": "parquet",
"credentials_json": "{\"type\":\"service_account\", ...}"
}
}'Snowflake Connector
What Arthur needs
Arthur connects to Snowflake using username/password or key-pair authentication. You must provision a dedicated Snowflake user with access to the warehouse, database, schema, and table(s) Arthur will read.
Required Snowflake privileges
Run the following SQL as a Snowflake ACCOUNTADMIN or SYSADMIN to set up a least-privilege role for Arthur:
-- Create a dedicated role for Arthur
CREATE ROLE arthur_reader;

-- Grant warehouse usage (Arthur needs a running warehouse to execute queries)
GRANT USAGE ON WAREHOUSE <your_warehouse> TO ROLE arthur_reader;

-- Grant database and schema access
GRANT USAGE ON DATABASE <your_database> TO ROLE arthur_reader;
GRANT USAGE ON SCHEMA <your_database>.<your_schema> TO ROLE arthur_reader;

-- Grant read access to the specific table(s)
GRANT SELECT ON TABLE <your_database>.<your_schema>.<your_table> TO ROLE arthur_reader;

-- Create the Arthur service user
CREATE USER arthur_service
    PASSWORD = '<strong-password>'
    DEFAULT_ROLE = arthur_reader
    DEFAULT_WAREHOUSE = <your_warehouse>
    MUST_CHANGE_PASSWORD = FALSE;

GRANT ROLE arthur_reader TO USER arthur_service;
Key-pair authentication (recommended): Generate an RSA key pair, assign the public key to the Snowflake user with
ALTER USER arthur_service SET RSA_PUBLIC_KEY='<public_key>', and supply the private key in the connector config. This avoids password rotation complexity.
Step 2 — Configure the connector
Via the Arthur UI
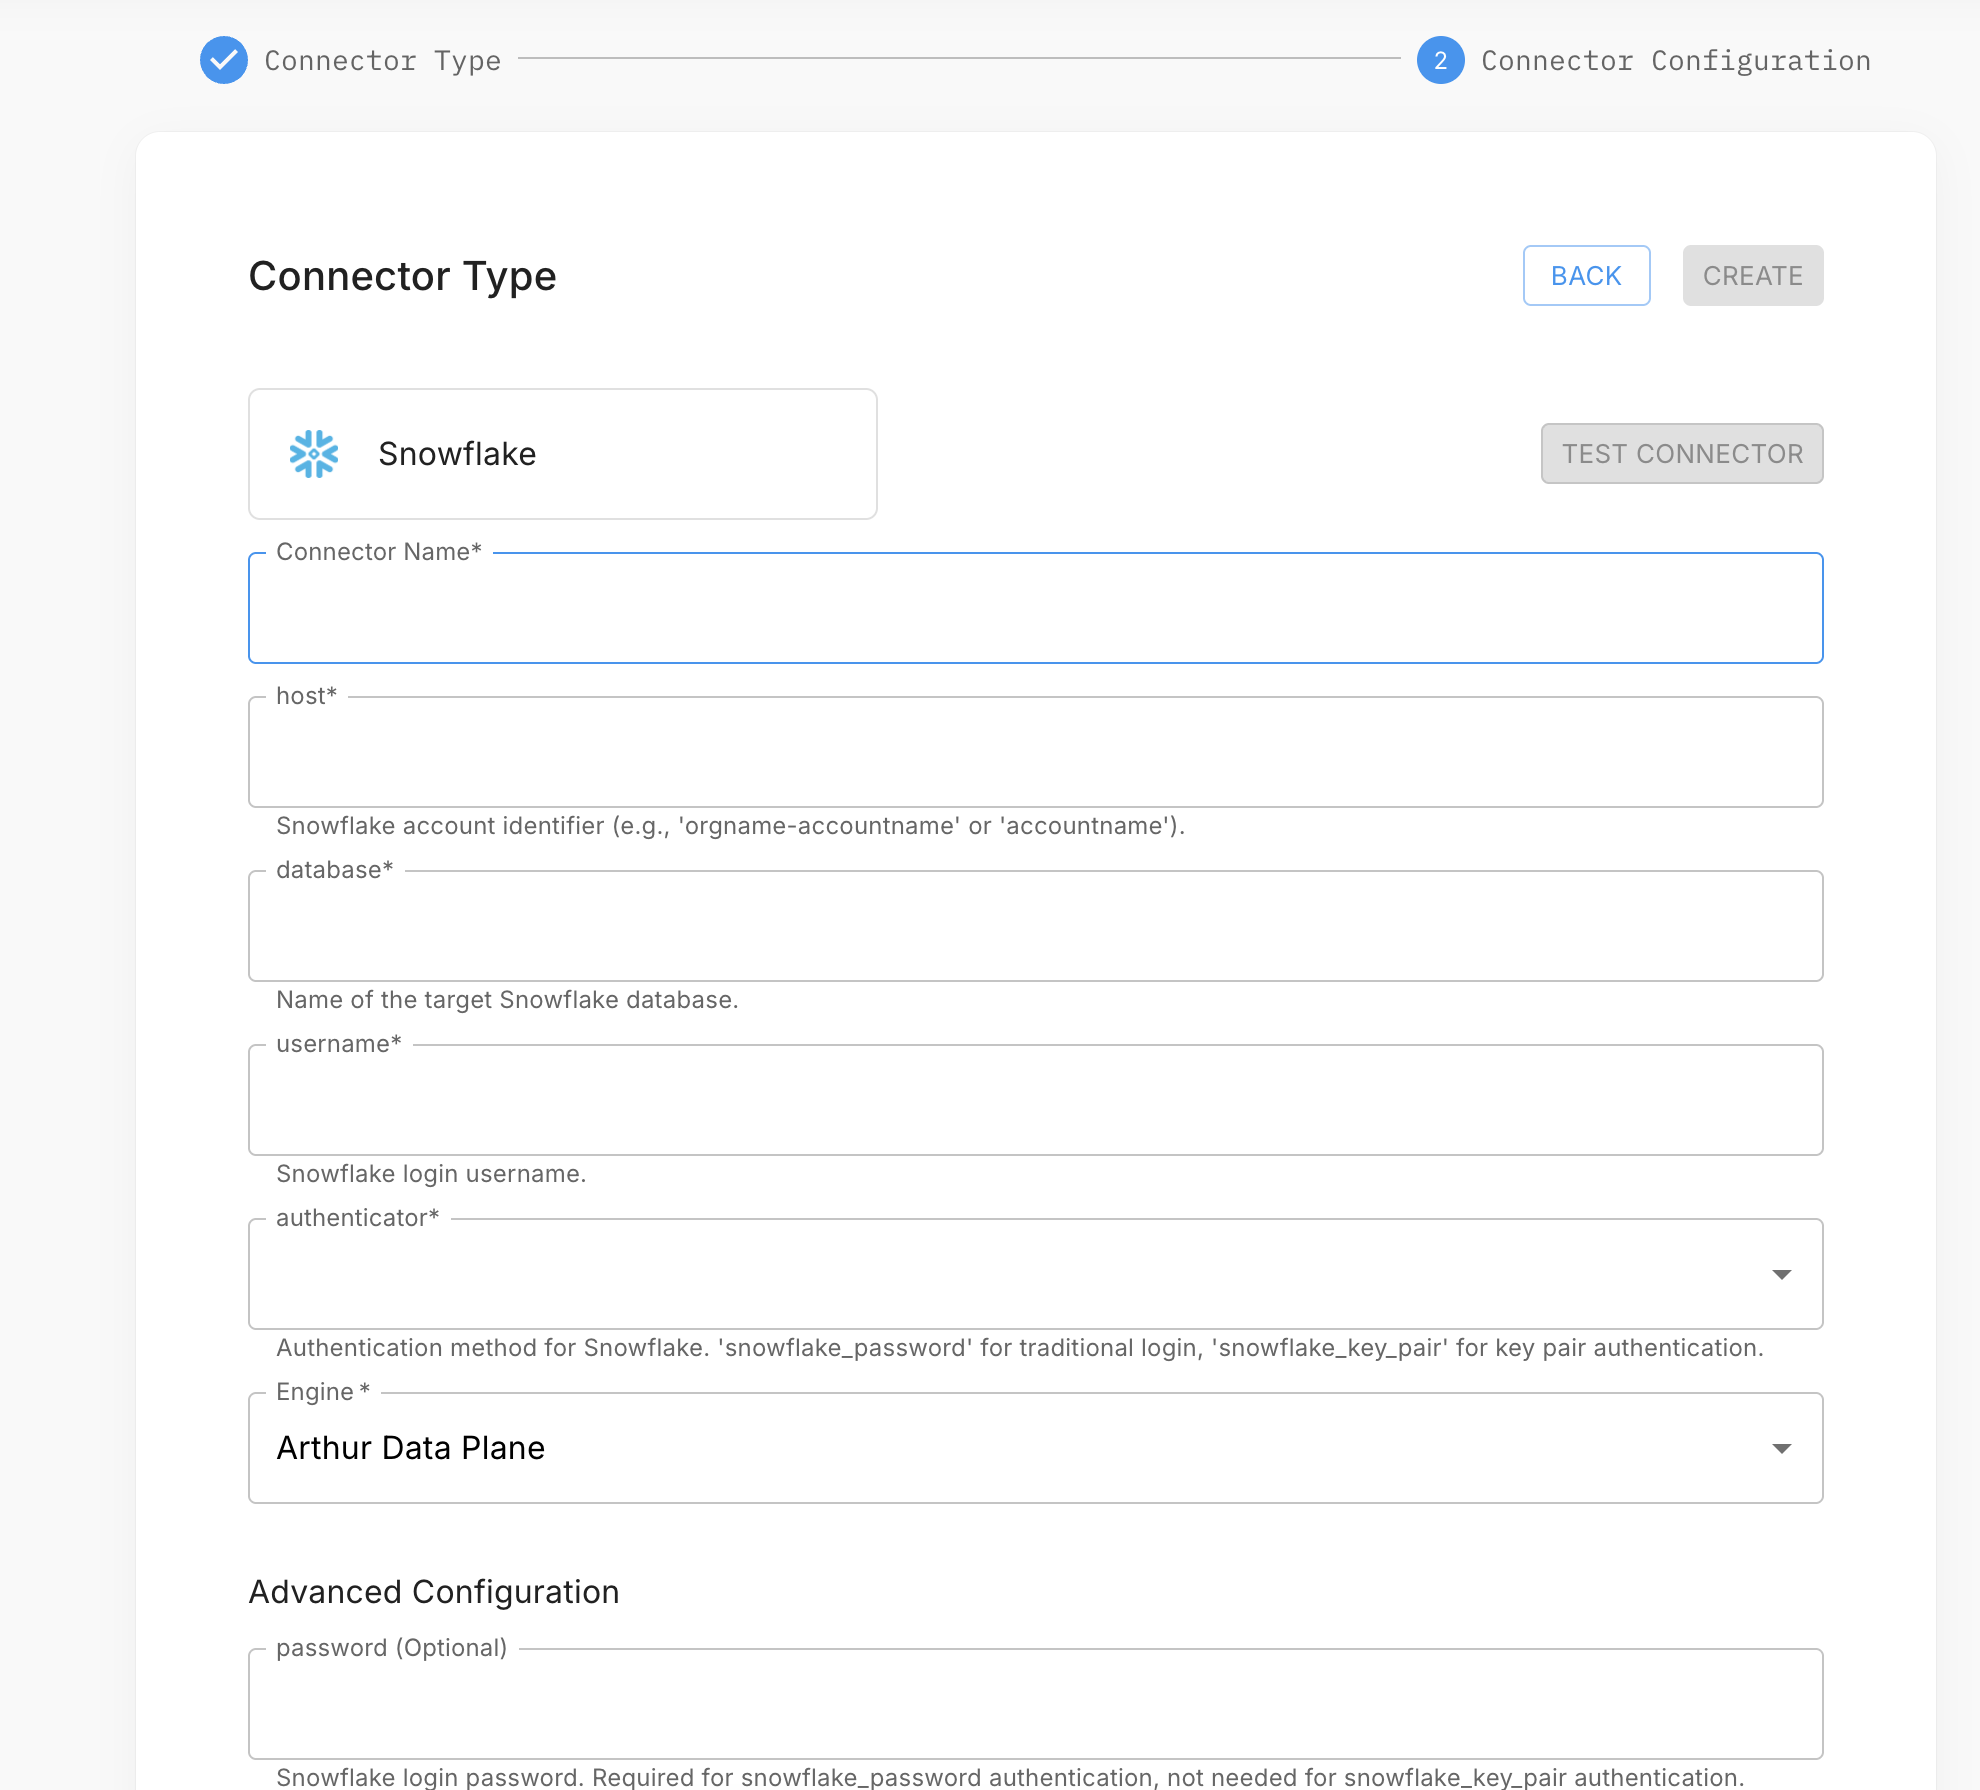
- In your project, open the Data Connectors tab and click Add Data Connector.
- Select Snowflake and click Next.
- Enter a connector name and fill in: Account (your Snowflake account identifier), User, Password (or private key for key-pair auth), Warehouse, Database, Schema, and Table.
- Select your data plane and click Test Connection.
- Click Create to save the connector.
Via the API
connector_payload = {
    "connector_type": "snowflake",
    "name": "prod-snowflake-connector",
    "config": {
        "account": "myorg-myaccount",       # Snowflake account identifier
        "user": "arthur_service",
        "password": "<password>",            # omit if using key-pair
        # "private_key": "<pem-string>",    # use instead of password for key-pair
        "warehouse": "COMPUTE_WH",
        "database": "ML_PROD",
        "schema": "INFERENCE_LOGS",
        "table": "MODEL_PREDICTIONS"
    }
}

response = requests.post(
    "https://<your-arthur-host>/api/v1/connectors",
    headers={
        "Authorization": "Bearer <your-api-token>",
        "Content-Type": "application/json"
    },
    json=connector_payload
)
print(response.json())
const connectorPayload = {
connector_type: "snowflake",
name: "prod-snowflake-connector",
config: {
account: "myorg-myaccount",
user: "arthur_service",
password: "<password>",
warehouse: "COMPUTE_WH",
database: "ML_PROD",
schema: "INFERENCE_LOGS",
table: "MODEL_PREDICTIONS"
}
};
const response = await fetch("https://<your-arthur-host>/api/v1/connectors", {
method: "POST",
headers: {
Authorization: "Bearer <your-api-token>",
"Content-Type": "application/json"
},
body: JSON.stringify(connectorPayload)
});curl -X POST "https://<your-arthur-host>/api/v1/connectors" \
-H "Authorization: Bearer <your-api-token>" \
-H "Content-Type: application/json" \
-d '{
"connector_type": "snowflake",
"name": "prod-snowflake-connector",
"config": {
"account": "myorg-myaccount",
"user": "arthur_service",
"password": "<password>",
"warehouse": "COMPUTE_WH",
"database": "ML_PROD",
"schema": "INFERENCE_LOGS",
"table": "MODEL_PREDICTIONS"
}
}'Snowflake account identifier format
The account field uses Snowflake's account identifier format. Find yours in the Snowflake UI under Admin → Accounts, or from your login URL:
| Login URL | account value |
|---|---|
https://myorg-myaccount.snowflakecomputing.com | myorg-myaccount |
https://xy12345.us-east-1.snowflakecomputing.com | xy12345.us-east-1 |
Warehouse auto-suspend considerations
Arthur's scheduled queries will resume a suspended warehouse. If your warehouse has a short auto-suspend window (e.g., 60 seconds), this is fine — Arthur will resume it, run the query, and the warehouse will suspend again. Factor this into your Snowflake credit usage estimates.
Databricks Connector
What Arthur needs
Arthur connects to Databricks using either a SQL Warehouse (recommended for production) or an All-Purpose Cluster. You need:
- A Databricks Personal Access Token (PAT) or Service Principal OAuth token with access to the target catalog, schema, and table.
- The JDBC/ODBC server hostname and HTTP path for your SQL Warehouse or cluster.
- The Unity Catalog path (catalog, schema, table) or legacy Hive metastore path (database, table) for your inference data.
Required Databricks permissions
Grant the Arthur service principal or user the following privileges on the Unity Catalog objects:
-- Grant catalog usage
GRANT USE CATALOG ON CATALOG ml_prod TO `arthur-service-principal`;

-- Grant schema usage
GRANT USE SCHEMA ON SCHEMA ml_prod.inference_logs TO `arthur-service-principal`;

-- Grant table read access
GRANT SELECT ON TABLE ml_prod.inference_logs.model_predictions TO `arthur-service-principal`;
For legacy Hive metastore (non-Unity Catalog), grant SELECT on the database table via the Databricks workspace admin UI or GRANT SELECT ON TABLE <db>.<table> TO <user>.
Step 1 — Find your connection details
- In the Databricks workspace, navigate to SQL Warehouses (or Compute for clusters).
- Select your warehouse/cluster and click Connection details.
- Note the Server hostname and HTTP path.
For a SQL Warehouse, the HTTP path looks like /sql/1.0/warehouses/abc123def456.
For a cluster, it looks like /sql/protocolv1/o/1234567890/0123-456789-abc123.
Step 2 — Generate a Personal Access Token
- In the Databricks workspace, click your username → Settings → Developer → Access tokens.
- Click Generate new token, set an expiry, and copy the token value.
Service Principal (recommended for production): Create a Service Principal in the Databricks account console, grant it workspace access, and use OAuth M2M (machine-to-machine) tokens instead of a personal PAT. This avoids tying access to an individual user account.
Step 3 — Configure the connector
Via the Arthur UI
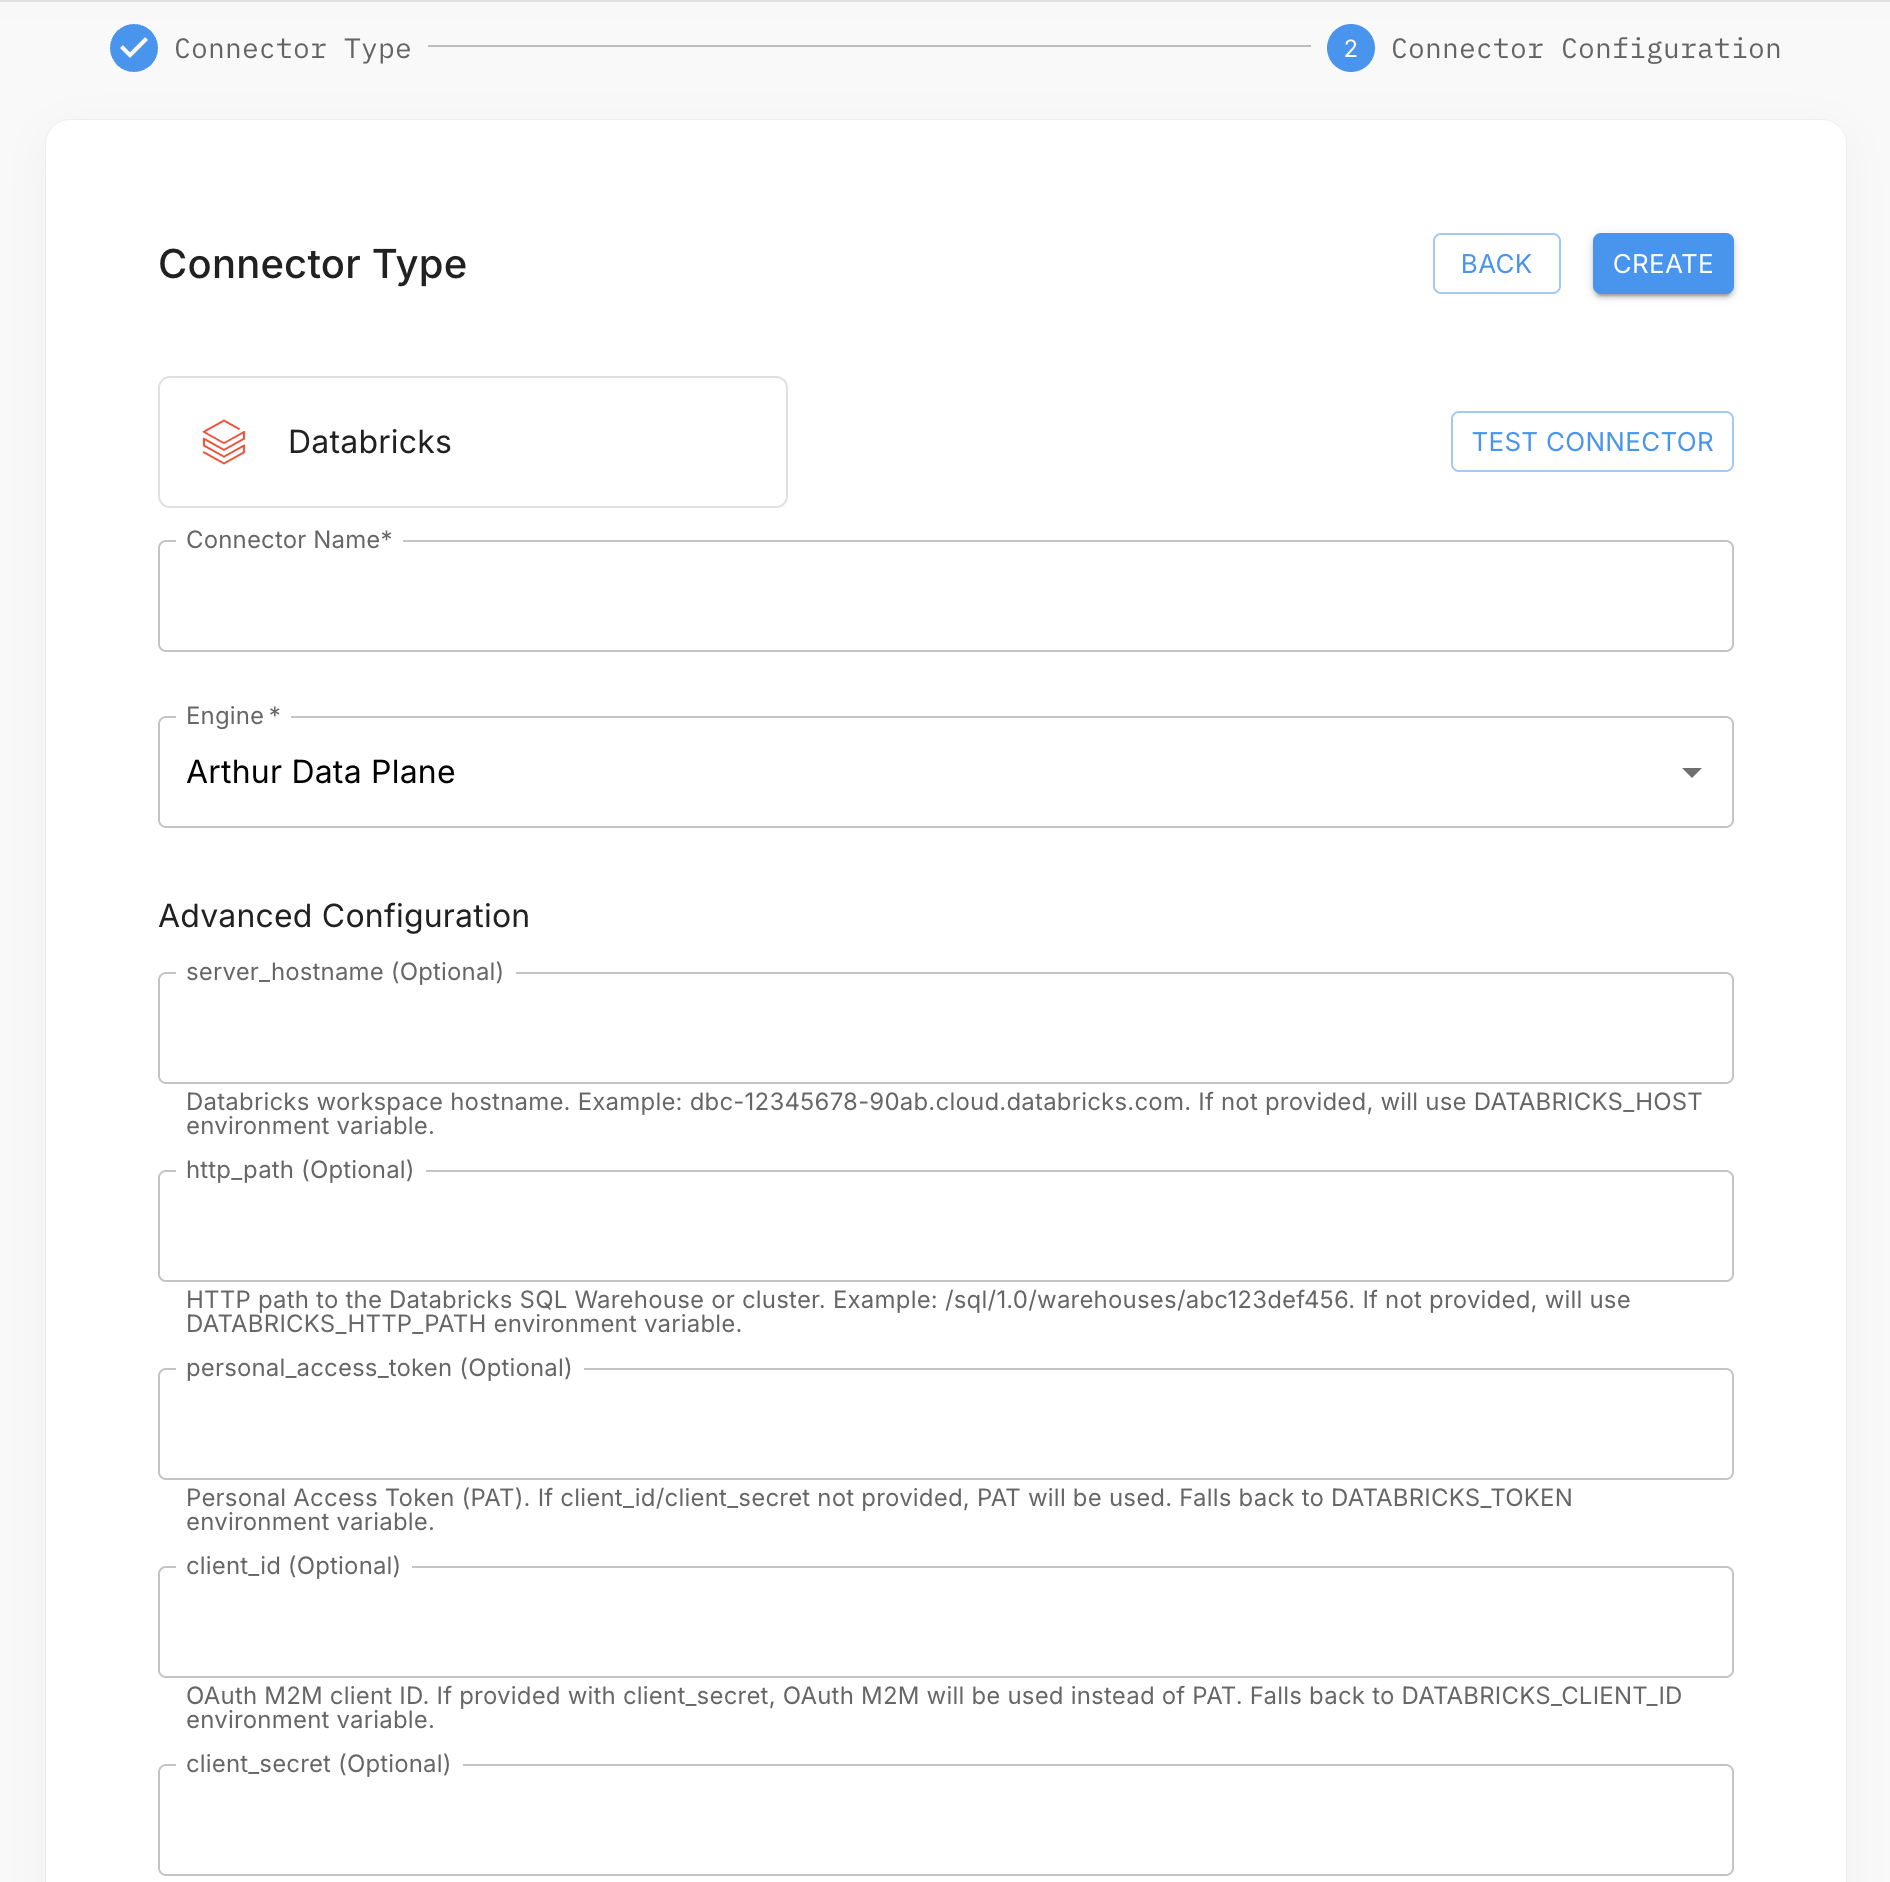
- In your project, open the Data Connectors tab and click Add Data Connector.
- Select Databricks and click Next.
- Enter a connector name and fill in: Server Hostname, HTTP Path, Access Token, Catalog, Schema, and Table.
- Select your data plane and click Test Connection.
- Click Create to save the connector.
Via the API
connector_payload = {
    "connector_type": "databricks",
    "name": "prod-databricks-connector",
    "config": {
        "host": "adb-1234567890123456.7.azuredatabricks.net",
        "http_path": "/sql/1.0/warehouses/abc123def456",
        "access_token": "dapi...",
        "catalog": "ml_prod",           # Unity Catalog catalog name
        "schema": "inference_logs",     # schema/database name
        "table": "model_predictions"    # Delta table name
    }
}

response = requests.post(
    "https://<your-arthur-host>/api/v1/connectors",
    headers={
        "Authorization": "Bearer <your-api-token>",
        "Content-Type": "application/json"
    },
    json=connector_payload
)
print(response.json())
const connectorPayload = {
connector_type: "databricks",
name: "prod-databricks-connector",
config: {
host: "adb-1234567890123456.7.azuredatabricks.net",
http_path: "/sql/1.0/warehouses/abc123def456",
access_token: "dapi...",
catalog: "ml_prod",
schema: "inference_logs",
table: "model_predictions"
}
};
const response = await fetch("https://<your-arthur-host>/api/v1/connectors", {
method: "POST",
headers: {
Authorization: "Bearer <your-api-token>",
"Content-Type": "application/json"
},
body: JSON.stringify(connectorPayload)
});curl -X POST "https://<your-arthur-host>/api/v1/connectors" \
-H "Authorization: Bearer <your-api-token>" \
-H "Content-Type: application/json" \
-d '{
"connector_type": "databricks",
"name": "prod-databricks-connector",
"config": {
"host": "adb-1234567890123456.7.azuredatabricks.net",
"http_path": "/sql/1.0/warehouses/abc123def456",
"access_token": "dapi...",
"catalog": "ml_prod",
"schema": "inference_logs",
"table": "model_predictions"
}
}'Delta Lake and time travel
Arthur leverages Delta Lake's transaction log for efficient incremental reads. When Arthur queries your Delta table, it uses the _commit_timestamp metadata to identify new records since the last ingestion watermark — no full table scans required. Ensure your Delta table has not had its transaction log vacuumed beyond Arthur's query interval (default retention is 7 days; Arthur's default query interval is 1 hour).
ODBC Connector
What Arthur needs
The ODBC connector is Arthur's generic escape hatch for any SQL-compatible database that isn't covered by a first-class connector. It connects using either a DSN (Data Source Name) configured on the Arthur host, or a connection string passed directly in the connector config.
Supported databases: Any database with a standards-compliant ODBC driver. Common examples include PostgreSQL, MySQL, Microsoft SQL Server, Oracle, and Teradata. The ODBC driver must be installed on the Arthur ML Engine host.
Via the Arthur UI
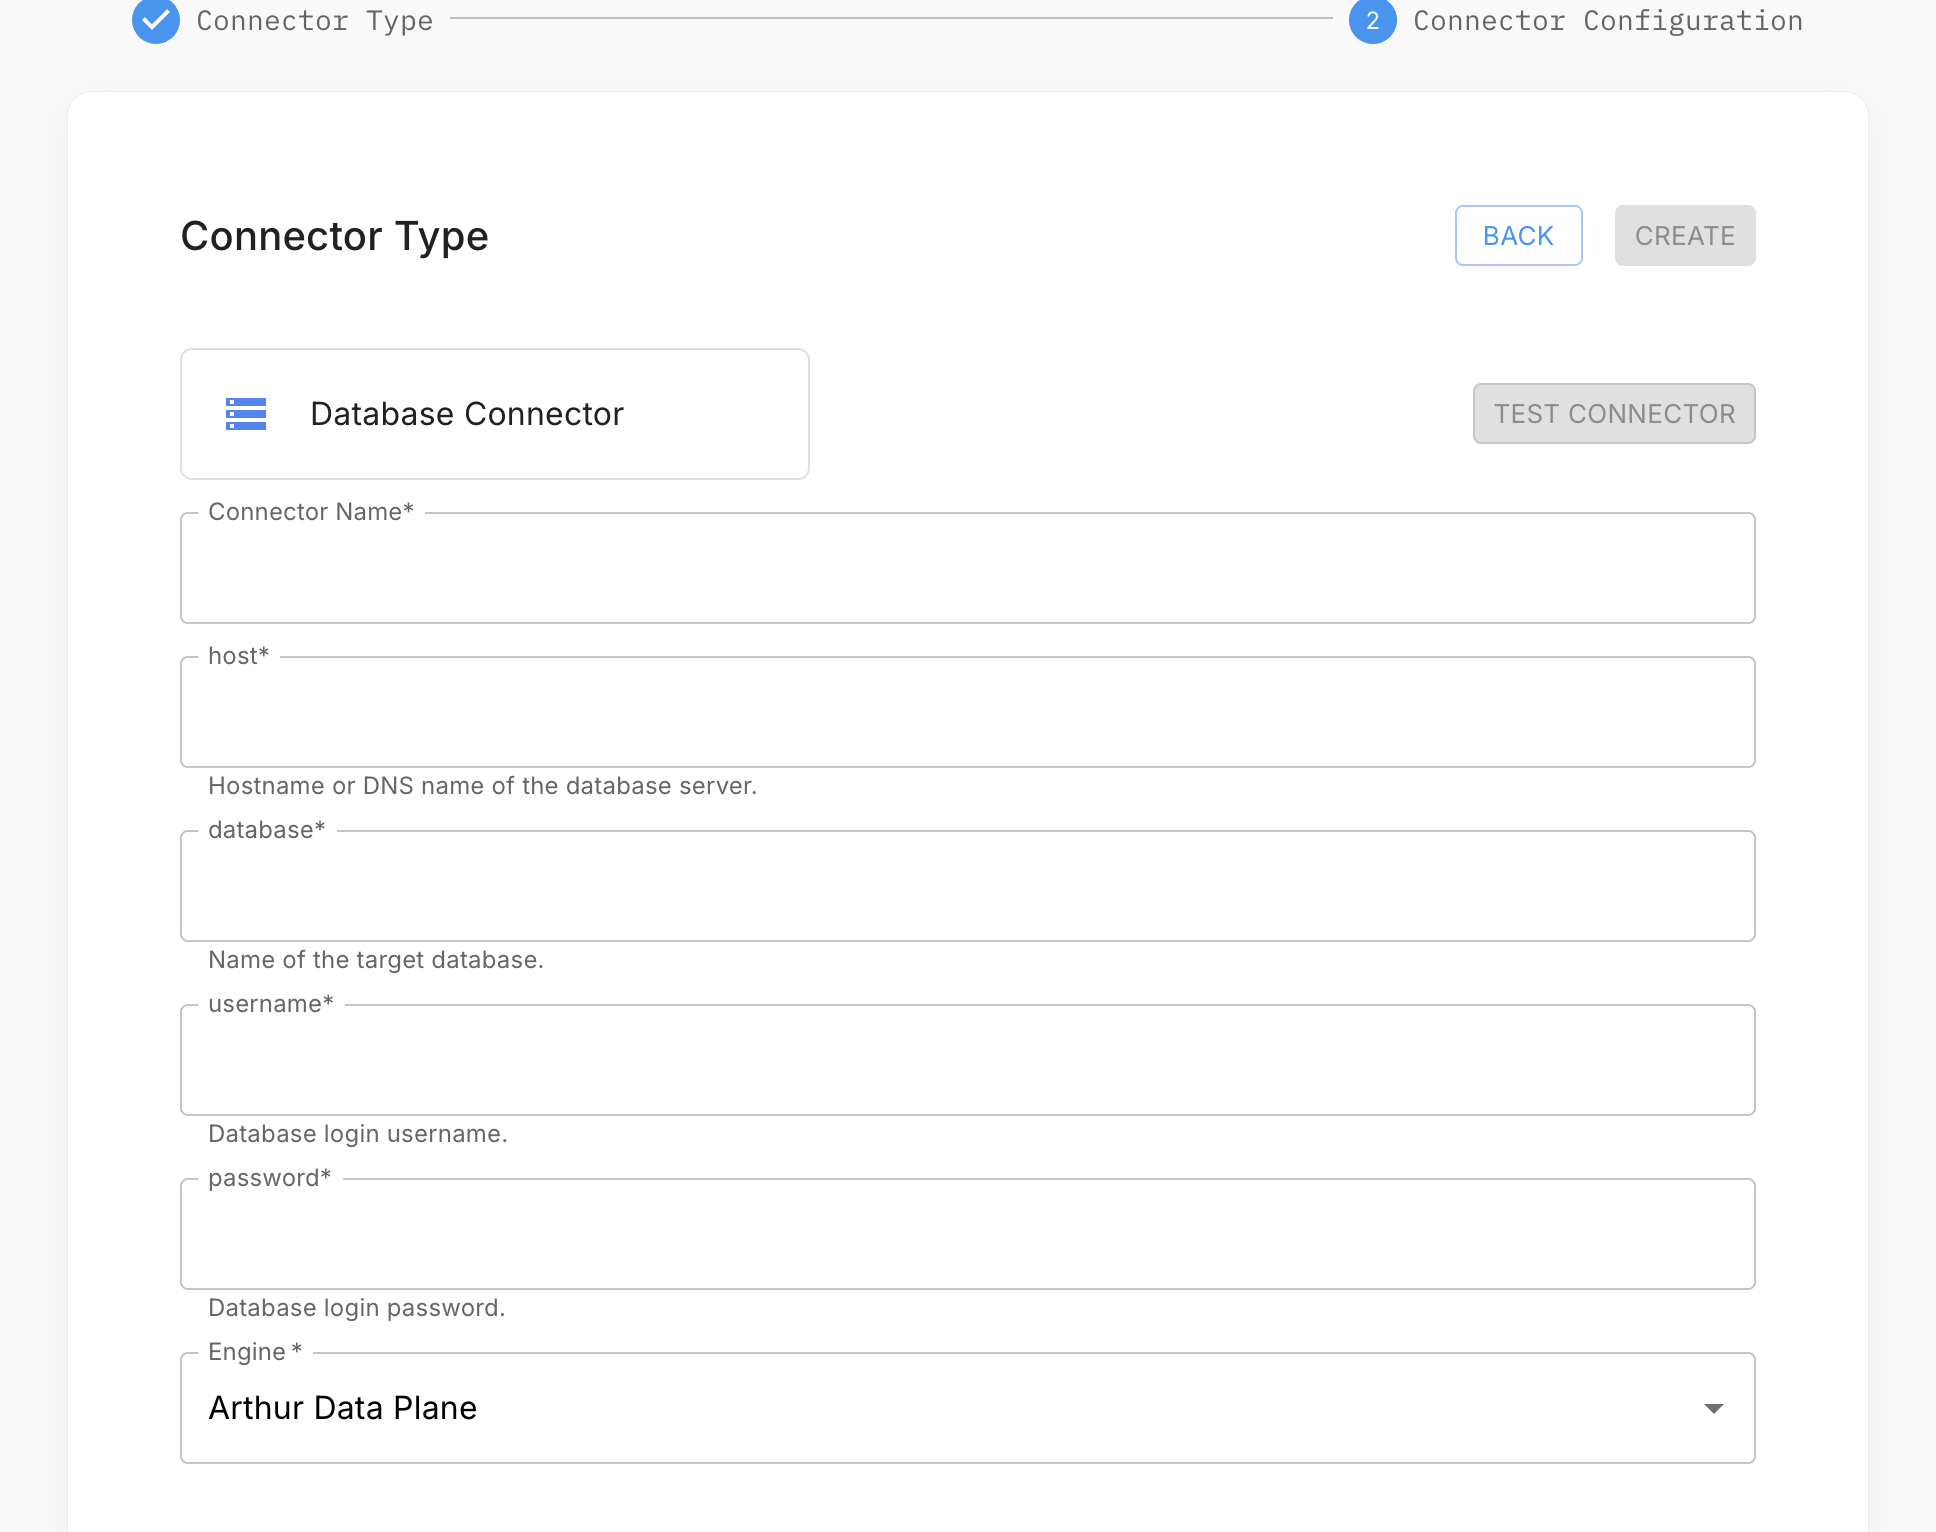
- In your project, open the Data Connectors tab and click Add Data Connector.
- Select ODBC and click Next.
- Enter a connector name and fill in either DSN + Username + Password, or a full Connection String.
- Add the Table and optional Schema fields.
- Select your data plane and click Test Connection.
- Click Create to save the connector.
Option A — DSN-based connection
A DSN abstracts the driver and connection details into a named configuration on the host. This is useful when your DBA manages connection parameters centrally.
Prerequisites:
- The ODBC driver for your database is installed on the Arthur ML Engine host (e.g.,
psqlodbcfor PostgreSQL,msodbcsql18for SQL Server). - A DSN is configured in
/etc/odbc.ini(system DSN) or~/.odbc.ini(user DSN) on the Arthur host.
Example /etc/odbc.ini entry for PostgreSQL:
[MyPostgresDB]
Driver = PostgreSQL Unicode
Server = db.internal.example.com
Port = 5432
Database = ml_inference
Configure the connector:
connector_payload = {
    "connector_type": "odbc",
    "name": "prod-postgres-odbc",
    "config": {
        "dsn": "MyPostgresDB",
        "username": "arthur_reader",
        "password": "<password>",
        "table": "model_predictions",
        "schema": "public"
    }
}

response = requests.post(
    "https://<your-arthur-host>/api/v1/connectors",
    headers={
        "Authorization": "Bearer <your-api-token>",
        "Content-Type": "application/json"
    },
    json=connector_payload
)
const connectorPayload = {
connector_type: "odbc",
name: "prod-postgres-odbc",
config: {
dsn: "MyPostgresDB",
username: "arthur_reader",
password: "<password>",
table: "model_predictions",
schema: "public"
}
};
const response = await fetch("https://<your-arthur-host>/api/v1/connectors", {
method: "POST",
headers: {
Authorization: "Bearer <your-api-token>",
"Content-Type": "application/json"
},
body: JSON.stringify(connectorPayload)
});curl -X POST "https://<your-arthur-host>/api/v1/connectors" \
-H "Authorization: Bearer <your-api-token>" \
-H "Content-Type: application/json" \
-d '{
"connector_type": "odbc",
"name": "prod-postgres-odbc",
"config": {
"dsn": "MyPostgresDB",
"username": "arthur_reader",
"password": "<password>",
"table": "model_predictions",
"schema": "public"
}
}'Option B — Connection string
Pass the full ODBC connection string directly. This is useful for dynamic environments where DSN configuration on the host isn't practical.
connector_payload = {
    "connector_type": "odbc",
    "name": "prod-sqlserver-odbc",
    "config": {
        "connection_string": "Driver={ODBC Driver 18 for SQL Server};Server=sql.internal.example.com,1433;Database=MLProd;UID=arthur_reader;PWD=<password>;Encrypt=yes;TrustServerCertificate=no;",
        "table": "ModelPredictions",
        "schema": "dbo"
    }
}

response = requests.post(
    "https://<your-arthur-host>/api/v1/connectors",
    headers={
        "Authorization": "Bearer <your-api-token>",
        "Content-Type": "application/json"
    },
    json=connector_payload
)
const connectorPayload = {
connector_type: "odbc",
name: "prod-sqlserver-odbc",
config: {
connection_string:
"Driver={ODBC Driver 18 for SQL Server};Server=sql.internal.example.com,1433;Database=MLProd;UID=arthur_reader;PWD=<password>;Encrypt=yes;TrustServerCertificate=no;",
table: "ModelPredictions",
schema: "dbo"
}
};
const response = await fetch("https://<your-arthur-host>/api/v1/connectors", {
method: "POST",
headers: {
Authorization: "Bearer <your-api-token>",
"Content-Type": "application/json"
},
body: JSON.stringify(connectorPayload)
});curl -X POST "https://<your-arthur-host>/api/v1/connectors" \
-H "Authorization: Bearer <your-api-token>" \
-H "Content-Type: application/json" \
-d '{
"connector_type": "odbc",
"name": "prod-sqlserver-odbc",
"config": {
"connection_string": "Driver={ODBC Driver 18 for SQL Server};Server=sql.internal.example.com,1433;Database=MLProd;UID=arthur_reader;PWD=<password>;Encrypt=yes;TrustServerCertificate=no;",
"table": "ModelPredictions",
"schema": "dbo"
}
}'Security note: Connection strings often contain credentials in plaintext. Arthur encrypts the
connection_stringfield at rest, but ensure you're using TLS for the Arthur API call itself (always usehttps://).
Using a Connector in an Application
Connectors are scoped to a project — once created, any application within that project can use it. Before an application can read from a connector, you must create a dataset that points to it. The dataset is what the application actually queries.
Step 1 — Create a dataset from the connector
Option A — From the project's Data Connectors tab:
- In your project, open the Data Connectors tab and select the connector.
- Click Create Dataset and configure the table, timestamp column, and any column mappings.
- Save the dataset — it is now available to all applications in the project.
Option B — During new application setup:
The new application creation flow lets you create a connector and dataset inline — no need to set them up separately first.
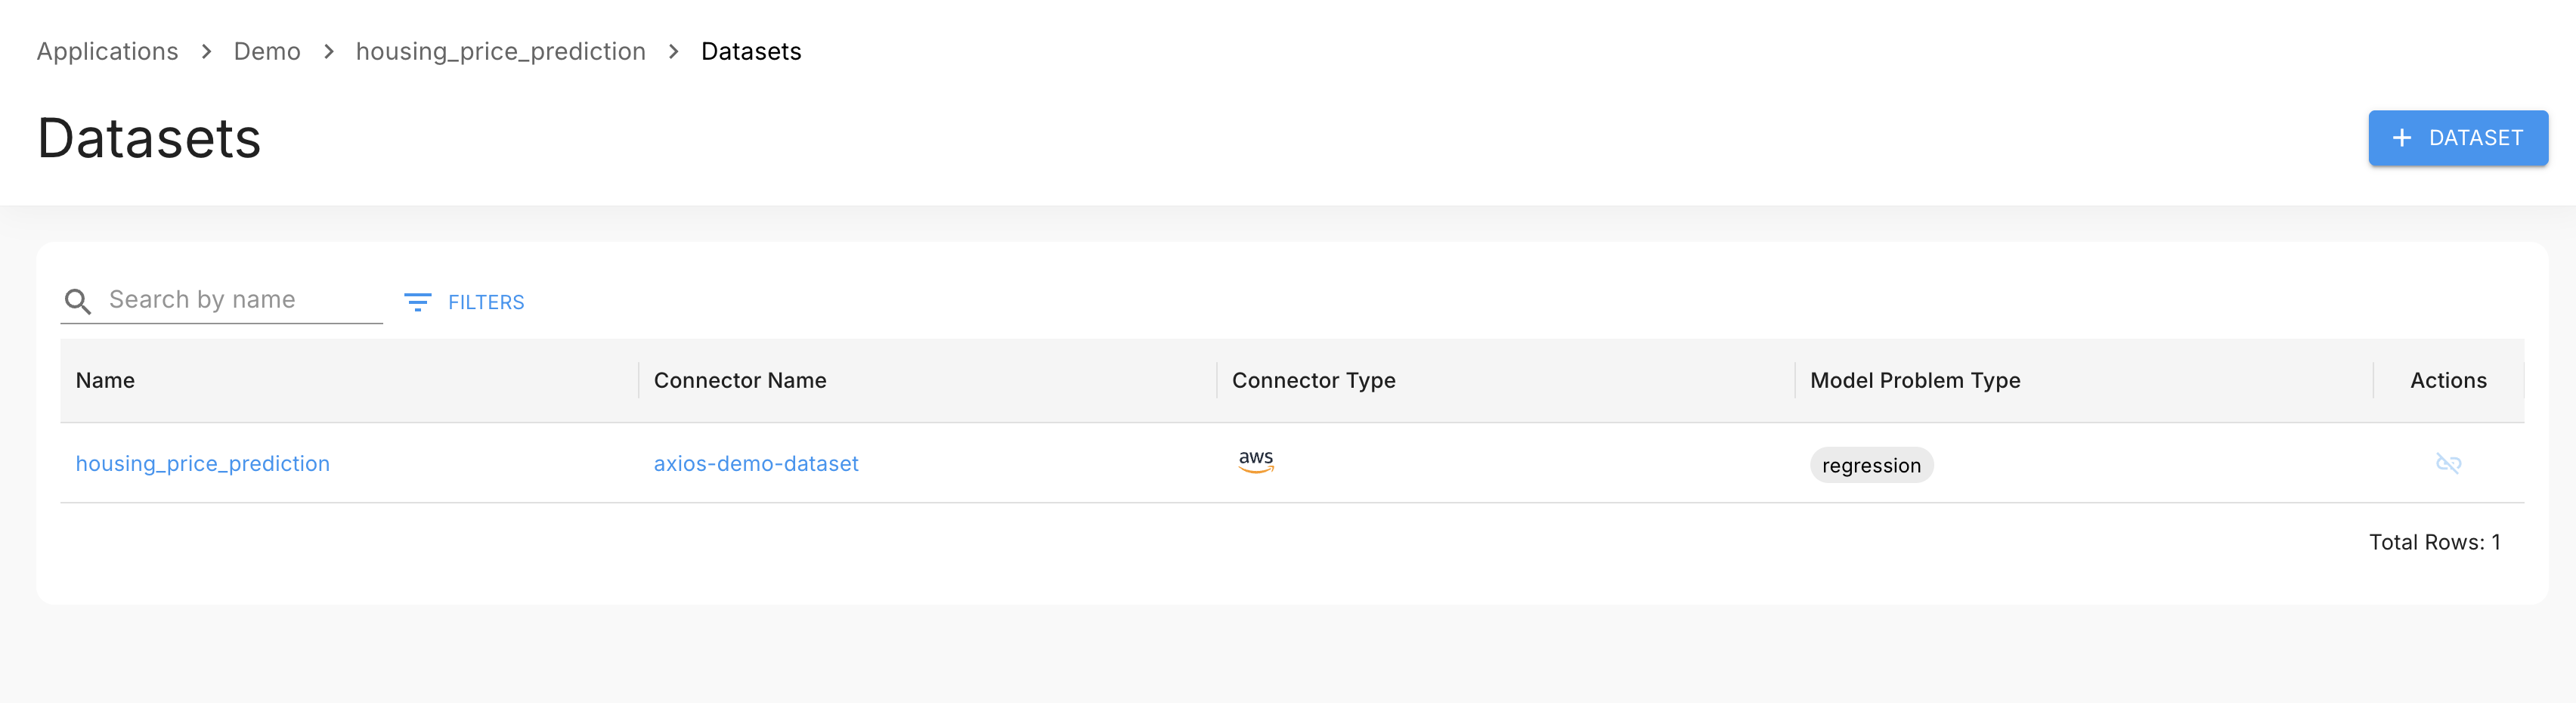
Step 2 — Attach the dataset to an application
- Open the application in Arthur.
- Click Application Management → Datasets.
- Click Add Dataset and select the dataset you just created.
Next Steps
With your connector set up and data flowing into Arthur:
- Datasets — Configure your dataset schema, column types, and ground truth mappings.
- Metrics & Query Language — Set up the standard metrics Arthur computes against your data.
- Custom Metrics — Define metric logic specific to your model and use case.
- Observe & Dashboard — Build dashboards to monitor your model's performance over time.
Updated 2 months ago