Datasets
Overview
ML Model applications only. Datasets are available exclusively for applications with the ML Model type. Gen AI and Agentic model applications do not support platform datasets.
Datasets in the Arthur Platform are named collections of rows scoped to a Project. They store the data your ML application needs for monitoring and evaluation — typically a Prediction Dataset, Ground Truth Dataset, and Training Dataset, along with any additional datasets such as Validation, Test, or Metadata.
Datasets are created at the project level and then attached to ML Model applications. You can create a new dataset from a data connector, or join two existing datasets together. Once attached to an application, datasets can be browsed, searched, and managed through the Platform UI or API.
Scope of this page: This page covers platform-side datasets for ML Model applications only. For information about the Arthur Engine's datasets, see the Engine documentation.
flowchart LR
    A[Project] -->|existing datasets| C[Dataset Configuration]
    B[Data Connector] -->|ingest new dataset| C
    C -->|assigned to| D[ML Model Application]
    D --> E[Inferences]
Application Creation Flow
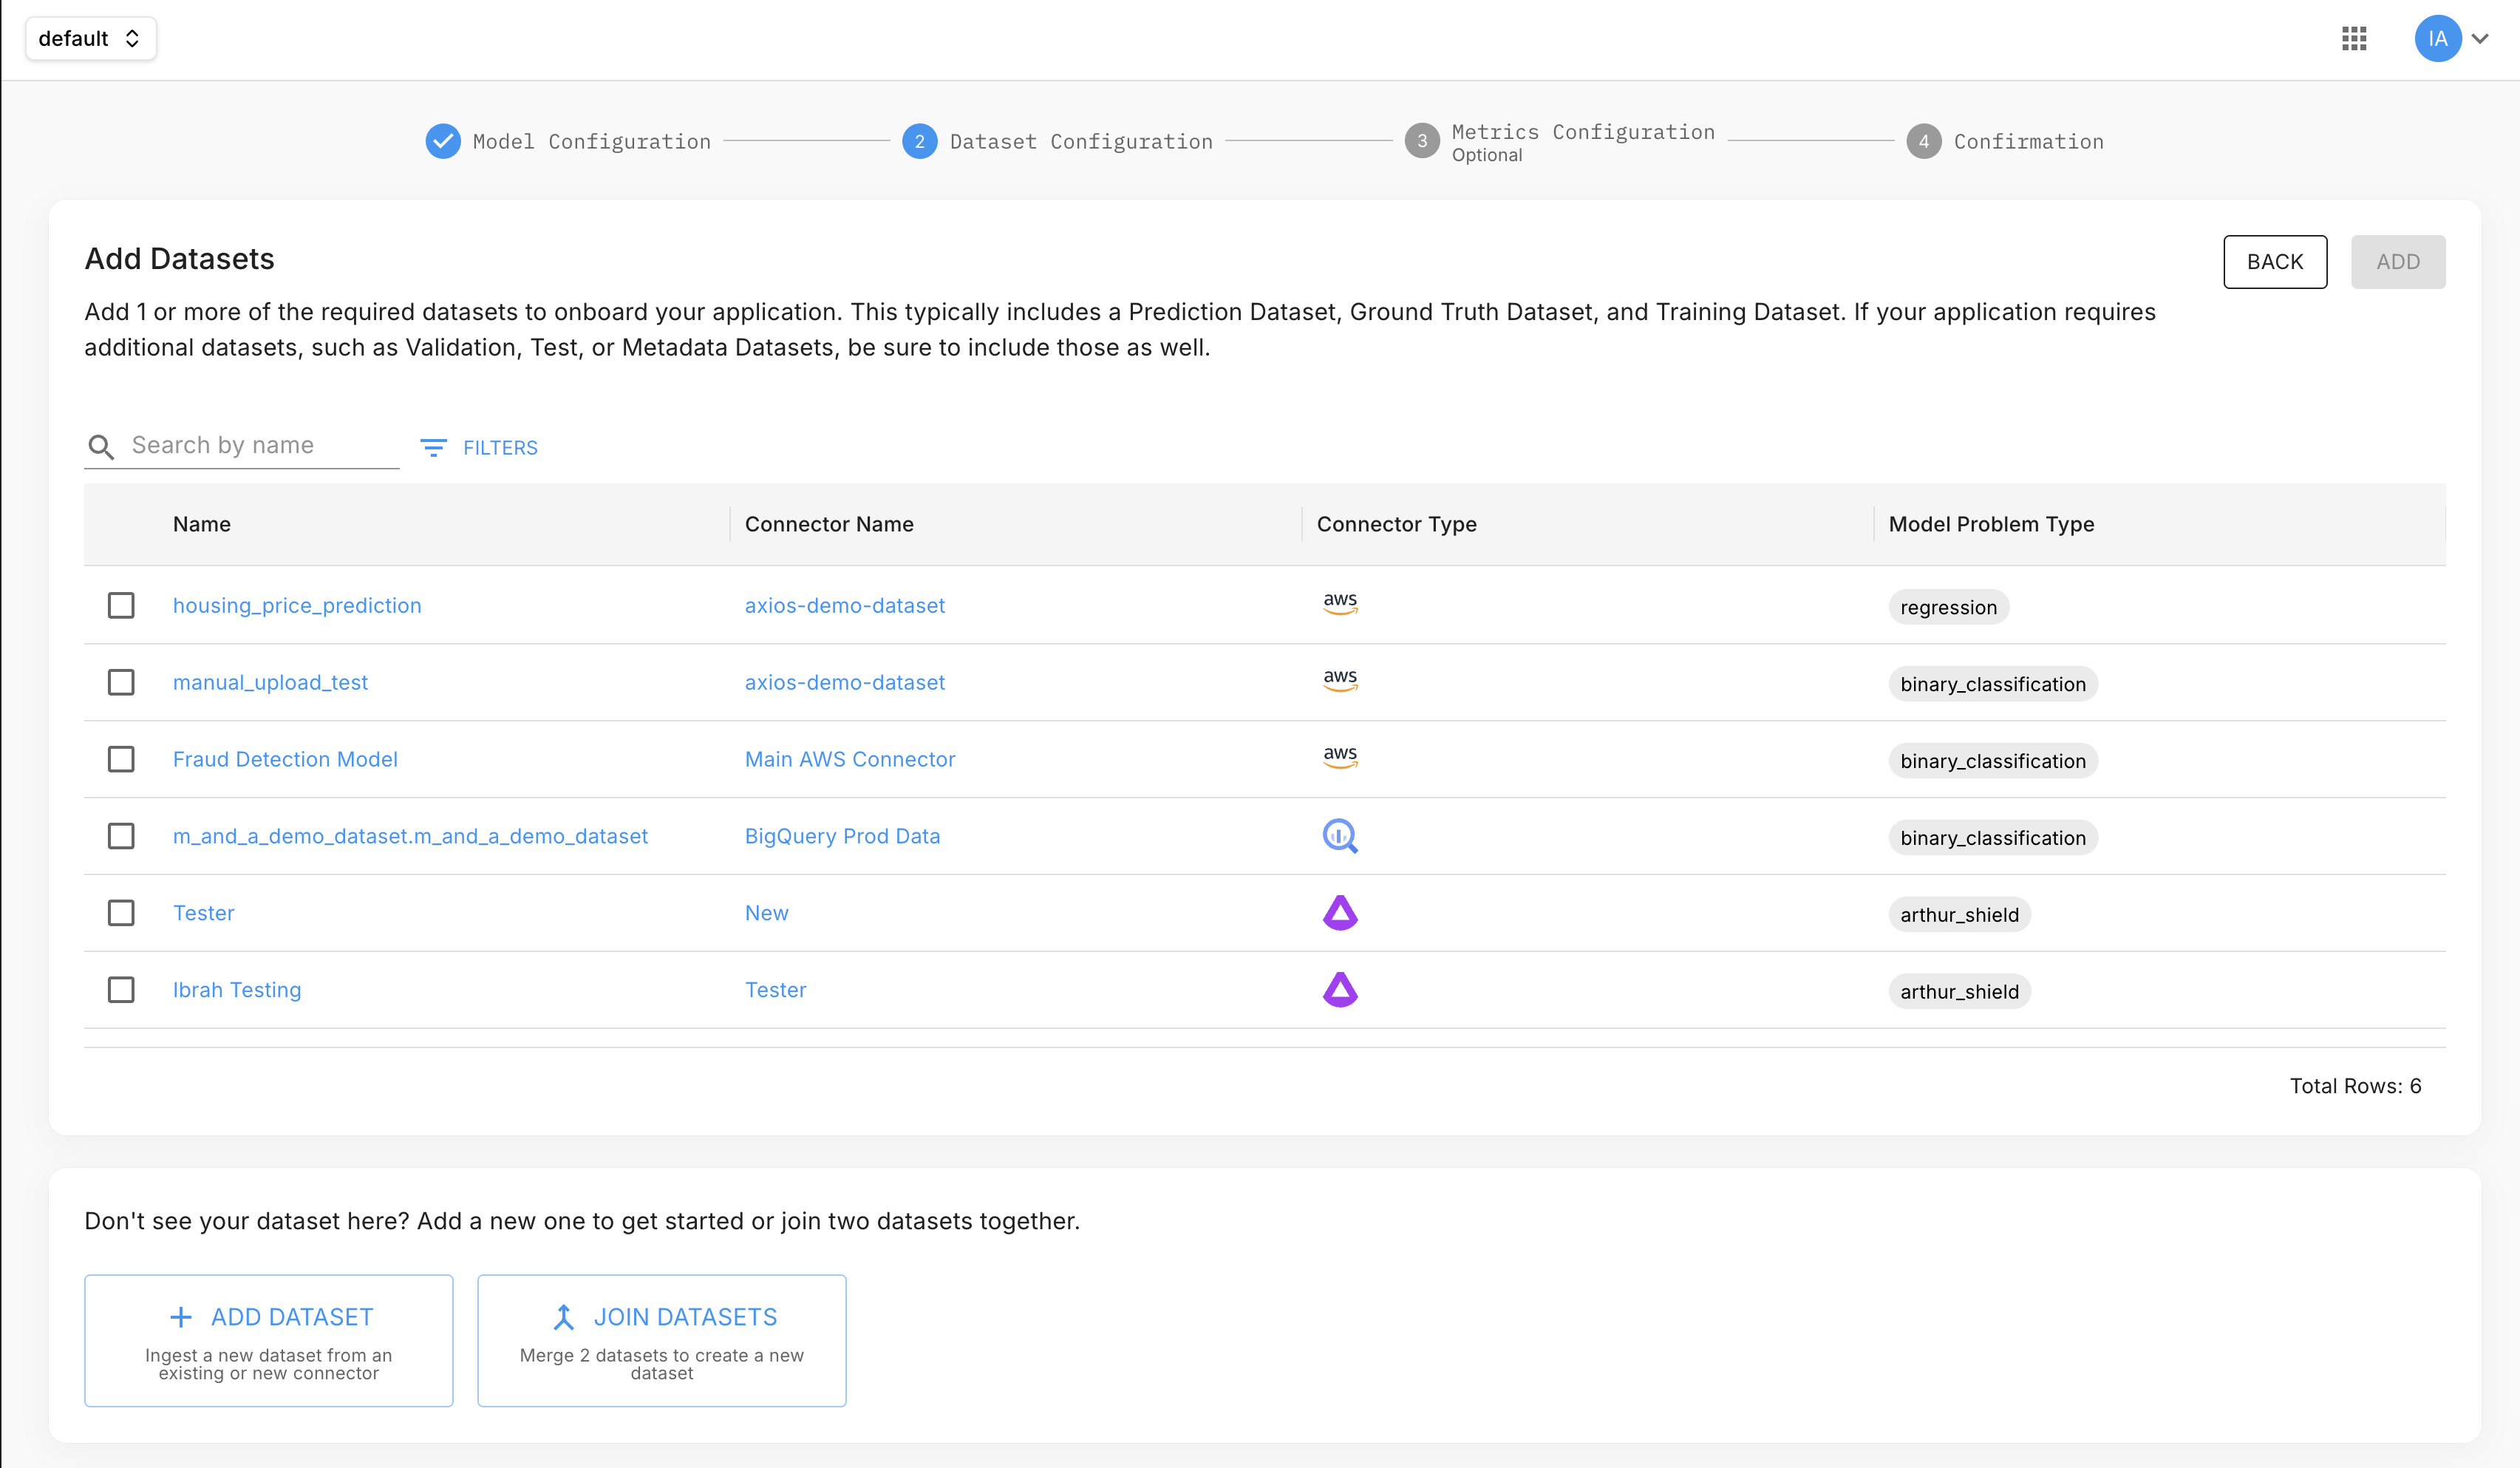
When creating an ML Model application, Dataset Configuration is step 2 of 4 (after Model Configuration). On this screen you can:
- Assign existing datasets — any dataset already in the project appears in the list, showing its name, connector, connector type, and model problem type. Select one or more to attach them to the application.
- Add a new dataset — ingest data from an existing connector, or create a new connector as part of this step.
- Join datasets — merge two existing datasets into a new combined dataset.
Before You Start
- A data connector — required to ingest new datasets. You can create one during the application creation flow or set one up in advance. See Connectors.
- The Arthur Python SDK (optional, for SDK examples):
pip install arthur-client
Create a Dataset
Datasets are created from the project Datasets page using a 4-step wizard.
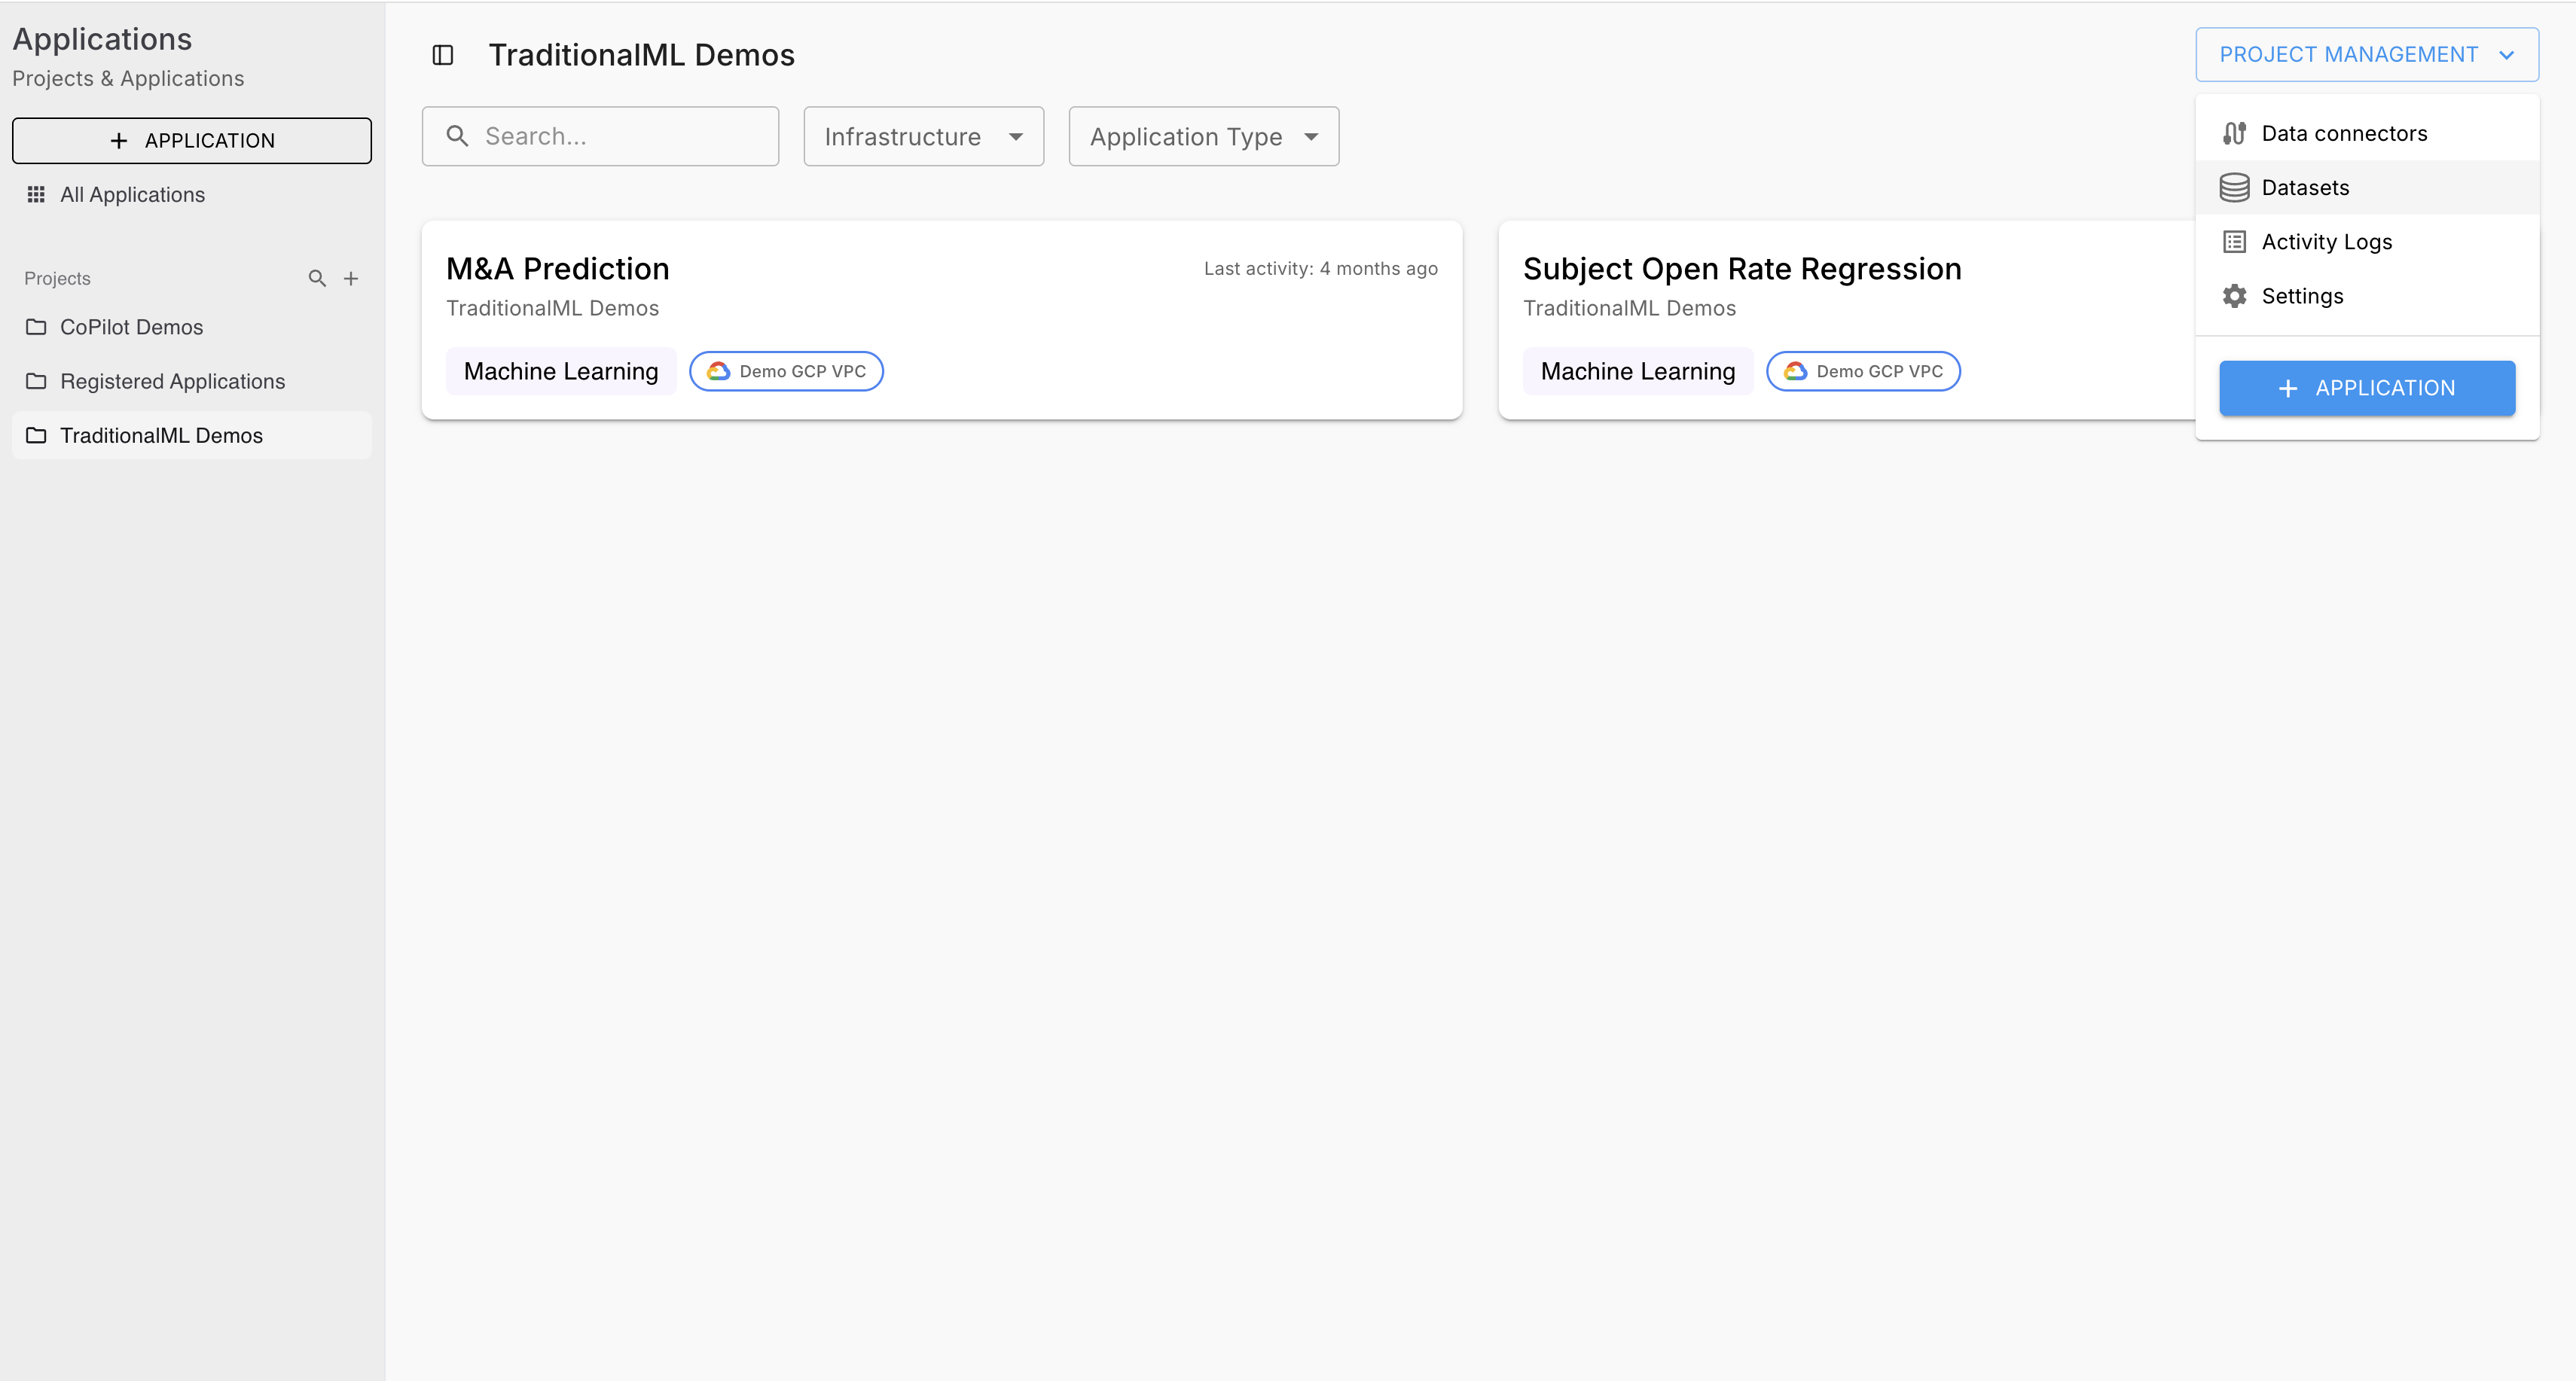
- Navigate to your project and select Datasets from the left nav.
- Click Add Dataset (top right).
- Select Add Dataset to open the creation wizard.
Step 1 — Source: Select an existing connector, or create a new one inline.
Step 2 — Dataset: Enter a dataset name and select the model problem type. Fill in any required fields for your connector type. Expand Advanced Configuration for optional fields.
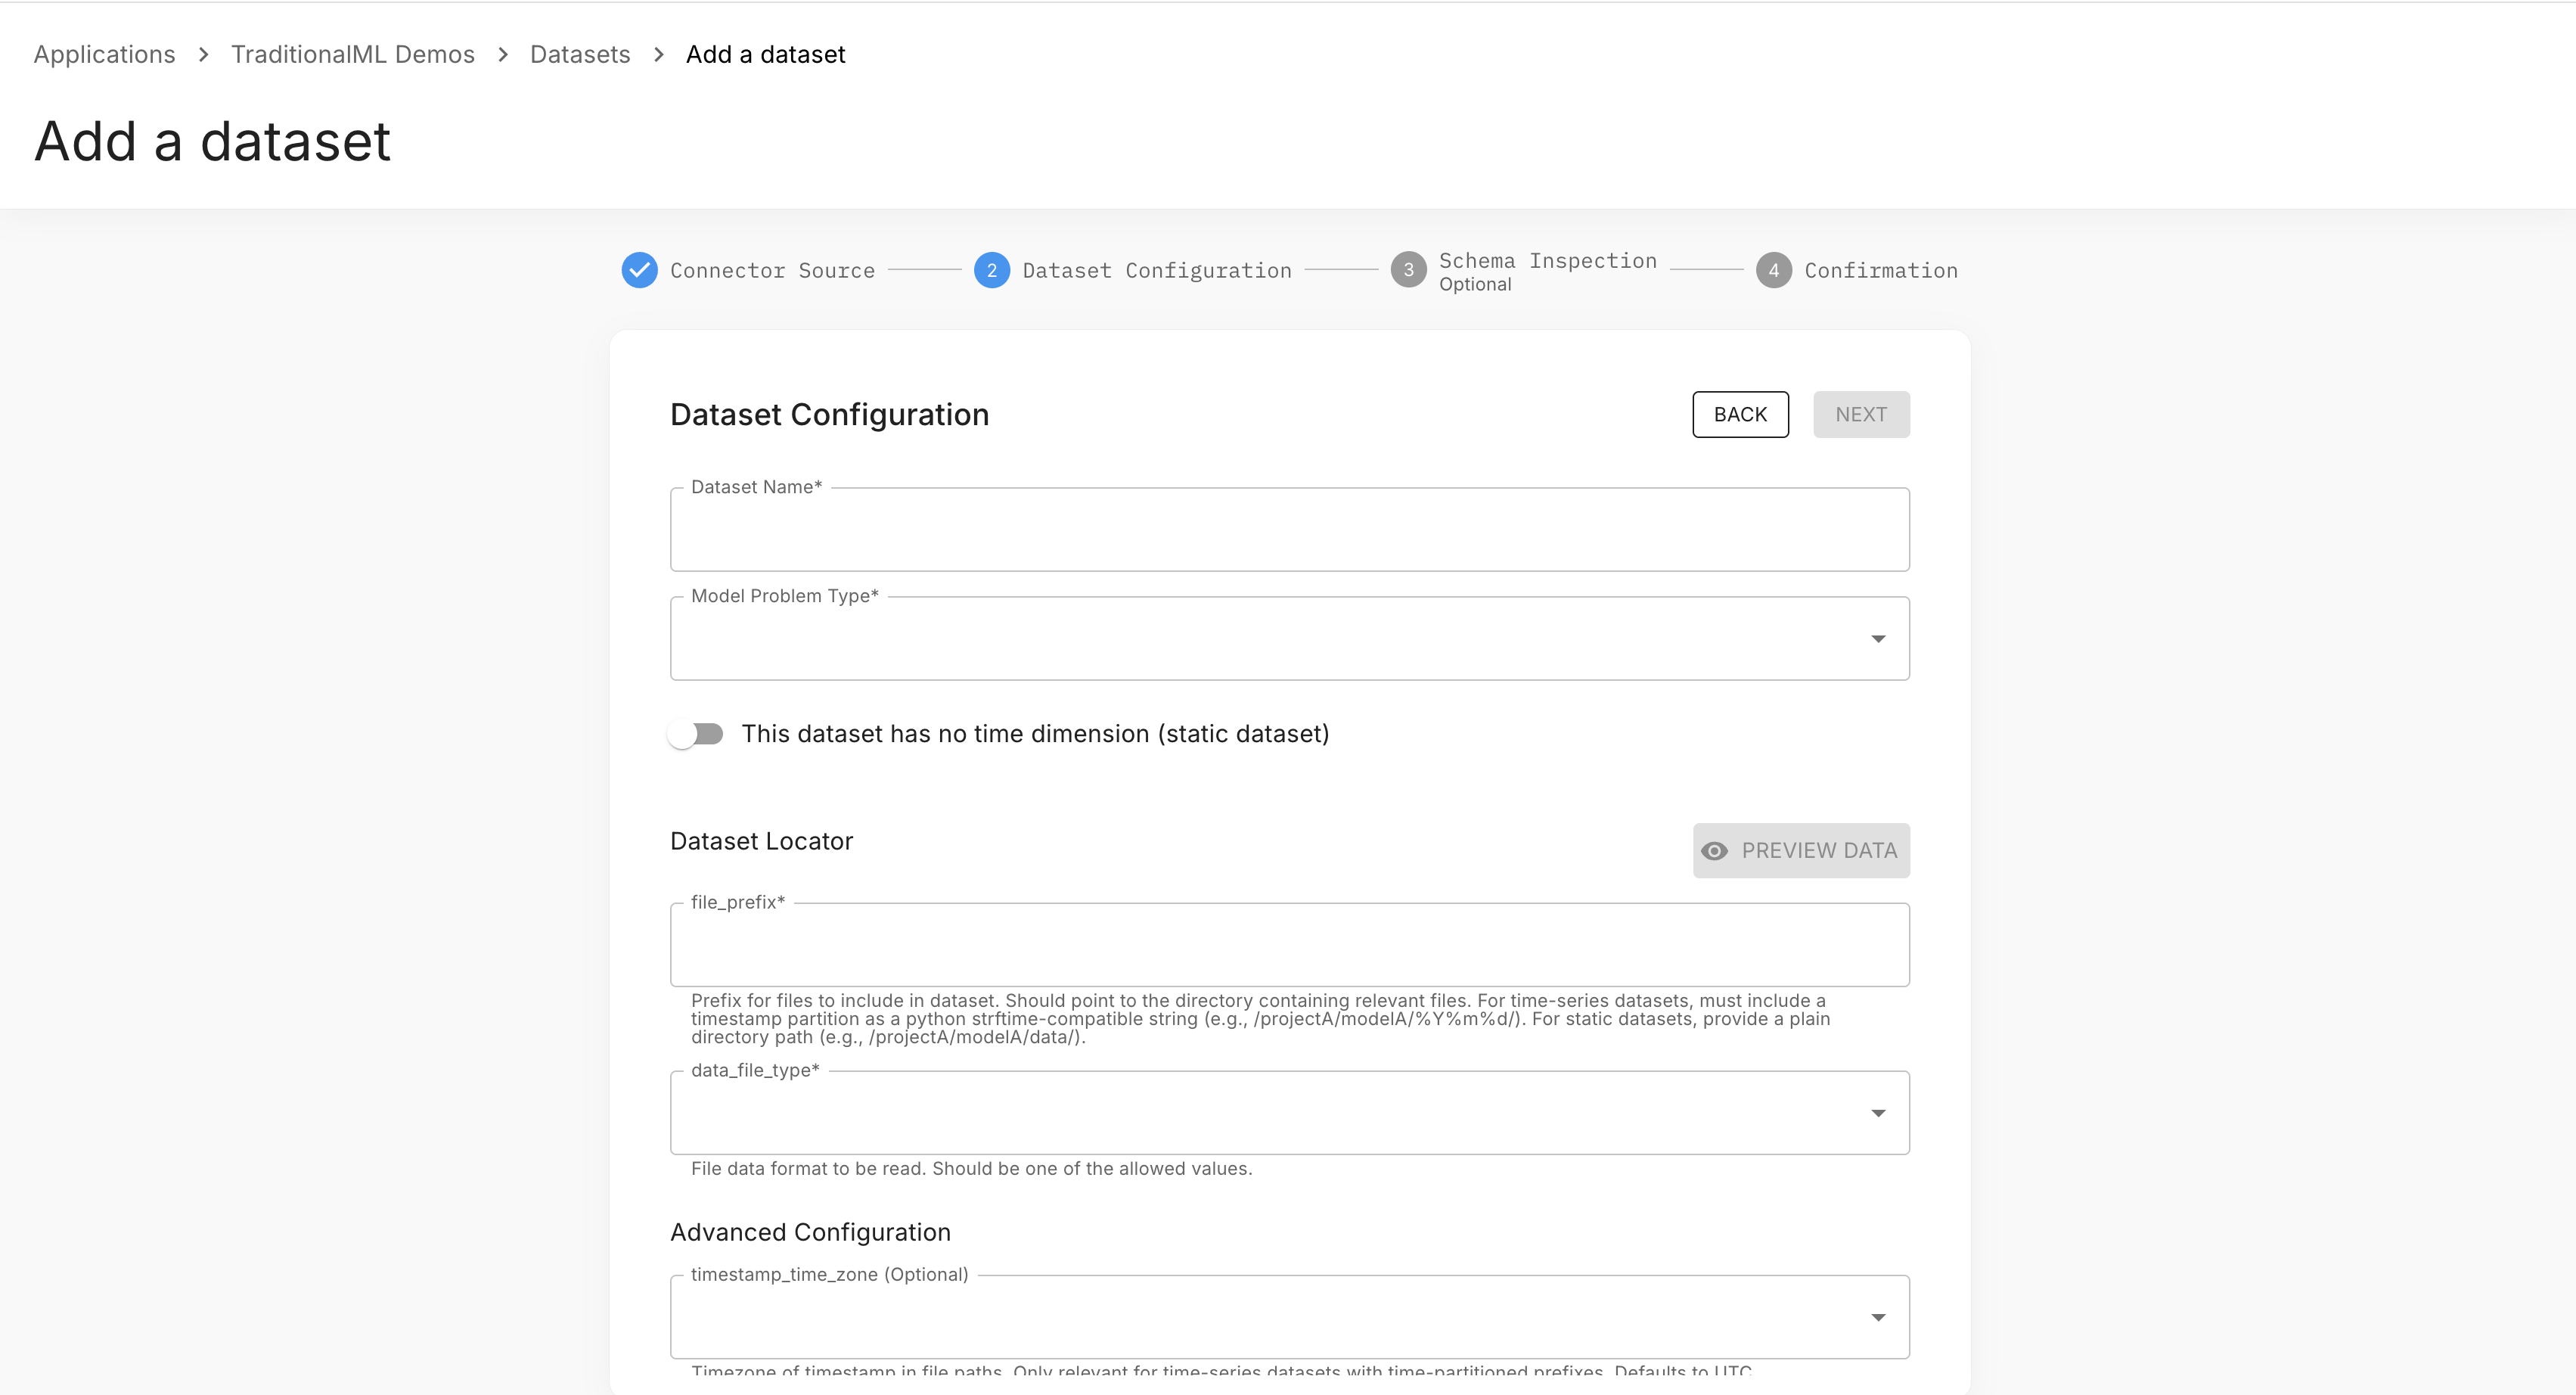
Step 3 — Schema (optional): Review the inferred columns and data types. Tag the primary timestamp column if required for your dataset type. Use Refresh to re-inspect the source.
Step 4 — Confirmation: Review your selections and click Submit. You'll be taken to the new dataset's detail page.
Join Datasets
To combine two existing datasets, click Add Dataset and select Join Datasets. This opens a 3-step wizard:
Step 1 — Join Configuration: Select a left dataset and right dataset, choose the join column for each, and select a join type (Left Outer, Right Outer, Inner, or Full Outer).
Step 2 — Dataset Information: Give the joined dataset a name and select its model problem type.
Step 3 — Joined Data Preview: Review the schema and a sample of the resulting data before confirming.
Note: Joined datasets are read-only after creation — their schema and configuration cannot be edited.
Add a Dataset to an Application
To attach an existing project dataset to an application:
- Navigate to the application and select Datasets from the left nav.
- Click Add Dataset.
- Select the dataset from the list and click Add.
Via API
Endpoint: POST /api/v2/tasks/{task_id}/datasets
from arthur_client import ArthurClient

client = ArthurClient(api_url="https://<your-arthur-host>", api_key="<your-api-key>")

dataset = client.datasets.create(
    task_id="your-task-id",
    name="my-evaluation-dataset",
    description="Ground-truth examples for Q3 evaluation run",
)

print(dataset.dataset_id)const response = await fetch(
`https://<your-arthur-host>/api/v2/tasks/${taskId}/datasets`,
{
method: "POST",
headers: {
"Content-Type": "application/json",
Authorization: "Bearer <your-api-key>",
},
body: JSON.stringify({
name: "my-evaluation-dataset",
description: "Ground-truth examples for Q3 evaluation run",
}),
}
);
const dataset = await response.json();
console.log(dataset.dataset_id);curl -X POST "https://<your-arthur-host>/api/v2/tasks/<task_id>/datasets" \
-H "Content-Type: application/json" \
-H "Authorization: Bearer <your-api-key>" \
-d '{
"name": "my-evaluation-dataset",
"description": "Ground-truth examples for Q3 evaluation run"
}'Browse and Inspect
Dataset List
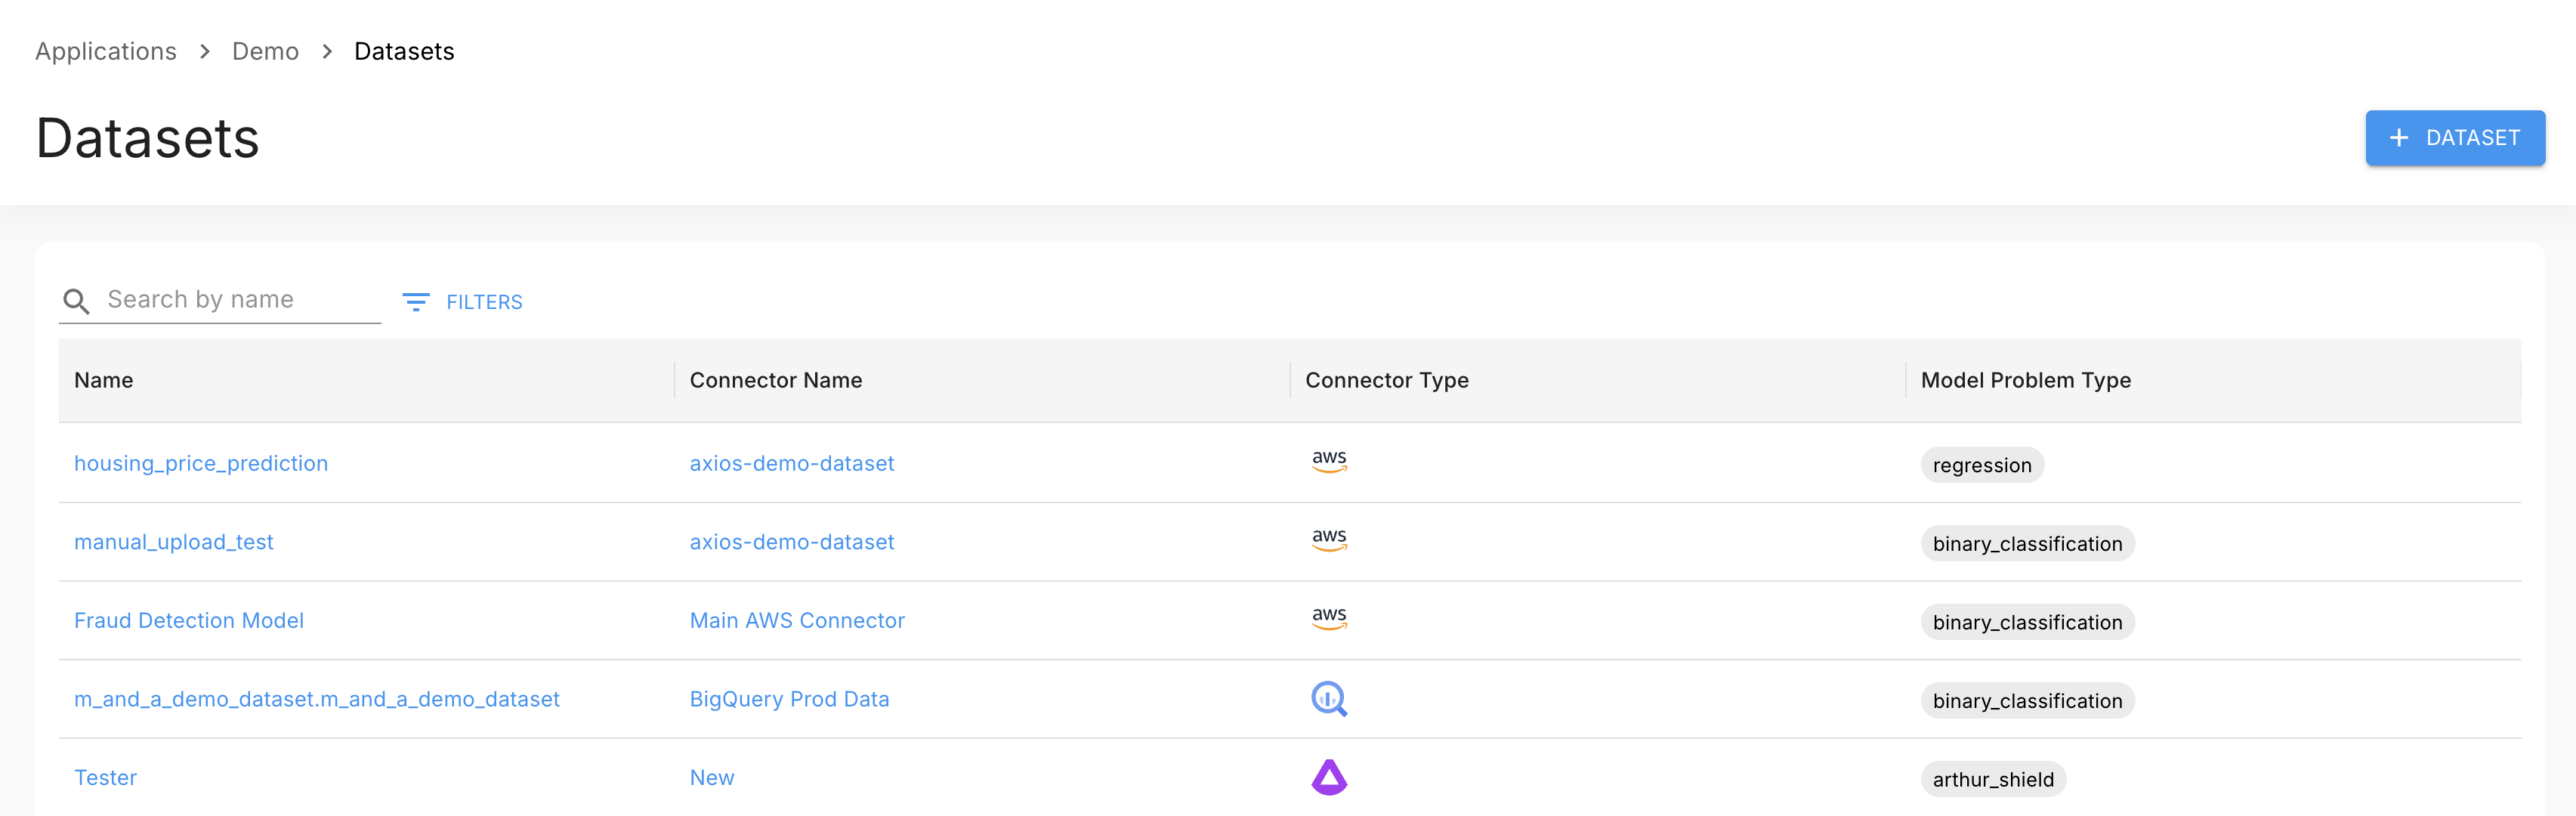
Navigate to your project and select Datasets from the left nav. The list shows all datasets in the project with their name, connector, connector type, and model problem type. Use the search bar to filter by name, or click Filters to apply column-specific filters.
Click a dataset name to open its detail page.
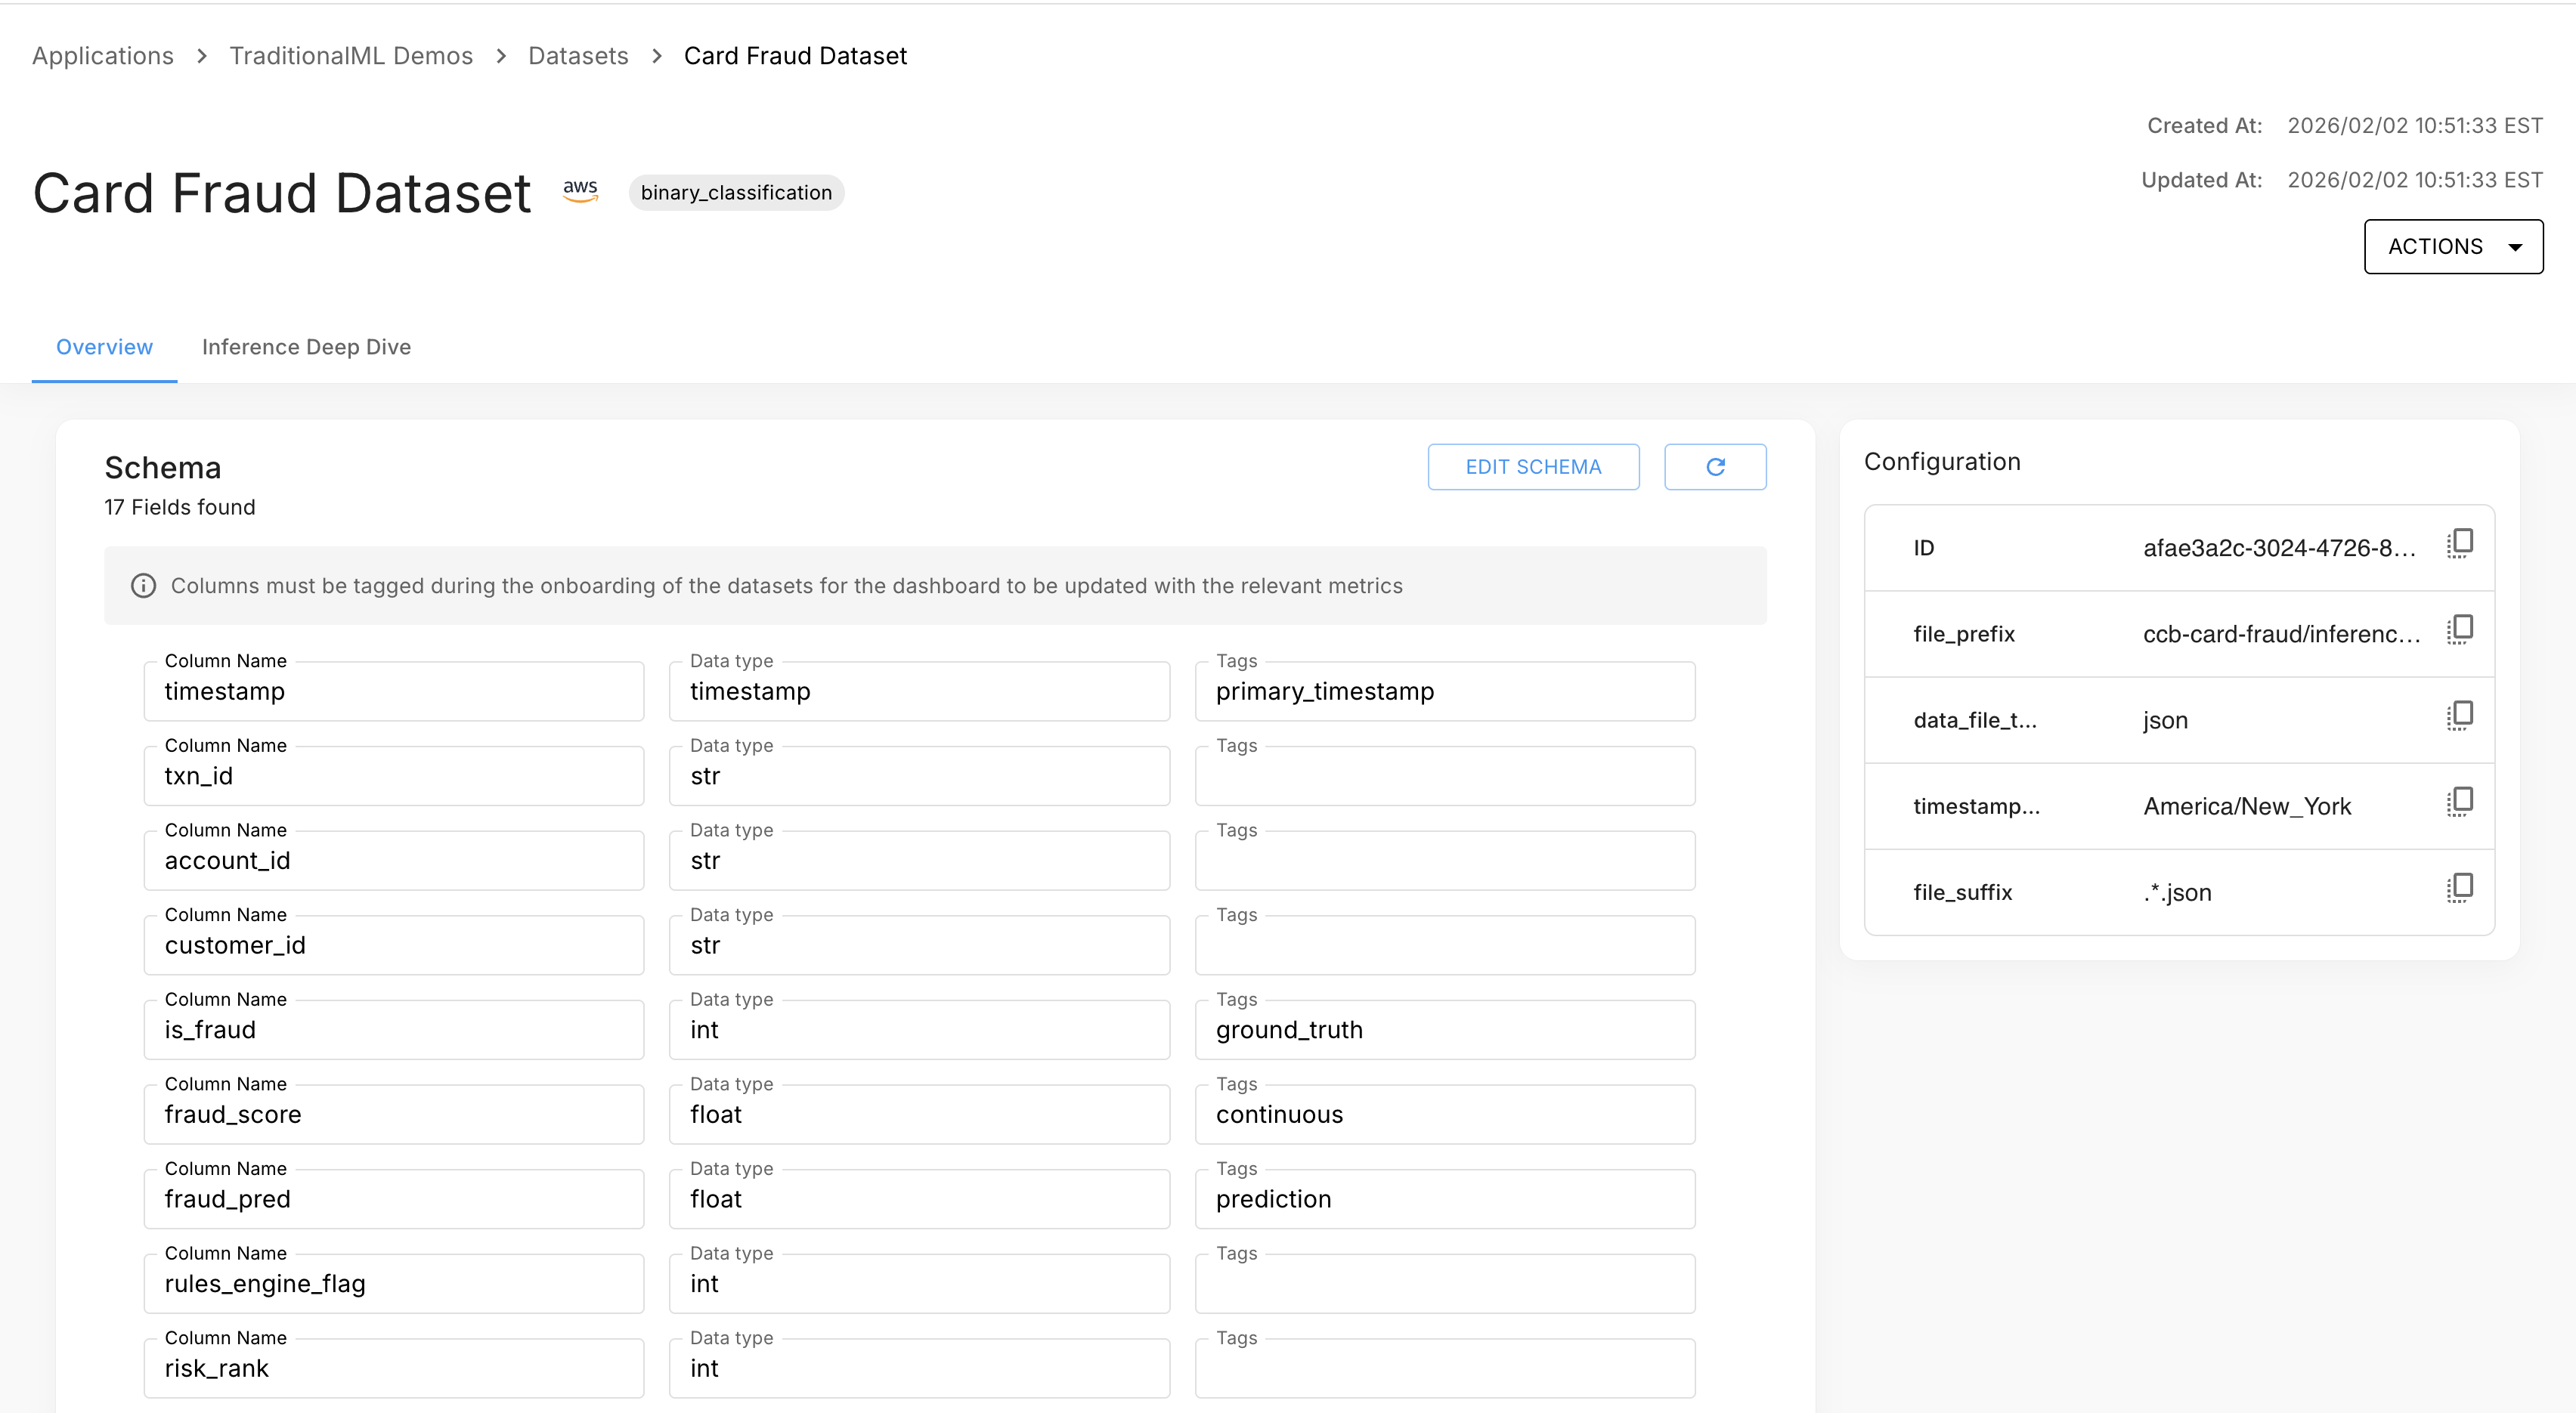
Dataset Detail — Overview Tab
The detail page header shows the dataset name (click to rename inline), model problem type, and created/updated timestamps. The Actions menu (three-dot) gives access to Edit Configuration, Join Dataset, and Delete Dataset.
The Overview tab shows the dataset schema — all columns with their inferred data types. Click Edit Schema to modify column definitions, or Refresh to re-inspect the source.
The right sidebar shows the dataset's configuration, including its ID, connector key-value pairs, and (for joined datasets) source datasets and join type.
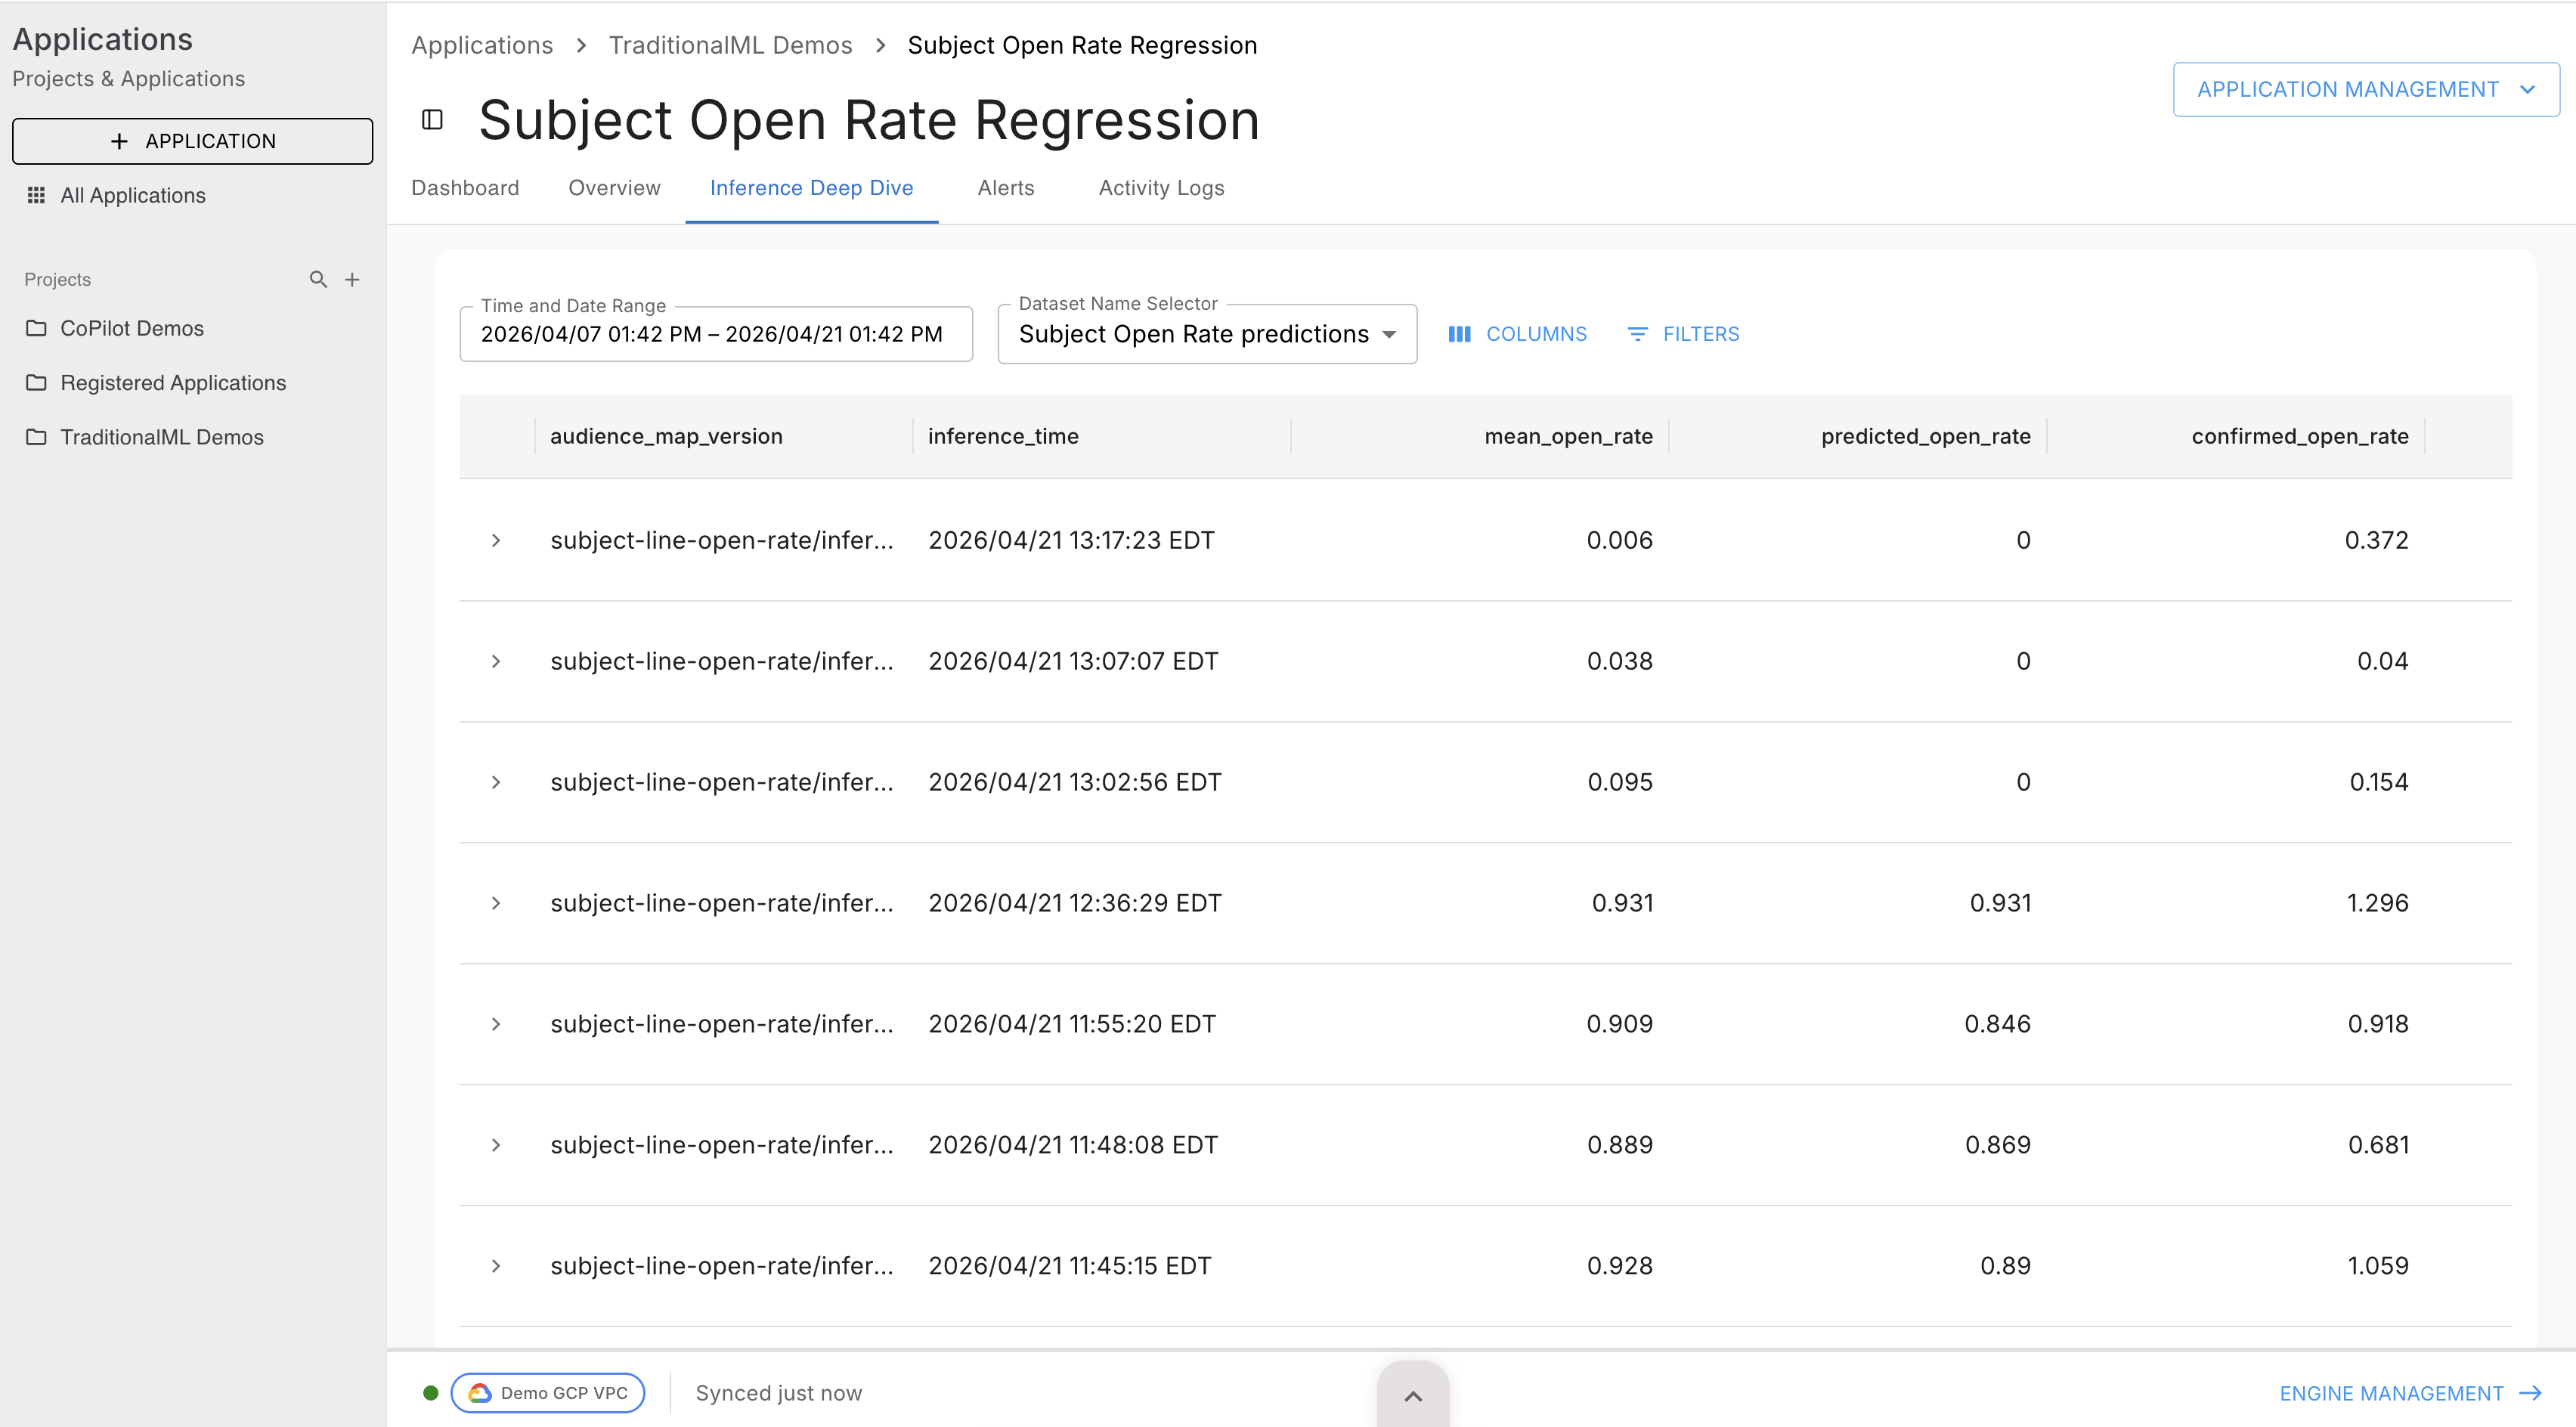
Dataset Detail — Inference Deep Dive Tab
The Inference Deep Dive tab lets you browse the actual row data.
- Use the date range picker to set the window (default: last 14 days).
- Click Filters to filter by column values.
- Data is retrieved on demand — the table shows a loading state while the background job runs. A Cancel button appears if the job can be cancelled.
- Once loaded, paginate through results and toggle column visibility using the column controls.
Via API
Search datasets in a project:
results = client.datasets.search(
    task_id=task_id,
    dataset_name="evaluation",
    page=1,
    page_size=20,
)
for ds in results.items:
    print(ds.dataset_id, ds.name)
Browse rows:
GET /api/v2/datasets/{dataset_id}/rows
| Parameter | Description |
|---|---|
search | Case-insensitive substring search across all column values |
sort | asc or desc |
page_size | Rows per page (1–5000, default 10) |
page | Page number |
rows = client.datasets.get_rows(
    dataset_id="<dataset_id>",
    search="France",
    page=1,
    page_size=50,
)
for row in rows.items:
    print(row)
Update a Dataset
Rename
On the dataset detail page, click the dataset name in the header. It becomes an editable field — type the new name and press Enter or click outside to save.
Edit Configuration
- On the dataset detail page, open the Actions menu and select Edit Configuration.
- Update the name, problem type, or connector-specific fields.
- Click Save. A confirmation message appears and the page refreshes.
Note: Editing configuration is disabled for joined datasets and datasets without a connector.
Via API
PATCH /api/v2/datasets/{dataset_id}
updated = client.datasets.update(
dataset_id="<dataset_id>",
name="my-evaluation-dataset-v2",
description="Updated with additional Q4 examples",
)
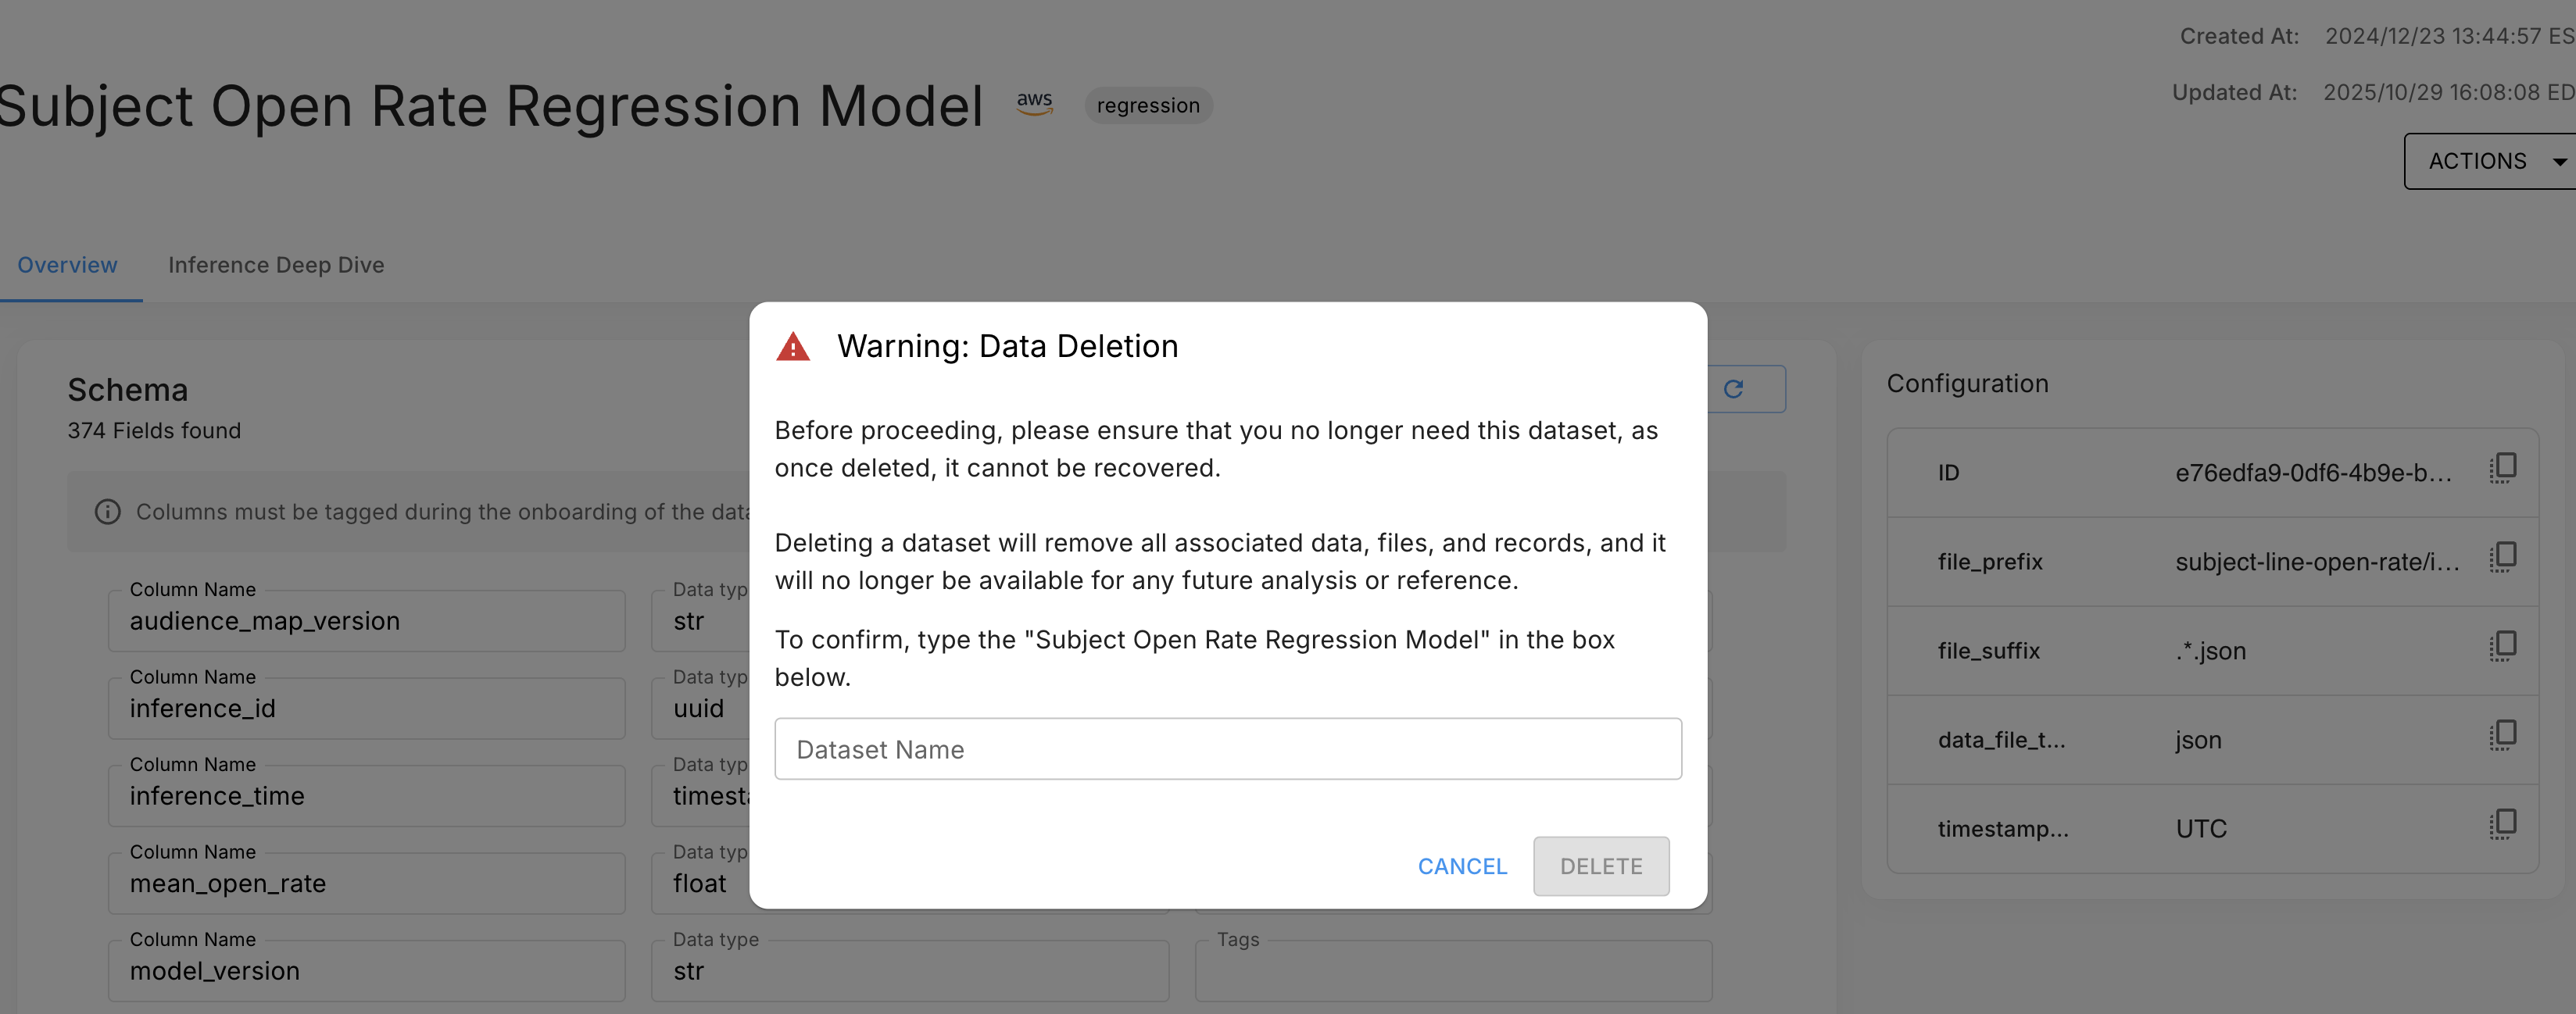
print(updated.name)Delete a Dataset
- On the dataset detail page, open the Actions menu and select Delete Dataset.
- In the confirmation modal, type the exact dataset name to confirm.
- Click Delete. The dataset is permanently removed and you are returned to the project datasets page.
Warning: Deletion is permanent and irreversible. There is no soft-delete or recycle bin. Export any data you need before proceeding.
Via API
DELETE /api/v2/datasets/{dataset_id}
client.datasets.delete(dataset_id="<dataset_id>")A successful deletion returns HTTP 204 No Content.
API Reference
| Action | Endpoint |
|---|---|
| Create dataset | POST /api/v2/tasks/{task_id}/datasets |
| Browse rows | GET /api/v2/datasets/{dataset_id}/rows |
| Search datasets | GET /api/v2/tasks/{task_id}/datasets/search |
| Get dataset | GET /api/v2/datasets/{dataset_id} |
| Update dataset | PATCH /api/v2/datasets/{dataset_id} |
| Delete dataset | DELETE /api/v2/datasets/{dataset_id} |
Next Steps
- Attach metrics — Once your dataset is set up, attach metrics to start monitoring your ML application. See Metrics.
- Set up custom metrics — Define your own evaluation logic with Custom Metrics.
- Set up alert rules — Use the Alert Rules documentation to configure threshold-based alerts on your dataset metrics.
- Manage access — Use Role Bindings to control which users and groups can read or modify datasets within your project.
Updated 2 months ago